XREXS KYX-0035-WiFi
XREXS KYX-0035-WiFi 12.2 Inch Digital Wall Clock User Manual
Model: KYX-0035-WiFi
Introduction
The XREXS 12.2 Inch Digital Wall Clock (Model: KYX-0035-WiFi) is designed to provide precise timekeeping with a large, clear LED display. This multifunctional clock features WiFi time synchronization, a remote control for easy operation, dual alarms, and a versatile timer function. Its modern design makes it suitable for various environments, including homes, offices, and classrooms.

Image: Overview of the XREXS Digital Wall Clock highlighting its key features.
Package Contents
Please check the package for the following items:
- 1 x XREXS 12.2 Inch WiFi Sync Wall Clock
- 1 x Remote Control
- 1 x Power Plug (Adapter)
- 1 x USB Cable (3m long)
- 1 x Ruler (for mounting assistance)
- 1 x User Manual (this document)
- 2 x Mounting Nails

Image: All components included in the XREXS Digital Wall Clock package.
Setup
1. Power Connection
Connect the provided USB cable to the clock and then to the power plug. Insert the power plug into a standard electrical outlet. The clock will power on automatically.
2. Mounting Options
The clock offers two installation methods:
- Wall Mount: Use the two mounting holes on the back of the clock and the provided nails to secure it to a wall.
- Desk/Shelf Placement: The clock includes a base that allows it to stand upright on a desk, shelf, or any flat surface.

Image: Dimensions and desk placement of the XREXS Digital Wall Clock.
3. WiFi Time Synchronization
The clock uses WiFi to automatically synchronize time, eliminating manual adjustments. Follow these steps:
- Ensure the clock is powered on.
- Using the remote control, navigate to the WiFi setup menu.
- Connect the clock to your local WiFi network. You may need to select your network and enter the password.
- Once connected, select your local time zone.
- The clock will automatically synchronize the time and date. It also supports automatic Daylight Saving Time (DST) adjustments.
Note:
- Important: The WiFi connection is solely for time synchronization and does not involve any privacy information.
- The remote control has a straight-line operating distance of up to 5 meters.

Image: Effortless setup and WiFi time synchronization process.
Operating Instructions
The XREXS Digital Wall Clock offers multiple functions controlled via the included remote.
1. Display Modes
The clock displays hours, minutes, seconds, date, month, and day of the week. It supports both 12-hour and 24-hour formats. Use the remote control to switch between different display modes or functions (Clock, Timer, Alarm).
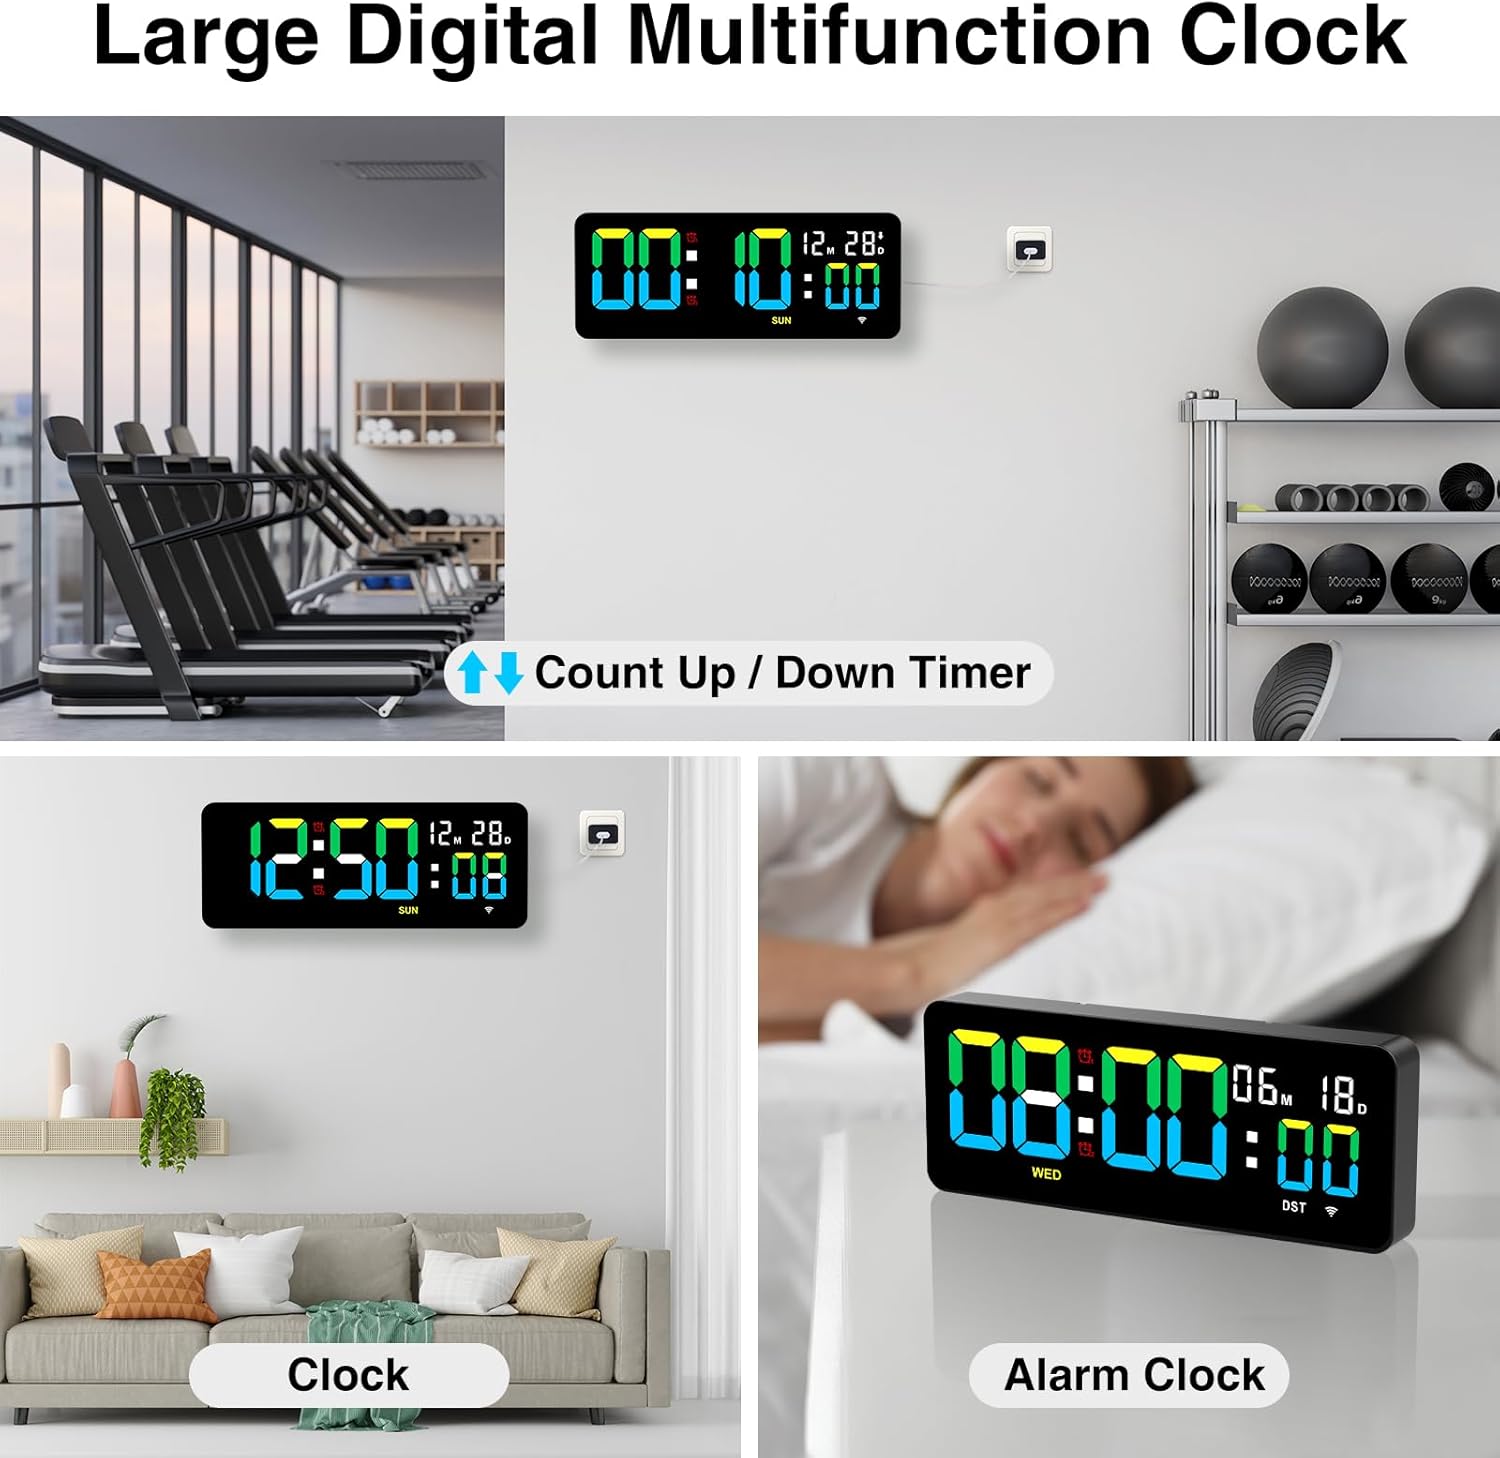
Image: Multifunction display modes including Clock, Timer, and Alarm.
2. Brightness Adjustment
The clock features three adjustable brightness levels to suit your environment and preference. Use the remote control to cycle through High, Medium, and Low brightness settings.

Image: Three levels of display brightness.
3. Alarm Clock Function
The clock allows you to set two independent alarms simultaneously. The alarm offers three modes to meet diverse needs (specific modes not detailed in product info, refer to full manual for details). Use the remote control to set and manage alarms.
- Press the AL1 or AL2 button on the remote to set the respective alarm.
- Use the number buttons to input the desired alarm time.
- Confirm the setting.
4. Timer Function (Countdown/Count-Up)
The integrated timer supports both countdown and count-up functions, with a maximum timing cycle of 99 hours, 59 minutes, and 59 seconds.
- Countdown: Set a desired time using the remote. Upon completion, the clock will emit a 60-second "beep-beep-beep" alert.
- Count-Up: Start the timer from zero.
- Memory Function: The timer retains previous settings if not manually cleared.
- Reset: Use the Reset button on the remote to clear the current timer setting and start a new cycle.
This feature is ideal for various activities such as cooking, exercise, study sessions, or managing children's screen time.
Maintenance
To ensure the longevity and optimal performance of your XREXS Digital Wall Clock, follow these simple maintenance guidelines:
- Cleaning: Gently wipe the display and casing with a soft, dry, or slightly damp cloth. Avoid using abrasive cleaners, solvents, or chemical sprays, as these can damage the surface.
- Placement: Place the clock in a location away from direct sunlight, extreme temperatures, and high humidity to prevent damage to the electronic components and display.
- Power: Always use the provided power adapter and USB cable. Do not attempt to use other adapters unless they meet the exact specifications.
- Handling: Handle the clock and remote control with care to avoid physical damage.
Troubleshooting
If you encounter any issues with your XREXS Digital Wall Clock, please refer to the following common solutions:
1. Clock Does Not Power On
- Ensure the power plug is securely inserted into both the clock and the electrical outlet.
- Check if the electrical outlet is functioning correctly by plugging in another device.
- Verify that the USB cable is not damaged.
2. Incorrect Time Display
- WiFi Sync: Ensure the clock is successfully connected to your WiFi network and the correct time zone is selected. Re-attempt WiFi setup if necessary.
- Manual Adjustment: If WiFi is unavailable, refer to the full product manual for instructions on manual time setting using the remote control.
3. Remote Control Not Responding
- Check the battery in the remote control and replace it if necessary.
- Ensure there are no obstructions between the remote control and the clock.
- Make sure you are within the 5-meter operating range.
- Point the remote directly at the clock's sensor.
4. Alarm Not Sounding
- Verify that the alarm is enabled and set to the correct time.
- Check the alarm volume settings (if adjustable, refer to the full manual).
5. Timer Issues
- Ensure the timer function is correctly activated and the time is set.
- If the timer is not resetting, try pressing the Reset button on the remote.
Specifications
| Brand | XREXS |
| Model Number | KYX-0035-WiFi |
| Display Type | Digital LED |
| Screen Size | 12.2 Inches |
| Product Dimensions | 30W x 12H centimetres (approx. 11.81W x 4.73H inches) |
| Power Source | Corded Electric (USB Cable and Power Plug) |
| Special Features | Adjustable Brightness (3 levels), Alarm (2 alarms), Calendar Display, Count Up/Down Timer, WiFi Time Sync, Auto DST, Remote Control |
| Mounting Type | Wall Mount, Desk Placement |
| Frame Material | Acrylic |
| Indoor/Outdoor Use | Indoor |
Warranty and Support
For warranty information or technical support, please refer to the documentation included with your purchase or contact XREXS customer service directly. Contact details can typically be found on the manufacturer's official website or on the product packaging.
Ask a question about this manual
Ask about setup, troubleshooting, compatibility, parts, safety, or missing instructions. Manuals+ will review the question and use this page’s manual context to help answer it.