1. Safety Information
Please read all instructions carefully before assembly and use. Failure to follow these instructions may result in injury or damage to the product.
- Assembly: Always assemble this product with at least 2-4 adults. Be cautious when handling heavy components and sharp edges. Protective gloves are recommended during assembly.
- Location: Choose a level, stable surface for installation. Ensure adequate clearance around the shed for assembly and access.
- Security: Keep valuable items secure by utilizing the provided lockable door mechanism.
- Weather Conditions: While designed for durability, extreme weather conditions (e.g., severe winds, heavy snow loads) may require additional anchoring or precautions.
- Children and Pets: Keep children and pets away from the assembly area. Do not allow children to play inside or around the shed unsupervised.
- Ventilation: Ensure proper ventilation to prevent moisture buildup and maintain air quality inside the shed.
2. Package Contents
Verify that all components listed below are present before beginning assembly. If any parts are missing or damaged, please contact customer support.
- Galvanized Steel Panels (Walls, Roof)
- Frame Components (Galvanized Steel)
- Hardware Kit (Screws, Nuts, Washers)
- Door Assembly (Single Hinged, Lockable)
- Roof Plastic Protection Corners
- Plastic Screw Sleeves
- Assembly Instructions Manual
- Bonus Accessories:
- Handheld Work Light
- Outdoor Solar-Powered Sensor Light
- Mounting Gloves

Figure 2.1: Illustration of typical package contents, including the shed components and bonus accessories.
3. Product Overview and Specifications
The Benass 10x8 FT Outdoor Storage Shed is designed for durable and secure outdoor storage. It features galvanized steel construction for weather resistance and a functional design for various storage needs.
3.1 Key Features
- Dimensions: Approximately 112.59"L x 87.71"W x 81.49"H, providing around 457 cubic feet of storage.
- Material: Galvanized Steel with anti-rust treatment for enhanced durability and weather resistance.
- Roof Design: Enhanced three-beam roof design with a slope to prevent water accumulation.
- Ventilation: Four-vent airflow system for effective air circulation, reducing heat and odors.
- Security: Lockable doors for secure storage.
- Weather Resistance: Waterproof, UV resistant, and designed for high wind and snow load capacity.
3.2 Product Dimensions

Figure 3.1: Detailed product dimensions for the 10x8 FT storage shed.
3.3 Material and Construction

Figure 3.2: Features of the galvanized steel construction, emphasizing durability and weather protection.
4. Assembly Instructions
Assembly requires 2-4 adults and approximately 2-4 hours. Follow the detailed instructions provided in the separate assembly manual included with your package. The following provides a general overview and important tips.
4.1 Preparation
- Site Selection: Choose a flat, level area for the shed. A concrete slab or treated wood foundation is recommended (floor not included).
- Tools Required: You will need a screwdriver, wrench, and possibly a drill.
- Safety Gear: Wear the provided mounting gloves to protect your hands from sharp edges.
- Unpack: Carefully unpack all boxes and identify all parts using the parts list in your manual. Note that the product may arrive in multiple boxes on different days.

Figure 4.1: The shed components are shipped in two separate boxes, which may arrive on different days.
4.2 General Assembly Steps
- Base Assembly: Construct the base frame on your prepared site. Ensure it is square and level.
- Wall Panel Installation: Attach the wall panels to the base frame, following the numerical order in the manual. Secure panels using the provided screws and plastic screw sleeves.
- Roof Frame Assembly: Assemble the roof support beams and attach them to the top of the wall panels.
- Roof Panel Installation: Install the roof panels, ensuring they overlap correctly to prevent water entry. Secure with screws and attach roof plastic protection corners.
- Door Installation: Mount the door frame and hang the lockable doors. Adjust hinges for smooth operation.
- Accessory Installation: Install the solar-powered sensor light and any other included accessories as per their individual instructions.

Figure 4.2: Key structural components and protective measures for assembly.
Video 4.1: General assembly overview (7:59 duration). This video demonstrates the steps involved in constructing the shed.
Video 4.2: Detailed assembly guide (10:27 duration). This video provides a more in-depth look at each assembly step.
5. Operation
Using your Benass Outdoor Storage Shed is straightforward. Here are some operational guidelines:
- Door Usage: Open and close the doors gently. Ensure they are properly aligned and latched when closed. Use the lock for security.
- Ventilation: The shed features integrated vents to promote airflow. Do not block these vents to ensure proper air circulation and prevent moisture buildup.
- Storage Capacity: The shed offers approximately 457 cubic feet of storage. Organize items efficiently to maximize space and maintain accessibility.
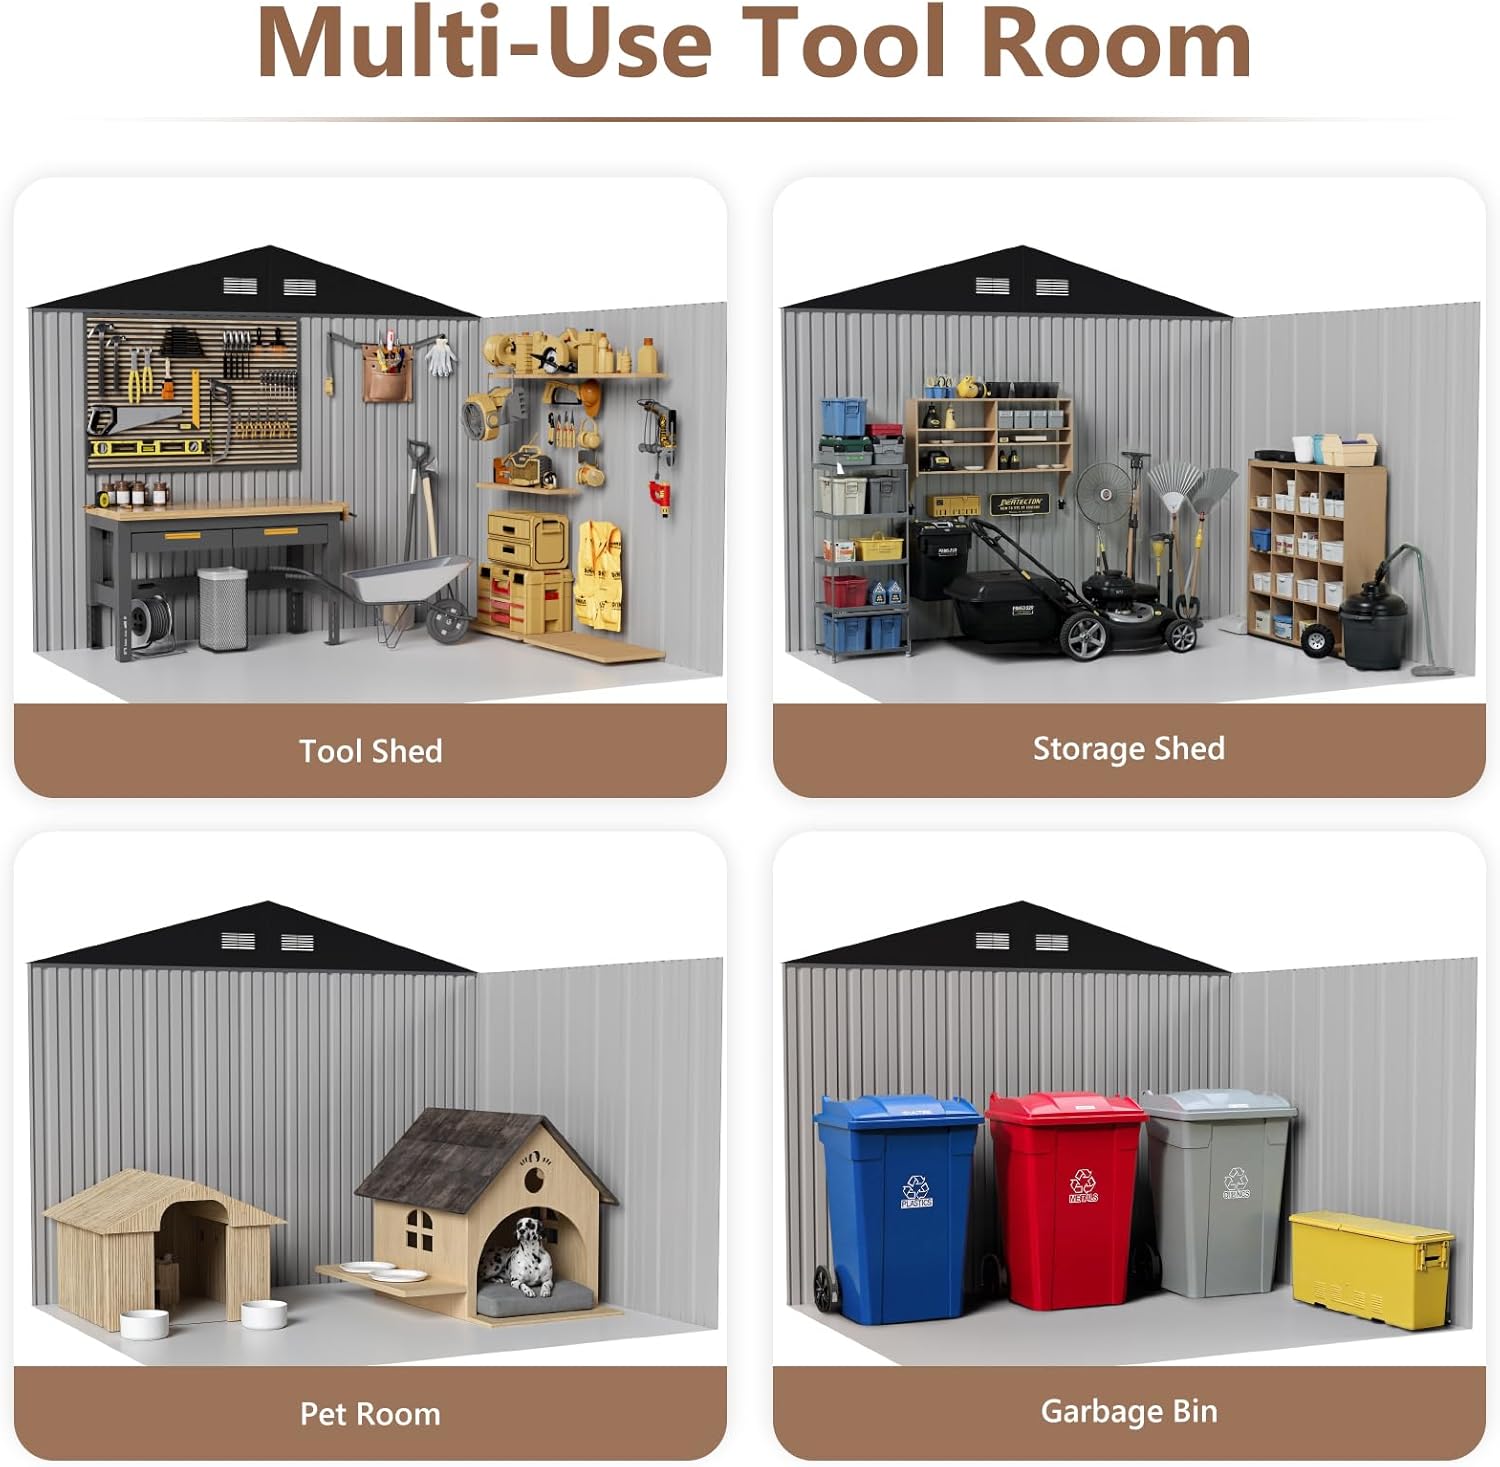
Figure 5.1: Examples of multi-use configurations for the storage shed.

Figure 5.2: The shed is suitable for storing a variety of tools and outdoor equipment.

Figure 5.3: Convection vents facilitate airflow, maintaining a fresh interior.
6. Maintenance
Regular maintenance will extend the life and appearance of your storage shed.
- Cleaning: Clean the exterior of the shed periodically with mild soap and water. Avoid abrasive cleaners or harsh chemicals that could damage the galvanized finish.
- Inspection: Annually inspect all screws, bolts, and connections to ensure they are tight. Re-tighten if necessary. Check for any signs of rust or damage to the panels.
- Drainage: Ensure the area around the shed has proper drainage to prevent water from pooling at the base. The sloped roof is designed to shed water effectively.
- Snow Removal: In areas with heavy snowfall, periodically remove excessive snow from the roof to prevent structural strain, despite its high load capacity.

Figure 6.1: The shed is designed to withstand high snow loads and strong winds.
7. Troubleshooting
Here are solutions to common issues you might encounter:
| Problem | Possible Cause | Solution |
|---|---|---|
| Water accumulation inside the shed | Improper assembly of roof panels; blocked vents; uneven ground. | Review roof panel installation to ensure proper overlap. Clear any obstructions from vents. Ensure the shed is on a level surface with good drainage. |
| Doors do not close or latch properly | Uneven base; misaligned hinges; obstruction. | Check if the shed base is level. Adjust door hinges. Remove any debris or obstructions from the door path. |
| Shed feels unstable or wobbly | Loose fasteners; uneven ground; insufficient anchoring. | Tighten all screws and bolts. Ensure the base is level. Consider additional anchoring to the ground if in a windy area (anchoring hardware not included). |
| Solar light not working | Insufficient sunlight exposure; battery issue; sensor obstruction. | Ensure the solar panel receives direct sunlight for several hours daily. Check for any obstructions covering the sensor. Refer to the solar light's individual manual for specific troubleshooting. |
8. Customer Support
For any questions, missing parts, or assistance during assembly or usage, please reach out directly to our friendly customer support team. Please have your model number (10x8 FT) and purchase information ready when contacting support.
Contact Information: Refer to the contact details provided in your purchase documentation or on the Benass official website.