1. Introduction
This manual provides detailed instructions for the installation, operation, and maintenance of your Dasaita 13.3-inch Double Din Android 13 Car Stereo. Please read this manual thoroughly before using the product to ensure proper function and safety. Keep this manual for future reference.
2. Product Overview
2.1 Key Features
- Vehicle Compatibility: Designed for double DIN frames (178x100mm), compatible with various vehicles including Nissan Qashqai and Subaru Forester.
- Powerful Performance: Octa-core Qualcomm 665 CPU, 8GB RAM, 256GB ROM, running Android 13 OS.
- Wireless Connectivity: Supports Wireless Apple CarPlay and wired/wireless Android Auto, Bluetooth 5.0, 5G WiFi, and 4G LTE via SIM card.
- High-Resolution Display: 13.3-inch QLED Full-fit capacitive touchscreen with 1920*1080P resolution.
- Advanced Audio: Built-in TDA7808 amplifier chip (23W RMS/50 peak x 4 channels), 4V audio output, DTS sound processing, and optical fiber output.
- Navigation & Safety: In-dash GPS navigation and built-in gyro sensor for Off-Road Inclinometer functions, monitoring roll and pitch angles.
- User Interface: Customizable UI, intelligent day/night mode switching, and split-screen functionality.
2.2 What's in the Box
The package includes the following components:
- Dasaita 13.3-inch Head Unit
- User Manual
- Tool kit
- Audio Output & Camera Input cables
- AUX In & Front Camera Input cables
- 2x USB cables
- WiFi antenna
- SIM card cable
- GPS antenna
- 4G antenna
- Microphone
- Power Cable
- USB Adapter
- Canbus decoder (if applicable)

Image: All components included in the product packaging.
3. Installation & Setup
3.1 Vehicle Compatibility and Fitment
The Dasaita 13.3-inch head unit is designed to fit standard double DIN openings (178x100mm). For vehicles with non-standard openings, an additional installation kit may be required. Specific cables and dash kits might be needed for certain vehicle models to retain OEM features.

Image: Examples of the head unit installed in different vehicle dashboards.

Image: Illustration of retaining OEM radio features and expanding content.
3.2 Physical Installation and Adjustable Screen
The head unit features an adjustable 13.3-inch floating screen. It can be moved vertically by ±2.5cm and tilted up/down or left/right by 30 degrees to optimize viewing angles.
- Face down the head unit screen and remove the 4 securing screws.
- Lay the unit flat and remove the support bracket screws.
- Adjust the screen vertically by 2.5cm. Secure the bracket screws, then reinstall the screen fixing screws.

Image: Adjustable viewing angle options for the screen.

Image: Detailed steps for adjusting the screen's vertical position.
3.3 Wiring Diagram
Refer to the universal wiring diagram for connecting the various components. Ensure all connections are secure before powering on the unit.

Image: Universal wiring diagram for the head unit.
3.4 SIM Card Installation
To enable 4G LTE connectivity, insert a 4G SIM card into the provided slot. Ensure the engine is turned off before inserting the SIM card.
- Turn off the vehicle engine.
- Carefully insert the 4G SIM card into the designated slot. Only standard SIM cards are supported.
- After installation, navigate to Settings > Car Setting > Factory Setting > Find SIM card voice call and select "Yes" to enable 4G LTE phone call functionality.

Image: Instructions for inserting a 4G SIM card.

Image: Steps to enable 4G LTE phone calls.
4. Operating Instructions
4.1 Wireless CarPlay and Android Auto
Connect your iPhone or Android device wirelessly via Bluetooth 5.0 for seamless integration with Apple CarPlay or Android Auto. Access navigation, make calls, send messages, and play music directly from your phone's interface on the head unit screen.
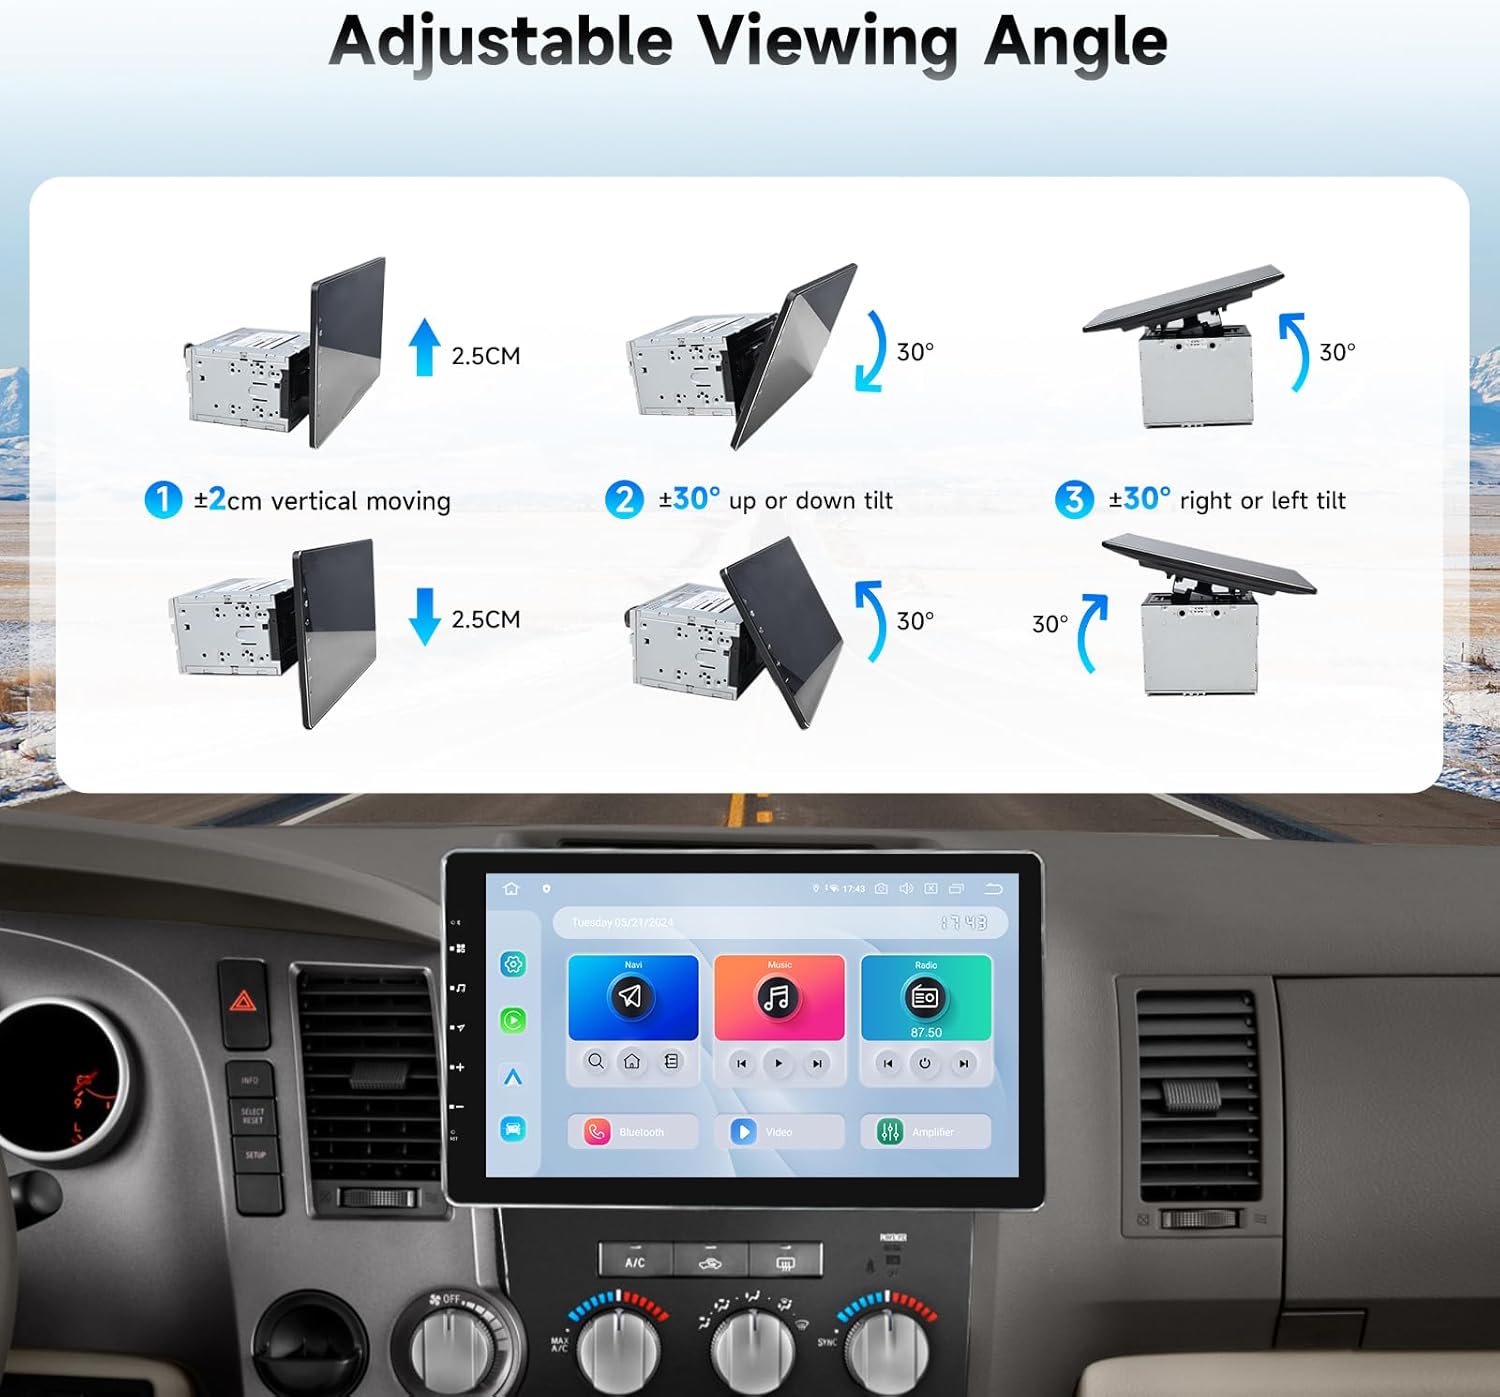
Image: Apple CarPlay and Android Auto interfaces.
4.2 DTS Sound Processing
The built-in DTS sound processor and TDA7808 amplifier chip deliver high-quality audio. Customize your sound experience by adjusting equalizer settings, delay times, and other audio parameters to match your preferences.

Image: DTS sound processor interface.
4.3 Off-Road Inclinometer Functions
The integrated gyro sensor provides real-time monitoring of your vehicle's roll and pitch angles. An alarm will sound if preset values are exceeded, enhancing driving safety, especially on uneven terrain.

Image: Off-Road Inclinometer display.
4.4 User Interface Customization
The Android 13 OS allows for personalized customization of the user interface. You can rearrange app icons, set day or night modes, and utilize the split-screen function for multitasking.

Image: Intelligent Day and Night Mode Switching.

Image: User-Friendly Interface with customization options.
4.5 Screen Sharing and Mirroring
The head unit supports wireless TV projection and wired/wireless mirroring via the Zlink app. This allows you to display content from your smartphone directly onto the larger screen.
4.6 4G LTE Phone Calls
With a 4G SIM card installed and enabled, you can make and receive phone calls directly from the head unit. The quality of the call depends on the signal strength of your location.

Image: Bluetooth 5.0 for hands-free phone calls.
5. Specifications
| Feature | Specification |
|---|---|
| Model Number | HA2308 |
| Display Size | 13.3 Inches |
| Resolution | 1920*1080P |
| Operating System | Android 13 |
| CPU | Octa-core Qualcomm 665 |
| RAM | 8GB |
| ROM | 256GB |
| Bluetooth | Bluetooth 5.0 |
| Connectivity | Bluetooth, USB, Wi-Fi, 4G LTE |
| Audio Output Mode | Stereo |
| Amplifier Chip | TDA7808 (23W RMS/50 peak x 4 channels) |
| Special Features | Touchscreen, DTS, Gyro Sensor (Off-Road Inclinometer) |
| Item Weight | 13.2 pounds |
| Product Dimensions | 12.8 x 6 x 7.6 inches |

Image: Product dimensions.
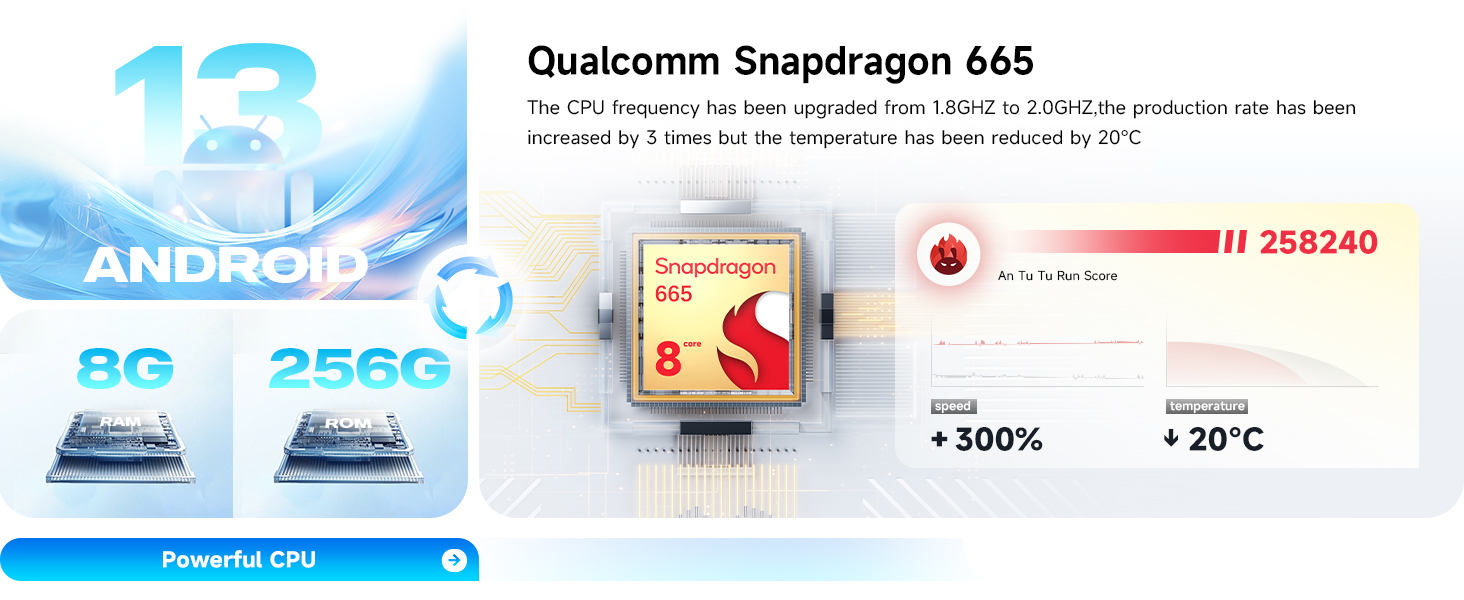
Image: Powerful CPU and memory specifications.
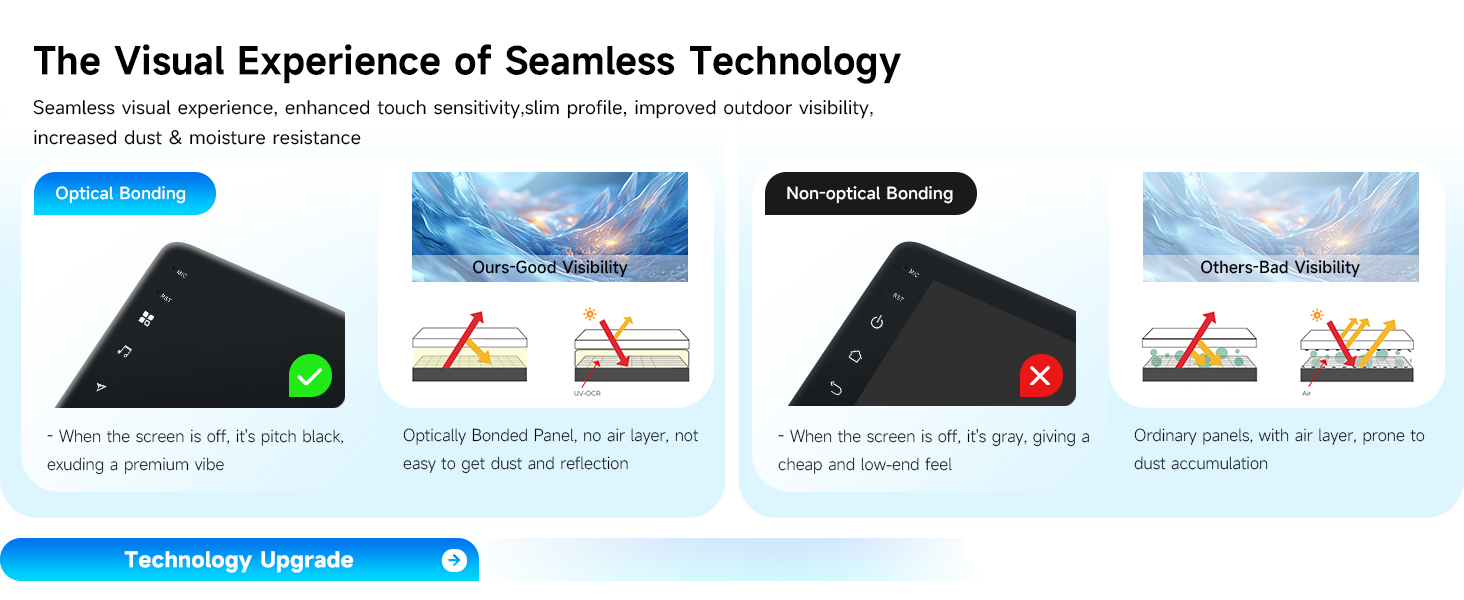
Image: High-definition fully laminated screen details.
6. Maintenance
To ensure the longevity and optimal performance of your Dasaita car stereo, follow these maintenance guidelines:
- Screen Cleaning: Use a soft, lint-free cloth to gently wipe the touchscreen. For stubborn smudges, slightly dampen the cloth with water or a screen-safe cleaner. Avoid harsh chemicals or abrasive materials.
- Software Updates: Periodically check for and install software updates to ensure the system runs efficiently and has the latest features and security patches.
- Environmental Care: Avoid exposing the unit to extreme temperatures, direct sunlight for prolonged periods, or excessive moisture.
- Cable Connections: Ensure all cables are securely connected and free from damage. Loose connections can lead to intermittent issues.
7. Troubleshooting & Support
7.1 Common Issues
- No Power: Check power cable connections and vehicle's fuse box.
- No Sound: Verify speaker connections, volume settings, and audio output mode.
- Touchscreen Unresponsive: Try restarting the unit. If issues persist, contact support.
- GPS Signal Loss: Ensure the GPS antenna is properly installed and has a clear view of the sky.
- CarPlay/Android Auto Connection Issues: Ensure Bluetooth is enabled on both devices and the phone is compatible. Try restarting both the phone and the head unit.
7.2 Warranty Information
This Dasaita product comes with a 1-year warranty from the date of purchase. Please retain your proof of purchase for warranty claims. The warranty covers manufacturing defects but does not cover damage caused by misuse, improper installation, or unauthorized modifications.
7.3 Customer Support
If you encounter any issues or have questions not covered in this manual, please contact Dasaita Official Store customer support. You can typically find contact information on the seller's page or through your purchase platform.

Image: How to contact customer support.