Introduction
This manual provides detailed instructions for the assembly, operation, maintenance, and troubleshooting of your ATTAV Outdoor Dog Enclosure. Please read this manual thoroughly before assembly and use to ensure proper setup and safe operation. Keep this manual for future reference.
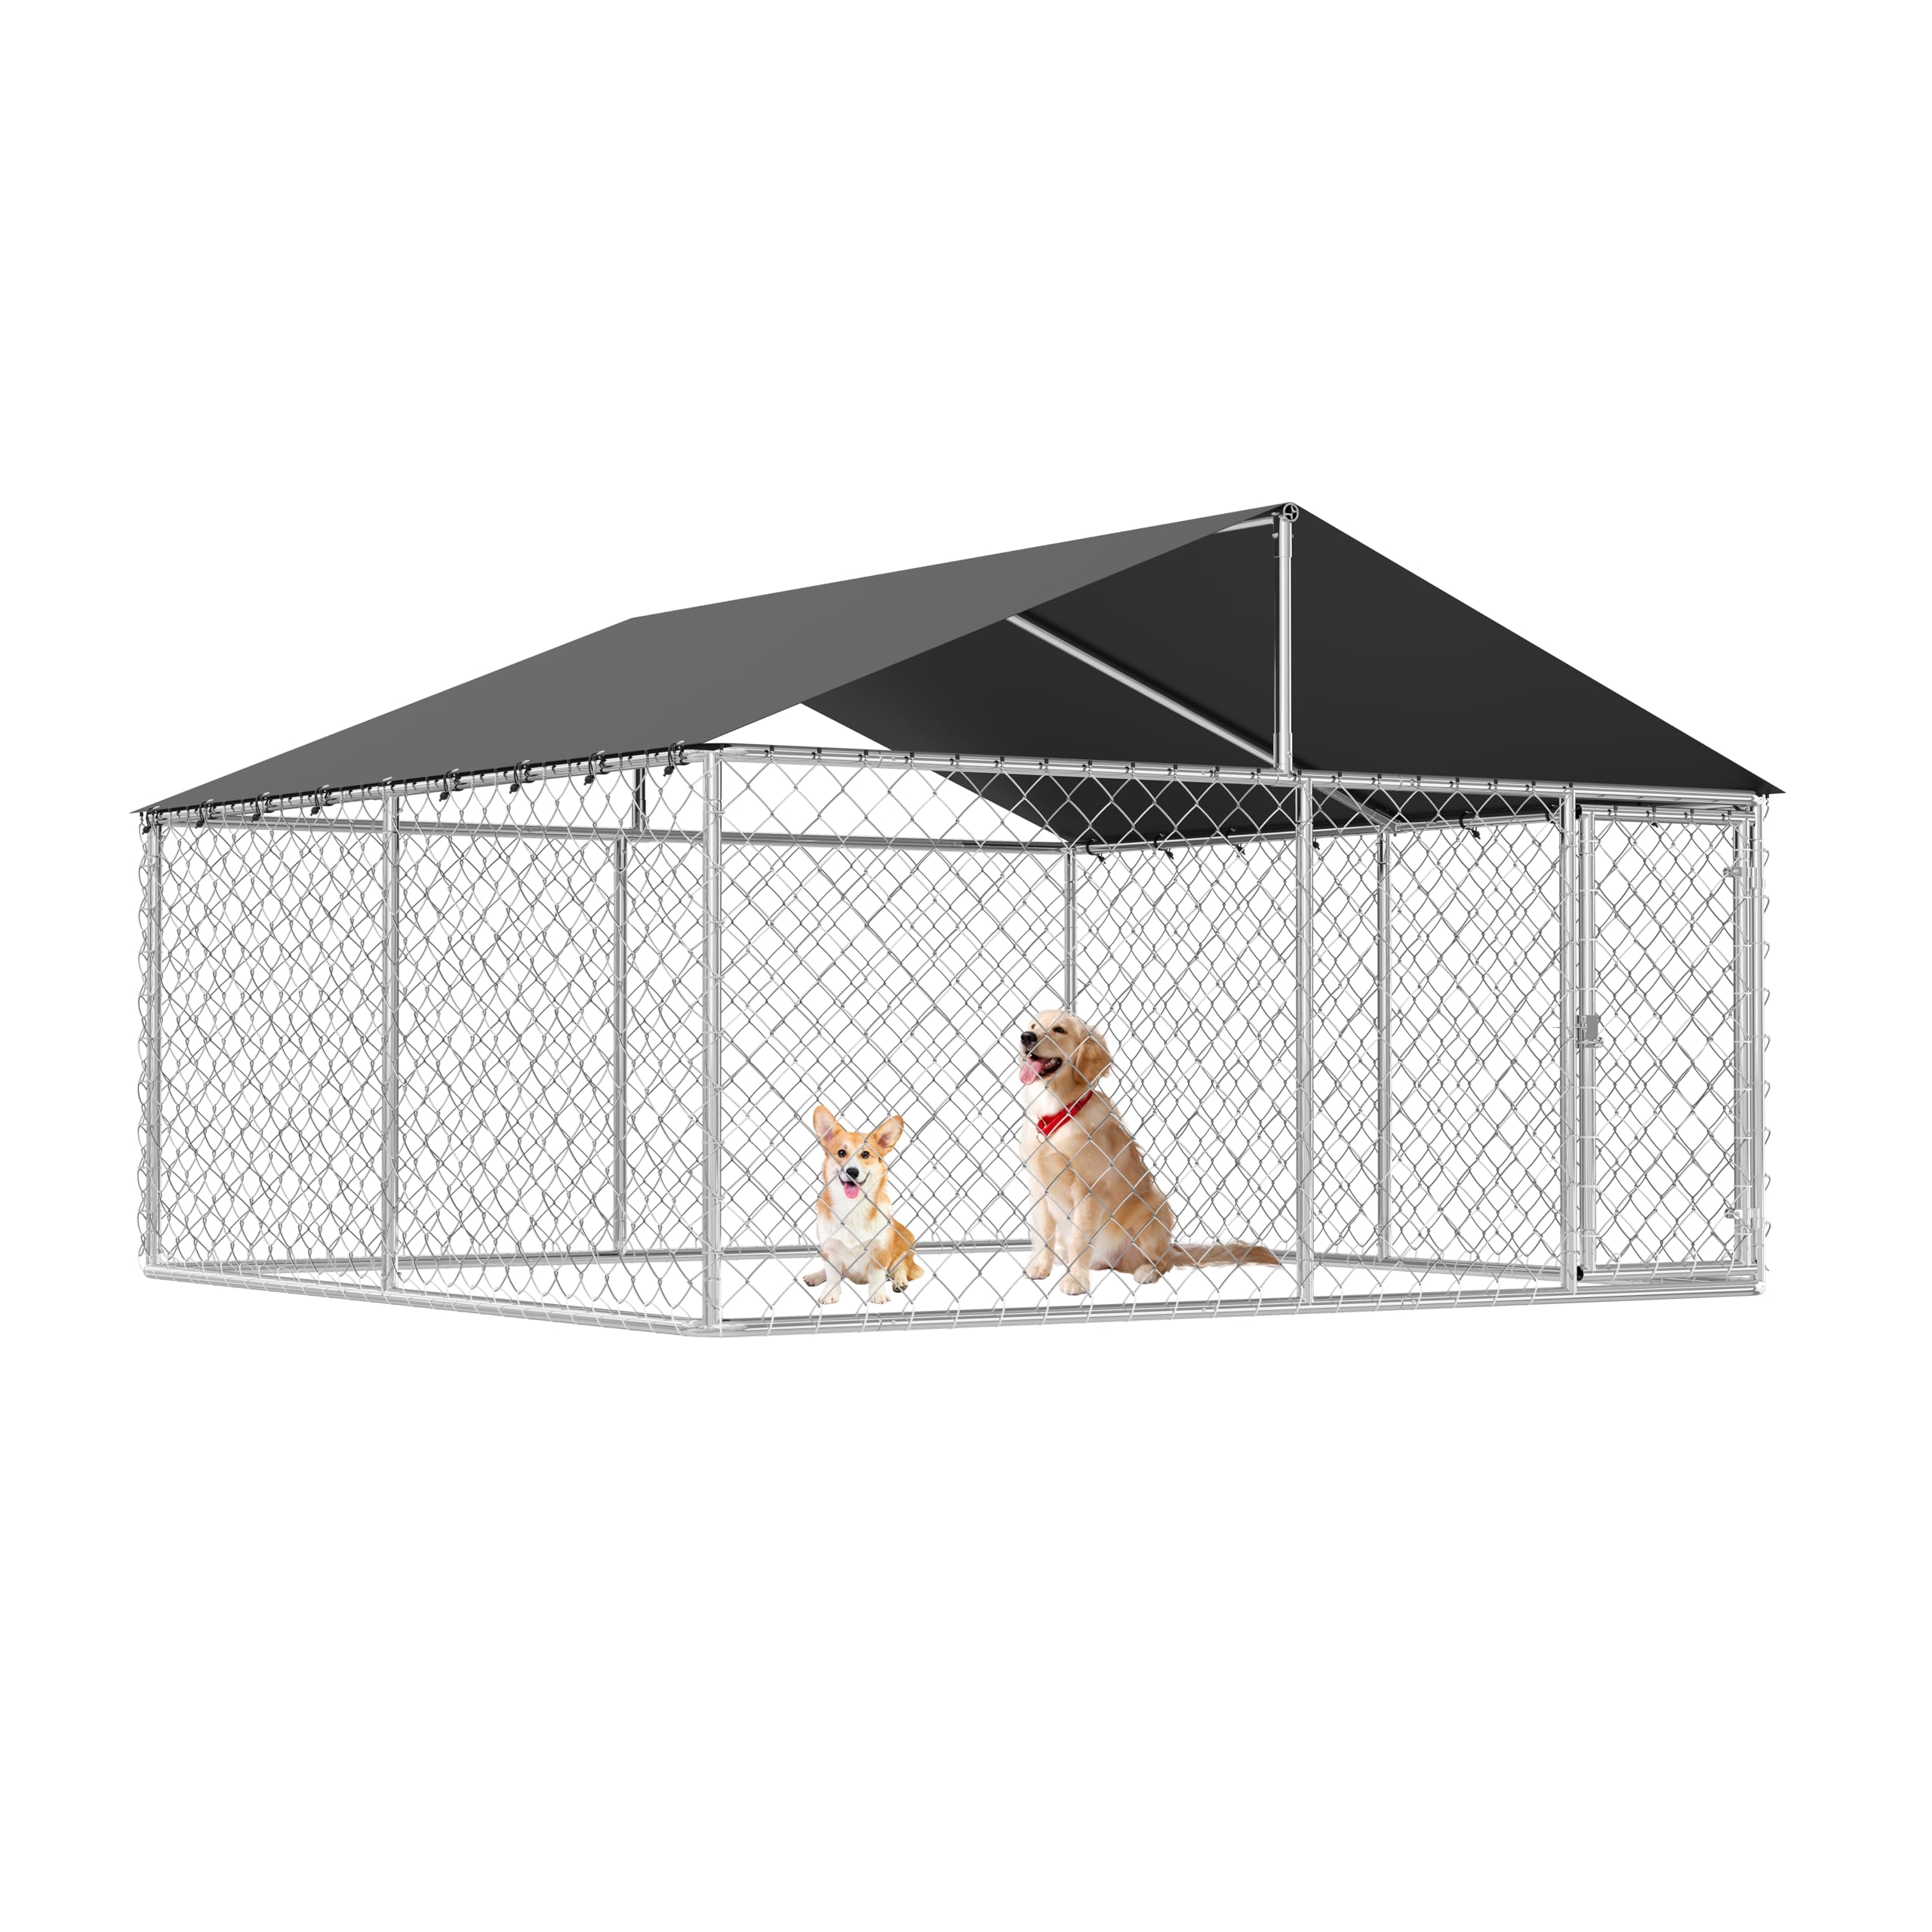
Image: Fully assembled ATTAV Outdoor Dog Enclosure with a protective roof cover, situated in a green yard.
Safety Information
Always prioritize safety during assembly and use. Failure to follow these instructions may result in injury or damage to the product.
- Adult Assembly Required: This product requires assembly by at least two adults. Do not attempt to assemble alone.
- Wear Protective Gear: Wear gloves during assembly to protect hands from sharp edges.
- Secure Installation: Ensure all components are securely fastened before placing pets inside. Use the provided ground stakes to anchor the enclosure firmly to the ground.
- Weather Conditions: Remove the roof cover during heavy snowfall to prevent collapse. Monitor weather conditions and ensure the enclosure remains stable.
- Regular Inspection: Periodically inspect the enclosure for any loose parts, damage, or wear. Repair or replace damaged components immediately.
- Proper Placement: Place the enclosure on a level surface away from potential hazards.
- Pet Supervision: While the enclosure provides a secure space, always supervise your pets, especially during initial use.
Package Contents
Verify that all parts are present before beginning assembly. If any parts are missing or damaged, contact customer support.
| Component | Quantity | Description |
|---|---|---|
| Metal Frame Panels | Varies by size | Galvanized steel frame sections for walls and roof. |
| Wire Mesh Panels | Varies by size | Steel wire mesh for enclosure walls. |
| Door Panel | 1 | Panel with integrated lockable door. |
| Roof Cover | 1 | PE fabric cover for rain and UV protection. |
| Connecting Clamps/Hardware | Set | Bolts, nuts, and clamps for securing panels. |
| Ground Stakes | Set | For anchoring the enclosure to the ground. |
| Gloves | 1 pair | For hand protection during assembly. |
| Instruction Manual | 1 | This document. |

Image: Detailed view of key components: lockable door mechanism, waterproof canopy fabric, frame clamps, steel wire mesh, and elastic buckles for the roof cover.
Setup and Assembly
Assembly typically takes approximately 3 hours with two people. Follow these steps carefully:
- Unpack and Inspect: Carefully unpack all components and lay them out. Compare with the package contents list to ensure everything is present and undamaged.
- Assemble Base Frame: Connect the bottom metal frame panels to form the base perimeter of the enclosure. Ensure all connections are secure but do not fully tighten bolts until the entire frame is assembled.
- Attach Wall Panels: Attach the wire mesh wall panels to the base frame. Integrate the door panel into the desired position. Secure panels using the provided clamps and hardware.
- Install Roof Frame: Assemble the roof frame structure according to the diagrams. Lift and attach the roof frame to the top of the wall panels.
- Tighten All Connections: Once the entire frame (base, walls, roof) is assembled, go back and fully tighten all bolts and clamps to ensure maximum stability.
- Install Roof Cover: Drape the PE fabric roof cover over the assembled roof frame. Secure the cover using the elastic buckles or ties provided, ensuring it is taut and covers the entire roof area.
- Anchor to Ground: Use the ground stakes to firmly anchor the base of the enclosure to the ground. This prevents movement and adds stability.
- Final Check: Inspect the entire enclosure to ensure all parts are correctly assembled, secure, and stable. Check the door latch for proper function.

Image: Close-up details illustrating the stainless steel frame, wire mesh construction, and nylon rope securing the roof cover, highlighting the robust build.
Operation
- Door Usage: The enclosure features a secure, lockable door. Always ensure the door is properly latched and locked when your pet is inside to prevent escape.
- Pet Introduction: Introduce your pet to the enclosure gradually. Ensure they have access to water and shade within the enclosure.
- Roof Cover Functionality: The PE fabric roof cover provides protection from sun and rain. Ensure it is securely fastened to the frame using the elastic buckles.

Image: Detailed view of the durable metal bottom frame and the secure, lockable door mechanism, emphasizing safety features.
Maintenance
- Cleaning: Regularly clean the enclosure. The metal frame and wire mesh can be wiped down with a damp cloth and mild detergent. Rinse thoroughly.
- Roof Cover Care: The PE fabric roof cover can be cleaned with water and a soft brush. Allow it to air dry completely before reattaching or storing.
- Seasonal Adjustments: During periods of heavy snowfall, it is recommended to remove the roof cover to prevent snow accumulation and potential damage to the frame.
- Hardware Check: Periodically check all bolts, clamps, and connections to ensure they remain tight. Tighten as necessary.
- Rust Prevention: The galvanized metal is rust-resistant, but regular cleaning and inspection can further prolong its lifespan. Address any signs of rust promptly.

Image: The dog kennel with its roof cover, illustrating its waterproof properties during rain and UV protection under sunlight.
Troubleshooting
| Problem | Possible Cause | Solution |
|---|---|---|
| Enclosure feels unstable or wobbly. | Loose connections; not properly anchored. | Ensure all bolts and clamps are fully tightened. Verify ground stakes are securely driven into the ground. Relocate to a more level surface if necessary. |
| Door does not latch securely. | Misalignment; obstruction in latch mechanism. | Check for any obstructions. Adjust the door panel slightly if possible to ensure proper alignment with the latch. Inspect the latch for damage. |
| Roof cover sags or collects water. | Cover not taut; improper installation. | Re-adjust and re-secure the roof cover, ensuring all elastic buckles or ties are tight. Ensure the roof frame is correctly assembled to provide proper slope. |
| Difficulty assembling panels. | Incorrect orientation; missing hardware. | Refer to the assembly instructions and diagrams. Ensure panels are oriented correctly. Verify all necessary hardware is present. Do not force components. |
Specifications
- Model: ATTAV Outdoor Dog Enclosure
- Dimensions (Assembled): 120"W x 120"D x 72"H (304.8 cm W x 304.8 cm D x 182.88 cm H)
- Material: Galvanized Steel Frame, Steel Wire Mesh, PE Fabric Roof Cover
- Weight: Approximately 110 pounds (49.9 kg)
- Color: Silver (frame), Black (roof cover)
- Target Audience: Dogs (suitable for small, medium, and large breeds)

Image: A diagram illustrating the overall dimensions of the enclosure (118"W x 118"D x 72"H) and indicating its suitability for various pets including cats, dogs, rabbits, and geese.
Warranty and Customer Support
ATTAV stands behind the quality of its products. For any questions, concerns, or assistance with your Outdoor Dog Enclosure, please contact ATTAV Customer Support. While specific warranty details are not provided in this manual, please retain your proof of purchase for any warranty claims.
For customer support, please refer to the contact information provided at the point of purchase or on the official ATTAV website.