1. Introduction and Safety Information
Thank you for choosing the JUMMICO Outdoor Trampoline. This manual provides essential information for the safe assembly, operation, and maintenance of your trampoline. Please read all instructions carefully before assembly and use to ensure maximum safety and product longevity. Keep this manual for future reference.
1.1 General Safety Guidelines
- Adult Supervision: Always ensure adult supervision when children are using the trampoline.
- One Jumper at a Time: To prevent collisions and injuries, only one person should jump on the trampoline at a time.
- Weight Limit: Do not exceed the maximum weight capacity of 150 kg (330 lbs).
- Clearance: Ensure adequate overhead and surrounding clearance from walls, fences, trees, and other obstacles.
- No Somersaults: Avoid somersaults or other high-risk maneuvers unless professionally trained and supervised.
- Weather Conditions: Do not use the trampoline in strong winds, rain, or other adverse weather conditions.
- Inspection: Regularly inspect the trampoline for damaged, worn, or missing parts. Replace any faulty components immediately.
- Safety Net: Always ensure the safety net is properly installed and secured before use. The curved and inclined poles reduce impact risk, and the net is fixed to the trampoline edge for continuous protection.
- Spring Protection: The trampoline features 42 high-strength galvanized springs with an anti-rust layer and unique non-slip hooks for smooth, safe bouncing.
2. Assembly Instructions
Assembly typically requires 2-3 adults and can take approximately 1.5 hours. Follow these steps carefully.
2.1 Unpacking and Component Check
Carefully unpack all components and verify against the parts list (not provided in JSON, so please refer to your packaging). Ensure all parts are present and undamaged before proceeding.
- Trampoline frame components (alloy steel)
- Jumping mat (high-density PE, 260 g/m²)
- 42 galvanized springs
- Safety enclosure net (90 g/m² dense mesh)
- Curved support poles for the net
- Ladder
- Protective padding (three-layer: weather-resistant PE + 15mm EPE foam + 130 g/m² polyethylene)
- Assembly tools (if included)
2.2 Frame Assembly
Connect the alloy steel frame sections. The 38mm galvanized, stainless steel tubes are designed for easy installation.

Figure 1: Illustration of the 38mm galvanized steel frame tubes and their easy connection mechanism.
2.3 Jumping Mat and Spring Installation
Attach the jumping mat to the frame using the 42 high-strength springs. Ensure each spring is securely hooked to both the mat and the frame. The unique non-slip spring hooks ensure a smooth and secure bounce.

Figure 2: Detail of the 42 high-strength, galvanized springs with anti-rust coating, designed for superior rebound and load capacity.
2.4 Safety Net and Pole Installation
Install the curved support poles around the trampoline frame. Then, attach the safety enclosure net to these poles and secure it to the edge of the jumping mat. This design ensures continuous protection and prevents sagging.

Figure 3: The curved safety net poles and dense mesh net (90 g/m²) provide protection and are easy to install.
2.5 Final Assembly Steps
Install the protective padding over the springs and frame. Attach the ladder securely to the trampoline frame. Perform a final check to ensure all connections are tight and the safety net is properly tensioned.

Figure 4: Visual representation of the estimated 1.5-hour assembly time.
3. Operating Instructions
Proper use of the JUMMICO trampoline ensures a safe and enjoyable experience.
3.1 Before Each Use
- Ensure the trampoline is on a level surface.
- Check that the safety net zipper is fully closed and secured.
- Verify that the protective padding covers all springs and the frame.
- Remove any sharp objects or debris from the jumping mat.
3.2 Jumping Techniques
- Always enter and exit the trampoline using the ladder.
- Begin with small bounces and gradually increase height.
- Maintain control at all times. If you lose control, bend your knees to stop bouncing.
- Land on the center of the mat.
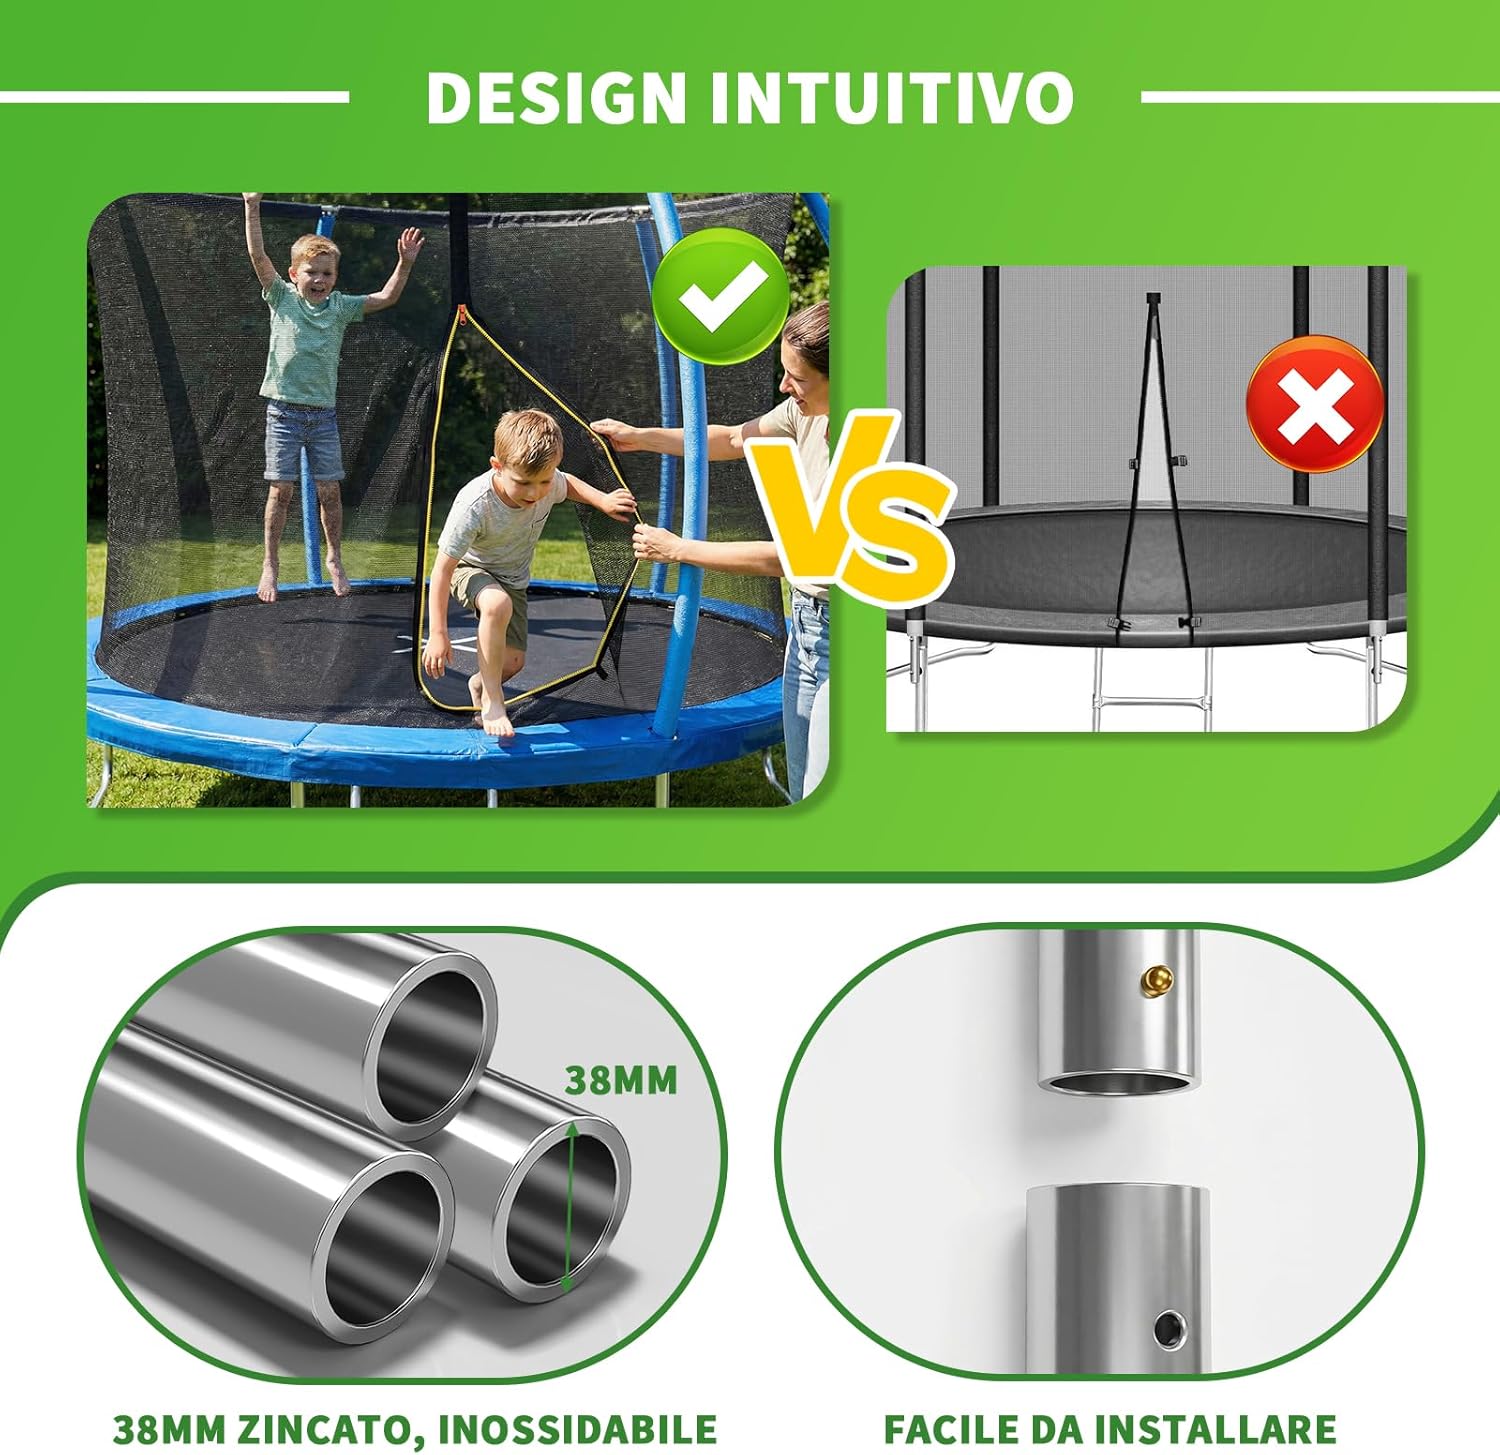
Figure 5: Children enjoying the trampoline, highlighting the spacious jumping area.
4. Maintenance
Regular maintenance will extend the life of your JUMMICO trampoline and ensure continued safety.
4.1 Routine Checks
- Monthly: Inspect all nuts and bolts for tightness. Tighten as necessary.
- Monthly: Check springs for damage, stretching, or rust. Replace any compromised springs.
- Monthly: Examine the jumping mat for tears, holes, or excessive wear.
- Monthly: Inspect the safety net for tears, holes, or loose attachments. Ensure the zipper functions correctly.
- Monthly: Check the protective padding for damage or displacement.
- Seasonally: For prolonged periods of non-use or during harsh weather, consider disassembling and storing the trampoline indoors, or covering it with a weather-resistant cover.
4.2 Cleaning
Clean the jumping mat and protective padding with mild soap and water. Rinse thoroughly and allow to air dry. Do not use abrasive cleaners or brushes.
5. Troubleshooting
This section addresses common issues you might encounter.
5.1 Assembly Difficulties
- Problem: Parts do not fit together easily.
- Solution: Ensure you are using the correct parts for each step. Some components may require firm pressure or the assistance of a second person to align properly. Refer to the assembly diagrams.
- Problem: Springs are difficult to attach.
- Solution: Use the provided spring tool (if applicable) or a similar tool to stretch and attach springs. Attach springs opposite each other to distribute tension evenly.
5.2 Performance Issues
- Problem: Reduced bounce.
- Solution: Check all springs for damage or stretching. Ensure the jumping mat is free from debris and properly tensioned.
5.3 Safety Net Issues
- Problem: Net sags or is loose.
- Solution: Ensure the top steel wire ring is correctly integrated and tensioned. Re-check all pole connections and net attachments.
6. Specifications
| Feature | Detail |
|---|---|
| Brand | JUMMICO |
| Model Name | 1062-75bl |
| Product Type | Outdoor Trampoline |
| Frame Dimensions | 220 cm (for 228cm model) / 183cm (for 183cm model) |
| Overall Product Dimensions (L x W x H) | 2.2L x 2W x 2.2H meters (for 228cm model) |
| Shape | Round |
| Frame Material | Alloy Steel (38mm galvanized, stainless) |
| Jumping Mat Material | High-density Polyethylene (PE) 260 g/m² |
| Number of Springs | 42 (galvanized, anti-rust) |
| Safety Net Material | Dense Mesh (90 g/m²) |
| Protective Padding | 3-layer: Weather-resistant PE + 15mm EPE foam + 130 g/m² Polyethylene |
| Maximum Load Capacity | 150 kg (330 lbs) |
| Item Weight | 25.5 kg |
| Color | Blue |
| Included Components | Trampoline (frame, mat, springs, net, poles, padding, ladder) |
| Certifications | Independently tested by Intertek, GS certified |
7. Warranty and Support
Your JUMMICO Outdoor Trampoline comes with a 2-year product warranty from the date of purchase, covering manufacturing defects.
7.1 Warranty Claims
In the event of a warranty claim, please retain your proof of purchase. Contact JUMMICO customer service with details of the issue. The warranty does not cover damage caused by improper assembly, misuse, neglect, accidents, or normal wear and tear.
7.2 Customer Support
For any questions regarding assembly, operation, maintenance, or parts replacement, please contact JUMMICO customer support. Refer to the contact information provided with your purchase or on the official JUMMICO website.
Note: No official product video URLs were provided in the product data, therefore no videos could be embedded in this manual.