1. Introduction
This manual provides detailed instructions for the assembly, operation, maintenance, and troubleshooting of your Benass 20x20 Heavy Duty Carport Canopy. Please read this manual thoroughly before installation and use to ensure proper setup and safe operation. This carport canopy is designed to provide a large, portable shelter solution, featuring a galvanized steel frame and a 170gms PE canopy top for durability and protection.
2. Safety Information
Adherence to these safety guidelines is crucial for preventing injury and damage to the product.
- Always follow the manufacturer's instructions for setup and use.
- Ensure the product is properly anchored in windy conditions. High winds can cause structural failure if not adequately secured.
- Keep the product clean and free of debris to prevent fire hazards.
- In snowy conditions, clear snow or ice from the roof daily to prevent collapse due to excessive weight.
- Do not use open flames or heating devices inside the carport.
- Keep children and pets away from the assembly area.
3. Package Contents
Verify that all components are present before beginning assembly. If any parts are missing or damaged, contact Benass customer support.
- Galvanized Steel Frame (1.5" diameter pipes)
- PE Canopy Top (170gms)
- 2 Wind Ropes
- 2 Binding Straps
- 4 Sandbags
- 2 Sidewalls
- 1 Solar Light
- 1 Light Strip
- Alloy Screwed Nail Base and Ground Nails with Hooks
- Highly Extensible Buckles

Figure 3.1: Stability components including ropes, binding, support bars, ground nails, and sandbags.
4. Setup Instructions
Assembly of this carport requires at least 2-3 people due to its large size. Follow these steps carefully.
- Step 1: Assemble the Top Frame. Connect the frame pieces to form the roof structure.
- Step 2: Install the Top Reinforced Steel Pipes. Secure the reinforced pipes to the assembled top frame for added stability.
- Step 3: Assemble Small Support Beams. Attach any smaller support beams as indicated in the diagram.
- Step 4: Install the Cover and Secure It. Drape the PE canopy top over the assembled roof frame and secure it in place.
- Step 5: Install Steel Pipes at Four Corners. Attach the vertical steel pipes to form the corner supports.
- Step 6: Install Supporting Legs and Side Fabric. Connect the remaining supporting legs and attach the side fabric panels.
- Step 7: Install Base and Fix It with Nails. Secure the base of the carport to the ground using the provided alloy screwed nail base and ground nails.
- Step 8: Secure the Perimeter and Fix the Carport. Use wind ropes, binding straps, and sandbags to further secure the carport against wind.

Figure 4.1: Visual guide for the 8-step installation process.
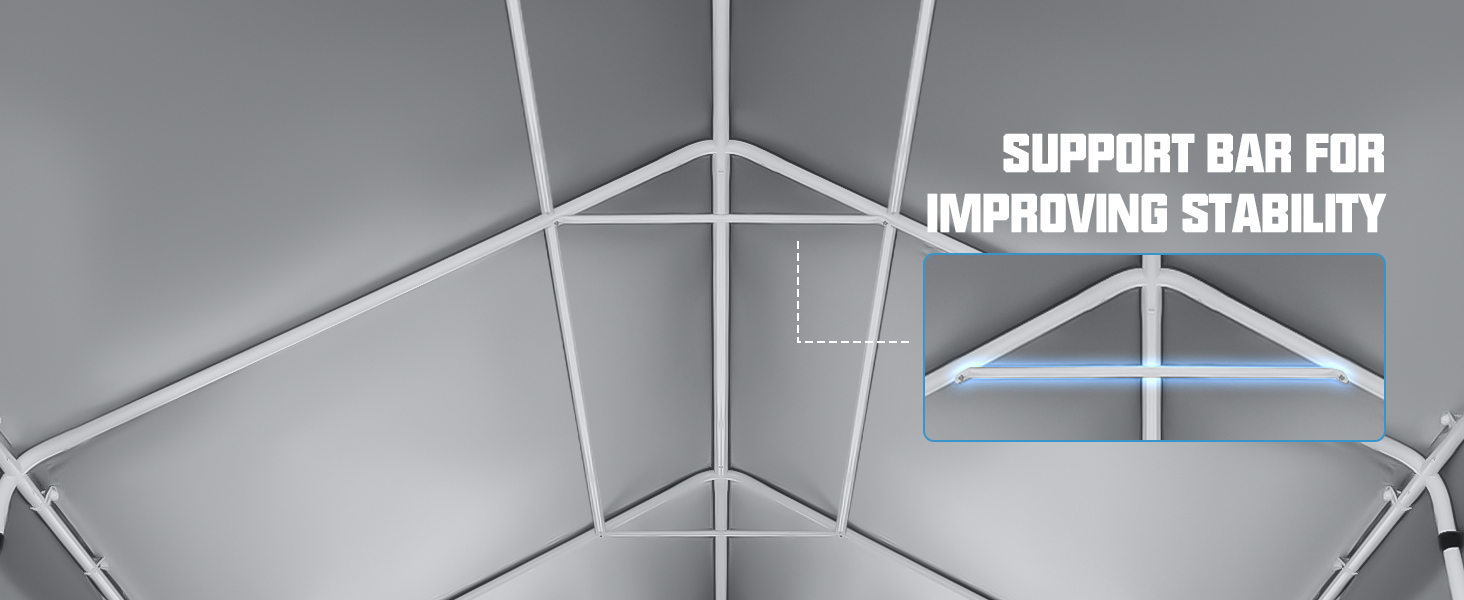
Figure 4.2: Internal support bar structure for enhanced stability.
5. Operating Instructions
Maximize the functionality of your carport with these operational tips.
- Ventilation: Utilize the roll-up zipper door and the four side mesh roll-up windows to ensure proper air circulation, especially during warmer weather or when parking vehicles for extended periods.
- Night Illumination: The included solar light and light strip can be used to provide illumination around and inside the carport during nighttime. Position the solar panel in an area that receives ample sunlight.
- Door Operation: The roll-up zipper door allows for easy vehicle access and can be secured in an open position for drive-through convenience.

Figure 5.1: Roll-up zipper door for ventilation and access.

Figure 5.2: Mesh window for improved airflow.

Figure 5.3: Solar LED lights and light strip for night use.
6. Maintenance
Regular maintenance will extend the lifespan of your carport canopy.
- Cleaning: The durable PE canvas material is cleanable. Use mild soap and water to clean the canopy and frame. Avoid harsh chemicals that could damage the material.
- Snow Removal: In areas with snowfall, regularly clear snow and ice from the canopy roof to prevent structural strain and potential collapse.
- Anchoring Check: Periodically inspect all anchoring points, ropes, and straps to ensure they remain secure, especially after strong winds or storms.
- Frame Inspection: Check the galvanized steel frame for any signs of rust, bending, or damage. Address any issues promptly to maintain structural integrity.

Figure 6.1: Carport in snowy conditions, highlighting the importance of snow removal.
7. Troubleshooting
This section addresses common issues you might encounter.
- Carport Instability: Ensure all frame connections are tight and all anchoring points (ground nails, ropes, sandbags) are properly secured. Re-check installation steps.
- Water Accumulation on Roof: Verify that the canopy is taut and properly installed to allow water runoff. Clear any debris that might be obstructing drainage.
- Zipper Malfunction: Check for any fabric caught in the zipper. Apply a silicone-based lubricant if the zipper is stiff.
- Solar Light Not Working: Ensure the solar panel is clean and receiving direct sunlight for several hours. Check connections to the light unit.
For issues not covered here, please contact Benass customer support.
8. Specifications
| Feature | Detail |
|---|---|
| Brand | Benass |
| Model Number | 20x20-SW-GY-9 |
| Material | Alloy Steel (Frame), 170gms PE (Canopy) |
| Color | Gray |
| Product Dimensions (L x W x H) | 20'L x 20'W x 12.14'H (240"L x 240"W x 145"H) |
| Water Resistance Level | Waterproof |
| Frame Type | Galvanized Steel |
| Assembly Required | Yes |

Figure 8.1: Product dimensions overview.
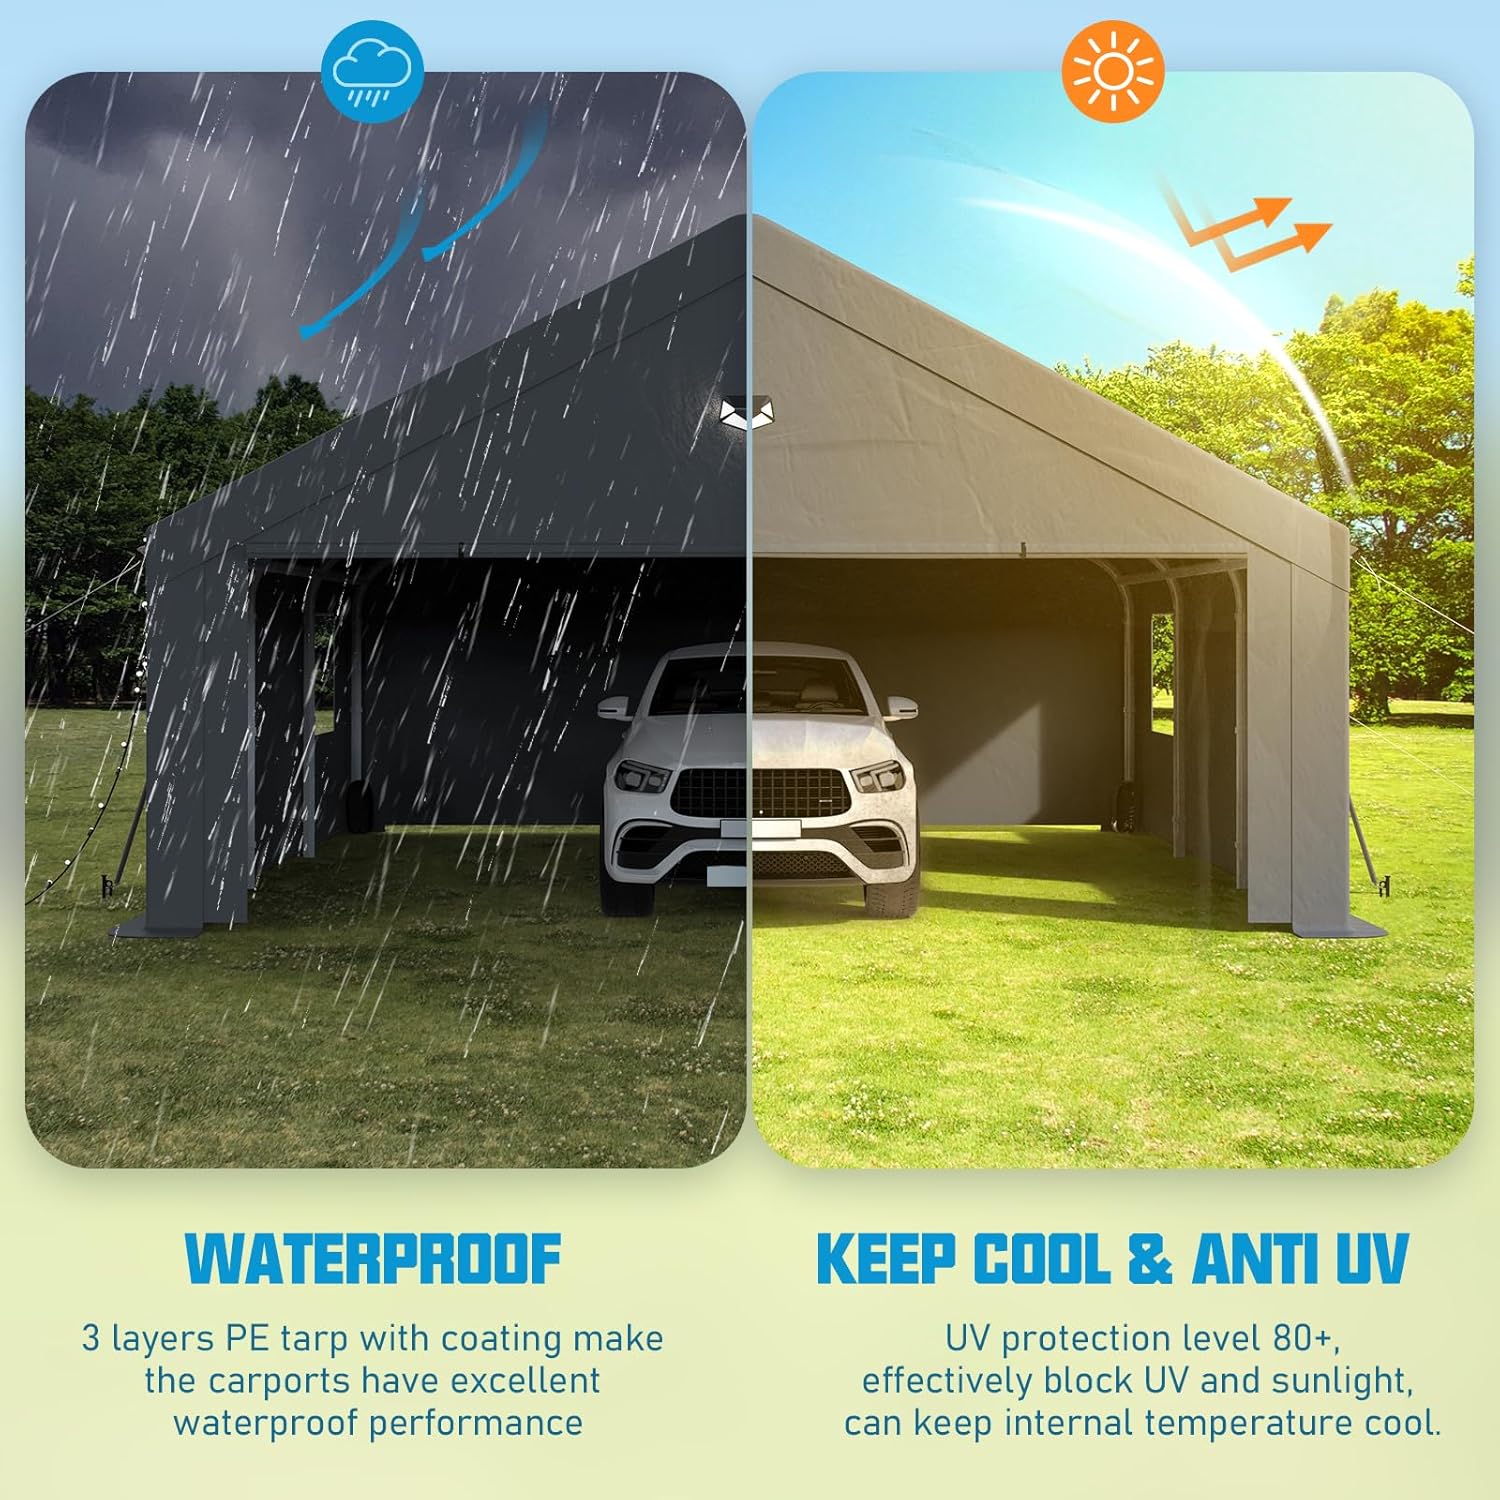
Figure 8.2: Waterproof and UV protection features.
9. Warranty and Support
Benass is committed to customer satisfaction.
- Warranty: We offer a one-year 100% satisfactory after-sales service. If you encounter any problems upon receiving the carport or during its use, please contact us immediately.
- Customer Support: For assistance, questions, or to report issues, please visit the official Benass Store on Amazon or contact Benass-US directly through your purchase platform.