
1. Product Overview
The xsdzgdzy 12 Gal Horizontal Electric Blast Drying Oven is designed for efficient drying, heating, and reheating of various materials in laboratory and industrial settings. It features uniform heating capabilities, an intelligent temperature controller, and a spacious double-tier interior.

Figure 1: xsdzgdzy 12 Gal Horizontal Electric Blast Drying Oven.
2. What's in the Box
Upon unpacking, ensure all the following components are present:
- 1 x Horizontal Electric Blast Drying Oven
- 2 x Adjustable Trays
- All necessary accessories for assembly and operation
3. Specifications
| Feature | Detail |
|---|---|
| Model Number | 12 Gal |
| Power | 1000W, 110V |
| Temperature Range | Room Temperature +18°F to 572°F (300°C) |
| Capacity | 12 Gallons, Double-tier |
| Tray Load Capacity | 33 lbs per tray |
| Controller Type | Digital Display PID Temperature Controller |
| External Dimensions (Approx.) | 46.5cm (18.3in) Width, 65cm (25.6in) Depth, 49.5cm (19.48in) Height |
| Internal Dimensions (Approx.) | 34cm (13.38in) Width, 34cm (13.38in) Depth, 35cm (13.78in) Height (usable space) |

Figure 2: General view of the drying oven. Refer to the table for precise dimensions.
4. Setup
- Unpacking: Carefully remove the drying oven and all accessories from the packaging. Inspect for any shipping damage.
- Placement: Place the oven on a stable, level, and heat-resistant surface. Ensure adequate clearance around the oven for ventilation (at least 10 cm on all sides). Avoid placing it near flammable materials or in direct sunlight. The oven is equipped with foot pads for stability.
- Tray Installation: Insert the adjustable trays into the desired positions within the oven chamber. The oven supports two trays, each capable of holding up to 33 lbs.
- Power Connection: Connect the oven to a grounded 110V power outlet. Ensure the power supply meets the oven's requirements (1000W, 110V).
- Initial Cleaning: Before first use, wipe the interior of the oven with a damp cloth to remove any manufacturing residues. Ensure the oven is completely dry before powering on.

Figure 3: Interior view showing adjustable trays.

Figure 4: Close-up of the oven's stable foot pads.
5. Operating Instructions
The oven features an intelligent PID temperature controller for precise temperature management and ease of use.
5.1 Control Panel Overview

Figure 5: Detailed view of the control panel and fan switch.
The control panel consists of a digital display and several buttons for setting parameters. The fan switch controls the internal air circulation.
5.2 Basic Operation
- Power On: Press the green "Power" button to turn on the oven. The digital display will illuminate.
- Setting Temperature:
- Press the "SET" button (often labeled 'SCT' or similar) to enter temperature setting mode.
- Use the "SHIFT" button to move the cursor to the desired digit.
- Use the "INC" (increase) or "DEC" (decrease) buttons (often labeled '+' and '-') to adjust the temperature value.
- Press "SET" again to confirm and save the target temperature. The oven will begin heating to the set point.
- Setting Time (if applicable): The PID controller supports timing functions. Refer to the specific controller model's manual for detailed instructions on setting the timer.
- Fan Operation: Use the "Fanswitch" knob to control the internal fan.
- "OFF": Fan is off.
- "I", "II", "III": Different fan speeds for varying air circulation needs. Higher settings provide faster and more uniform drying.
- Monitoring: The digital display shows both the current temperature (PV) and the set temperature (SV).
- Power Off: Press the green "Power" button again to turn off the oven.
5.3 Video Demonstration
Video 1: Demonstration of the xsdzgdzy 12 Gal Horizontal Electric Blast Drying Oven, showing its features and basic operation.
6. Maintenance
- Cleaning:
- Ensure the oven is powered off and cooled down before cleaning.
- Wipe the exterior with a soft, damp cloth. Avoid abrasive cleaners.
- For the interior, remove trays and wipe with a mild detergent solution, then rinse with clean water and dry thoroughly.
- Do not spray water directly into the control panel or electrical components.
- Ventilation: Regularly check that the heat dissipation holes on the sides and back of the oven are not obstructed. Proper airflow is essential for performance and safety.
- Door Seal: Inspect the door sealant for any signs of wear or damage. A proper seal is crucial for maintaining temperature stability and energy efficiency.
- Drainage Hole: Ensure the drainage hole (if used for moisture removal) is clear and unobstructed.
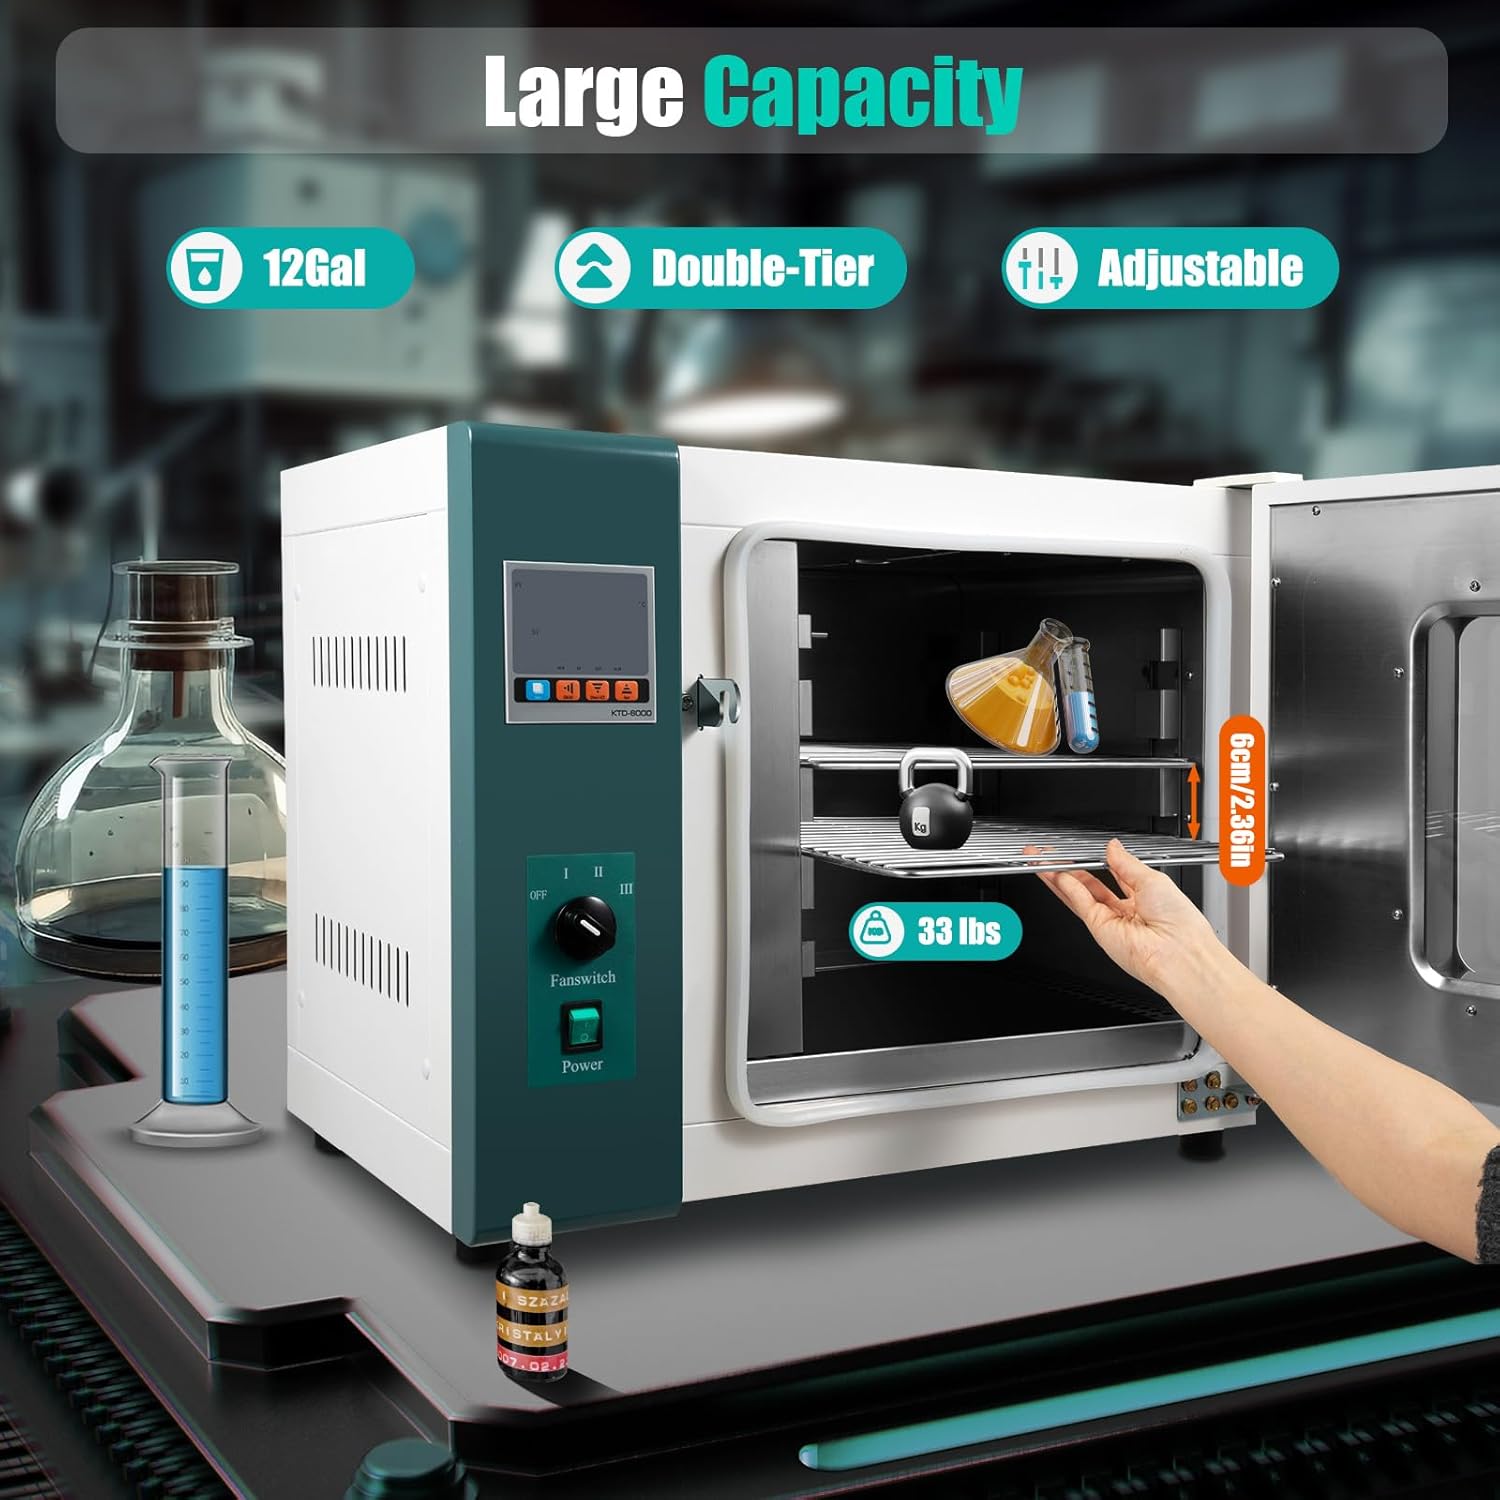

Figure 6: Drainage hole (left) and door sealant (right) for maintenance reference.

Figure 7: Side view illustrating the heat dissipation vents.
7. Troubleshooting
| Problem | Possible Cause | Solution |
|---|---|---|
| Oven does not power on | No power supply; Power button not pressed; Fuse blown | Check power cord connection and outlet; Press power button; Check and replace fuse if necessary (consult qualified personnel). |
| Temperature not reaching set point | Door not sealed properly; Overload; Heater malfunction; Incorrect temperature setting | Ensure door is fully closed and sealed; Reduce load; Contact support for heater inspection; Verify temperature setting. |
| Uneven drying | Fan not operating; Overloaded chamber; Improper material placement | Check fan switch setting; Do not overload the oven; Arrange materials to allow proper airflow. |
| Over-temperature alarm | Sensor error; Controller malfunction; External heat source | Power off and restart the oven; If issue persists, contact support; Ensure oven is not exposed to external heat. |
For issues not listed above or if troubleshooting steps do not resolve the problem, please contact customer support.
8. Warranty and Support
For specific warranty information, please refer to the documentation provided with your purchase or contact the seller directly. Technical support can be obtained through the manufacturer or authorized service centers.
Manufacturer: xsdzgdzy