
1. Introduction
This manual provides essential information for the safe and efficient operation of your Xijia 3600W Hybrid Inverter. This multi-function inverter/charger integrates an inverter, solar charger, and battery charger to deliver uninterrupted power. It features a comprehensive LCD display for user-configurable settings such as battery charging current, AC/solar charger priority, and acceptable input voltage.
2. Safety Instructions
Please read all instructions and warnings carefully before installation and operation. Failure to follow these instructions may result in electric shock, fire, severe injury, or death.
- Installation must be performed by qualified personnel.
- Ensure all wiring is correctly sized and properly insulated.
- Do not disassemble the inverter. There are no user-serviceable parts inside.
- Keep the inverter away from flammable materials, moisture, and direct sunlight.
- Ensure adequate ventilation around the unit to prevent overheating.
- Always disconnect all power sources (AC, DC, and solar) before performing any maintenance or wiring.
3. Product Overview
The Xijia 3600W Hybrid Inverter is designed for versatile power management, combining multiple functions into a single unit. Below are key components and features.
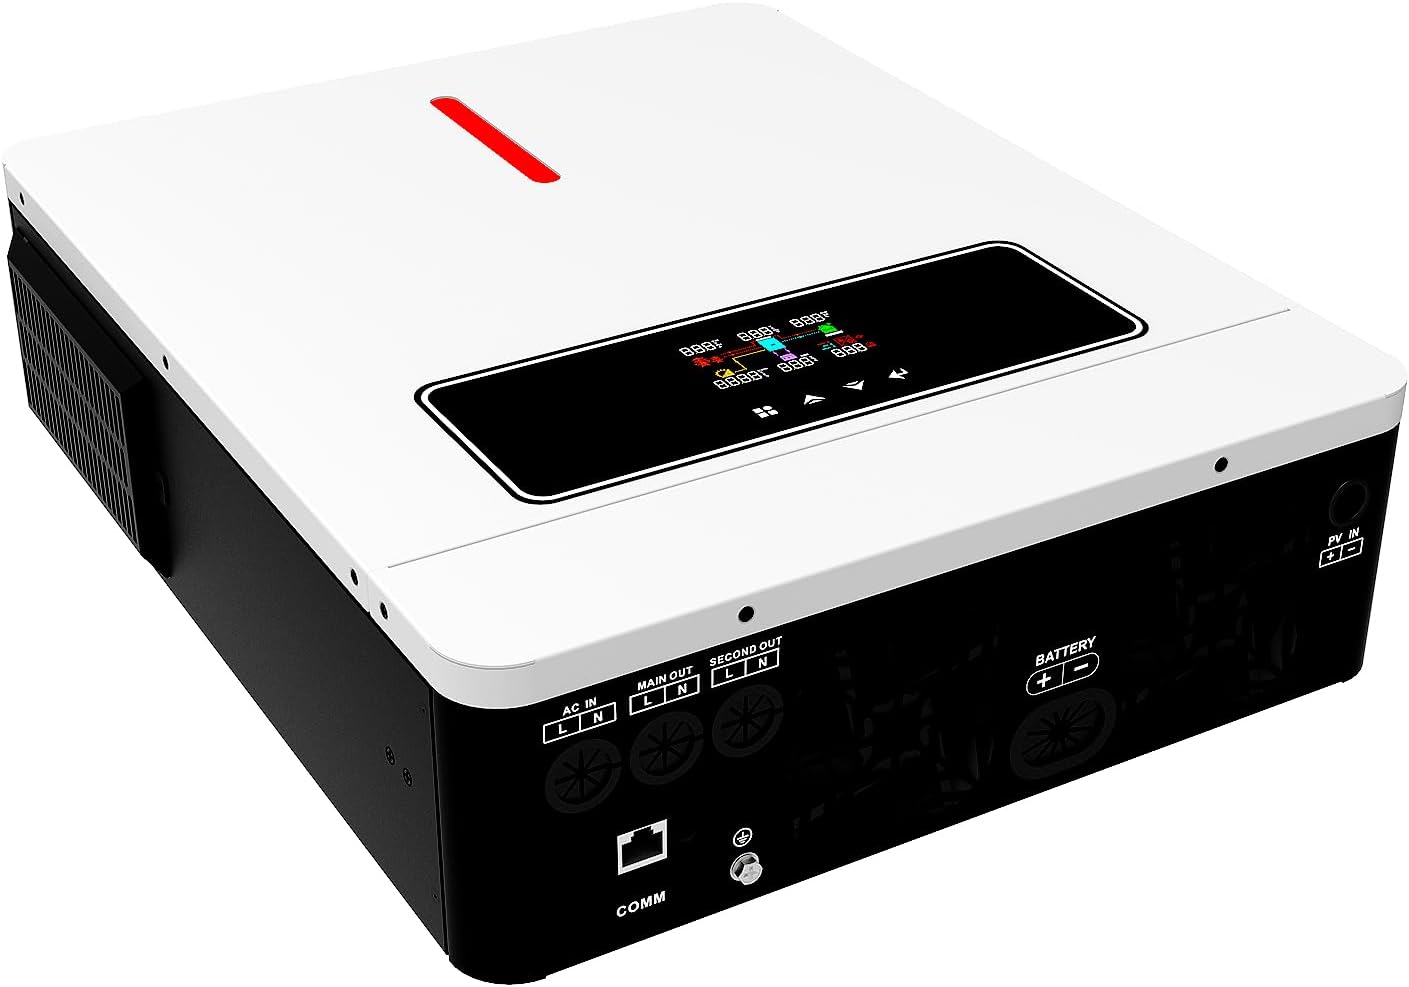
Figure 3.1: Front and top view of the Xijia 3600W Hybrid Inverter, showing the LCD display and control buttons.

Figure 3.2: Rear view of the inverter, detailing AC input, main output, second output, battery terminals, PV input, and communication port.
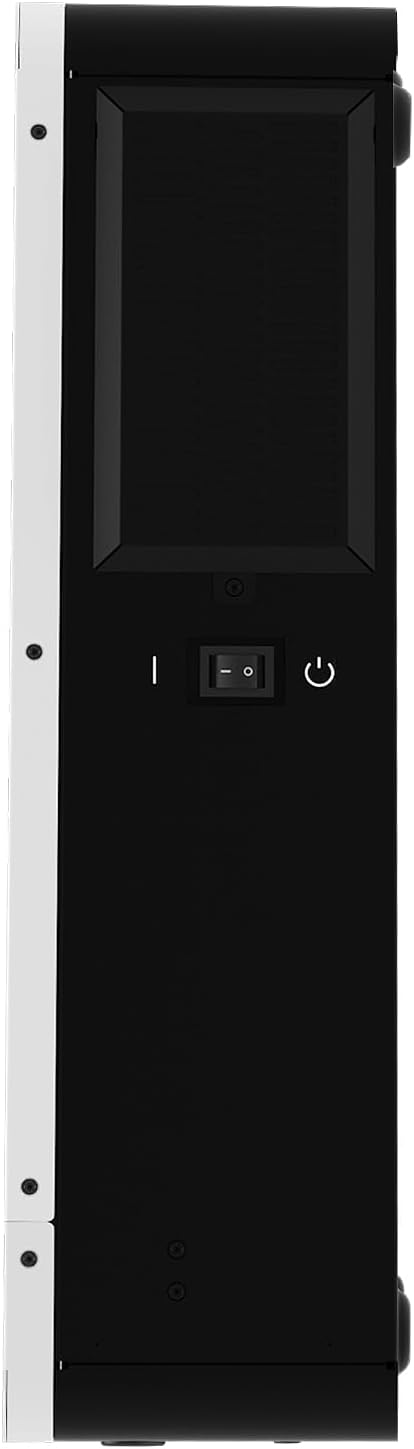
Figure 3.3: Side view of the inverter, highlighting the main power switch.
3.1 Key Features:
- Integrated 3600W inverter, 120A MPPT solar charger, and battery charger.
- Supports 24V Lead-Acid (Seal, AGM, Gel, Flooded) and Lithium batteries.
- High-efficiency MPPT tracking technology (up to 98%).
- Multiple charging modes: Only Solar, Mains First, Solar First, Mains & Solar hybrid.
- Three output modes: Solar First, Mains First, SBU Priority.
- LCD display and LED indicators for system data and operating status.
- Configurable battery charging current, AC/Solar Charger priority, and Load Supply Priority.
- Built-in WiFi module for remote monitoring via iOS/Android app or web interface.
- Pure sine wave output.
4. Setup and Installation
Proper installation is crucial for the safe and optimal performance of your hybrid inverter. Refer to local electrical codes and standards.
4.1 Mounting the Inverter
Mount the inverter vertically on a sturdy surface in a well-ventilated area. Ensure sufficient clearance around the unit for heat dissipation. Avoid mounting near flammable materials or in direct sunlight.
4.2 Wiring Connections
All wiring must be performed with the inverter powered off and all power sources disconnected.
- Battery Connection: Connect the battery bank to the BATTERY terminals (positive to positive, negative to negative). Ensure correct polarity.
- PV Input Connection: Connect the solar panel array to the PV IN terminals. Observe correct polarity and ensure the PV input voltage is within the specified range (60-500Vdc).
- AC Input Connection: Connect the utility grid or generator AC power to the AC IN terminals.
- AC Output Connection: Connect your loads to the MAIN OUT and/or SECOND OUT terminals.
- Grounding: Connect the inverter's ground terminal to a reliable earth ground.
4.3 WiFi Module Installation and Setup
The inverter includes a WiFi module for remote monitoring. Follow these steps to set it up:
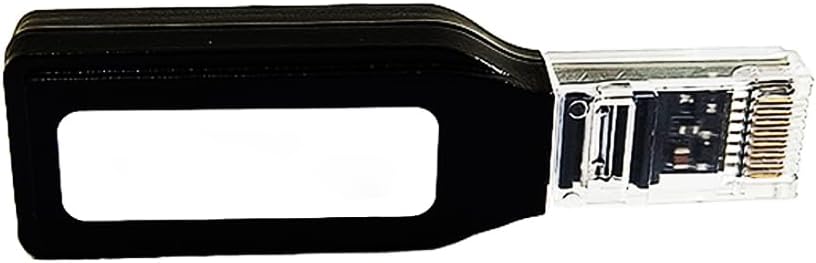
Figure 4.1: The WiFi module, which connects to the inverter's communication port.

Figure 4.2: Overview of the wireless Wi-Fi distribution network setup process.

Figure 4.3: Features of the WiFi module, including network connection, data transmission, and status monitoring for real-time fault diagnosis.
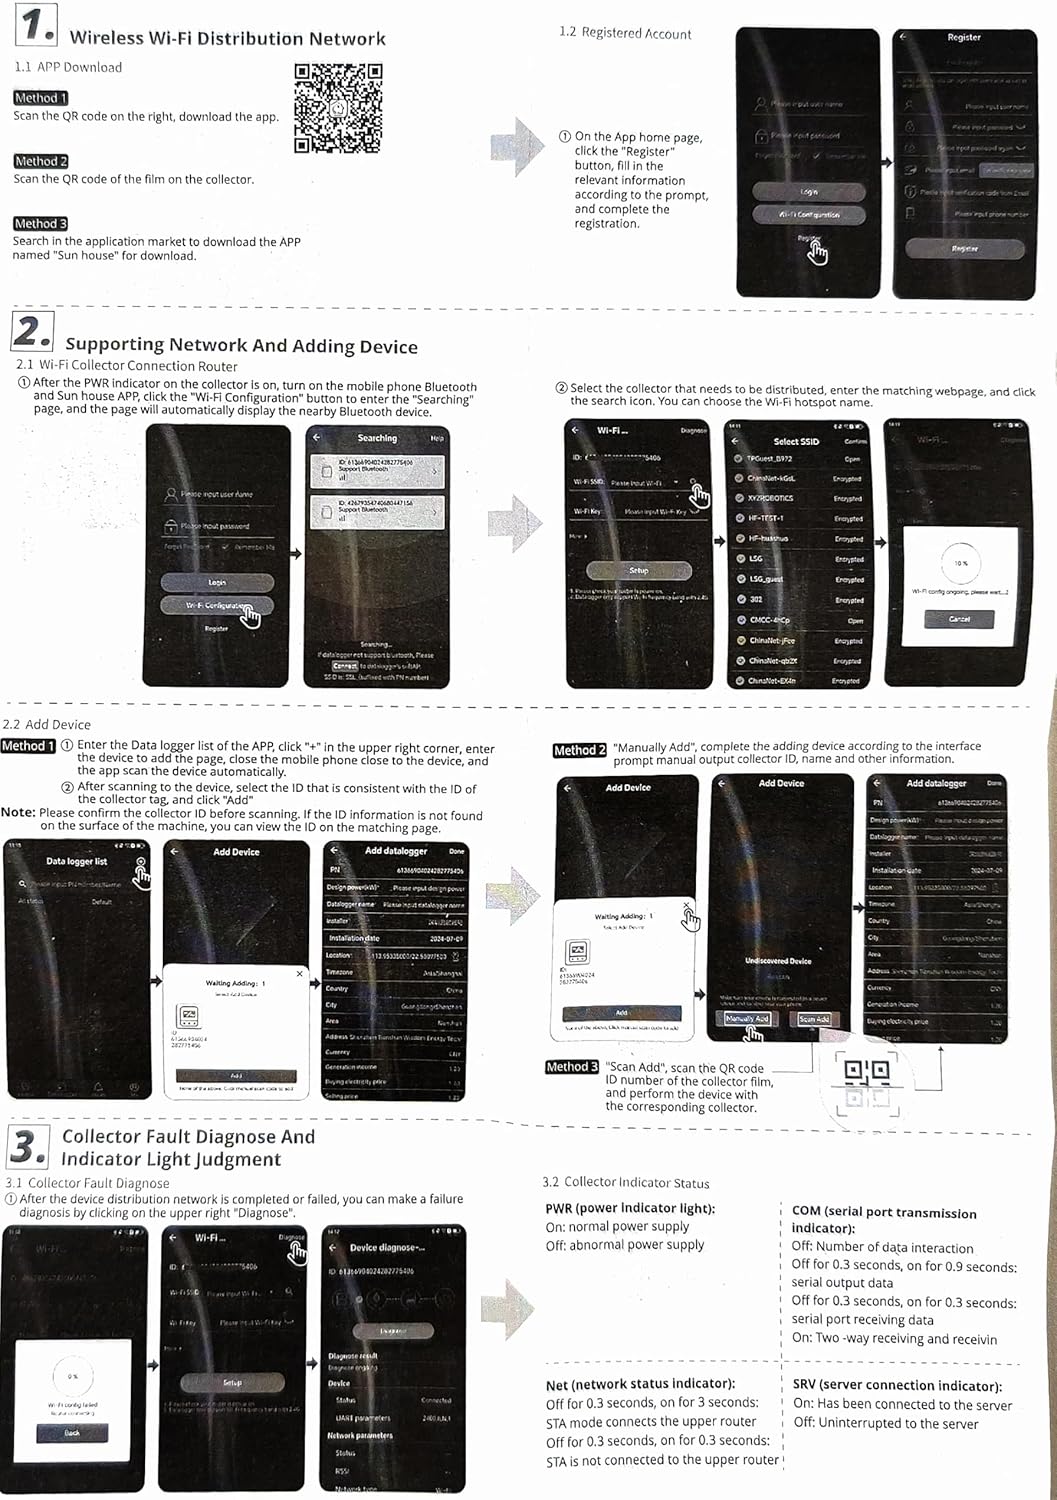
Figure 4.4: Detailed steps for setting up the WiFi module, including APP download, network configuration, and device adding procedures. The APP can be downloaded from http://download.app.solar.siseli.com/?prd=1&pcid=232064315364966401.
- Connect the WiFi Module: Insert the WiFi module into the COMM port on the inverter.
- Download the App: Scan the QR code provided in the manual or on the module itself, or visit http://download.app.solar.siseli.com/?prd=1&pcid=232064315364966401 to download the "Sun House" application for your mobile device (iOS or Android).
- Register an Account: Open the app and follow the on-screen instructions to register a new user account.
- Add Device:
- Method 1 (Automatic): After the PWR indicator on the collector is on, ensure your mobile phone's Bluetooth is enabled. The app should automatically detect nearby Bluetooth devices. Select your device and proceed with network configuration.
- Method 2 (Manual): Enter the data logger ID (found on the module) and other required information manually in the app.
- Method 3 (Scan QR Code): Scan the QR code on the collector to add the device.
- Network Configuration: Follow the app's prompts to connect the WiFi module to your local wireless network.
5. Operating Instructions
Once installed, the inverter can be configured and operated via its LCD display and buttons, or remotely via the WiFi module and app.
5.1 Powering On/Off
- To Power On: Ensure all connections are secure. Switch on the main power switch located on the side of the inverter. The LCD display will illuminate.
- To Power Off: Disconnect all AC loads. Switch off the main power switch. Disconnect AC input, then PV input, and finally the battery bank.
5.2 LCD Display and Settings
The LCD display provides real-time system data and allows configuration of various parameters. Use the buttons adjacent to the display to navigate menus and adjust settings.
- Battery Charging Current: Adjust the charging current for your battery type.
- AC/Solar Charger Priority: Set whether the inverter prioritizes AC power or solar power for battery charging.
- Load Supply Priority: Configure the order of power sources for supplying loads (e.g., Solar First, Mains First, SBU Priority).
- Acceptable Input Voltage Range: Set the acceptable voltage range for the AC input.
5.3 Charging Modes
The inverter supports four charging modes:
- Only Solar: Batteries are charged exclusively by solar power.
- Mains First: Utility grid (mains) power is prioritized for charging. Solar power acts as a supplement or backup.
- Solar First: Solar power is prioritized for charging. Utility grid power acts as a supplement or backup.
- Mains & Solar Hybrid: Both mains and solar power are used simultaneously for charging, optimizing efficiency.
5.4 Output Modes
The inverter offers three output modes for supplying power to your loads:
- Solar First: Loads are primarily powered by solar energy. If solar is insufficient, battery power or mains power (depending on configuration) will be used.
- Mains First: Loads are primarily powered by the utility grid. If mains power is unavailable, the inverter switches to battery or solar power.
- SBU Priority (Solar-Battery-Utility): Loads are powered first by solar, then by battery, and finally by the utility grid if both solar and battery are insufficient.
6. Maintenance
Regular maintenance ensures the longevity and reliable operation of your Xijia Hybrid Inverter.
- Cleaning: Periodically clean the exterior of the inverter with a dry, soft cloth. Ensure ventilation openings are free from dust and debris. Do not use liquid cleaners.
- Connection Check: Annually inspect all electrical connections (battery, PV, AC input/output) for tightness and corrosion. Tighten any loose connections.
- Battery Inspection: If using lead-acid batteries, check electrolyte levels and terminal condition as per battery manufacturer guidelines.
- Environmental Check: Ensure the installation environment remains within specified temperature and humidity ranges.
- Firmware Updates: Check the manufacturer's website or app for any available firmware updates for the inverter or WiFi module.
7. Troubleshooting
This section provides solutions to common issues you might encounter. For problems not listed here, contact customer support.
| Problem | Possible Cause | Solution |
|---|---|---|
| Inverter does not power on. | No battery connection, low battery voltage, power switch off. | Check battery connections and voltage. Ensure the power switch is ON. |
| No AC output. | Overload, short circuit, low battery, inverter fault. | Reduce load. Check for short circuits. Charge batteries. Check LCD for error codes. |
| Solar charging not working. | PV panels disconnected, low solar irradiance, incorrect PV voltage, MPPT fault. | Check PV connections. Ensure sufficient sunlight. Verify PV voltage is within range. |
| WiFi module not connecting. | Incorrect WiFi password, module not properly inserted, network issues. | Re-enter WiFi password. Ensure module is securely connected. Check home network status. Refer to Section 4.3. |
8. Specifications
| Parameter | Value |
|---|---|
| Model Number | B0G4FNHY7X |
| Output Power | 3600 Watts |
| Input Voltage (DC) | 24 Volts |
| Max. PV Input Power | 4200W |
| PV Input Voltage Range | 60-500Vdc |
| Max. PV Input VOC | 500V DC |
| Charge Current | 120A |
| Nominal Input Frequency | 60Hz |
| Power Source | Solar Powered |
| Recommended Uses | Boat, Camping, Home, Household appliances, Recreational Vehicle, Small electronics |
9. Warranty and Support
For warranty information and technical support, please refer to the documentation included with your purchase or contact Xijia customer service. Keep your purchase receipt as proof of purchase.
Manufacturer: Xijia
Contact: Refer to the official Xijia website or your retailer for support contact details.