Introduction
Thank you for choosing the Monstrum Beast 3-15x44 Rifle Scope. This mid-power variable optic (MPVO) is designed for precision and versatility, featuring a 3-15x magnification range and a 44mm objective lens for enhanced light transmission and a wide field of view. This manual provides detailed instructions for the proper setup, operation, and maintenance of your scope to ensure optimal performance.
The FIB01 reticle variant includes a unique fiber optic reticle system, channeling light from an LED source to the center of the reticle for a daylight-bright center dot. It also features a side focus parallax adjustment dial for sharper focus, parallax elimination, and range estimation.
Setup and Installation
Package Contents
- Monstrum Beast 3-15x44 Rifle Scope
- Monstrum One-Piece Cantilever Scope Mount (30mm tube configuration)
- Bikini Lens Covers
Mounting the Scope
The Monstrum Beast scope comes with a dedicated one-piece cantilever scope mount designed for its 30mm tube.
- Ensure your firearm is unloaded and pointed in a safe direction.
- Attach the cantilever mount securely to your firearm's Picatinny or Weaver rail. Ensure proper eye relief by positioning the mount so the scope is at a comfortable distance from your eye when shouldering the firearm.
- Place the scope into the rings of the cantilever mount.
- Align the reticle horizontally. This can be done by using a plumb bob or a reticle leveling tool.
- Tighten the scope ring screws evenly and gradually to secure the scope without overtightening, which can damage the scope tube. Refer to the mount's specific torque specifications if available.

Image: Monstrum Beast 3-15x44 Rifle Scope with included cantilever mount, showing the overall design and mounting position.
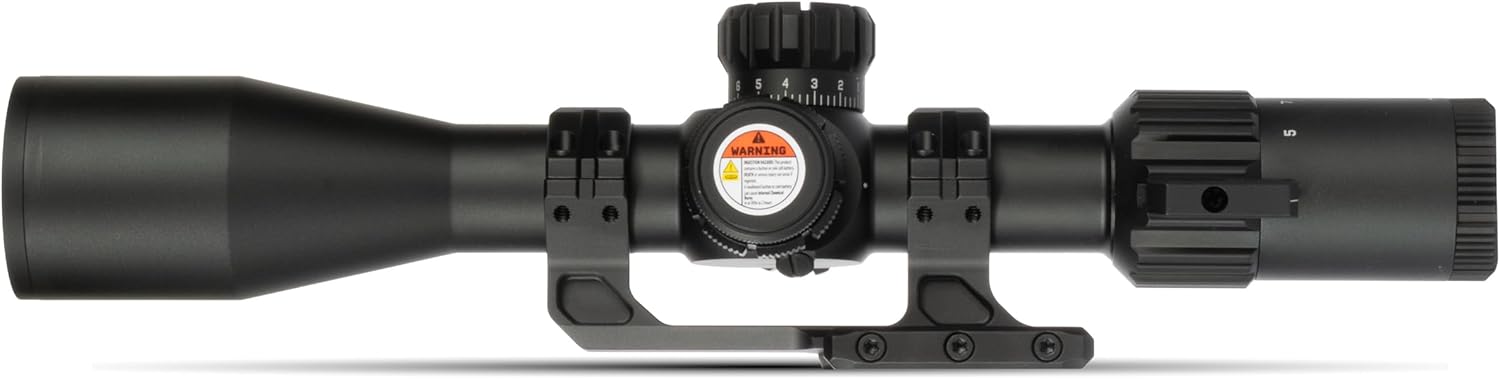
Image: Top-down view of the Monstrum Beast scope, highlighting the elevation and windage turrets, and the magnification adjustment ring.
Diopter Adjustment
The diopter adjustment ring, located at the eyepiece, allows you to fine-tune the reticle's focus to your individual eyesight.
- Point the scope at a plain, bright background (e.g., a clear sky or a blank wall).
- Look through the scope and quickly glance away.
- While looking away, adjust the diopter ring until the reticle appears sharp and clear when you quickly glance back through the scope. Avoid staring through the scope for too long during adjustment, as your eye may compensate for blurriness.
Operating Instructions
Magnification Adjustment
The Monstrum Beast offers a variable magnification range from 3x to 15x. Rotate the magnification ring, located near the eyepiece, to adjust the desired level of zoom. The numbers on the ring indicate the current magnification setting.
Side Focus Parallax Adjustment
Parallax is the apparent shift in the reticle's position relative to the target when the shooter's eye moves. The side focus dial on your scope allows you to eliminate parallax and achieve a sharper target image.
- Estimate the distance to your target.
- Rotate the side focus dial to the corresponding distance marked on the dial.
- Look through the scope. If the target image is not perfectly sharp, fine-tune the dial until both the reticle and the target appear clear and in focus.
- To check for parallax, move your head slightly up and down or side to side while looking through the scope. If the reticle appears to move relative to the target, adjust the parallax dial further until this movement is minimized or eliminated.

Image: Visual explanation of parallax and how the adjustable objective (side focus) helps to eliminate it and sharpen the image at various distances.
FIB01 Reticle and Illumination
The Monstrum Beast 3-15x44 features a FIB01 second focal plane reticle. Second focal plane reticles maintain their size across all magnification levels, ensuring consistent visibility. The FIB01 reticle utilizes a fiber optic tube to channel light from an LED source, creating a bright, illuminated center dot.
- To activate the reticle illumination, rotate the illumination dial, typically located on the side focus turret.
- Adjust the dial to select your desired brightness level.
- The fiber optic system provides a daylight-bright center dot, significantly brighter than traditional etched or wire illuminated reticles.

Image: Detailed view of the FIB01 reticle pattern, along with FIB02 and FIB03, showing their respective MOA measurements.

Image: Comparison illustrating the difference between traditional wire reticle illumination and the brighter, more effective fiber optic reticle illumination.
Windage and Elevation Adjustments
The windage (horizontal) and elevation (vertical) turrets are used to zero your scope and make adjustments for bullet drop and wind drift. These turrets feature tactile clicks for precise adjustments.
- Elevation Turret: Located on top of the scope. Rotate to adjust the point of impact vertically.
- Windage Turret: Located on the right side of the scope. Rotate to adjust the point of impact horizontally.
- Each click typically represents a specific change in point of impact (e.g., 1/4 MOA).
- After zeroing, many turrets can be reset to '0' for easy reference. Consult the specific turret design for instructions on resetting.
Zeroing Procedure (Box Method):
- Set up a target at your desired zeroing distance (e.g., 50 or 100 yards).
- Fire a shot, aiming at the center of the target.
- Adjust the turrets to move the point of impact to the center of the target.
- To confirm tracking, fire a shot, then adjust 5 clicks left, 5 clicks up, and fire again.
- Adjust 10 clicks right and fire.
- Adjust 10 clicks down and fire.
- Adjust 10 clicks left and fire.
- Adjust 5 clicks up and 5 clicks right and fire.
- If the scope tracks correctly, your shots should form a square pattern, returning to the original point of impact.
Care and Maintenance
Cleaning the Lenses
- Use a soft brush or compressed air to remove loose dust and debris from the lens surfaces.
- Apply a small amount of lens cleaning solution to a microfiber lens cloth.
- Gently wipe the lenses in a circular motion, starting from the center and moving outwards.
- Avoid using harsh chemicals, abrasive cloths, or excessive pressure, as these can damage the lens coatings.
Cleaning the Scope Body
- Wipe the exterior of the scope with a soft, damp cloth to remove dirt and fingerprints.
- For stubborn grime, a mild soap solution can be used, followed by wiping with a clean, damp cloth.
- Ensure all surfaces are dry before storage.
Storage
- Store the scope in a cool, dry place, away from direct sunlight and extreme temperatures.
- Use the provided bikini lens covers to protect the lenses from dust and scratches during storage and transport.
- If storing for extended periods, consider removing the battery for the reticle illumination to prevent corrosion.
Troubleshooting
Blurry Image or Reticle
- Reticle is blurry: Adjust the diopter ring at the eyepiece until the reticle is sharp for your eye.
- Target image is blurry: Adjust the side focus parallax dial to match the distance to your target. Ensure both the reticle and target are in focus.
Reticle Illumination Not Working
- Check if the illumination dial is turned on and set to a visible brightness level.
- Verify the battery is correctly installed and not depleted. Replace the battery if necessary.
Scope Not Holding Zero
- Ensure the scope mount is securely attached to the firearm and the scope rings are properly tightened. Loose mounting is a common cause of zero shift.
- Check that all screws on the mount and rings are torqued to the manufacturer's specifications.
- Verify that the firearm itself is not experiencing issues (e.g., loose barrel, stock, or action).
- Confirm that the ammunition used is consistent.
Point of Impact Shifts Inconsistently
- Re-check mounting stability as described above.
- Perform a box test (as described in the Operating Instructions) to verify the turrets are tracking accurately.
- Ensure consistent cheek weld and shooting form.
Specifications
| Brand | Monstrum |
| Model | SBA31544B-FIB01 |
| Magnification | 3-15x |
| Objective Lens Diameter | 44 mm |
| Reticle Type | FIB01 (Second Focal Plane, Fiber Optic Illuminated Dot) |
| Tube Diameter | 30 mm |
| Material | Alloy Steel, Aluminum |
| Mounting Type | Cantilever Mount (included) |
| Compatible Devices | Rifle, Shotgun |
| Night Vision | No |
| UPC | 810198401769 |
| Item Package Dimensions | 16.42 x 5.2 x 4.61 inches |
| Package Weight | 1.34 Kilograms |
Warranty and Support
For specific warranty information regarding your Monstrum Beast 3-15x44 Rifle Scope, please refer to the documentation included with your purchase or visit the official Monstrum website.
If you encounter any issues or require technical assistance, please contact Monstrum customer support directly. You can often find contact information on the manufacturer's website or through the retailer where the product was purchased.
Protection plans may be available for purchase separately through retailers. These plans typically offer extended coverage beyond the manufacturer's standard warranty.