1. Product Overview
This manual provides instructions for the installation, operation, and maintenance of your new carburetor. This carburetor is designed to replace the original part in compatible engines, ensuring reliable performance and efficient fuel delivery.
Key Features:
- Improved engine performance and stable idle.
- Reliable cold-starts.
- Durable construction for longevity.
- Includes spark plug and fuel line for a complete replacement solution.
Compatibility:
- Briggs & Stratton 4000 Watt Generator Model 030320
- Briggs & Stratton 9P702-0149-F1 engine
- Briggs & Stratton part number 597269
- Husqvarna YTH24V54 96045006400
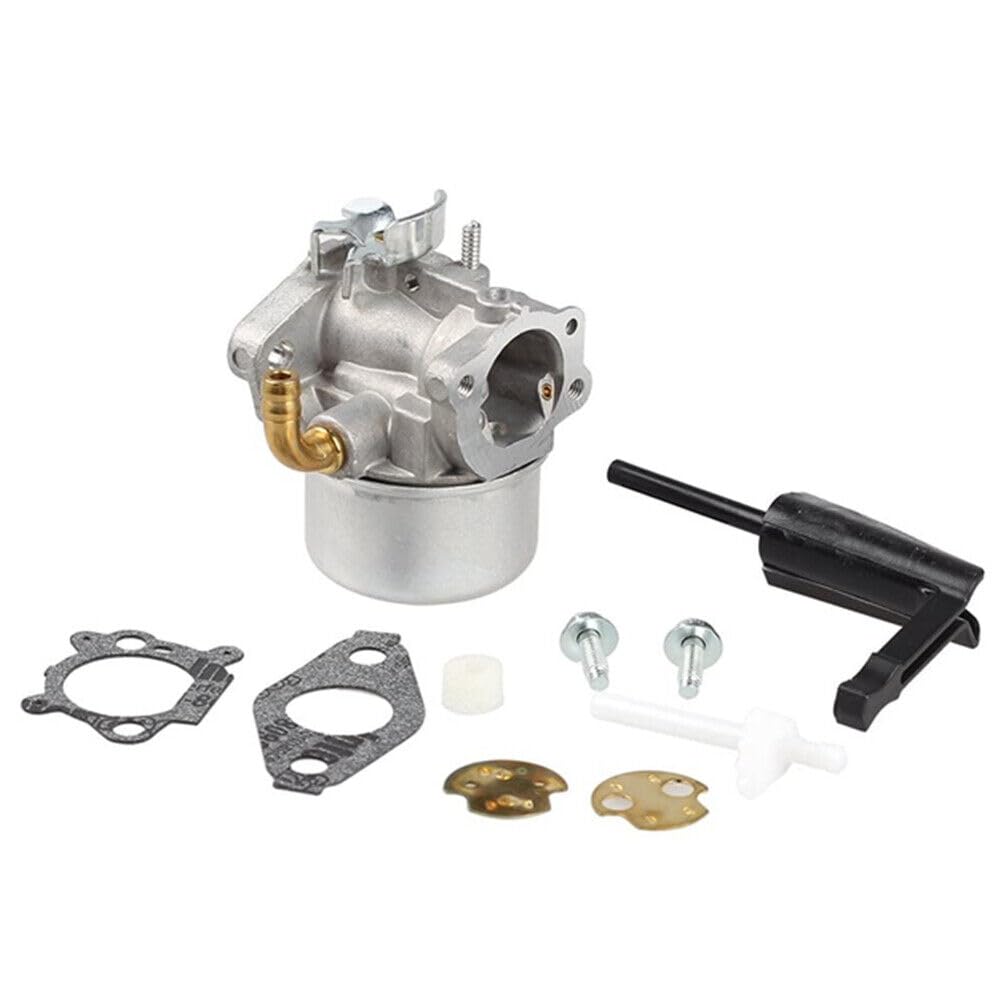
Image 1.1: The Generic carburetor kit, showing the main carburetor unit, a spark plug, and a fuel line. This image illustrates the components typically included for a complete replacement.
2. Setup and Installation
Proper installation is crucial for optimal performance and safety. If you are unsure about any step, it is recommended to consult a qualified technician.
2.1 Safety Precautions
- Always disconnect the spark plug wire before performing any maintenance or installation to prevent accidental starting.
- Ensure the engine is cool before beginning work.
- Work in a well-ventilated area.
- Wear appropriate personal protective equipment, such as gloves and eye protection.
- Drain the fuel tank before removing the old carburetor.
2.2 Installation Steps
- Prepare the Engine: Turn off the engine and allow it to cool. Disconnect the spark plug wire. Close the fuel valve and drain any remaining fuel from the tank.
- Remove Air Filter Assembly: Carefully remove the air filter housing and filter element to access the carburetor.
- Disconnect Fuel Line and Linkages: Disconnect the fuel line from the old carburetor. Note the routing of all linkages (throttle, choke) and springs before detaching them. Taking photos can be helpful.
- Remove Old Carburetor: Unbolt the old carburetor from the engine manifold. Remove any gaskets.
- Install New Carburetor: Ensure mating surfaces are clean. Install new gaskets (if provided) and mount the new carburetor. Tighten bolts securely but do not overtighten.
- Reconnect Linkages and Fuel Line: Reattach all throttle and choke linkages and springs exactly as they were on the old carburetor. Connect the new fuel line (if using the included one) to the carburetor and fuel tank.
- Install New Spark Plug: Replace the old spark plug with the new one provided in the kit. Ensure it is properly gapped according to your engine's specifications.
- Reassemble Air Filter: Reinstall the air filter element and housing.
- Refill Fuel: Open the fuel valve and refill the fuel tank with fresh, clean fuel.
Always verify model compatibility before installation for best performance.
3. Operating Instructions
After installation, follow these general guidelines for starting and operating your engine with the new carburetor.
3.1 Initial Start-Up
- Ensure all connections are secure and the fuel tank is filled.
- Connect the spark plug wire.
- Set the choke to the 'FULL CHOKE' position (if applicable for cold starts).
- Set the throttle to the 'FAST' or 'START' position.
- Pull the starter rope firmly or engage the electric starter until the engine fires.
- Once the engine starts, gradually move the choke to the 'OFF' or 'RUN' position as the engine warms up.
- Allow the engine to warm up for a few minutes before applying load.
3.2 Normal Operation
- For warm starts, the choke may not be necessary or only required for a brief moment.
- Monitor engine sound and performance. A properly functioning carburetor will provide a stable idle and smooth acceleration.
- Refer to your generator's specific operating manual for detailed instructions on its use.
4. Maintenance
Regular maintenance ensures the longevity and optimal performance of your carburetor and engine.
4.1 Fuel System Care
- Always use fresh, clean, unleaded gasoline. Stale or contaminated fuel is a common cause of carburetor issues.
- Consider using a fuel stabilizer if the engine will be stored for an extended period.
- Periodically check and clean the fuel filter (if equipped) to prevent debris from reaching the carburetor.
4.2 Carburetor Cleaning
- If the engine experiences rough idling, stalling, or difficulty starting, the carburetor may need cleaning.
- Use a carburetor cleaner spray to remove varnish and deposits. Follow the cleaner manufacturer's instructions.
- For thorough cleaning, the carburetor may need to be disassembled. This should only be done by individuals with mechanical experience.
4.3 Spark Plug Inspection
- Inspect the spark plug regularly for wear, fouling, or incorrect gap.
- Replace the spark plug annually or as recommended by your engine manufacturer.
5. Troubleshooting
This section addresses common issues you might encounter. For more complex problems, consult a professional.
| Problem | Possible Cause | Solution |
|---|---|---|
| Engine will not start | No fuel, stale fuel, clogged fuel filter, spark plug issue, choke setting incorrect | Check fuel level, use fresh fuel, clean/replace fuel filter, inspect/replace spark plug, adjust choke |
| Engine runs rough or stalls | Dirty carburetor, incorrect idle speed, air leak, stale fuel | Clean carburetor, adjust idle screw (if accessible), check for loose connections, use fresh fuel |
| Engine lacks power | Clogged air filter, dirty carburetor, incorrect fuel mixture | Clean/replace air filter, clean carburetor, ensure proper fuel/air mixture (professional adjustment may be needed) |
| Fuel leaks from carburetor | Loose connections, damaged gasket, stuck float | Tighten connections, replace gaskets, clean/inspect float assembly |
6. Specifications
- Brand: Generic
- Manufacturer: Generic
- UPC: 772224239053
- ASIN: B0G48XCVCF
- Compatible Engine Models: Briggs & Stratton 9P702-0149-F1, Briggs & Stratton 597269, Husqvarna YTH24V54 96045006400
- Compatible Generator Models: Briggs & Stratton 4000 Watt Generator Model 030320
7. Warranty and Support
For warranty information or technical support, please contact the seller or manufacturer directly. Keep your purchase receipt as proof of purchase.
If you have questions regarding installation or operation that are not covered in this manual, please reach out to the point of purchase for assistance.