1. Introduction
Thank you for choosing the Ralcam Dual Lens 360° Articulating Borescope. This advanced inspection tool is designed for detailed visual inspection in hard-to-reach areas, featuring a 4-way 180° articulation, dual lenses, and a 5-inch HD IPS display. This manual provides essential information for the safe and effective operation and maintenance of your device.

Image: The Ralcam Dual Lens 360° Articulating Borescope, showcasing its ergonomic design and large display.
2. What's in the Box
Verify that all components are present upon unboxing:
- Ralcam Borescope Unit (with 5-inch HD IPS Display and handle)
- 6.5mm Dual Lens Semi-Rigid Probe (5FT length)
- USB-C Charging/Data Transfer Cable
- 32GB Micro SD Card (pre-installed or separate)
- User Manual
- Carrying Case
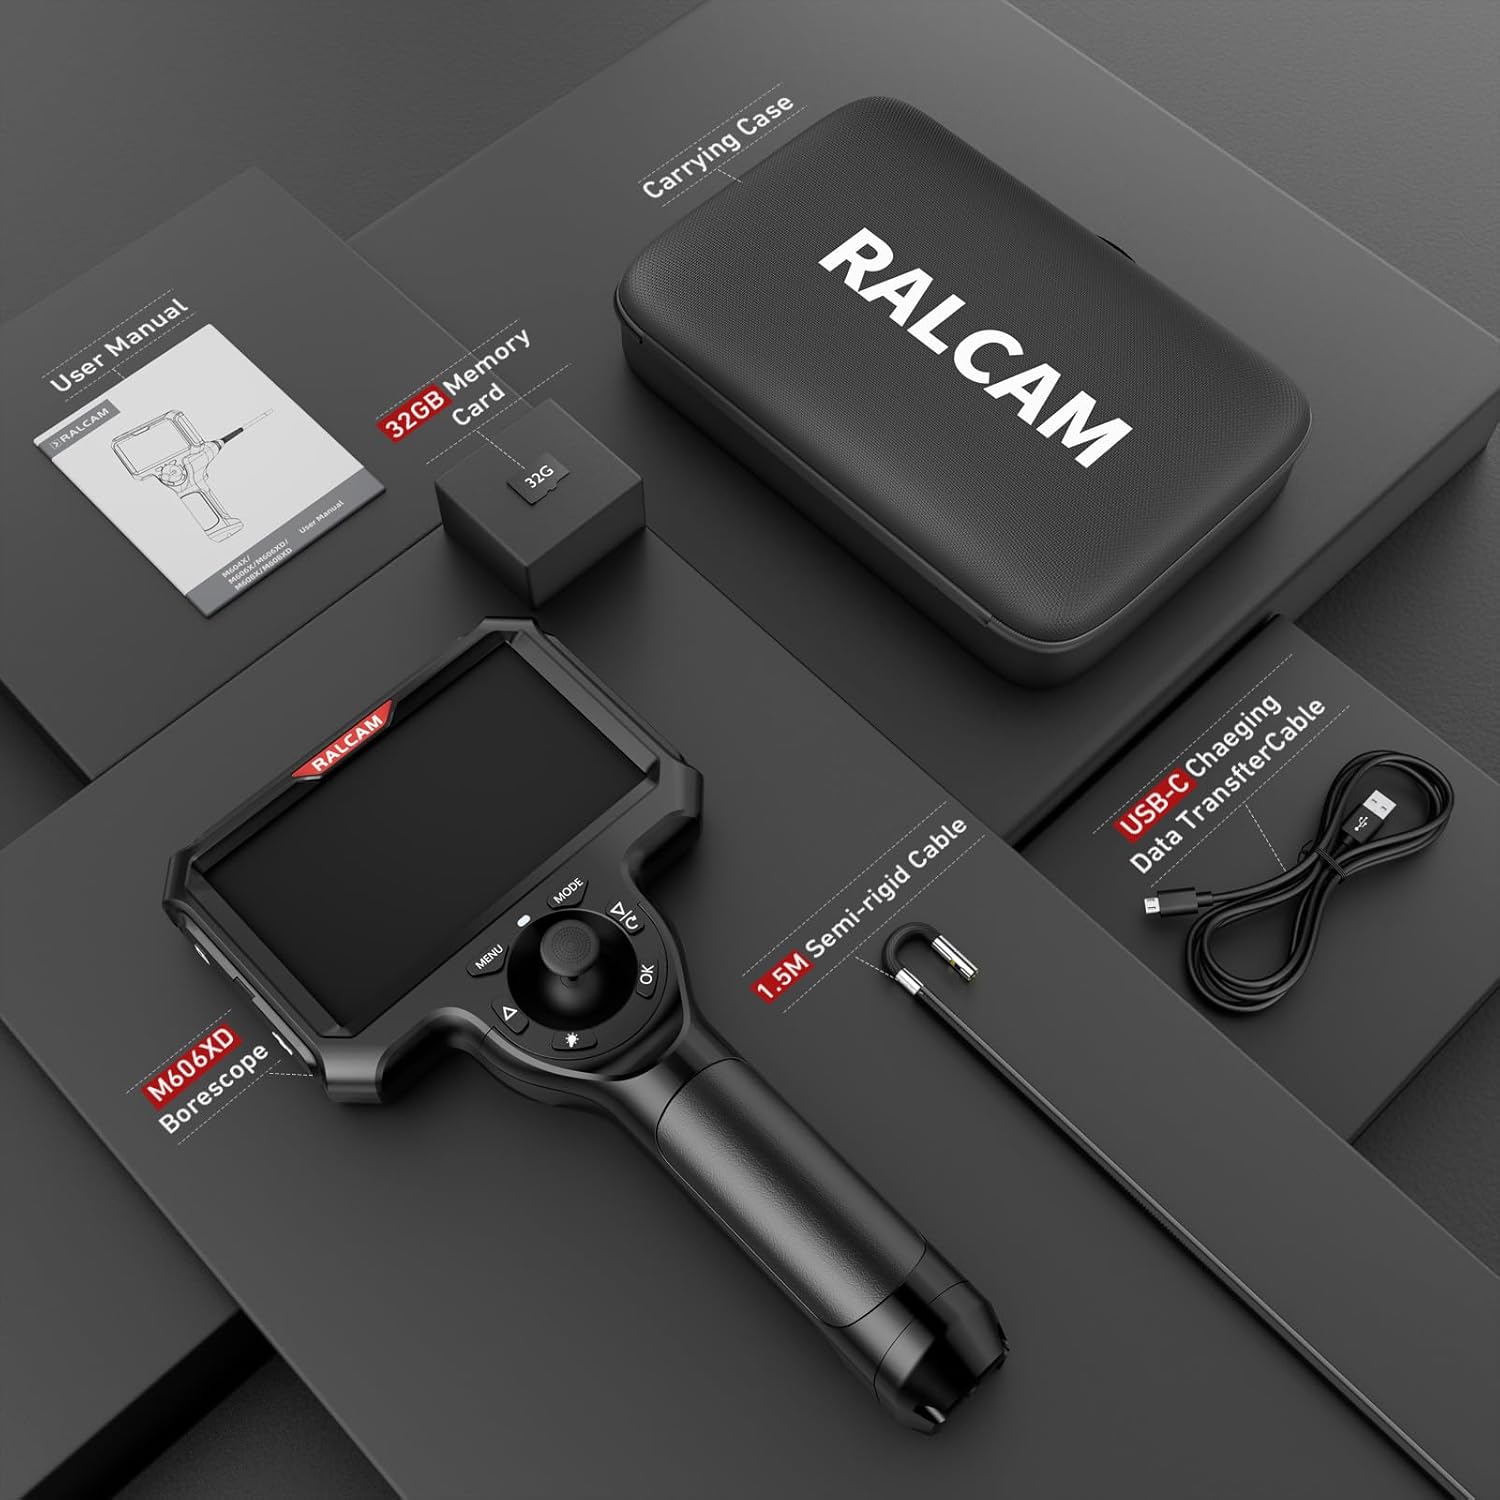
Image: All items included in the Ralcam Borescope package, neatly arranged in its carrying case.
3. Setup
3.1. Assembly
- Attach the Display: Align the 5-inch HD IPS display with the handle unit. Gently slide and click it into place until it is securely fastened.
- Connect the Probe: Insert the 6.5mm semi-rigid probe connector into the designated port on the main unit. Ensure a firm connection.
3.2. Charging the Device
The borescope is powered by a high-capacity rechargeable battery. For optimal performance, fully charge the device before first use.
- Connect the provided USB-C cable to the charging port on the device and to a compatible USB power adapter (not included) or computer.
- The charging indicator light will show the charging status.
- The battery is removable, allowing for continuous operation with spare batteries (sold separately).
3.3. Inserting the Micro SD Card
The device comes with a 32GB Micro SD card for storing photos and videos. Locate the SD card slot, typically protected by a rubber cover, and insert the card with the gold contacts facing down until it clicks into place.

Image: The borescope connected to a USB-C charging cable, illustrating its power input.
4. Operating Instructions
4.1. Powering On/Off
Press and hold the Power button (usually located on the top or side of the display unit) for a few seconds to turn the device on or off.
4.2. Articulation Control
The borescope features 4-way 180° articulation, providing a full 360° viewing range. Use the joystick control on the handle to precisely maneuver the probe tip.
- Move the joystick in the desired direction to bend the probe tip.
- The articulation allows for comprehensive inspection around corners and obstacles.
Video: Demonstration of the 4-way 360° articulation feature, showing precise joystick control of the probe tip.
4.3. Dual Lens Switching
The borescope is equipped with dual lenses (front and side) for versatile viewing. To switch between views:
- Long press the "Up" button (often labeled with a triangle pointing up) to toggle between Front View, Side View, and Dual View modes.
- In Dual View, both front and side camera feeds are displayed simultaneously on the screen.

Image: The borescope screen showing the dual lens functionality, allowing simultaneous viewing from both front and side cameras.
Video: A short clip demonstrating the seamless switching between front, side, and dual lens views on the Ralcam borescope.
4.4. Adjusting LED Brightness
The probe tip features 6+1 adjustable LED lights to illuminate inspection areas. Press the LED brightness button (often labeled with a light bulb icon) to cycle through 3 adjustable brightness levels.

Image: The borescope probe tip with its 6+1 LED lights, demonstrating three adjustable brightness settings for various lighting conditions.
4.5. Taking Photos and Recording Videos
The 5-inch HD IPS screen allows for capturing sharp, real-time images and videos.
- Switch Mode: Press the 'MODE' button to switch between Photo, Video, and Playback modes.
- Take Photo: In Photo mode, press the 'OK' button or the trigger on the handle to capture an image.
- Record Video: In Video mode, press the 'OK' button or the trigger on the handle to start recording. Press again to stop recording.
4.6. Viewing Stored Media
In Playback mode, use the navigation buttons (Up/Down) to browse through your captured photos and videos. Press 'OK' to view a selected item.
4.7. Menu Options
Press the 'MENU' button to access settings such as resolution, time watermark, date/time, language, screen brightness, image effects, ruler, automatic shut-down, and recording options. Use the navigation buttons to select and 'OK' to confirm.
4.8. High Temperature Protection
The device is equipped with high-temperature protection. If the probe temperature exceeds 90°C (194°F), the device will automatically shut down to prevent damage.
5. Maintenance
5.1. Cleaning the Probe and Lens
After each use, especially in dirty or oily environments, gently wipe the probe and lens with a soft, dry cloth. For stubborn grime, a slightly damp cloth with mild soap can be used, ensuring no liquid enters the device openings. The probe is IP67 waterproof.
5.2. Battery Care
To prolong battery life, avoid fully discharging the battery frequently. Store the device with a partial charge (around 50%) if not used for extended periods. The battery is removable for easy replacement or carrying spares.
5.3. Storage
Store the borescope and its accessories in the provided carrying case in a cool, dry place, away from direct sunlight and extreme temperatures.
6. Troubleshooting
- Device not powering on: Ensure the battery is fully charged. Check if the display is securely attached to the handle.
- No image on screen: Verify the probe is correctly connected. Check LED brightness settings.
- Cannot save photos/videos: Ensure the Micro SD card is properly inserted and has sufficient free space. The card may need to be formatted via the menu settings.
- Probe overheating: The device has high-temperature protection and will shut down if the probe exceeds 90°C (194°F). Allow it to cool down before resuming operation.
- Articulation not responding: Check for any obstructions in the probe's articulation mechanism. Ensure the joystick is functioning correctly.
7. Specifications
| Feature | Specification |
|---|---|
| Model Name | M606XD-S1.5M |
| Brand | Ralcam |
| Screen Size | 5 Inches |
| Video Capture Resolution | 720p |
| Effective Still Resolution | 2.1 MP |
| Probe Diameter | 6.5 Millimeters |
| Articulation | 4-Way 180° (360° viewing range) |
| Lenses | Dual Lens (Front & Side) |
| Cable Type | 5FT Semi-rigid Snake Tube |
| Lighting | 6+1 Adjustable LED Lights |
| Water Resistance Level | Waterproof (IP67 for probe) |
| Media Type | Micro SD Card (32GB included) |
| Connectivity Technology | USB Type C |
| Audio Recording | Yes |
| High Temperature Protection | Automatic shut-down if temperature ≥ 90°C/194°F |
8. Warranty Information
This Ralcam borescope comes with a 1-Year Warranty from the date of purchase, covering manufacturing defects. Please retain your proof of purchase for warranty claims. The warranty does not cover damage caused by misuse, accidents, unauthorized modifications, or normal wear and tear.
9. Customer Support
For technical assistance, troubleshooting, or warranty inquiries, please contact Ralcam customer support through the vendor's official channels or the platform where the product was purchased. Refer to the product packaging or Ralcam's official website for the most up-to-date contact information.