1. Product Overview
The PUREPLUS 2-Stage Whole House Water Filtration System is designed to provide clean, filtered water throughout your entire home. This system effectively reduces chlorine, odor, heavy metals, iron, and manganese, protecting your household appliances and improving water quality for various uses.
The system features a two-stage filtration process:
- Stage 1 (PP10BB-CC): A multi-layer sediment and carbon filter that removes up to 99% of chlorine, taste, odor, sand, rust, and sediment. This filter is certified by IAPMO R&T to NSF/ANSI 42.
- Stage 2 (RFN10BB-SZ): An iron and manganese reducing filter that effectively removes iron, manganese, sediment, and sand, reducing iron levels from up to 3.0 ppm down to 0.01 ppm.
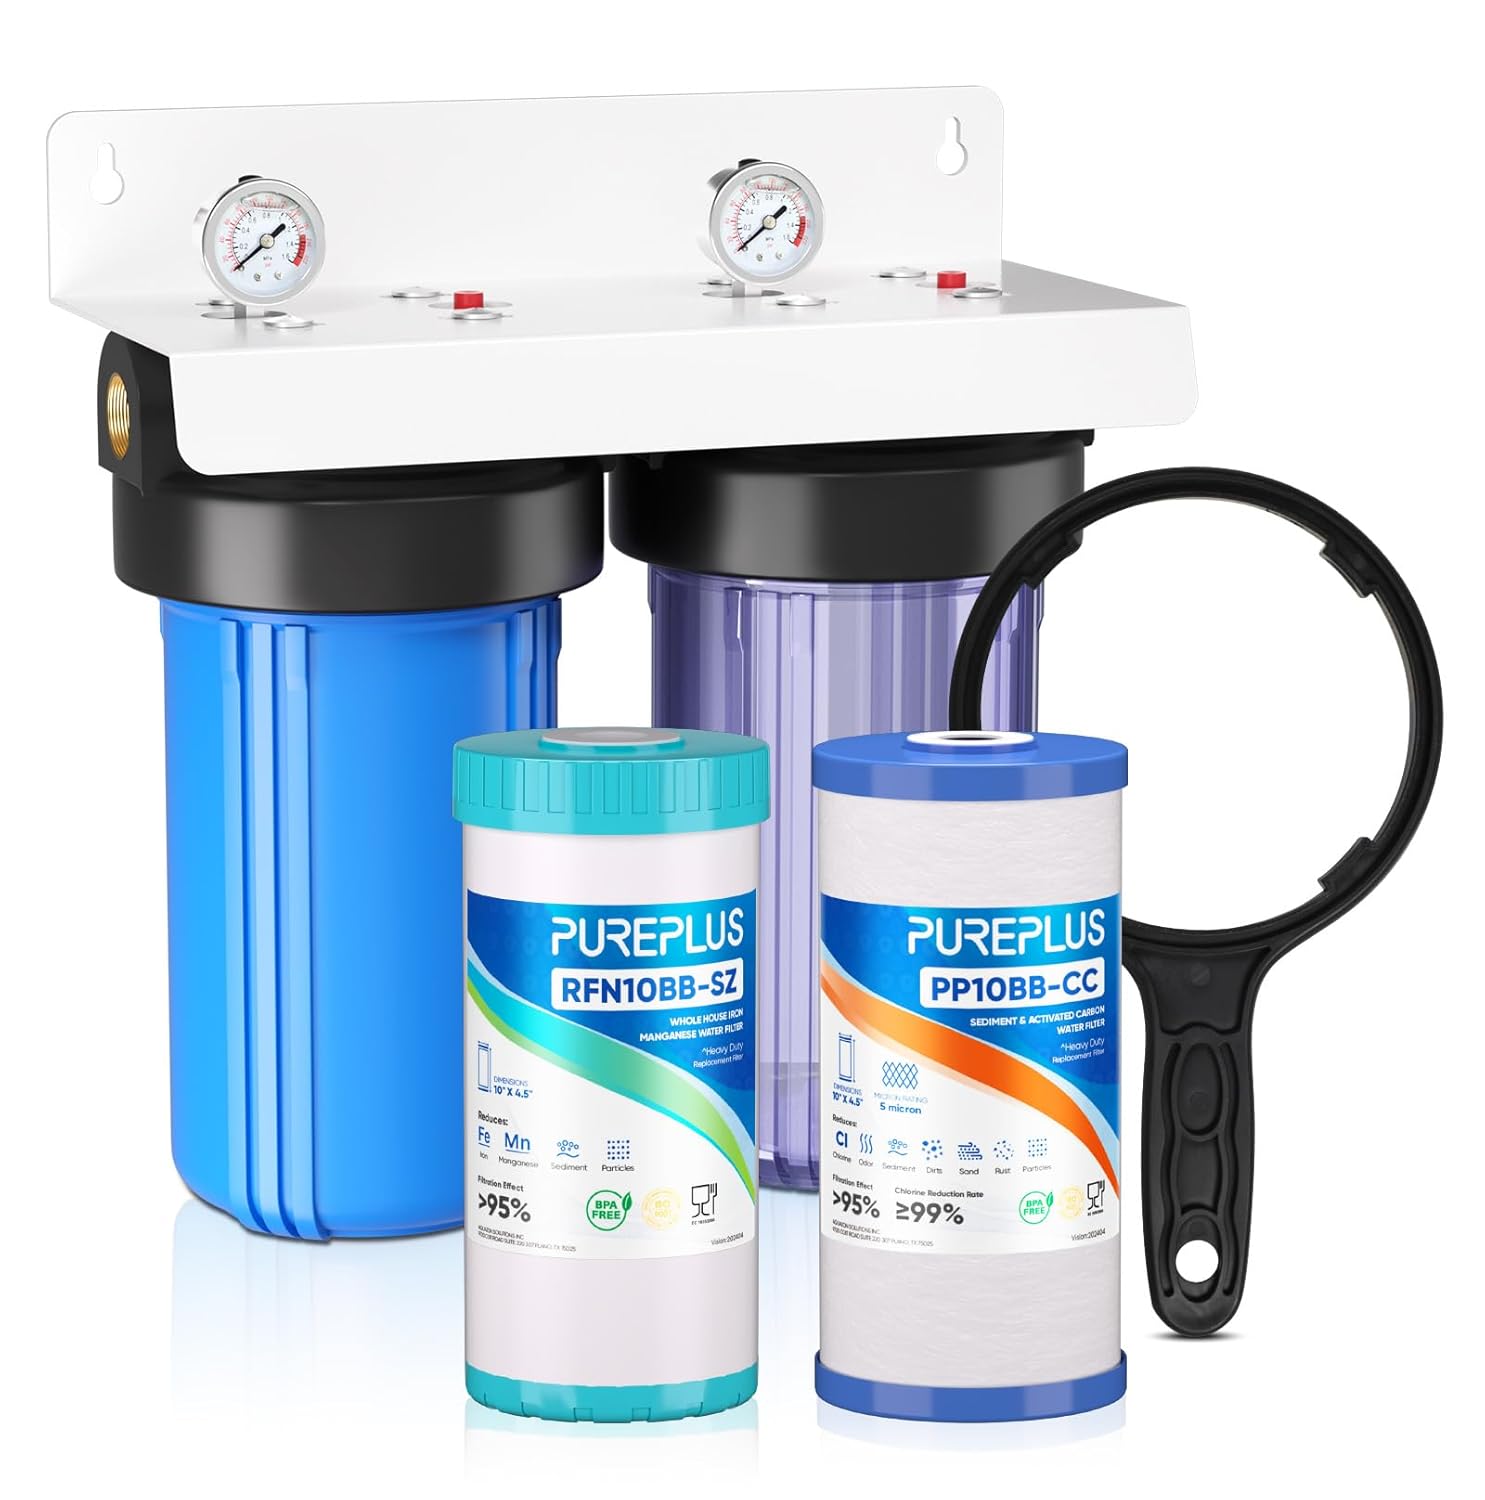
Image 1.1: The PUREPLUS 2-Stage Whole House Water Filtration System, showing the two filter housings and pressure gauges.

Image 1.2: Diagram illustrating the multi-layered filtration process, including polypropylene, granular activated carbon, and iron removal media, achieving a 5-micron rating.
2. Safety Information
Please read and understand all safety instructions before installing or operating this water filtration system. Failure to follow these instructions could result in property damage, injury, or death.
- Always turn off the main water supply and relieve pressure before performing any installation or maintenance.
- Ensure all connections are secure and leak-free to prevent water damage.
- Do not install the system in direct sunlight or in areas exposed to freezing temperatures.
- Use appropriate plumbing tools and materials. Professional installation is recommended if you are not experienced with plumbing.
- The maximum operating temperature for this system is 100°F (38°C). Do not exceed this temperature.
- Keep the filter wrench and other small components out of reach of children.
3. Components List
Verify that all components are present before beginning installation:
- 2-Stage Whole House Water Filtration System Head with Mounting Bracket
- Two 10" x 4.5" Filter Housings (one clear, one blue)
- PP10BB-CC Sediment & Carbon Filter Cartridge (Stage 1)
- RFN10BB-SZ Iron & Manganese Reducing Filter Cartridge (Stage 2)
- Dual Pressure Gauges (pre-installed)
- Filter Wrench
- Mounting Screws

Image 3.1: All included components of the PUREPLUS 2-Stage Whole House Water Filtration System, including the main unit, filter cartridges, and wrench.
4. Setup and Installation
Follow these steps for proper installation of your PUREPLUS Whole House Water Filtration System.
4.1 Pre-Installation
- Choose Location: Select a suitable location for installation, typically on the main water line after the water meter and before the water heater. Ensure there is enough space for filter replacement.
- Turn Off Water: Shut off the main water supply to your home.
- Depressurize System: Open a faucet at the lowest point in your home to drain water and relieve pressure.
- Gather Tools: You will need a pipe cutter, thread sealant tape, adjustable wrenches, and a drill for mounting.
4.2 Mounting the System
- Position the mounting bracket against the wall at the desired height. Mark the drilling points.
- Drill pilot holes and secure the system to the wall using the provided mounting screws. Ensure it is level and securely fastened.
4.3 Connecting Plumbing
- Cut into your main water line at the chosen installation point.
- Apply thread sealant tape to the 1-inch inlet/outlet brass ports of the filter system.
- Connect the incoming water line to the system's inlet (typically the right side, leading to the clear housing for Stage 1).
- Connect the outgoing water line to the system's outlet (typically the left side, after the blue housing for Stage 2).
- Ensure all connections are tight and leak-free.

Image 4.1: Diagram showing the water flow through the two stages of filtration: Stage 1 (PP10BB-CC Carbon and Sediment Filter) and Stage 2 (RFN10BB-SZ Iron and Manganese Reducing Filter).

Image 4.2: Close-up view of key features including the 1-inch inlet/outlet brass ports for strong and durable connections, double O-rings for sealed and leak-proof operation, and pressure release buttons for relieving pressure.
5. Operating Instructions
5.1 Initial Startup
- Slowly turn on the main water supply.
- Allow the system to fill with water. You may hear air escaping.
- Once the system is full, open a nearby cold water faucet to purge air from the lines. Let the water run for 10-15 minutes to flush the new filters and remove any carbon fines.
- Check for any leaks around the filter housings and connections.
5.2 Normal Operation
The system operates automatically once installed. The pressure gauges allow you to monitor the water pressure before and after each filter stage. A significant drop in pressure across a filter indicates that the cartridge is becoming clogged and needs replacement.
6. Maintenance
Regular filter replacement is crucial for optimal performance and water quality.
6.1 Filter Replacement Schedule
Filter cartridges should be replaced every 3-6 months or after filtering approximately 30,000 gallons, depending on your water quality and usage. The clear housing for Stage 1 allows visual monitoring of sediment buildup.
6.2 Replacing Filter Cartridges
- Turn Off Water: Shut off the main water supply to the system.
- Relieve Pressure: Press the red pressure release buttons on top of each housing to relieve internal pressure.
- Unscrew Housings: Use the provided filter wrench to unscrew the filter housings counter-clockwise.
- Remove Old Filters: Discard the old filter cartridges.
- Clean Housings: Clean the inside of the filter housings with warm, soapy water. Rinse thoroughly. Inspect and lubricate O-rings if necessary.
- Insert New Filters: Place the new PP10BB-CC filter into the clear housing (Stage 1) and the new RFN10BB-SZ filter into the blue housing (Stage 2). Ensure they are centered.
- Screw Housings Back On: Hand-tighten the housings clockwise until snug, then use the filter wrench for an additional 1/4 to 1/2 turn to ensure a tight seal. Do not overtighten.
- Restore Water Supply: Slowly turn on the main water supply and follow the initial startup procedure (Section 5.1) to flush the new filters and check for leaks.

Image 6.1: Illustration of the simple cartridge replacement process using the provided wrench, highlighting the longer lifespan and stable high flow of the system.
7. Troubleshooting
| Problem | Possible Cause | Solution |
|---|---|---|
| Low Water Pressure | Clogged filter cartridges | Replace filter cartridges. |
| Low Water Pressure | Air in the system | Open a faucet to purge air. |
| Water Leaks from Housing | Improperly seated O-ring or overtightened housing | Turn off water, relieve pressure, unscrew housing, inspect/re-seat O-ring, apply silicone grease if needed, hand-tighten then use wrench for 1/4 turn. |
| Water Leaks from Connections | Loose plumbing connections or insufficient thread sealant | Turn off water, relieve pressure, tighten connections, or reapply thread sealant tape. |
| Poor Water Quality (Taste/Odor) | Expired or saturated carbon filter | Replace the carbon filter cartridge (PP10BB-CC). |
| Poor Water Quality (Iron/Manganese) | Expired or saturated iron reduction filter | Replace the iron/manganese reduction filter cartridge (RFN10BB-SZ). |
8. Specifications
| Feature | Specification |
|---|---|
| Model Name | PP-WFM10BBT2A-BBC-RSZ |
| Product Dimensions (L x W x H) | 16.3" x 7.5" x 15.7" |
| Item Weight | 10.05 Kilograms |
| Filtration Stages | 2-Stage (Sediment & Carbon, Iron & Manganese Reduction) |
| Filter Cartridges | PP10BB-CC (Stage 1), RFN10BB-SZ (Stage 2) |
| Inlet/Outlet Size | 1-inch |
| Capacity | Up to 30,000 Gallons |
| Filter Lifespan | 3-6 Months (dependent on water quality) |
| Material | Food-grade Polypropylene, Natural Coconut Activated Carbon, Iron Reduction Media |
| Max. Operating Temperature | 100°F (38°C) |
| Special Features | Clear Housing (Stage 1), Dual Pressure Gauges, Pressure Release Buttons |
9. Warranty and Support
For warranty information or technical support, please refer to the contact details provided with your purchase or visit the official PUREPLUS website. Keep your purchase receipt as proof of purchase for any warranty claims.