Introduction
This manual provides essential information for the safe and effective operation, maintenance, and setup of your HEINPRO Cordless Tiller Cultivator. Designed for gardening tasks such as plowing, turning soil, aerating, and blending compost, this tool offers cordless convenience and powerful performance. Please read this manual thoroughly before use.
Safety Information
- Battery and Charger: Note that the battery and charger are not included with this tool. This tiller is compatible with DeWALT 20V MAX lithium-ion batteries (DCB200, DCB201, DCB203, DCB204, DCB205, DCB206, DCB207, DCB208, DCB210, DCB230, DCB240, etc.).
- Dual Safety Switch: For secure operation, the machine only operates when the safety lock button (left side) and the trigger are pressed simultaneously. This prevents accidental starts.
- Usage Environment: Do not use for tilling in dense grass where blades may tangle. Always clear the area of weeds and debris before operation to prevent damage to the tool and ensure user safety.
Components and Features
The HEINPRO Cordless Tiller Cultivator is designed with user convenience and efficiency in mind. Key components include:
- High-Efficiency 360RPM Motor: Provides powerful tilling action.
- Durable Steel Tines: Four hardened steel blades for effective soil cultivation.
- Tine Guard: Protects against debris during operation.
- Adjustable Auxiliary Handle: For comfortable and controlled operation.
- Real-Time Battery Indicator: Located on the handle to monitor power levels.
- Quick-Release Collar and Ring-Latch Pin: For easy assembly and disassembly of the 3-section pole.
- Safety Lock Button and Trigger: Dual safety mechanism for preventing accidental starts.

Figure 1: Overview of the HEINPRO Cordless Tiller Cultivator with labeled components.
Setup
- Assemble the Pole: Connect the 3-section pole using the quick-release collars and secure with the ring-latch pins. Ensure all connections are rigid and wobble-free. The unit extends to a manageable 4.1 feet in length.
- Attach Auxiliary Handle: Adjust the auxiliary handle to a comfortable position for optimal control and reduced fatigue during operation.
- Install Tines: The durable steel tines are designed for quick attachment and removal. Secure them using the provided pins. (Refer to Figure 2 for visual guidance on tine installation/removal).

Figure 2: Attaching the durable steel tines to the tiller head.
- Insert Battery: Insert a fully charged Dewalt 20V MAX lithium-ion battery into the designated slot on the handle. The integrated battery charge indicator will show the current power level.
Video 1: Demonstrates the assembly process of the Cordless Tiller Cultivator, including attaching the handle and securing components.
Operating Instructions
- Prepare the Area: Before starting, ensure the area to be tilled is clear of large rocks, roots, and dense grass to prevent damage to the tines and ensure efficient operation.
- Start the Tiller: Press the safety lock button with your thumb and simultaneously squeeze the trigger to activate the tiller. The motor will deliver 360 RPM for powerful tilling.
- Tilling Technique: Guide the tiller over the soil, allowing the hardened steel blades to cultivate up to 9 inches wide and 7 inches deep. Move the tiller slowly and steadily for best results.
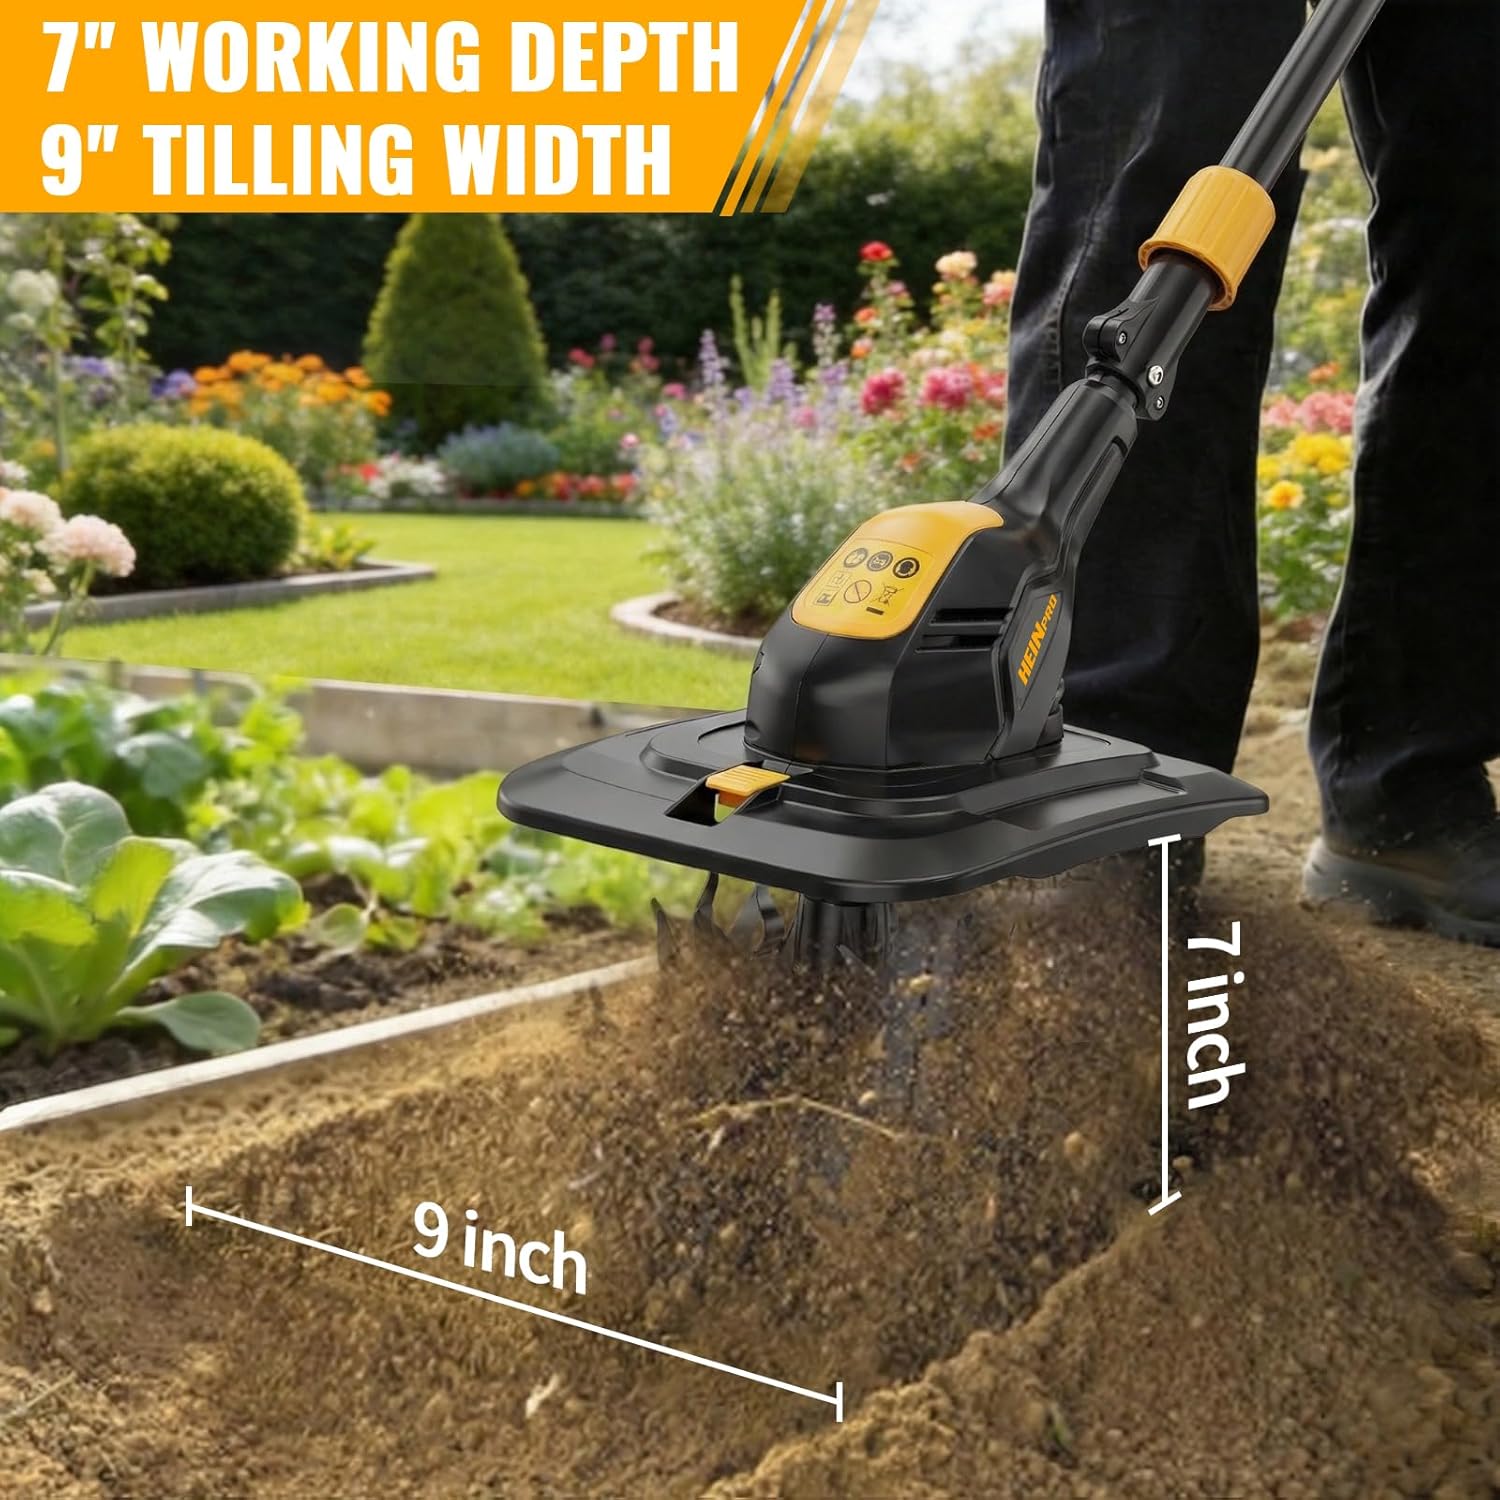
Figure 3: The tiller in action, demonstrating its 9-inch tilling width and 7-inch depth.
- Monitor Battery: Keep an eye on the integrated battery charge indicator on the handle to manage your runtime effectively.
- Versatile Use: This rotary cultivator is suitable for various tasks in small gardens, raised beds, and flower beds, including plowing, turning soil, aerating, and blending compost.
Video 2: Demonstrates the 360RPM Battery Powered Garden Cultivator in use, showing its effectiveness in tilling soil.
Maintenance
- Clean Tines: After each use, remove the tines using the pull-pin mechanism and clear any accumulated soil, weeds, or debris. This ensures optimal performance and extends the life of the blades.

Figure 4: Steps for quick-release and easy cleaning of the tiller tines.
- Store Properly: When not in use, disassemble the 3-section pole for compact storage. Store the tiller in a dry, protected area.
- Battery Care: Always store batteries in a cool, dry place and follow manufacturer guidelines for charging and storage.
Troubleshooting
If you encounter issues with your HEINPRO Cordless Tiller Cultivator, consider the following common solutions:
- Tiller not starting: Ensure the battery is fully charged and properly inserted. Verify that both the safety lock button and the trigger are pressed simultaneously.
- Reduced tilling performance: Check if the tines are clean and free of debris. Ensure the tines are securely attached. The battery might be low; check the battery indicator.
- Excessive vibration: Inspect tines for damage or bending. Ensure all pole sections are securely connected.
Specifications
| Feature | Detail |
|---|---|
| Product Dimensions | 10.3 x 9.7 x 49.6 inches |
| Item Weight | 9.4 pounds |
| Brand | HEINPRO |
| Power Source | Battery Powered (Battery and Charger not Included) |
| Tilling Width | 9 inches |
| Tilling Depth | 7 inches |
| Motor Speed | 360 RPM |
Warranty and Support
HEINPRO is committed to providing reliable solutions and customer satisfaction. While specific warranty details are not provided in this manual, the manufacturer offers 24-hour after-sales service support. For any questions, concerns, or support needs, please contact HEINPRO customer service.

Figure 5: HEINPRO customer support is available for assistance.