1. Product Overview
The Krysolad Shipping Container Solar Vent Kit is an integrated ventilation system designed to improve air circulation within various container structures. This kit utilizes solar energy to power its ventilation fans, effectively minimizing temperature differences and preventing issues such as condensation in colder conditions and overheating during warmer periods. It is suitable for container houses, offices, cabins, and other similar applications.
The system combines a solar-powered fan unit with a robust container vent, ensuring efficient air exchange and maintaining a more stable internal environment.

Image 1.1: Overview of the Krysolad Shipping Container Solar Vent Kit, showing the solar panel assembly and the fan unit.
2. Key Features
- Solar-Powered Operation: Utilizes clean solar energy to power the fan motor, reducing electricity consumption.
- Dual High-Speed Fans: Equipped with two powerful ventilation fans operating at 2688 r/min to maximize airflow and ensure efficient air exchange.
- Adjustable Solar Panel: The solar panel can be adjusted from 0° to 90° to optimize sun exposure and energy capture throughout the day.
- Durable Construction: Features a sturdy, waterproof solar panel and integrated vents made from heavy metal with a high UV-resistant coating, providing excellent corrosion resistance and durability against rain and sun erosion.
- Condensation and Overheating Prevention: Designed to blow fresh air into the container, effectively preventing condensation in winter and reducing high temperatures in summer.
- Integrated Vents with Screens: The vent unit includes screens to prevent debris and insects from entering the container while allowing air circulation.
- Wide Application: Suitable for 20/40-foot shipping containers, container houses, cabins, box-type offices, and gables.

Image 2.1: Detailed view of the kit's components, including the solar panel, adjustable mounts, dual fans, and integrated vent.
3. Package Contents
Please verify that all components are present and undamaged upon opening the package:
- Solar Panel Assembly (with adjustable bracket)
- Vent Unit with Integrated Dual Fans and Screens
- Mounting Hardware (screws)
4. Setup and Installation
The installation process for the Krysolad Shipping Container Solar Vent Kit is designed to be straightforward. Follow these steps for proper setup:
- Prepare the Mounting Location: Identify a suitable location on your shipping container or structure for the vent unit. Ensure the area is clear of obstructions and allows for proper airflow.
- Attach Solar Panel to Vent Unit: Use the provided screws to securely mount the solar panel assembly onto the vent unit. Ensure all connections are tight.
- Install Vent Unit: Install the combined solar vent unit onto the prepared opening in your container. Use appropriate fasteners (not included, depending on container material) to secure the vent unit firmly to the structure.
- Adjust Solar Panel Angle: Once the unit is installed, adjust the solar panel to face the sun directly. The panel can be angled between 0° and 90° to capture optimal sunlight throughout the day. This ensures a steady supply of energy to the fans.

Image 4.1: Illustration of the adjustable solar panel, demonstrating its 0-90 degree range for optimal sun exposure.
5. Operation
The Krysolad Shipping Container Solar Vent Kit operates automatically using solar power. There are no manual controls for daily operation.
- Automatic Activation: The fans will begin to operate when the solar panel receives sufficient sunlight.
- Optimal Performance: For best performance, ensure the solar panel is clean and adjusted to face the sun directly. This maximizes the energy supply to the fans, allowing them to operate at their full capacity of 2688 r/min.
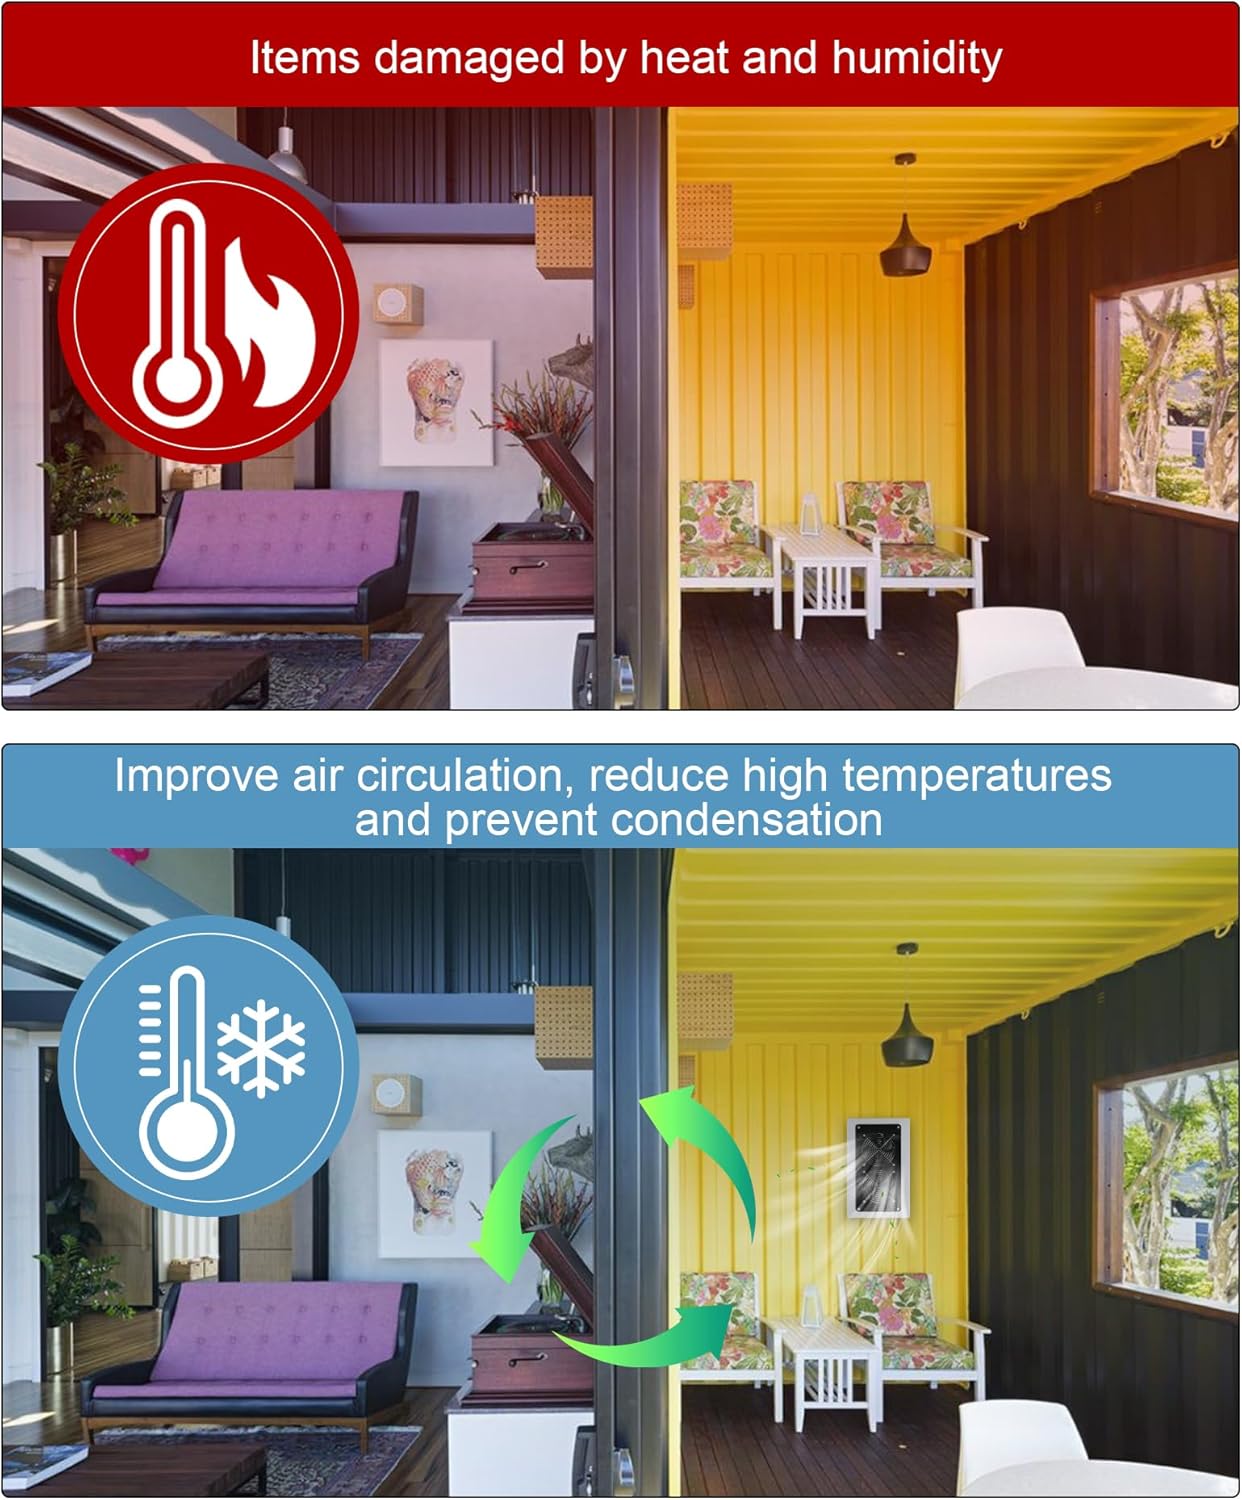
Image 5.1: Visual representation of how improved air circulation reduces high temperatures and prevents condensation inside a container.
6. Maintenance
Regular maintenance will ensure the longevity and efficient operation of your solar vent kit.
- Clean Solar Panel: Periodically clean the surface of the solar panel with a soft, damp cloth to remove dust, dirt, or debris that may reduce its efficiency. Avoid abrasive cleaners.
- Inspect Vent Screens: Check the integrated screens on the vent unit for any accumulation of leaves, insects, or other obstructions. Clean as necessary to maintain optimal airflow.
- Check Fan Blades: Occasionally inspect the fan blades for any debris or damage. Gently clean the blades if dust or dirt has accumulated.
- Examine Mounting: Ensure all mounting screws and fasteners remain tight and secure. Re-tighten if any looseness is detected.

Image 6.1: The durable coating and carbon alloy steel construction ensure resistance to long-term rain and sun erosion, highlighting the low maintenance design.
7. Troubleshooting
If you encounter issues with your solar vent kit, refer to the following troubleshooting guide:
- Fans Not Running:
- Ensure the solar panel is receiving direct sunlight.
- Check if the solar panel surface is clean and free of obstructions (e.g., leaves, snow, dirt).
- Verify that the solar panel is angled correctly towards the sun.
- Inspect fan blades for any physical obstructions preventing rotation.
- Insufficient Airflow:
- Confirm the solar panel is clean and optimally angled for maximum power generation.
- Check the vent screens for blockages and clean them if necessary.
- Ensure there are no internal obstructions within the container blocking the vent's airflow.
8. Specifications
| Specification | Detail |
|---|---|
| Product Style | Shipping Container Solar Vent Kit |
| ASIN | B0G4832HPK |
| Fan Speed | 2688 r/min (revolutions per minute) |
| Solar Panel Adjustability | 0° to 90° |
| Materials | Waterproof solar panel, heavy metal vents with UV-resistant coating |
| Application | 20/40-foot shipping containers, container houses, cabins, box-type offices, gables |
9. Warranty and Support
For detailed warranty information, product registration, or technical support, please refer to the official Krysolad website or contact their customer service department directly. Keep your purchase receipt as proof of purchase for any warranty claims.