
1. Introduction
Thank you for choosing the Furider T6 Electric Bike. This manual provides essential information for the safe assembly, operation, maintenance, and troubleshooting of your new e-bike. Please read this manual thoroughly before your first ride and keep it for future reference. Proper use and maintenance will ensure optimal performance and longevity of your electric bicycle.
2. Safety Information
Your safety is paramount. Always wear a helmet and appropriate safety gear when riding. Familiarize yourself with local traffic laws and regulations regarding electric bicycles. Regular inspections and maintenance are crucial for safe operation.
- Pre-Ride Check: Before each ride, check tire pressure, brake function, battery charge, and ensure all quick releases and fasteners are secure.
- Braking: Practice braking in a safe area to understand the stopping distance. Mechanical disc brakes provide strong stopping power.
- Visibility: Use the integrated headlight and ensure reflective elements on the tires are clean and visible, especially when riding at night or in low light conditions.
- Weather Conditions: Exercise caution when riding in wet or slippery conditions. The 26"x2.1" anti-slip tires offer good traction, but reduced grip is always a factor in adverse weather.
- Weight Limit: Do not exceed the maximum load capacity of 350 lbs (158 kg).
- Battery Safety: Only use the provided charger. Do not expose the battery to extreme temperatures or puncture it.

Image: The 26x2.1 inch anti-slip tires are designed to adapt to various road conditions, including sandy land, grassland, paved roads, and snow, enhancing stability and safety.
3. Package Contents
Upon unpacking, please verify that all the following components are included in your package:
- Furider T6 Electric Bike (90% pre-assembled)
- Removable Lithium-ion Battery (375Wh)
- Battery Charger
- Integrated Headlight
- Bicycle Lock
- Front and Rear Mudguards
- Assembly Tools
- User Manual (this document)
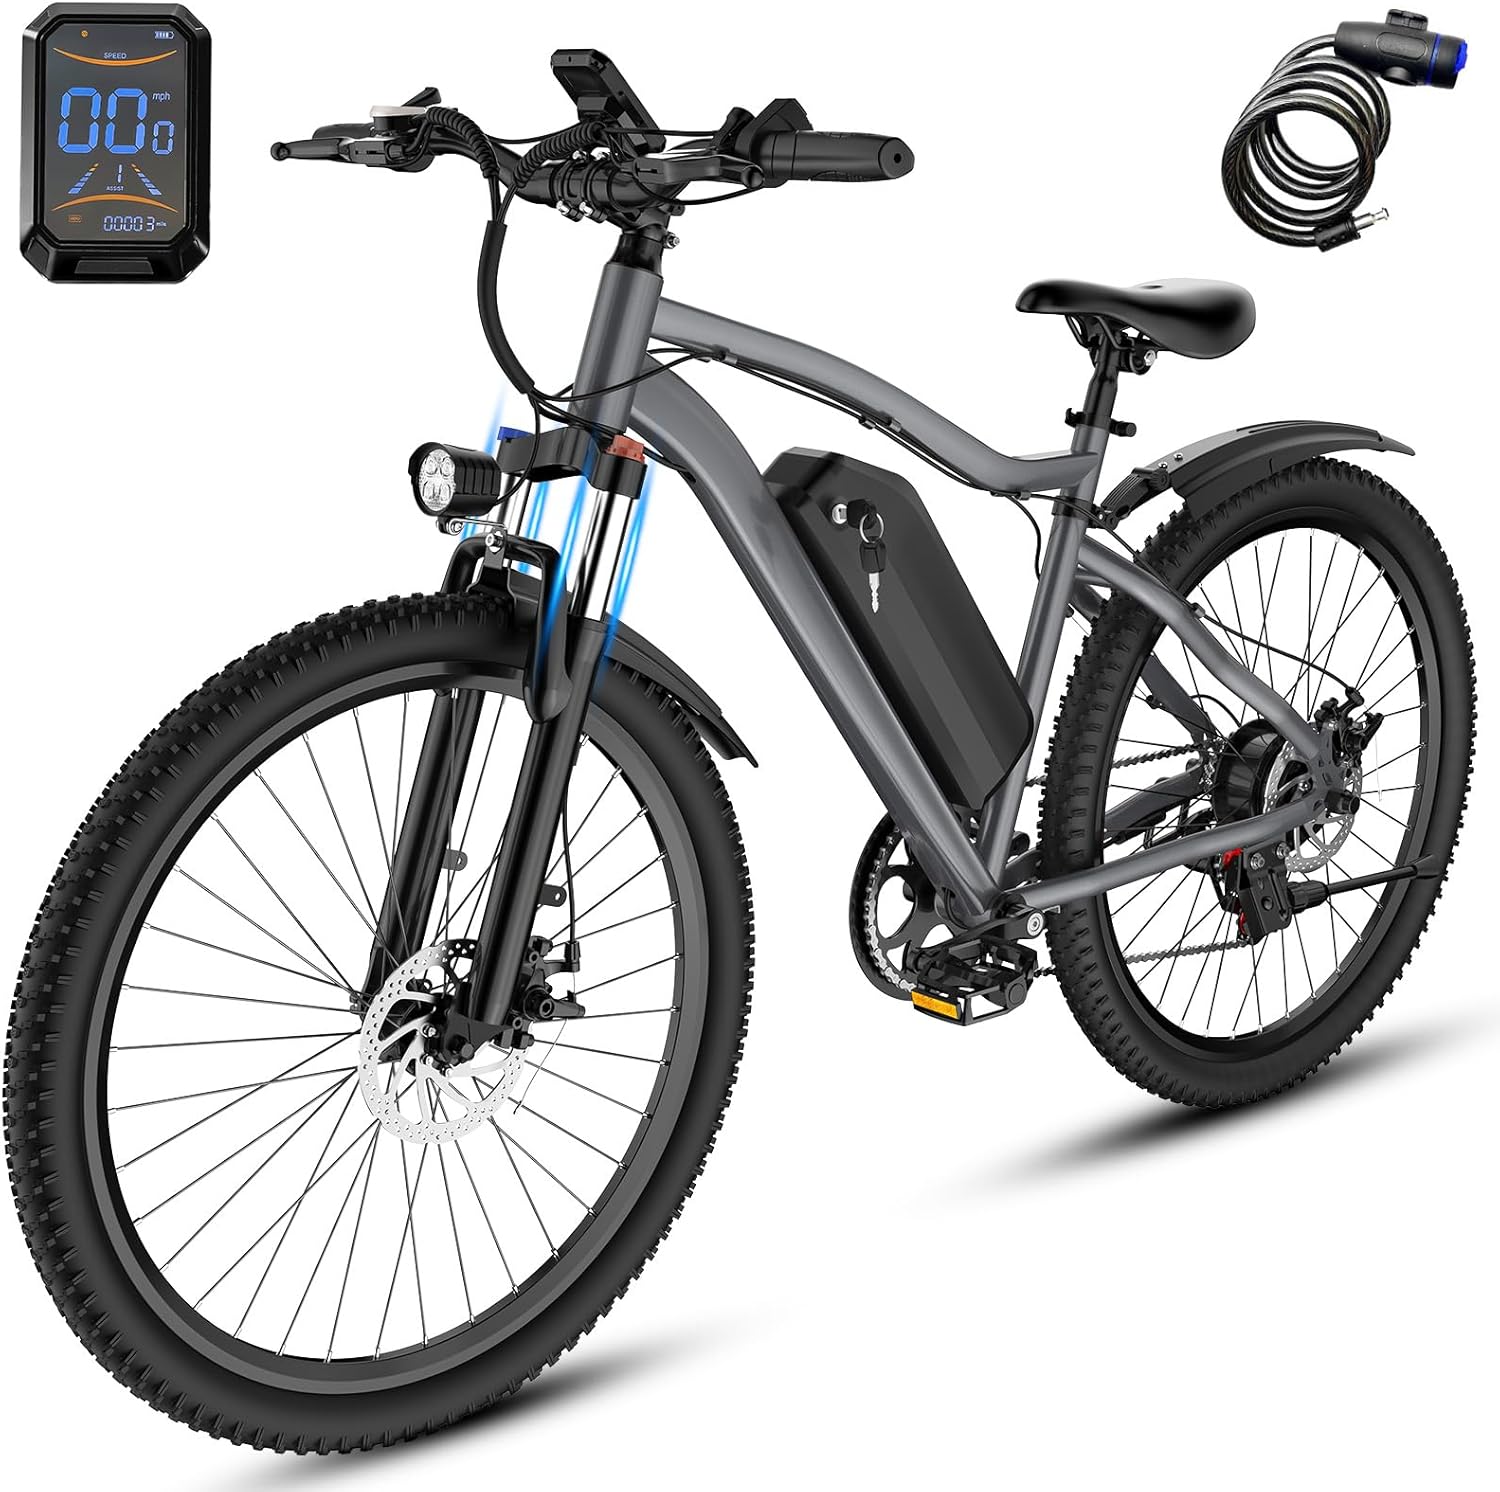
Image: The Furider T6 Electric Bike shown with its primary components and accessories, including the LED display and bicycle lock.
4. Setup and Assembly
Your Furider T6 Electric Bike arrives 90% pre-assembled. The remaining assembly steps are straightforward and can be completed with the included tools.
4.1 Unpacking
- Carefully remove the bike and all components from the packaging.
- Remove all protective packaging materials.
4.2 Handlebar Installation
- Attach the handlebars to the stem, ensuring they are centered and the brake levers and shifters are in a comfortable position.
- Tighten the stem bolts securely.
4.3 Pedal Installation
- Identify the left (L) and right (R) pedals.
- The right pedal (R) screws clockwise into the right crank arm.
- The left pedal (L) screws counter-clockwise into the left crank arm.
- Tighten pedals firmly with a wrench.
4.4 Front Wheel and Mudguard Installation
- Install the front wheel into the fork dropouts, ensuring the disc brake rotor is correctly seated in the caliper.
- Secure the wheel with the quick-release skewer or axle nuts.
- Attach the front mudguard to the fork.
4.5 Seat Post and Saddle Adjustment
- Insert the seat post into the frame's seat tube.
- Adjust the saddle height for comfortable pedaling, ensuring your leg has a slight bend at the bottom of the pedal stroke.
- Secure the seat post with the quick-release lever.

Image: Illustrations demonstrating how to adjust the handlebar angle for comfort and the seat height for proper riding posture.
5. Operating Instructions
Understanding your e-bike's controls is essential for a smooth and enjoyable ride.
5.1 Powering On/Off
- To power on the bike, press and hold the power button on the LED Smart Display.
- To power off, press and hold the power button again.
5.2 LED Smart Display
The LED Smart Display provides real-time information about your ride.
- Speed Display: Shows current riding speed.
- Battery Tip: Indicates remaining battery charge.
- 7-Speed Mode: Displays the current gear.
- Mileage History: Tracks distance traveled.
- Motor Error Warning: Alerts to potential motor issues.
- Cruise Control: While stationary, long press the "-" button to activate cruise control at 3.7 mph.
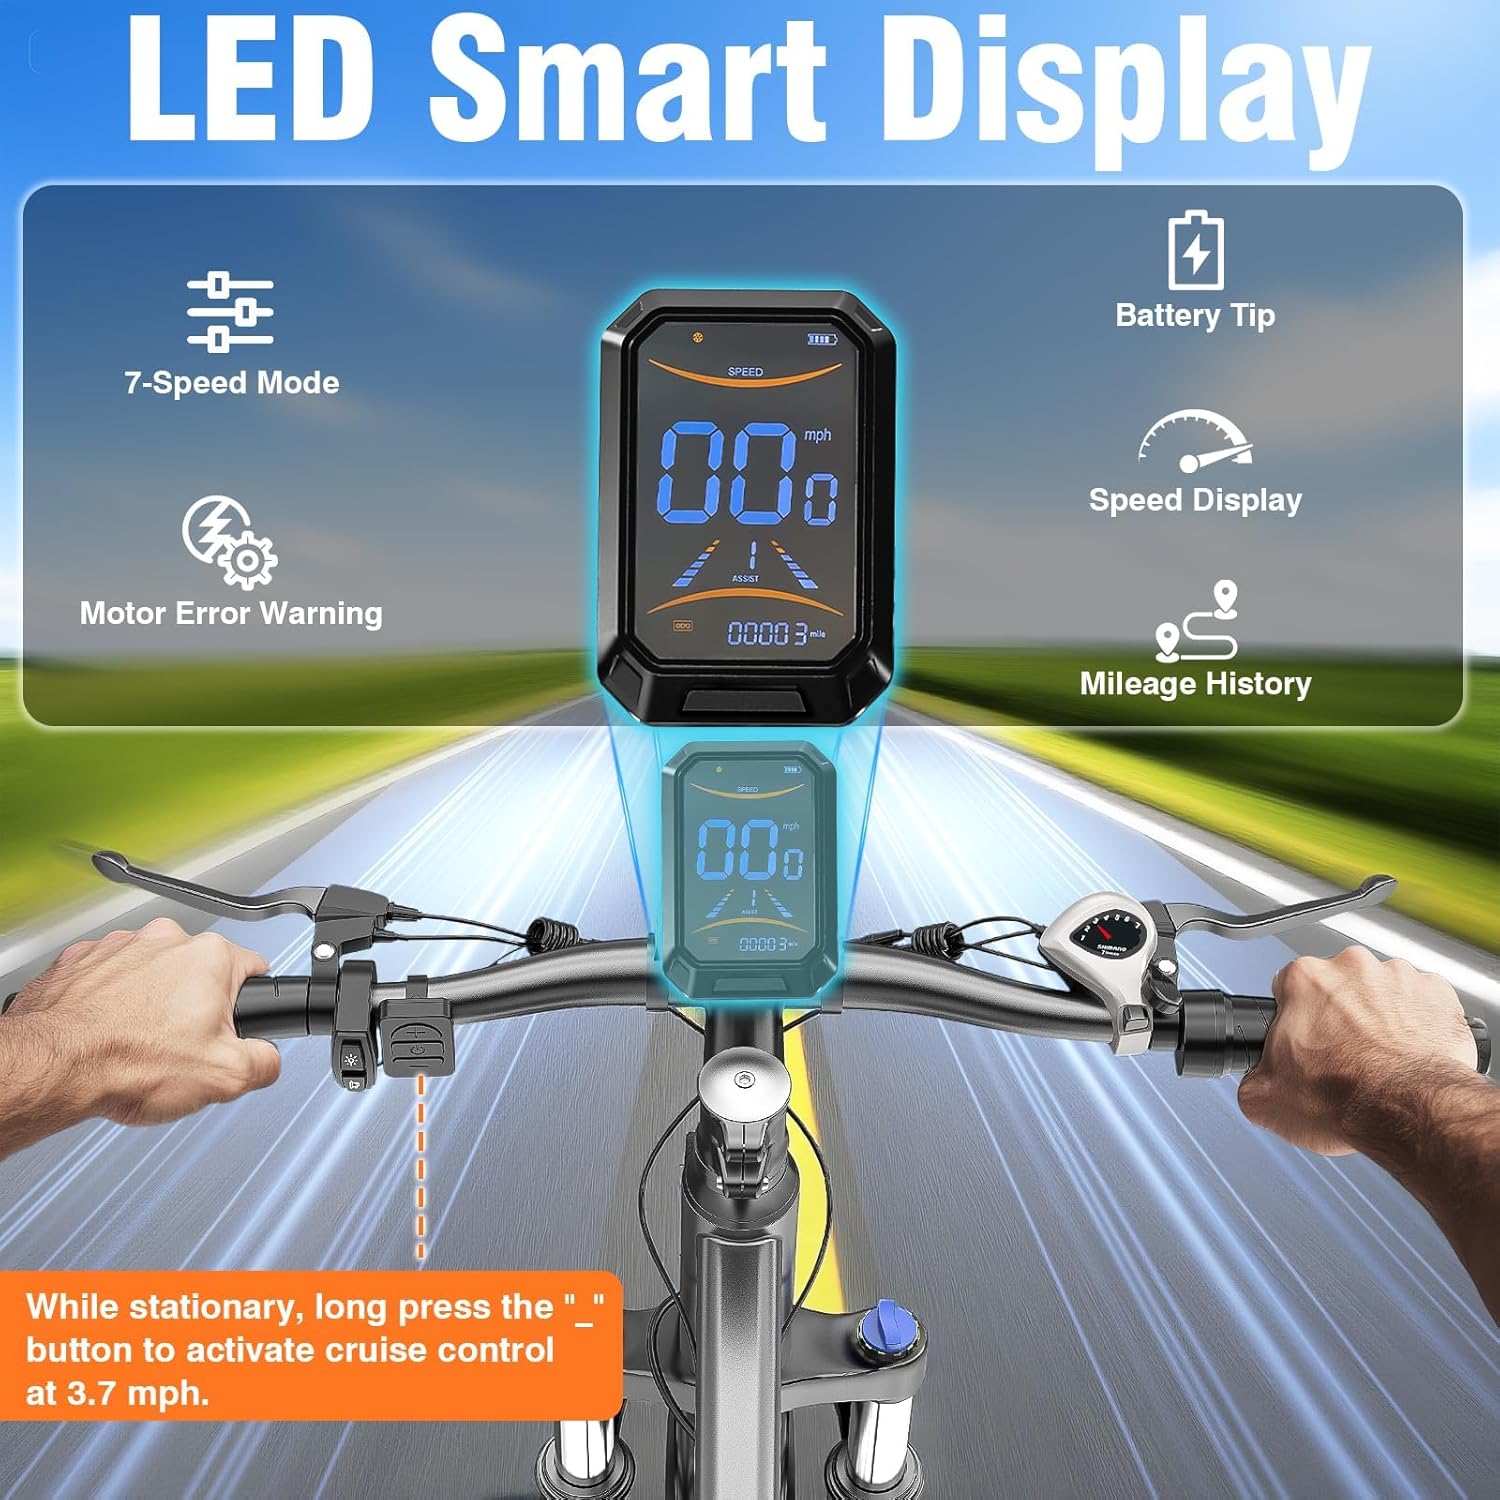
Image: The LED Smart Display provides essential riding information at a glance, including speed, battery level, and pedal assist mode.
5.3 Pedal Assist System (PAS)
The Furider T6 features a 5-level pedal assist system.
- Use the '+' and '-' buttons on the handlebar control to adjust the assist level from 1 (lowest assist) to 5 (highest assist).
- The motor provides assistance only when you are pedaling.
5.4 7-Speed Gear System
The 7-speed gear system allows you to adapt to various terrains and riding conditions.
- Shift gears using the trigger shifter on the handlebar.
- Lower gears (1-3) are for climbing hills or starting from a stop.
- Higher gears (5-7) are for flat terrain and higher speeds.
- Always shift gears while pedaling lightly to avoid strain on the drivetrain.

Image: Detail of the 7-speed gear system and the 720W peak motor, illustrating the bike's drive capabilities.
5.5 Lockable Suspension Fork
The front suspension fork can be locked or unlocked to suit different riding surfaces.
- Unlocked: Provides shock absorption for rough terrain, bumps, and vibrations, ensuring a smoother ride.
- Locked: Ideal for smooth paved roads, improving pedaling efficiency by preventing energy loss from suspension movement.
- Use the lever on the top of the fork to switch between locked and unlocked modes.
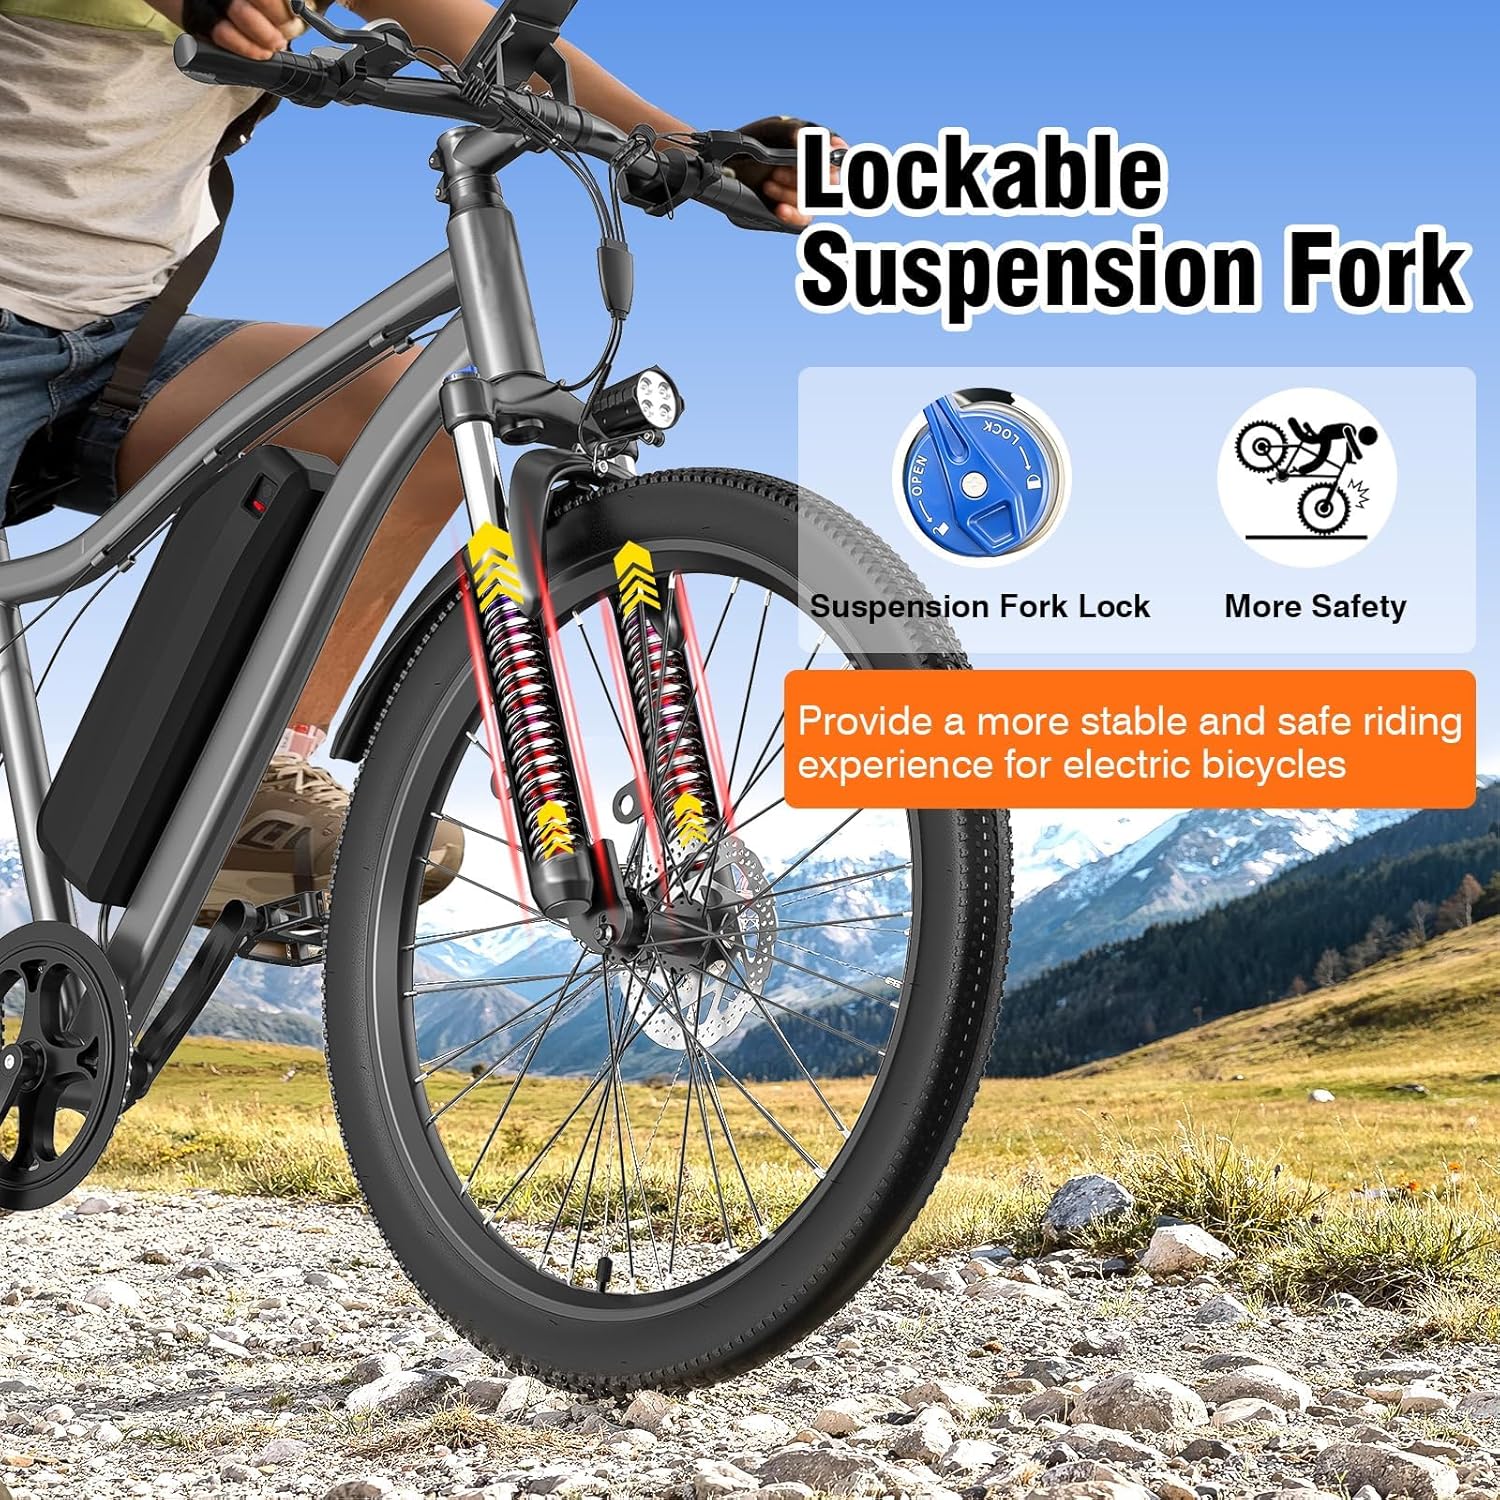
Image: The lockable suspension fork provides versatility for different riding conditions, offering stability and comfort.
6. Battery Charging and Care
The 375Wh removable lithium-ion battery powers your Furider T6 e-bike.
6.1 Charging the Battery
- The battery can be charged while installed on the bike or removed.
- Connect the charger to the battery's charging port, then plug the charger into a standard wall outlet.
- The charging indicator light on the charger will show the charging status (e.g., red for charging, green for fully charged).
- A full charge typically takes 4-6 hours. Do not overcharge the battery.
6.2 Battery Care
- Store the battery in a cool, dry place, away from direct sunlight and extreme temperatures.
- If storing for an extended period, charge the battery to approximately 50-70% and recharge every 2-3 months to maintain battery health.
- Do not immerse the battery in water.
- Only use the original Furider charger.

Image: The removable 375Wh lithium battery can be charged conveniently both on and off the bike, offering up to 50 miles of assisted cycling per charge.
7. Maintenance
Regular maintenance ensures the safety and longevity of your e-bike.
- Cleaning: Clean your bike regularly with a damp cloth. Avoid high-pressure washing directly on electrical components.
- Chain Lubrication: Lubricate the chain every 100-200 miles or after riding in wet conditions to ensure smooth shifting and prevent wear.
- Brake Inspection: Check brake pads for wear and replace them when necessary. Ensure brake levers are firm and responsive.
- Tire Pressure: Maintain recommended tire pressure (usually indicated on the tire sidewall) for optimal performance and puncture resistance.
- Fastener Check: Periodically check all bolts and nuts for tightness, especially on critical components like handlebars, seat post, wheels, and brakes.
- Professional Service: Consider having your e-bike professionally serviced at least once a year, or more frequently if you ride often or in challenging conditions.

Image: The mechanical disc brakes require regular inspection for optimal stopping power. The high carbon steel frame provides durability.
8. Troubleshooting
This section addresses common issues you might encounter with your Furider T6 Electric Bike.
| Problem | Possible Cause | Solution |
|---|---|---|
| Bike does not power on | Battery not charged or not properly installed; loose connections. | Ensure battery is fully charged and securely seated. Check all cable connections. |
| Motor not assisting | PAS level set to 0; brake levers engaged; motor error. | Increase PAS level. Ensure brake levers are fully released. Check display for error codes. |
| Short battery range | Low tire pressure; high assist level; heavy load; cold weather. | Inflate tires to recommended pressure. Use lower assist levels. Reduce load. Battery performance decreases in cold weather. |
| Brakes feel weak | Worn brake pads; loose cable; air in hydraulic system (if applicable). | Inspect and replace brake pads. Adjust brake cable tension. If issue persists, seek professional service. |
| Gears not shifting smoothly | Derailleur out of adjustment; dirty or dry chain. | Clean and lubricate the chain. Adjust derailleur limits and cable tension. |
8.1 Decoding Teaching Operations (Advanced Settings)
The following steps describe how to access and modify certain advanced settings on your display. Note: Customers are advised to comply with the laws and regulations of their respective states regarding whether to perform decoding operations. Any consequences arising from unauthorized decoding that violates state regulations are not the responsibility of the merchant and will be borne solely by the individual.
- Press and hold the power button to turn on the display.
- Press and hold the "+" and "-" buttons simultaneously for 5 seconds. The display will show P01.
- Press the power button repeatedly until the display shows P08.
- Click the "+" key to adjust the value until it shows 00042.
- Finally, press and hold the "+" and "-" buttons for 5 seconds to save the setting. The decoding is complete.

Image: Visual instructions for performing advanced display settings, including a warning about compliance with local regulations.
9. Specifications
Detailed technical specifications for the Furider T6 Electric Bike.
| Feature | Specification |
|---|---|
| Model | T6 |
| Bike Type | Electric Bike, Mountain Bike |
| Motor | 720W Peak Brushless Motor |
| Battery | 375Wh Removable Lithium-ion |
| Max Speed | 25 MPH (40 km/h) |
| Range per Charge | Up to 50 miles (80 km) with pedal assist |
| Charging Time | 4-6 hours |
| Pedal Assist Levels | 5 Levels |
| Gears | 7-Speed Gear System |
| Frame Material | High Carbon Steel |
| Wheel Size | 26 Inches |
| Tires | 26"x2.1" Anti-slip Tires |
| Suspension | Front Lockable Suspension Fork |
| Brakes | Mechanical Disc Brakes (Front & Rear) |
| Display | LED Smart Display |
| Max Load Capacity | 350 lbs (158 kg) |
| Bike Weight | 50.7 lbs (23 kg) |
| Recommended Rider Height | 5'3" - 6'7" (160 cm - 200 cm) |
| Certifications | UL 2849 Certified |

Image: Key dimensions of the Furider T6 Electric Bike, including length, width, height, wheelbase, and recommended rider height range.
10. Warranty and Support
10.1 Warranty Information
The Furider T6 Electric Bike comes with a 12-month limited warranty from the date of purchase. This warranty covers manufacturing defects in materials and workmanship. It does not cover normal wear and tear, damage caused by misuse, accidents, improper assembly or maintenance, or modifications.
Please retain your proof of purchase for warranty claims.
10.2 Customer Support
If you have any questions, require assistance with assembly, or encounter any issues not covered in this manual, please contact Furider customer support. Our dedicated team is available to provide assistance and ensure your satisfaction.
For support, please refer to the contact information provided with your purchase or visit the official Furider website.