1. Introduction
The Vortopt QR03 Reverse Osmosis (RO) System is designed to provide high-quality filtered water for your home. This system utilizes advanced filtration technology, including RO and PCB filter cartridges, to reduce various contaminants from your tap water. Proper installation and maintenance are crucial for optimal performance and longevity of the system.
2. Setup and Installation
Before beginning installation, ensure you have all necessary tools and components. Refer to the parts list provided with your system. It is recommended to install the system under your kitchen sink.
2.1. Installation Overview
The following video provides a general overview of the installation process for a similar reverse osmosis system. While specific models may vary, the fundamental steps for connecting water lines, filters, and the faucet are similar.
Video 1: Installation guide for a reverse osmosis system. This video demonstrates the general steps for setting up an under-sink RO system, including connecting to the water supply, installing the faucet, and connecting the drain.
2.2. Components and Dimensions
Familiarize yourself with the system's components and their dimensions for proper placement.

Image 1: The Vortopt QR03 Reverse Osmosis System with the RO filter highlighted, showing its dimensions (4" width, 12.6" height).
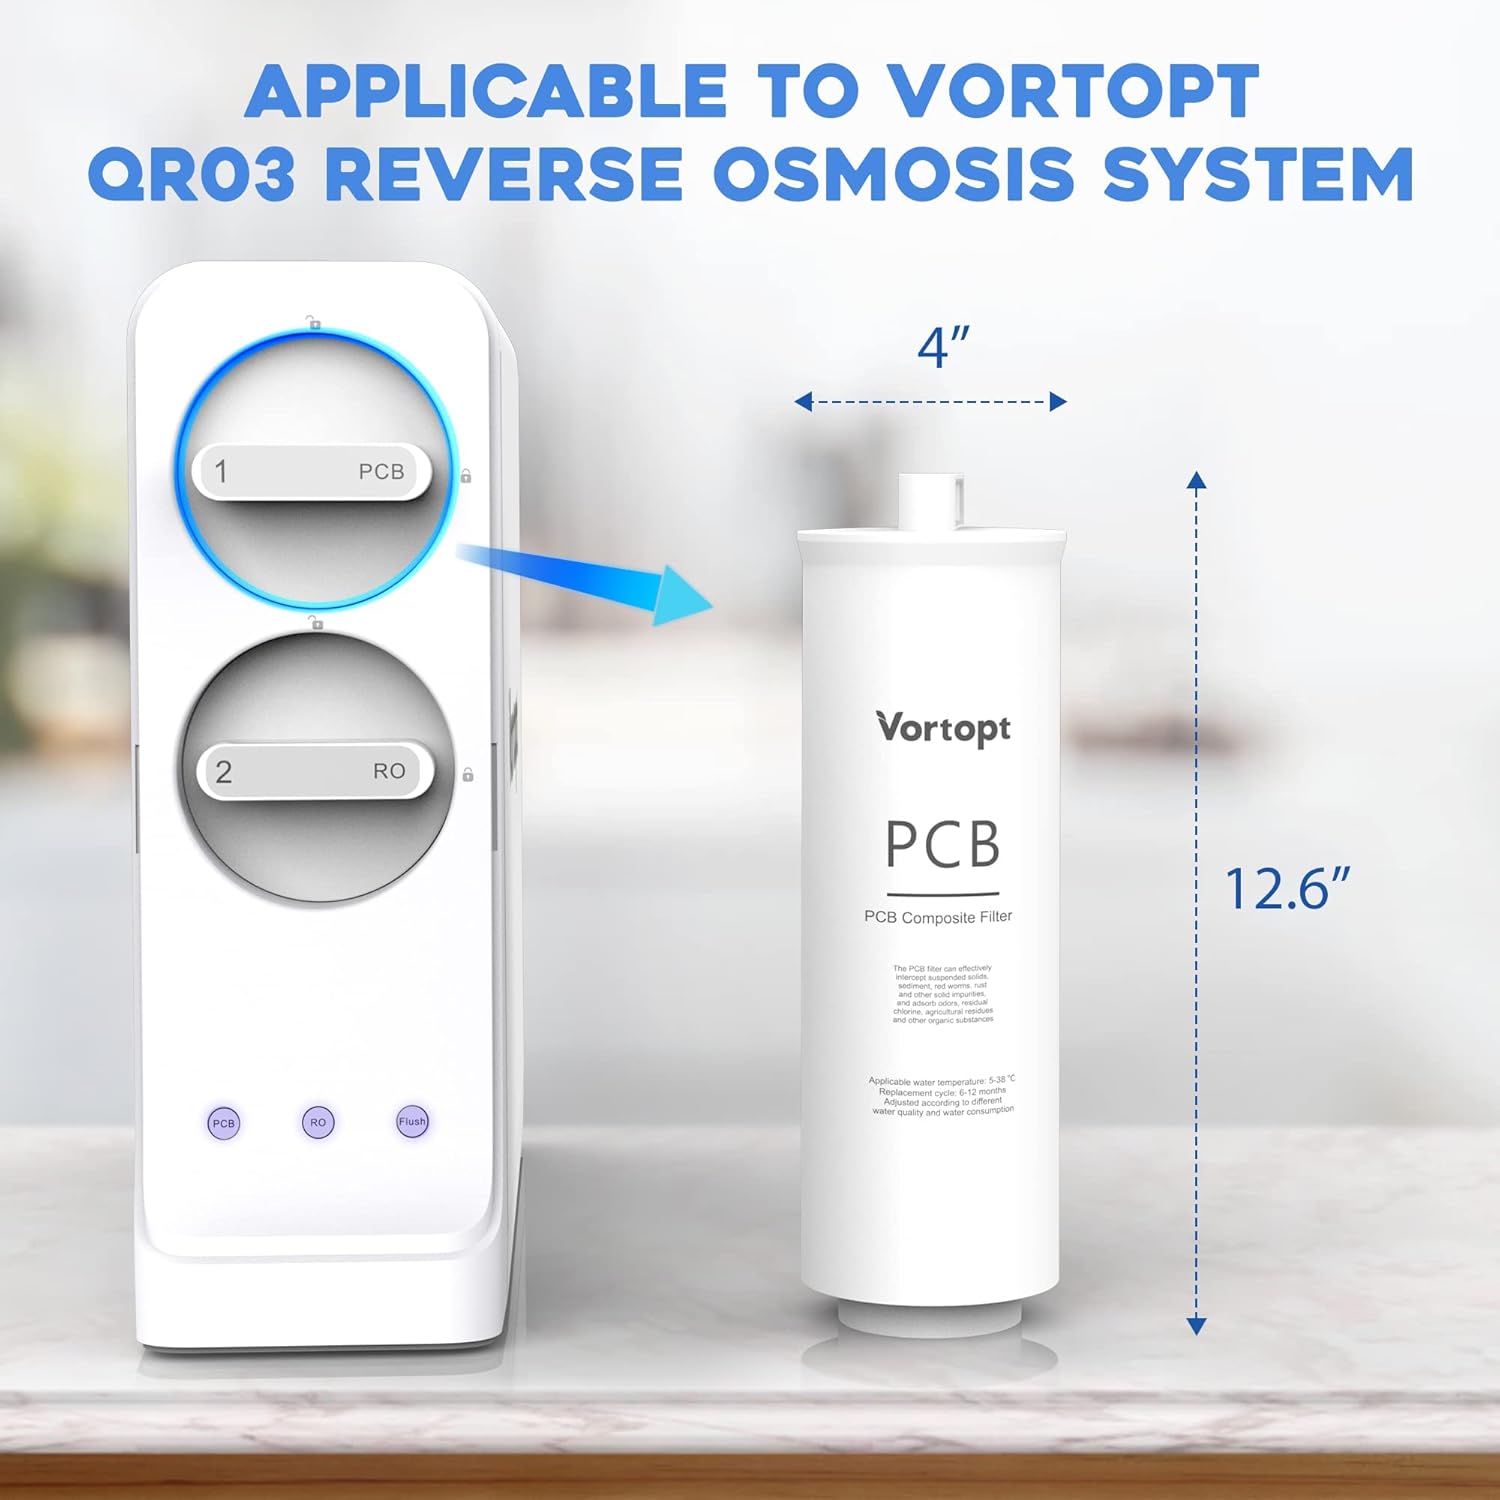
Image 2: The Vortopt QR03 Reverse Osmosis System with the PCB filter highlighted, showing its dimensions (4" width, 12.6" height).

Image 3: Illustration of the quick filter replacement process, indicating a 3-second replacement time and a service life of 6 to 12 months for the PCB filter.
3. Operating Instructions
Once installed, the Vortopt QR03 system operates automatically to provide purified water. To dispense water, simply open the dedicated filtered water faucet. The system will replenish the storage tank as water is consumed.
- Initial Flush: After installation, it is crucial to flush the system. Close the filtered water faucet and allow the storage tank to fill completely (this may take 30-60 minutes). Once full, open the faucet and let the water run for 10-15 minutes to flush out any carbon fines or air. Repeat this process 2-3 times.
- Water Dispensing: Use the dedicated filtered water faucet for drinking and cooking.
- System Noise: It is normal to hear a slight humming sound from the system during operation as water flows through the filters and the pump (if applicable) is active.
4. Maintenance and Filter Replacement
Regular filter replacement is essential to maintain the performance and water quality of your Vortopt QR03 system. The system uses two types of filters: RO (Reverse Osmosis) and PCB (Pre-Carbon Block) composite filters.
4.1. Filter Lifespan
- RO Filter: Recommended replacement every 24 to 36 months.
- PCB Filter: Recommended replacement every 6 to 12 months.
4.2. Filter Replacement Procedure
The Vortopt QR03 system features a quick twist-to-lock design for easy filter replacement.
- Shut off the water supply to the RO system.
- Locate the filter to be replaced (RO or PCB).
- Rotate the old filter 1/4 turn to the left to unlock it, then pull it downwards to remove.
- Insert the new filter upwards into the bracket, aligning the fittings.
- Rotate the new filter 1/4 turn to the right until it meets the end and locks into place.
- Turn on the water supply and check for leaks. Flush the system as described in the "Initial Flush" section.

Image 4: A single Vortopt PCB Replacement Filter Cartridge, designed for easy installation.

Image 5: Diagram illustrating the premium RO filtration technology, showing removal of contaminants, reduction of TDS over 90%, and removal of chlorine, scale, heavy metals, and fluoride.
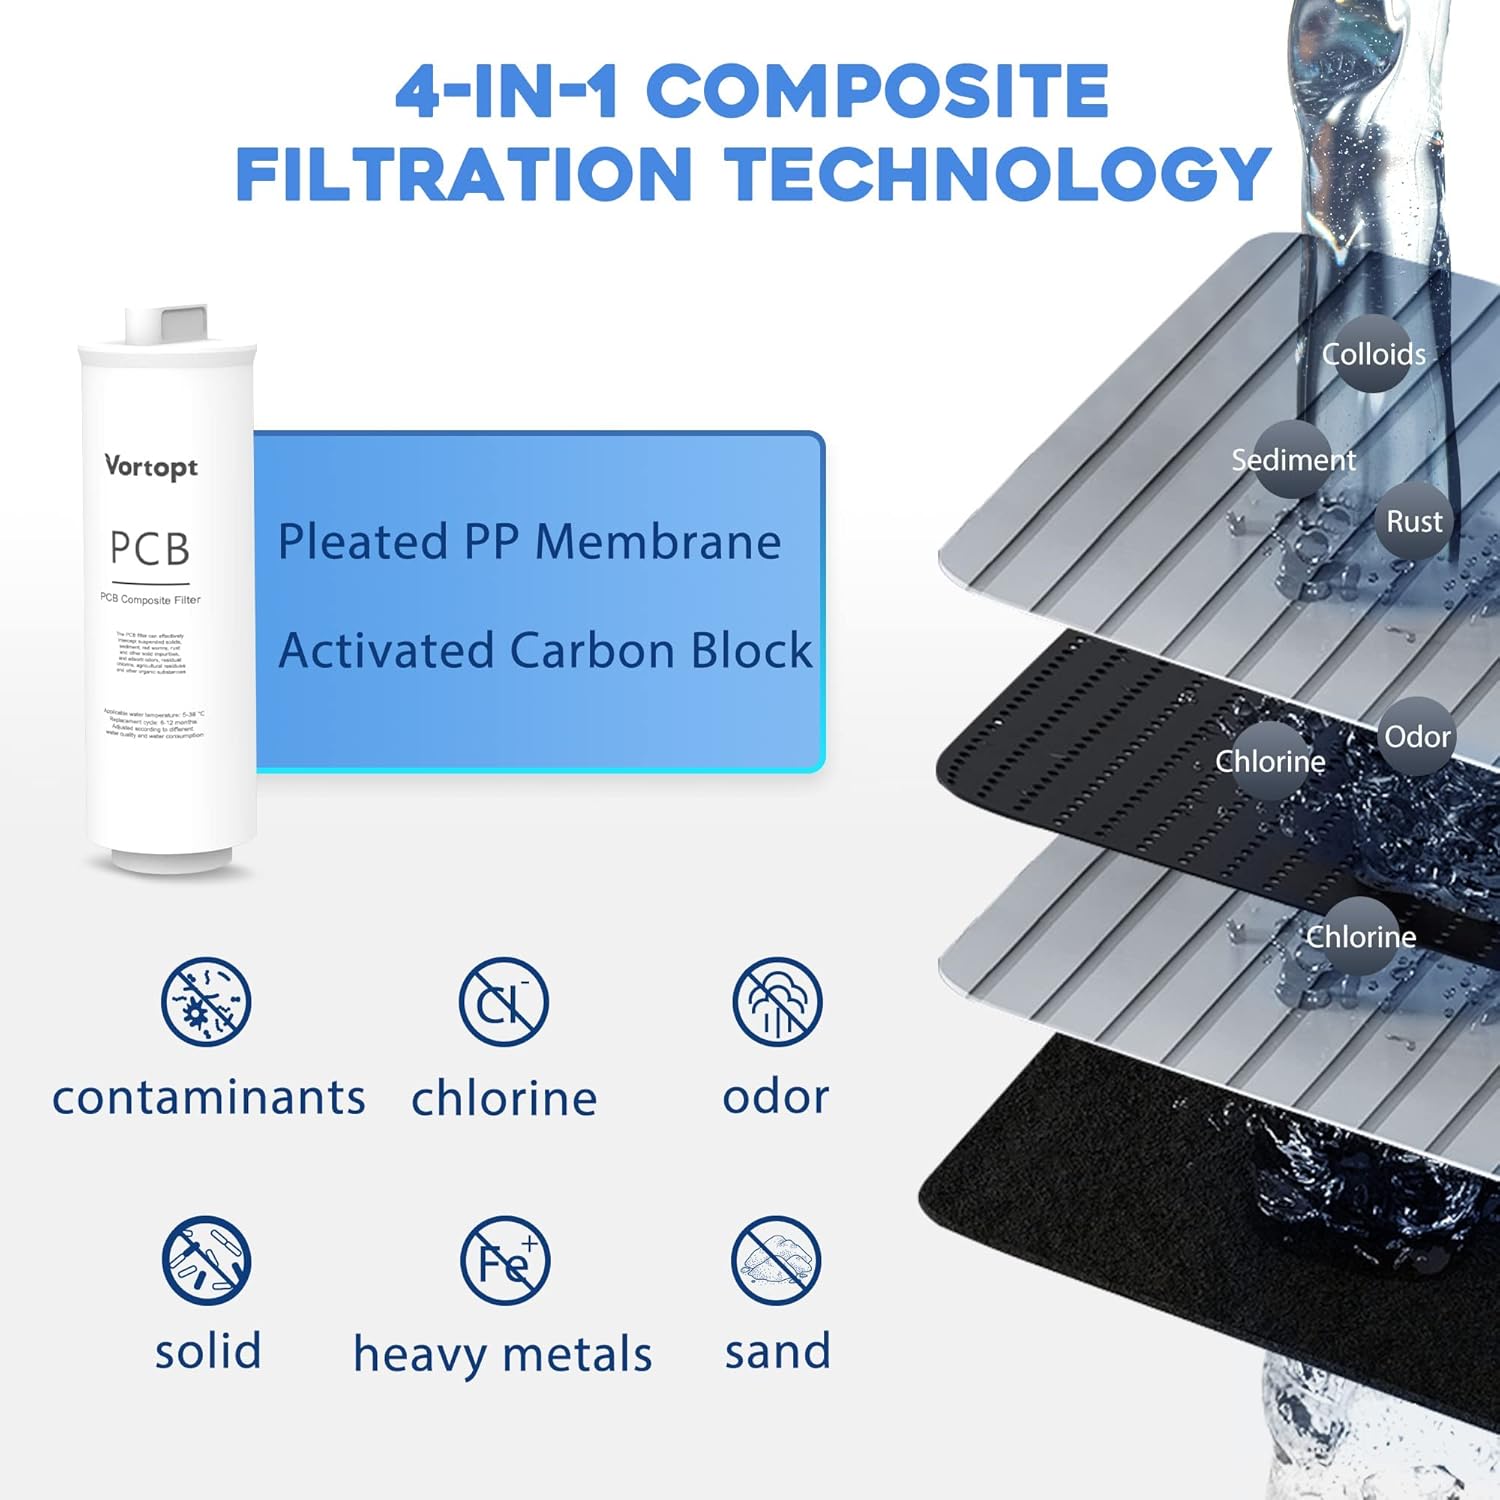
Image 6: Diagram illustrating the 4-in-1 composite PCB filtration technology, including pleated PP membrane and activated carbon block, for removing contaminants, chlorine, odor, solids, heavy metals, and sand.
5. Troubleshooting
| Problem | Possible Cause | Solution |
|---|---|---|
| No water from faucet | Water supply off; Storage tank empty; Clogged filters. | Check main water supply valve; Allow tank to fill; Replace filters. |
| Slow water flow | Low water pressure; Clogged filters; Air in system. | Check household water pressure; Replace filters; Flush system. |
| Water leaks | Loose connections; Damaged O-rings. | Tighten connections; Inspect and replace O-rings if damaged. |
| Bad taste/odor | Expired filters; Contamination. | Replace PCB and/or RO filters; Flush system thoroughly. |
If you encounter issues not listed here or if the solutions do not resolve the problem, please contact customer support.
6. Specifications
| Feature | Detail |
|---|---|
| Brand | Vortopt |
| Model Number | QR03 |
| Product Dimensions | 5"D x 5.1"W x 14.3"H |
| Material | RO Replacement Filter Cartridge and 2 PCB Replacement Filter Cartridge |
| External Testing Certification | NSF |
| RO Filter Lifetime | 24 to 36 Months |
| PCB Filter Lifetime | 6 to 12 Months (600GPD) |
7. Warranty Information
Vortopt products are manufactured to high-quality standards. For specific warranty details, please refer to the warranty card included with your product or visit the official Vortopt website. Keep your proof of purchase for warranty claims.
8. Customer Support
For technical assistance, replacement parts, or any questions regarding your Vortopt QR03 Reverse Osmosis System, please contact our customer support team:
- Website: Vortopt Official Store
- Email: [Insert Customer Support Email Here]
- Phone: [Insert Customer Support Phone Number Here]
Please have your model number (QR03) and purchase date ready when contacting support.