Introduction
This manual provides detailed instructions for the USKEYVISION Vlogging Kit R01 Pro Combo1. This comprehensive kit is designed to enhance content creation with an automatic face tracking tripod, a wireless lavalier microphone system, dual LED fill lights, and a remote control. Please read this manual thoroughly before use to ensure proper operation, maintenance, and to maximize the functionality of your device.
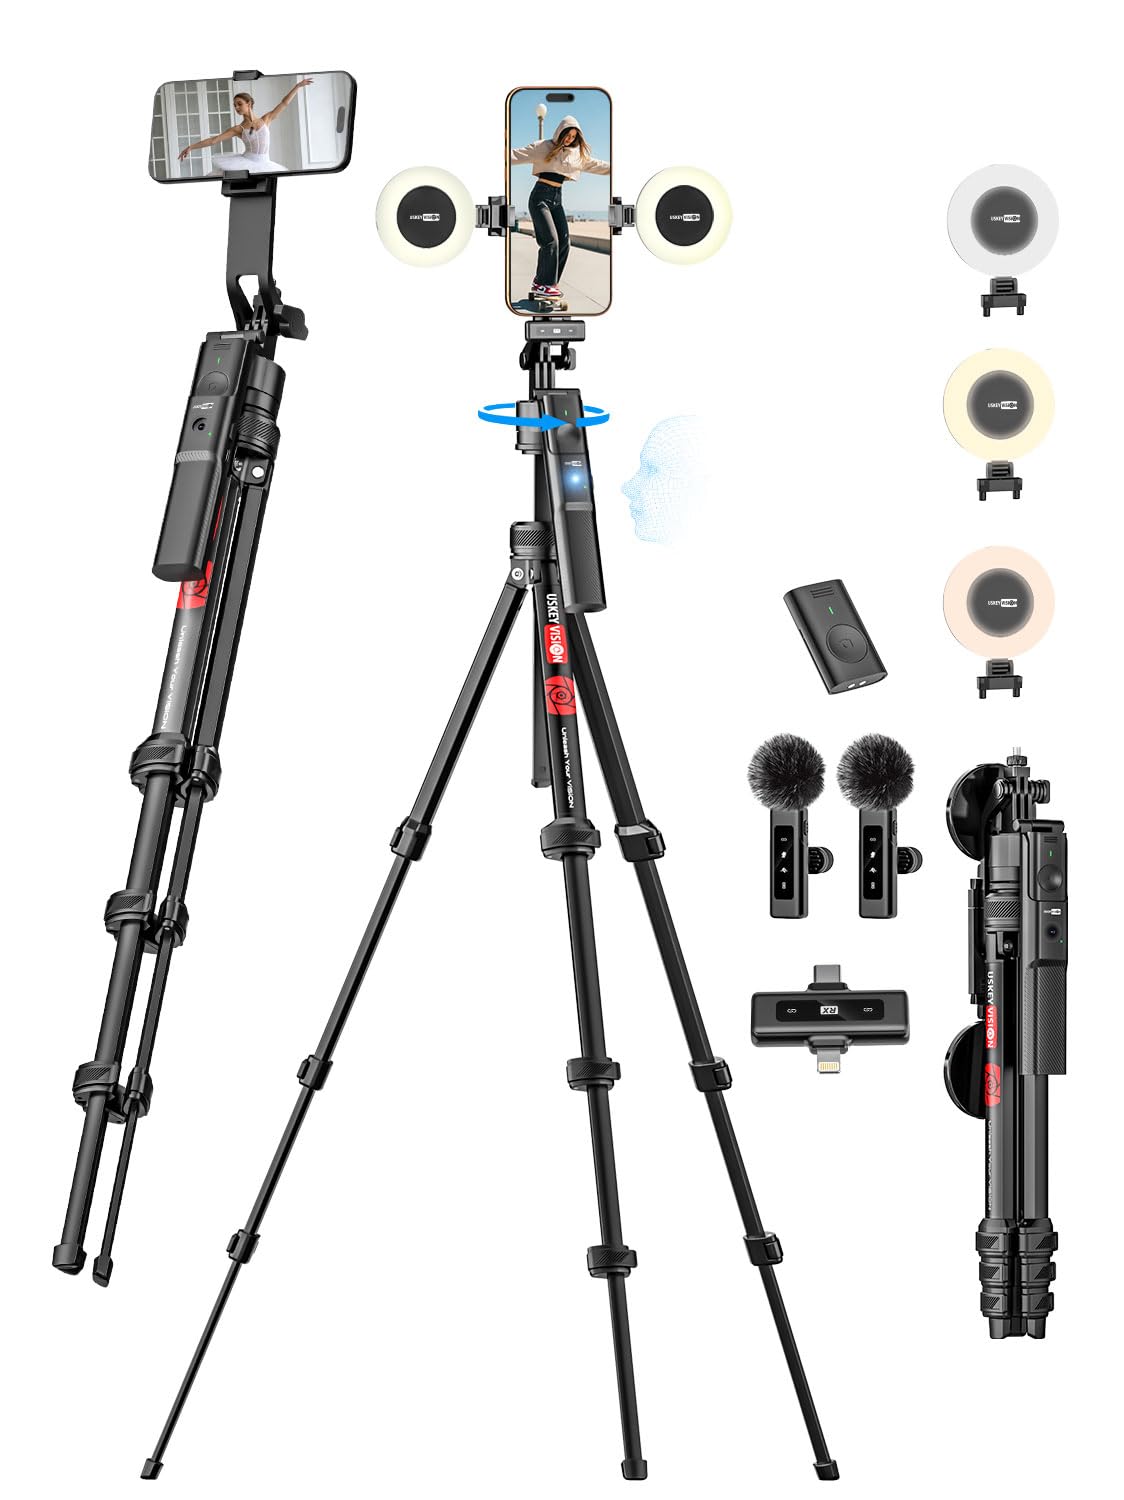
Image: Overview of the USKEYVISION Vlogging Kit R01 Pro Combo1, showcasing the tripod, phone holder, fill lights, and microphone.
Safety Information
- Do not expose the device to extreme temperatures, humidity, or direct sunlight.
- Keep the device away from water and other liquids.
- Do not attempt to disassemble or repair the device yourself. Contact customer support for assistance.
- Use only the provided charging cables and accessories.
- Ensure the tripod is stable on a flat surface before mounting a device.
What's in the Box
The USKEYVISION Vlogging Kit R01 Pro Combo1 includes the following components:
- Upgraded Automatic Face Tracking Tripod R01 Pro (1 unit)
- Phone Clip (1 unit, fits smartphones 2.1-2.87 inches wide; not compatible with foldable phones)
- LED Fill Light (2 units)
- Remote Control (1 unit)
- Microphone Transmitter (1 unit)
- Microphone Receiver (2 units)
- USB-C Charging Cable (4 units)
- User Manual (2 units)

Image: All components included in the USKEYVISION Vlogging Kit R01 Pro Combo1, neatly arranged.
Setup
1. Tripod Assembly and Height Adjustment
- Unfold the tripod legs and extend them to a stable position.
- Extend the central column to achieve the desired height. Secure it by twisting the locking mechanism. The tripod can extend from 34 inches to 74 inches.
- Attach the phone clip to the 1/4-inch threaded mount at the top of the tripod.
- Insert your smartphone into the phone clip. Ensure the phone is securely held. The clip supports smartphones with a width of 2.1 to 2.87 inches. Foldable phones are not recommended.

Image: Illustration showing various height configurations of the tripod, ranging from 15.74 inches to 50.39 inches (note: product specs state 34-74 inches).

Image: Diagram illustrating the wide compatibility of the tripod with various devices including smartphones (2.1-2.87 inches width), gimbals, compact cameras, action cameras, and ring lights via a 1/4-inch screw mount.
2. LED Fill Light Attachment
The two LED fill lights can be attached to the sides of the phone clip. Simply slide them into the designated slots until they click into place.
3. Wireless Lavalier Microphone Setup
- Charge the Microphone Components: Use the provided USB-C cables to fully charge the microphone transmitter(s) and receiver(s) before first use.
- Connect the Receiver: Plug the microphone receiver into your smartphone's charging port (USB-C or Lightning, depending on your phone model).
- Power On and Pair Transmitters: Long-press the power button on the microphone transmitter(s) to turn them on. The transmitter(s) and receiver will automatically pair. The pairing indicator light will flash during pairing and remain solid when connected.

Image: Step-by-step guide on automatic pairing of the wireless microphone: 1. Plug the receiver into the phone. 2. Press the transmitter power button. 3. Device is connected.
Operating Instructions
1. Automatic Face Tracking Tripod
The tripod features intelligent face tracking that automatically recognizes and follows your face to keep you centered in the frame. No additional app is required.
- Unlock the Switch: Before using face tracking, ensure the switch on the tripod head is in the unlocked position.
- Power On: Long-press the power button on the tripod to turn it on.
- Start Tracking (OK Gesture): Hold your hand in an "OK" gesture in front of the camera for 2 seconds to initiate face tracking. The tripod will begin to rotate and follow your movements.
- Stop Tracking (Palm Gesture): Hold your open palm in front of the camera for 2 seconds to stop face tracking.

Image: A person dancing while the tripod automatically tracks their face, demonstrating 360-degree rotation and movement tracking.

Image: Visual guide on how to use intelligent gesture control: Unlock switch, lift to unlock balance handle, long-press power button, use 'OK' gesture to start tracking, and 'Palm' gesture to stop tracking.
2. Wireless Lavalier Microphone
The wireless microphone system (2 Transmitters + 1 Receiver) captures clear audio with active noise reduction.
- Noise Reduction: The microphone automatically reduces ambient noise.
- Controls:
- Long Press Power Button: Power On/Off.
- Double-click Power Button: Turn on/off Mute mode.
- Triple-click Power Button: Turn on/off Reverberation effect.
- Range: Provides a stable audio recording range of up to 65 feet (20 meters).

Image: A visual representation of the noise reduction capability of the lavalier microphone, showing a 'before' (noisy) and 'after' (clear) sound wave comparison.
3. Adjustable LED Fill Lights
The two detachable LED fill lights provide adjustable illumination for various recording environments.
- Brightness Levels: Each light offers 3 brightness levels. Press the power button to cycle through them.
- Color Temperatures: Adjust between natural, cool, and warm lighting modes to suit your needs.

Image: Demonstration of the adjustable fill lights, showing three color temperature options: White, Natural, and Warm, each with a model illuminated by the respective light setting.
4. Detachable Remote Control
The remote control allows for convenient operation from a distance.
- Pairing: The remote control connects via Bluetooth. Turn on the remote and pair it with your smartphone through your phone's Bluetooth settings. Look for a device named 'Selfie' or similar.
- Range: Operates effectively up to 33 feet (10 meters).

Image: A person using the detachable remote control to operate the vlogging kit from a distance, with the phone mounted on the tripod.
Maintenance
- Cleaning: Use a soft, dry cloth to clean the surfaces of the tripod, lights, and microphones. Avoid using abrasive cleaners or solvents.
- Storage: Store the kit in a cool, dry place away from direct sunlight and extreme temperatures. When not in use for extended periods, ensure all components are fully charged before storage.
- Battery Care: For optimal battery life, avoid fully discharging the devices frequently. Recharge them regularly, even if not in constant use.
Troubleshooting
| Problem | Possible Cause | Solution |
|---|---|---|
| Face tracking not working. | Switch locked; incorrect gesture; low battery. | Ensure the tracking switch is unlocked. Use the correct 'OK' gesture. Charge the tripod. |
| Microphone not pairing or poor audio. | Not charged; not plugged in correctly; out of range; interference. | Ensure transmitters and receiver are charged. Re-plug the receiver. Move closer to the receiver. Avoid strong electromagnetic interference. |
| LED fill lights not turning on or dim. | Low battery; not securely attached. | Charge the fill lights. Ensure they are firmly attached to the phone clip. |
| Remote control not connecting. | Not paired; out of range; low battery. | Ensure remote is powered on and paired via Bluetooth. Move closer to the phone. Charge the remote. |
Specifications
| Feature | Detail |
|---|---|
| Model Name | R01 Pro |
| Brand | USKEYVISION |
| Material | Aluminum |
| Item Weight | 2.48 pounds |
| Maximum Height | 74 Inches |
| Minimum Height | 34 Inches |
| Compatible Devices | Smartphones (Width of 2.1"-2.87", Foldable phones not recommended), compact camera |
| Special Feature | Rotatable, Auto Face Tracking, Gesture Control |
| Batteries | 1 Lithium Ion batteries required (included) |
Warranty and Support
USKEYVISION products are covered by a limited warranty. For specific warranty details, please refer to the warranty card included in your product packaging or visit the official USKEYVISION website. If you encounter any issues or require technical assistance, please contact USKEYVISION customer support through their official channels. Please have your product model and purchase information ready when contacting support.


