
1. Introduction
This manual provides essential instructions for the safe and proper installation, operation, and maintenance of your INTERGREAT 10 Rifle Gun Safe. Please read this manual thoroughly before using the product and retain it for future reference. Ensure all users are familiar with its contents.
Important Safety Information:
- Always store firearms unloaded and locked within the safe.
- Keep the safe locked and keys/passcodes secured away from children and unauthorized individuals.
- Do not store emergency keys or external power boxes inside the safe.
- Install the safe in a secure location, preferably bolted to a wall or floor, to prevent unauthorized removal.
2. Product Overview and Components
The INTERGREAT 10 Rifle Gun Safe is designed to provide secure storage for your firearms and valuables. It features a high-density cold-rolled steel plate construction, an anti-theft and anti-pry system, and a digital keypad lock with emergency key access.
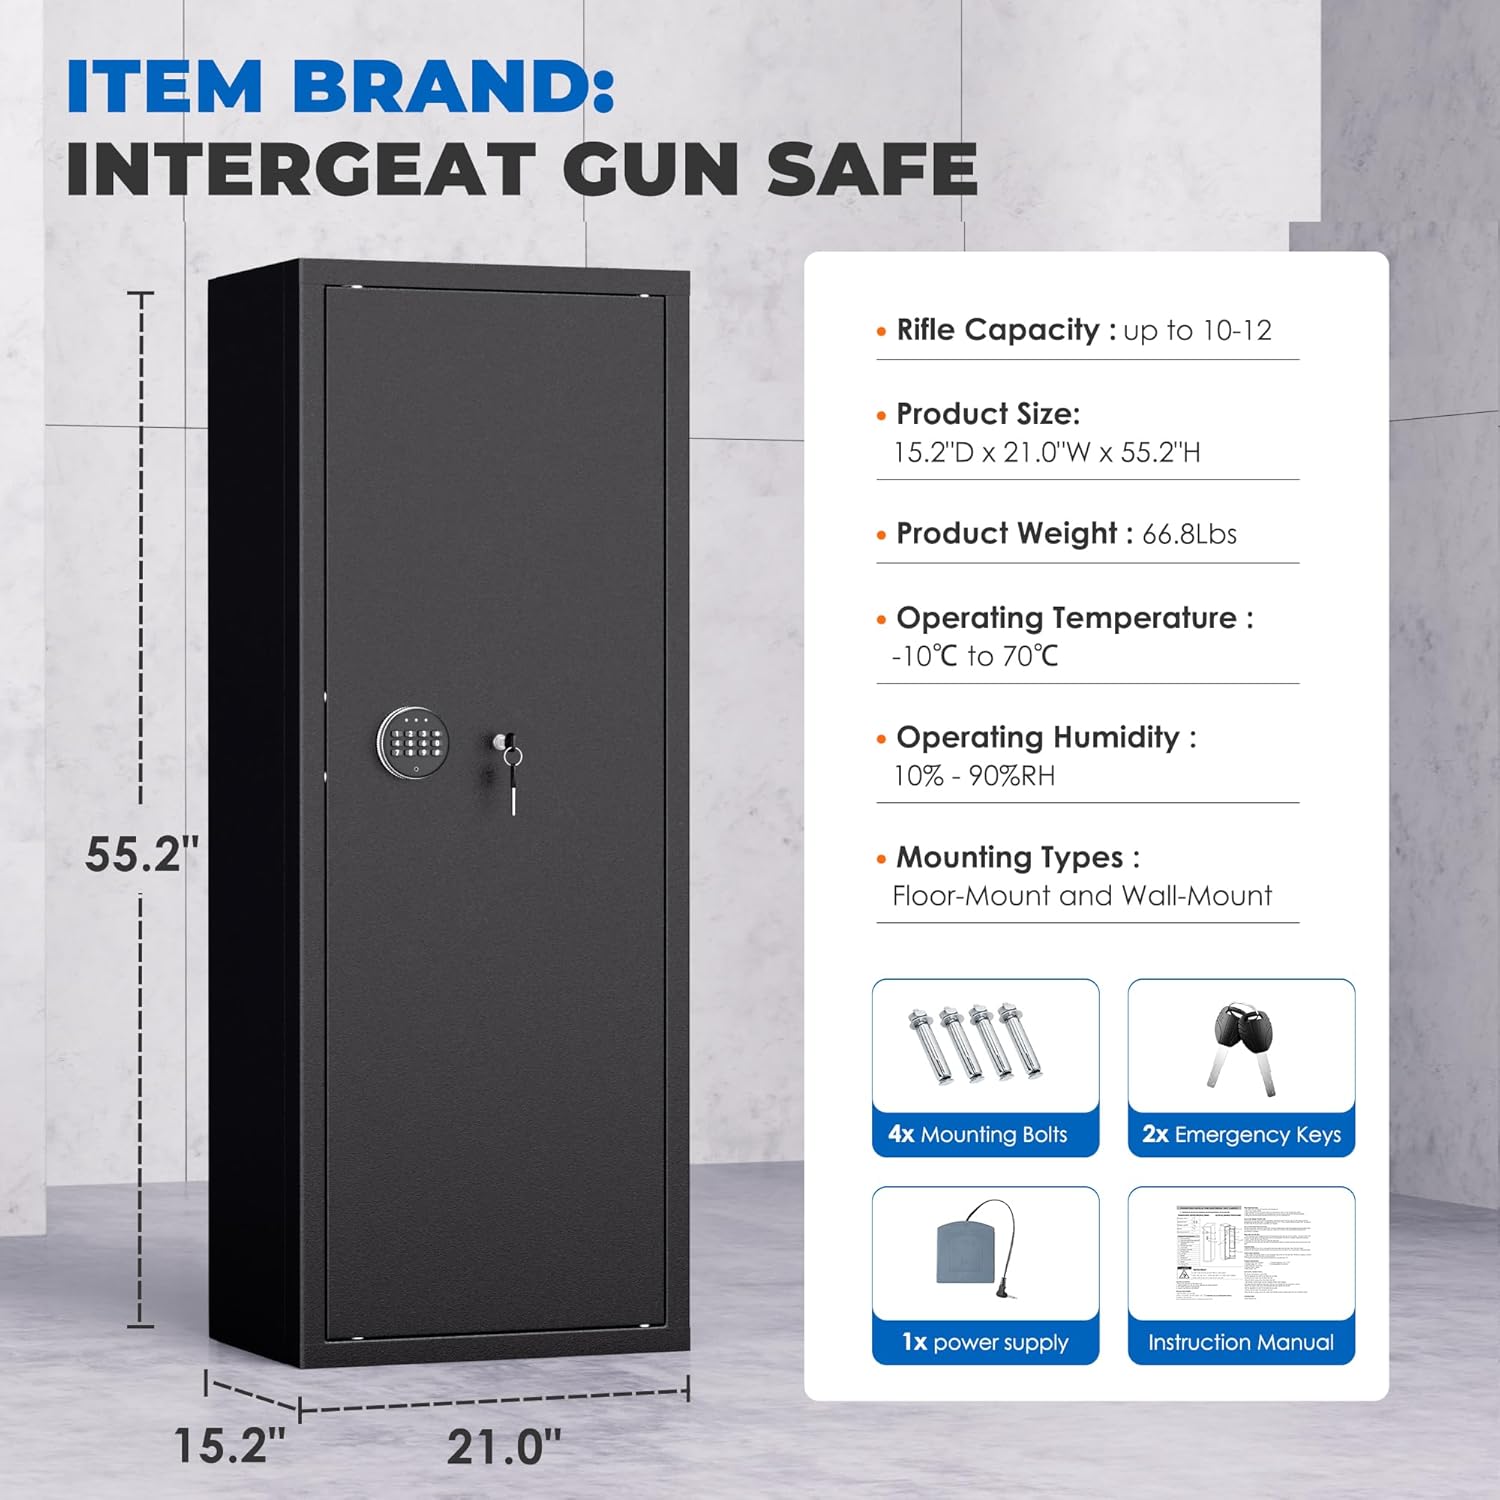
Image: The INTERGREAT 10 Rifle Gun Safe, showing its dimensions (15.2"D x 21.0"W x 55.2"H) and included accessories: 4x Mounting Bolts, 2x Emergency Keys, 1x Power Supply, and Instruction Manual.
Key Features:
- Durable Construction: Made of high-density cold-rolled steel plate for enhanced security.
- Anti-theft & Anti-pry System: Features a 30-inch thick alloy anti-pry steel door, 4 x 20mm solid locking bolts, and hidden hinges.
- Large Capacity: Accommodates up to 10 rifles.
- Customizable Interior: Includes 3 removable gun racks, an adjustable top shelf (120 lbs capacity), and 4 pistol storage pockets on the door.
- Dual Locking Mechanism: Digital keypad with personalized password and physical emergency key access.
- Alarm System: Vibration alarm and alarm buzzer for enhanced security.

Image: Detailed view of the safe's interior, highlighting the adjustable shelf, LED lighting, lock bolt mechanism, 4 pistol pockets, bullet bag, and handgun bag.
3. Setup and Installation
3.1 Unpacking
Carefully remove the safe from its packaging. Inspect the safe for any damage. Ensure all included components are present: 1 Handgun Bag, 2 Bullet Bags, 4 Expansion Bolts, 4 Pistol Pockets, and Emergency Power Supply.
3.2 Mounting the Safe
For maximum security, it is highly recommended to mount the safe to a wall or floor using the provided expansion bolts. This prevents unauthorized removal and tipping.
- Measure Location: Identify the desired location for the safe. Mark the positions for the pre-set drill holes on the wall or floor.
- Drill Holes: Drill holes at the marked locations suitable for the expansion bolts.
- Insert Anchors: Carefully press the anchors into the drilled holes.
- Secure Safe: Position the safe and align its pre-drilled holes with the anchors. Mount the safe by running screws through the safe's holes into the anchors and securing them tightly.

Image: Step-by-step guide for mounting the safe using 4 expansion bolts, illustrating measuring, inserting anchors, fixing the part, and securing the safe.
3.3 Initial Code Setup
Refer to the specific instructions provided with your safe for setting the initial digital password. Typically, this involves opening the safe with the emergency key, locating the reset button inside, pressing it, and then entering your desired new code on the keypad followed by a confirmation key (e.g., '#'). Test the new code with the door open before closing it.
4. Operation
4.1 Opening the Safe
Your safe offers multiple ways to access its contents:
- Digital Password + Knob: Enter your personalized digital password on the keypad, then turn the knob to open the door.
- Override Key + Knob: In case of forgotten password or battery depletion, insert the emergency override key into the keyhole, turn it, and then turn the knob to open the door.
- External Power Box: If the internal batteries are depleted and you do not have the emergency key readily available, connect the external power box to the designated port on the safe. This will power the keypad, allowing you to enter your digital password and open the safe.

Image: Visual representation of the three access methods: Digital Password + Knob, Override Key + Knob, and External Power Box. A critical reminder states: "TIP: please do not leave the emergency keys & external power box in your safe!"
4.2 Alarm Features
The safe is equipped with security alarms:
- Vibration Alarm: Press the '#' key on the keypad to activate the vibration alarm. The system will enter an alert state and trigger an alarm if the safe detects significant vibration or movement.
- Alarm Buzzer: If an incorrect password is entered three consecutive times, the alarm buzzer will activate for one minute. To silence the alarm, enter the correct code.

Image: Illustration of the safe's alarm system, detailing the vibration alarm (activated by pressing '#') and the alarm buzzer (triggered after three incorrect code entries).
4.3 Interior Organization
The safe's interior is designed for flexible storage:
- Removable Gun Racks: The three specialized rifle positions are equipped with detachable gun racks, allowing you to customize the layout based on your firearm collection.
- Adjustable Shelf: The top shelf can be adjusted to accommodate various items and has a load-bearing capacity of 120 pounds.
- Pistol Storage Pockets: Six door pockets are provided for convenient storage of handguns and ammunition.
5. Maintenance
5.1 Cleaning
The rifle gun cabinet's material offers excellent temperature and corrosion resistance, making it convenient for daily cleaning. Use a soft, damp cloth to wipe down the exterior and interior surfaces. Avoid abrasive cleaners or solvents that could damage the finish or electronic components.
5.2 Battery Replacement
The digital keypad is powered by batteries (type and quantity typically specified in a separate quick start guide or on the battery compartment itself). When batteries are low, the keypad may indicate this with a warning light or sound. Replace batteries promptly to ensure continuous operation. Use the external power box if batteries are completely depleted before replacement.
6. Troubleshooting
- Keypad Not Responding: Check battery levels. Use the external power box or emergency key to open the safe. Replace batteries if necessary.
- Alarm Sounds Continuously: If the alarm buzzer sounds after incorrect code entries, enter the correct code to disarm it. If the vibration alarm is active, ensure the safe is stable and not being disturbed. Deactivate the vibration alarm by pressing '#' again or by opening the safe with the correct code.
- Door Not Opening: Ensure the correct digital password is entered. If using the emergency key, ensure it is fully inserted and turned correctly. Check for any obstructions preventing the door from opening.
- Difficulty Setting Code: Ensure you are following the specific instructions for code setting. If the reset button is not responding, ensure the safe door is fully open and the batteries are fresh.
7. Specifications
| Feature | Detail |
|---|---|
| Brand | INTERGREAT |
| Model | 10 Rifle Gun Safe |
| Color | Black |
| Material | High-density cold-rolled steel plate (Metal) |
| Product Dimensions (D x W x H) | 15.2" x 21" x 55.2" |
| Rifle Capacity | Up to 10 rifles |
| Lock Type | Keypad (Digital Password) with Emergency Key |
| Mounting Type | Floor Mount, Wall Mountable |
| Adjustable Shelf Load Capacity | 120 Pounds |
| Included Components | 1 Handgun Bag, 2 Bullet Bags, 4 Expansion Bolts, 4 Pistol Pockets, Emergency Power Supply |
| Assembly Required | Yes |
8. Customer Support
For any questions, concerns, or assistance with your INTERGREAT 10 Rifle Gun Safe, please contact our professional after-sales team. We are available 24 hours a day to provide solutions and ensure your issues are handled properly.
Please refer to the product packaging or the INTERGREAT official website for specific contact information (e.g., phone number, email address, support portal).