ACMER P1 S PRO
ACMER P1 S Pro 6W Laser Engraver User Manual
Model: P1 S PRO | Brand: ACMER
1. Introduction
This manual provides essential information for the safe and efficient operation of your ACMER P1 S Pro 6W Laser Engraver. Please read it thoroughly before use and retain it for future reference.
The ACMER P1 S Pro is a versatile laser engraving and cutting machine designed for various materials, offering high precision and a large working area for creative projects.

Image: The ACMER P1 S Pro Laser Engraver, ideal for home and business DIY projects.
2. Safety Information
WARNING: Laser radiation can cause eye and skin damage. Always wear protective goggles when operating the machine. Never look directly into the laser beam.
- Operate the machine in a well-ventilated area to avoid inhaling fumes from engraved materials.
- Keep flammable materials away from the working area.
- Ensure the machine is placed on a stable, level surface.
- Do not leave the machine unattended during operation.
- Keep children and pets away from the machine.
- The P1 S Pro is tested to IEC 60825-1 Class 4 laser standards. Protective laser goggles with 97% UV filtration are included.
Image: Safety Always Protected. Always wear the provided protective laser goggles during operation.
3. Product Overview
The ACMER P1 S Pro features a robust design and advanced capabilities for precise engraving and cutting.
Key Features:
- Powerful 6W Dual-Beam Laser: Equipped with an ultra-fine 0.06 mm spot for 0.01 mm engraving precision.
- High Speed: Reaches speeds up to 10,000 mm/min.
- Cutting Capability: Cuts 12 mm wood or 8 mm acrylic in a single pass.
- Large Working Area: 380x370 mm (14.96x14.57 inches) for oversized designs and batch production.
- Multi-Device Connectivity: Supports WiFi, USB, and TF card file transfer.
- Wide Material Compatibility: Engraves on wood, bamboo, acrylic, leather, cardboard, anodized aluminum, coated metals, glass, and more.
- Modular Frame Design: Allows for quick assembly and easy maintenance.
- Movement Protection: Automatic shutdown if the machine is moved during operation.

Image: The ACMER P1 S Pro Laser Engraver, showcasing its overall design and working area.

Image: Illustration of the ultra-fine laser precision with a 0.06mm spot and 0.01mm accuracy.
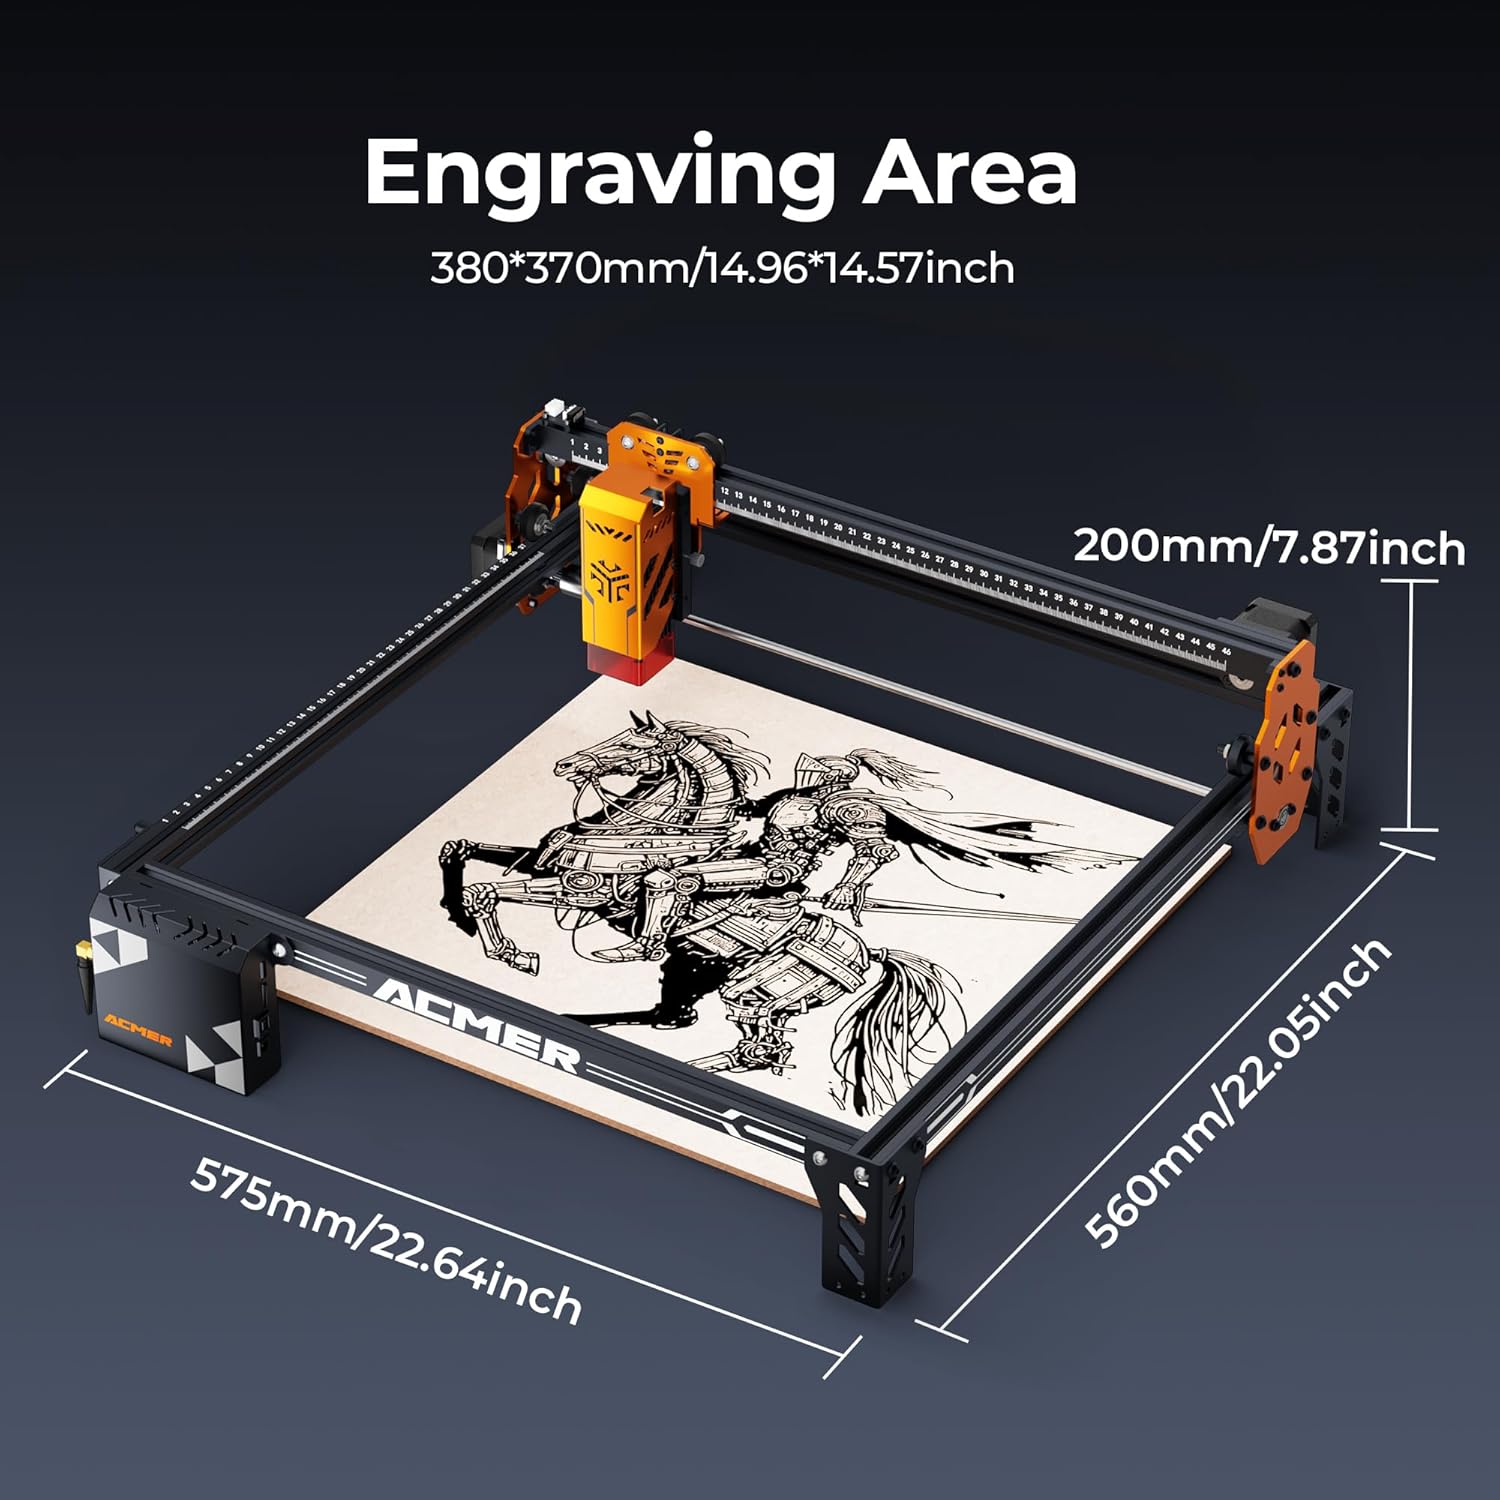
Image: Diagram showing the large engraving area of 380x370mm and overall machine dimensions.
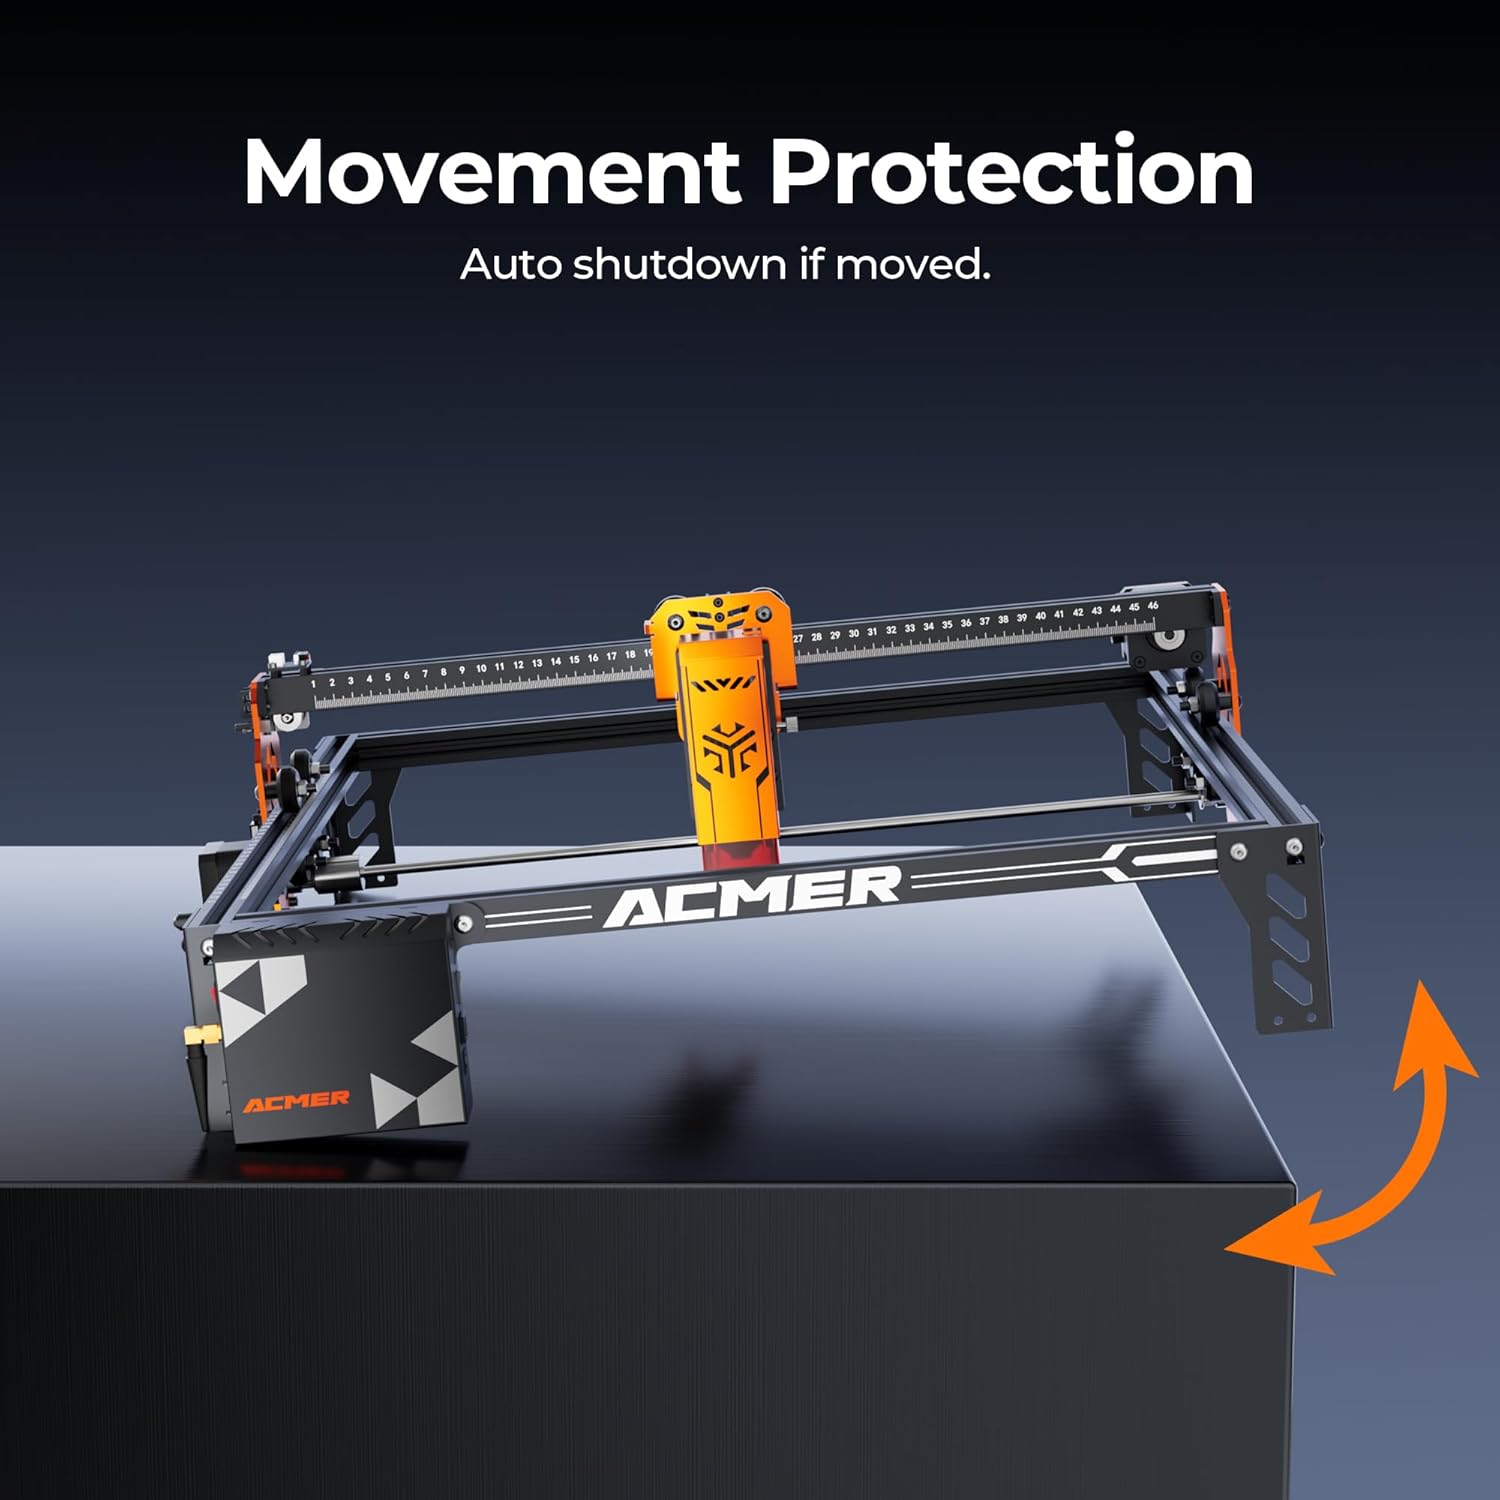
Image: Visual representation of the movement protection feature, showing auto-shutdown if the machine is moved.

Image: Details on the all-metal support frame and stable four-wheel structure for enhanced carving quality.

Image: Features including the large working area, convenient measuring ruler, and high-performance ESP32 MCU.

Image: Features like corrugated tubing for efficient cable organization and separated motor/laser module design for stability.

Image: Information on the new eye protection design and the ultra-thin engraving line capability.
4. Setup Instructions
Follow these steps to assemble and prepare your ACMER P1 S Pro for first use.
- Unpacking: Carefully remove all components from the packaging. Verify that all parts listed in the packing list are present.
- Frame Assembly: Assemble the modular frame components according to the included quick start guide. Ensure all screws are tightened securely.
- Laser Module Installation: Mount the laser module onto the X-axis carriage. Connect the necessary cables.
- Cable Management: Use the corrugated tubing to organize and secure all cables, preventing them from interfering with the laser path.
- Power Connection: Connect the power adapter to the machine and then to a suitable power outlet.
- Software Installation: Install the recommended engraving software (e.g., LaserGRBL, LightBurn) on your computer or the mobile app on your device.
- Connectivity: Connect the engraver to your computer via USB, or set up WiFi connectivity as per the software instructions. You may also use a TF card for file transfer.

Image: The machine demonstrating its WiFi connectivity feature, allowing control via smartphone.
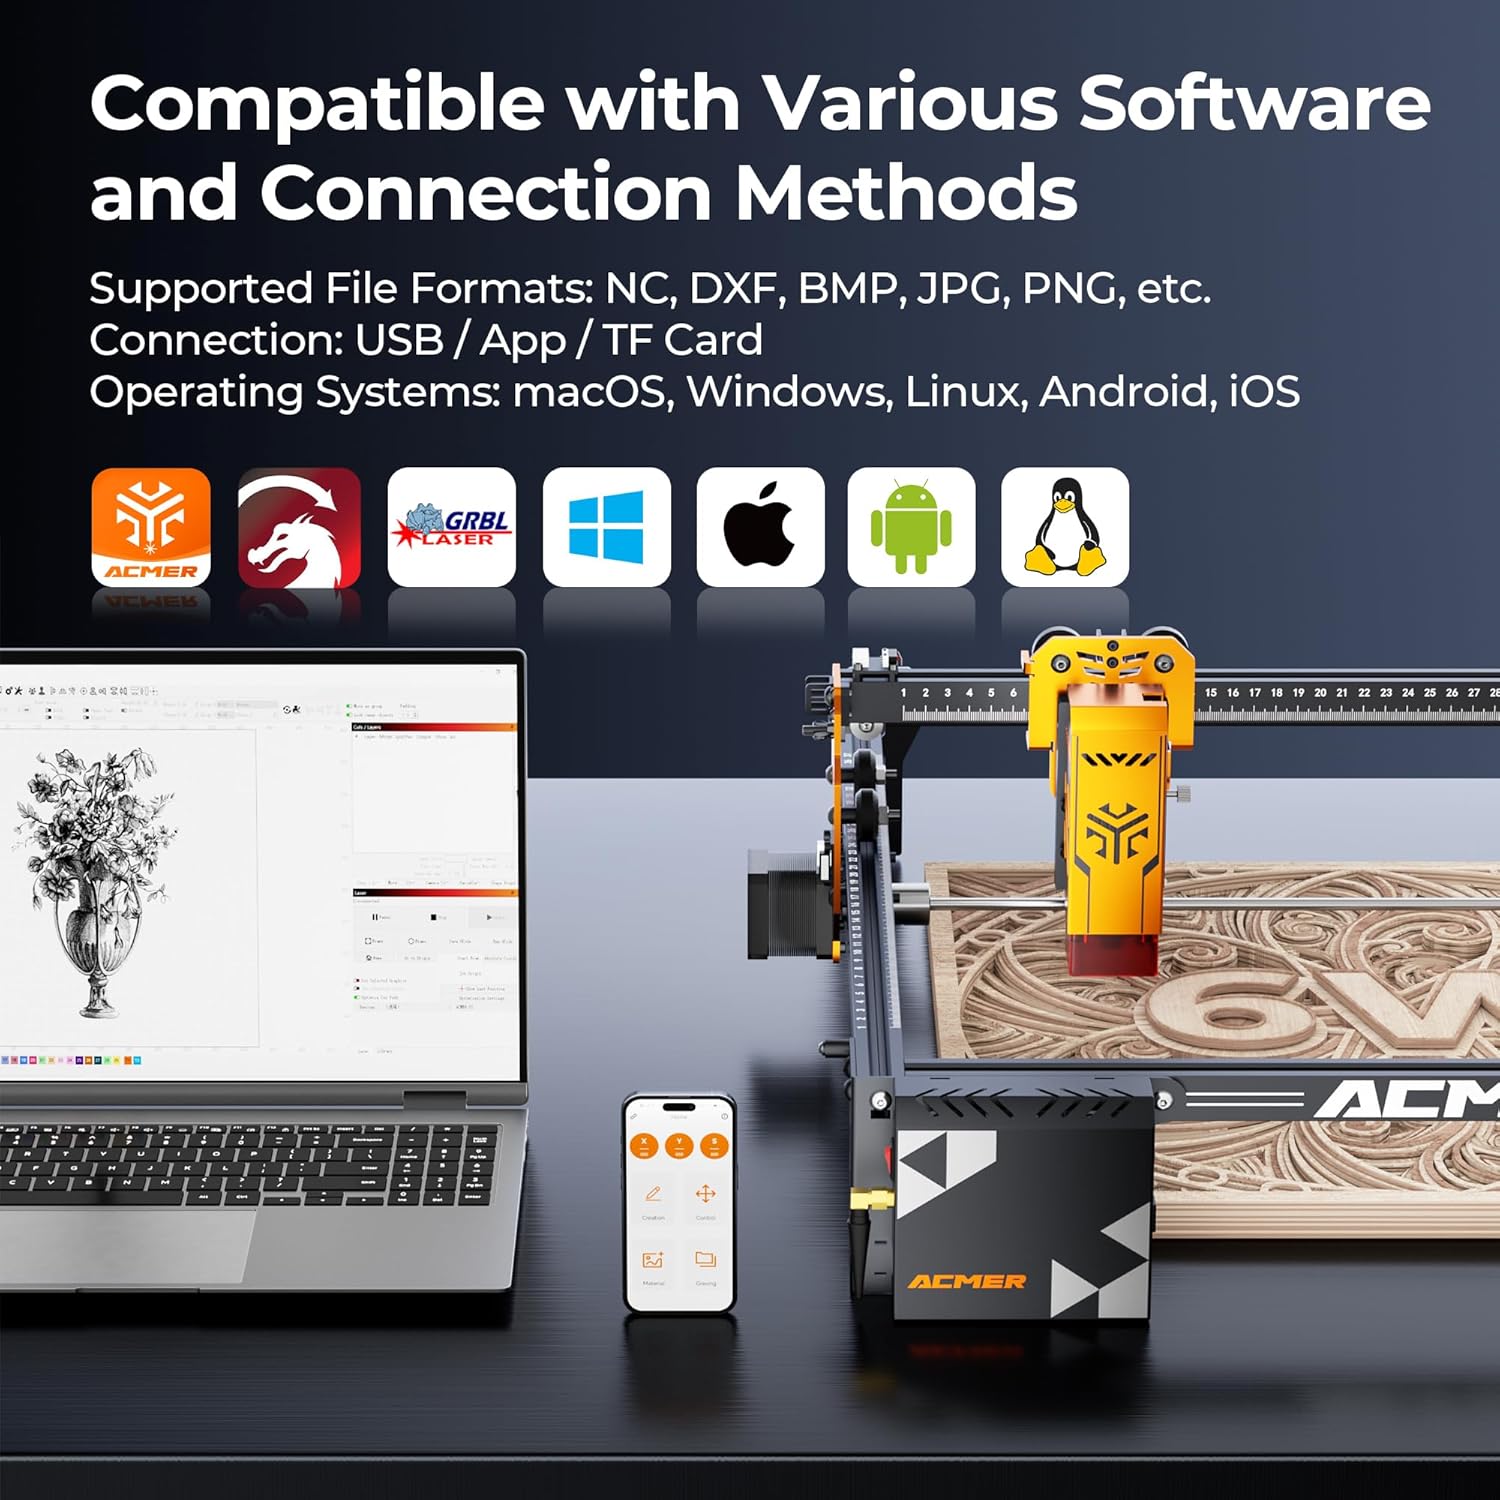
Image: Overview of compatible software and connection methods, including PC and mobile applications.

Image: Visual detailing the wide compatibility with various engraving software like LaserGRBL and LightBurn, supporting Windows, macOS, Android, and iOS.
5. Operating Instructions
This section outlines the basic steps for operating your laser engraver.
- Material Placement: Place the material to be engraved or cut onto the working surface. Use the convenient measuring ruler for precise positioning.
- Design Preparation: Open your design file in the chosen software. Adjust parameters such as laser power, speed, and passes according to the material type and desired outcome.
- Focus Adjustment: Adjust the laser focus as required for your material thickness.
- Start Operation: Initiate the engraving or cutting process from the software. Monitor the machine during operation.
- Rotary Attachment (Optional): If engraving curved objects, attach the optional rotary attachment and configure software settings accordingly.
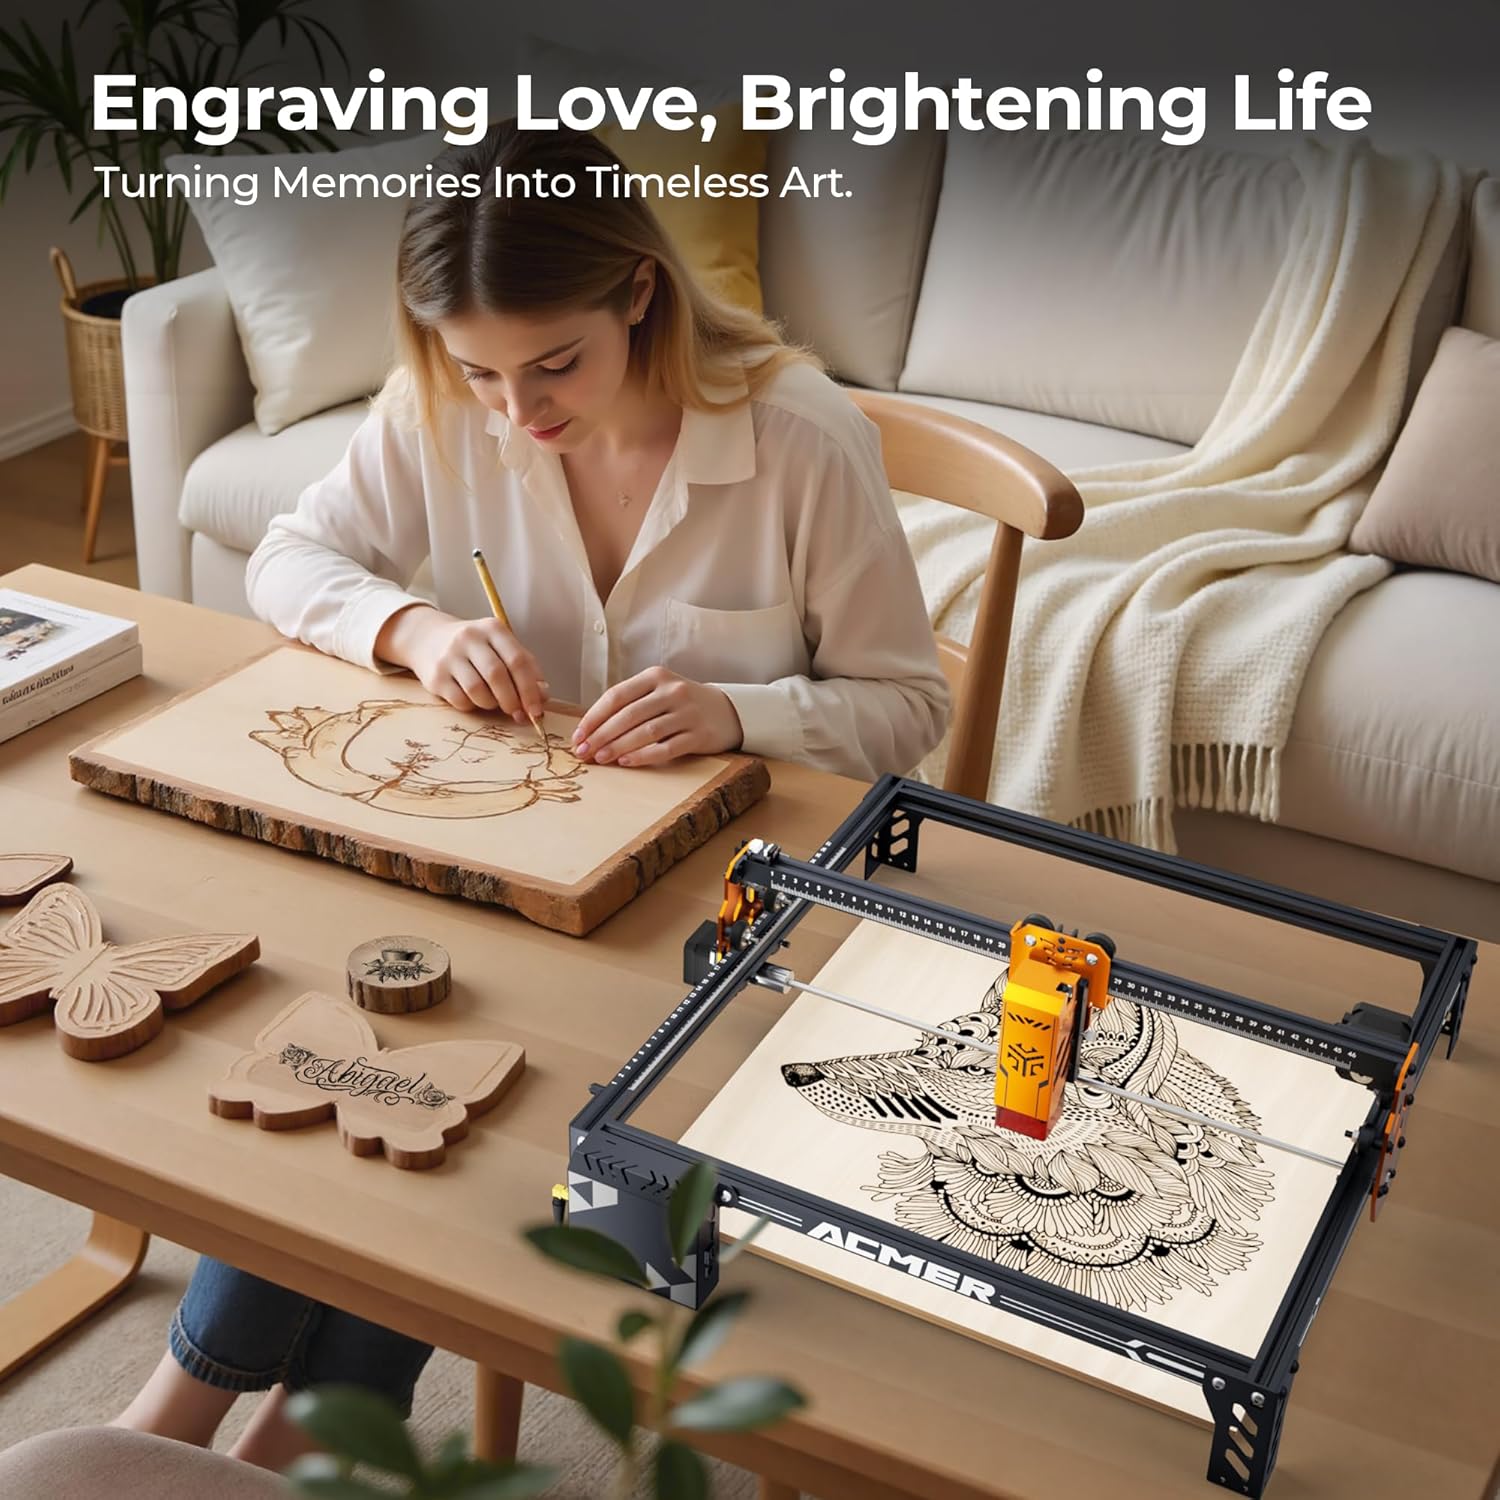
Image: A user operating the ACMER P1 S Pro to engrave a design onto a wooden surface.

Image: An example of using the ACMER P1 S Pro for creating intricate craft pieces.

Image: Illustrates the capability for one computer to control multiple laser engraving machines simultaneously, enhancing productivity.
6. Maintenance
Regular maintenance ensures optimal performance and extends the lifespan of your engraver.
- Cleaning the Laser Lens: Periodically clean the laser lens with a soft, lint-free cloth and lens cleaning solution to maintain engraving quality.
- Dust Removal: Use compressed air or a soft brush to remove dust and debris from the machine, especially from moving parts and ventilation openings.
- Lubrication: Apply a small amount of lubricant to the guide rails and lead screws as recommended in the detailed manual to ensure smooth movement.
- Firmware Updates: Check for and install any available firmware updates to ensure your machine has the latest features and performance improvements.
7. Troubleshooting
This section addresses common issues you might encounter.
| Problem | Possible Cause | Solution |
|---|---|---|
| Laser not firing | Power cable loose, software error, laser module fault. | Check power connections. Restart software and machine. Consult support if issue persists. |
| Poor engraving quality | Incorrect focus, dirty lens, wrong power/speed settings, material issue. | Adjust laser focus. Clean the lens. Verify software settings for material. Test on scrap material. |
| Machine not connecting | USB cable issue, WiFi network problem, driver not installed. | Try a different USB port/cable. Reconfigure WiFi. Reinstall drivers. |
| Movement protection triggered | Machine was bumped or moved during operation. | Ensure the machine is on a stable surface. Restart the job after securing the machine. |
8. Specifications
| Feature | Detail |
|---|---|
| Model | P1 S PRO |
| Laser Power | 6W (6000mW) Dual-Beam |
| Spot Size | 0.06 mm |
| Engraving Precision | 0.01 mm |
| Engraving Speed | Up to 10,000 mm/min |
| Working Area | 380 x 370 mm (14.96 x 14.57 inches) |
| Connectivity | WiFi, USB, TF Card |
| Supported OS | macOS, Windows, Linux, Android, iOS |
| Product Dimensions | 1 x 1 x 1 inches (Note: This dimension from product data may refer to packaging or a component, not the full machine footprint.) |
| Item Weight | 11.26 pounds |
| Manufacturer | Acmer |
9. Warranty and Support
ACMER products come with a standard manufacturer's warranty. Please refer to the warranty card included with your product for specific terms and conditions.
For technical support, troubleshooting assistance, or warranty claims, please contact ACMER customer service through their official website or the contact information provided in your product packaging.

Image: ACMER provides dedicated customer support for product assistance.

Image: Various certifications demonstrating compliance with international standards.
Ask a question about this manual
Ask about setup, troubleshooting, compatibility, parts, safety, or missing instructions. Manuals+ will review the question and use this page’s manual context to help answer it.