Introduction
This manual provides detailed instructions for the assembly, operation, and maintenance of your GOEBLESON 64.2” Dimmable Floor Lamp and Small Table Lamp Bundle. Please read this manual thoroughly before installation and use to ensure safe and efficient operation. Keep this manual for future reference.
Safety Instructions
- Ensure the power is off before installation, cleaning, or bulb replacement.
- Do not use the lamp in wet locations or near water.
- Use only bulbs that comply with the specified wattage and base type (E26).
- Keep the lamp away from flammable materials.
- Do not attempt to modify or repair the lamp yourself. Contact qualified personnel for service.
- Ensure all connections are secure before plugging into a power outlet.
Package Contents
Verify that all components are present before beginning assembly:
- Floor Lamp Shade
- Floor Lamp Pole Sections
- Floor Lamp Base
- Foot Switch (integrated with floor lamp cord)
- A19 LED Bulb (for floor lamp)
- Magnetic Remote Control
- Small Table Lamp with Shade and Wooden Base
- Instruction Manual

Image: Floor lamp components including the shade, foot switch, A19 bulb, and magnetic remote control.
Setup Instructions
Floor Lamp Assembly
- Carefully unpack all components and place them on a clean, flat surface.
- Thread the power cord through the floor lamp base.
- Screw the first pole section into the base, ensuring it is tightened securely.
- Continue screwing the remaining pole sections together, ensuring the cord passes through each section without twisting.
- Attach the lamp head assembly to the top pole section.
- Gently place the floor lamp shade onto the lamp head.
- Install the provided A19 LED bulb into the E26 socket.

Image: Floor lamp dimensions and E26 bulb compatibility details.
Small Table Lamp Setup
- Unpack the table lamp. The shade and wooden base are pre-assembled.
- Install an E26 base bulb (not included) into the socket.
- Place the lamp on a stable, flat surface.
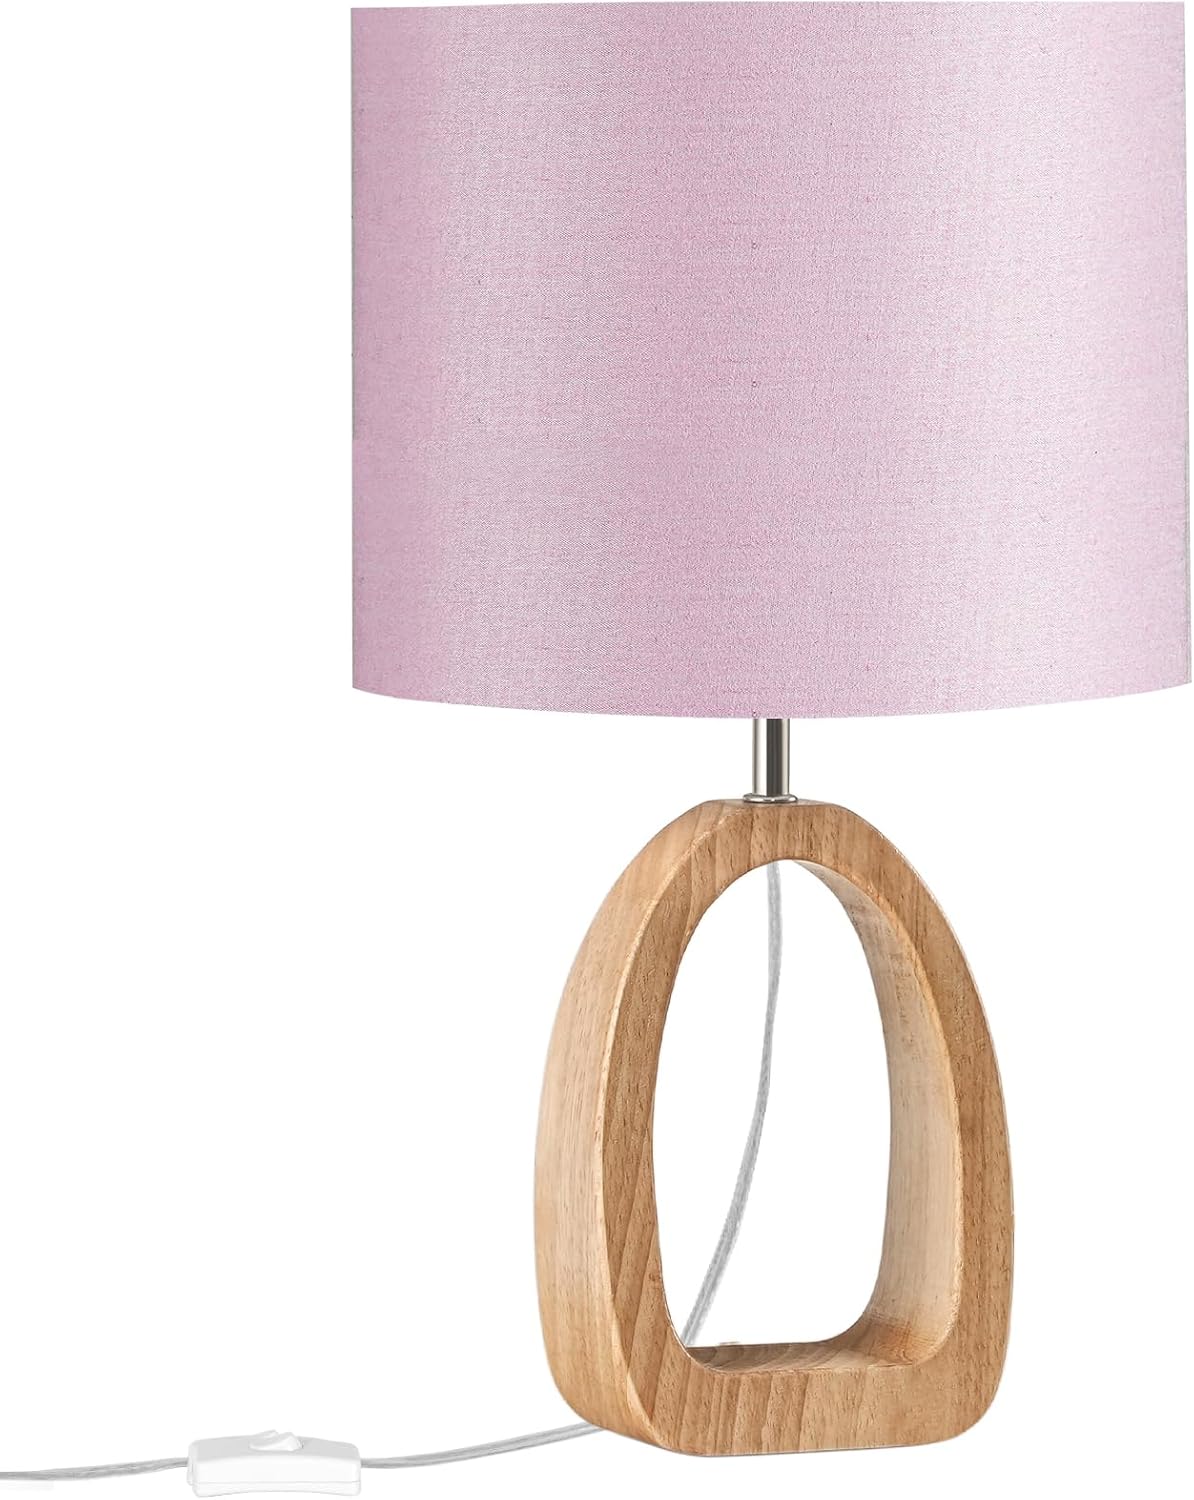
Image: Close-up of the small table lamp, highlighting its pink linen shade and wooden base.
Operating Instructions
Floor Lamp Operation
The floor lamp can be controlled using the magnetic remote control or the integrated foot switch.
- Foot Switch: Press the foot switch located on the power cord to turn the lamp ON or OFF.
- Magnetic Remote Control: The remote allows for advanced control. It can be magnetically attached to the lamp pole for convenient storage.

Image: Floor lamp demonstrating 3 color temperatures (3000K, 4500K, 6500K) and dimming capabilities.
Remote Control Functions:
- Power Button: Turns the lamp ON/OFF.
- Brightness Adjustment: Use '+' and '-' buttons to adjust brightness from 10% to 100%.
- Color Temperature Adjustment: Use 'K+' and 'K-' buttons to cycle through color temperatures: 3000K (Warm White), 4500K (Natural White), and 6500K (Daylight).
- 1-Hour Timer: Press the timer button to set the lamp to automatically turn off after one hour.
- Mode Selection: Buttons for 'Working Mode', 'Nursery Mode', 'Night Light Mode', and 'Reading Mode' provide preset brightness and color temperature settings.
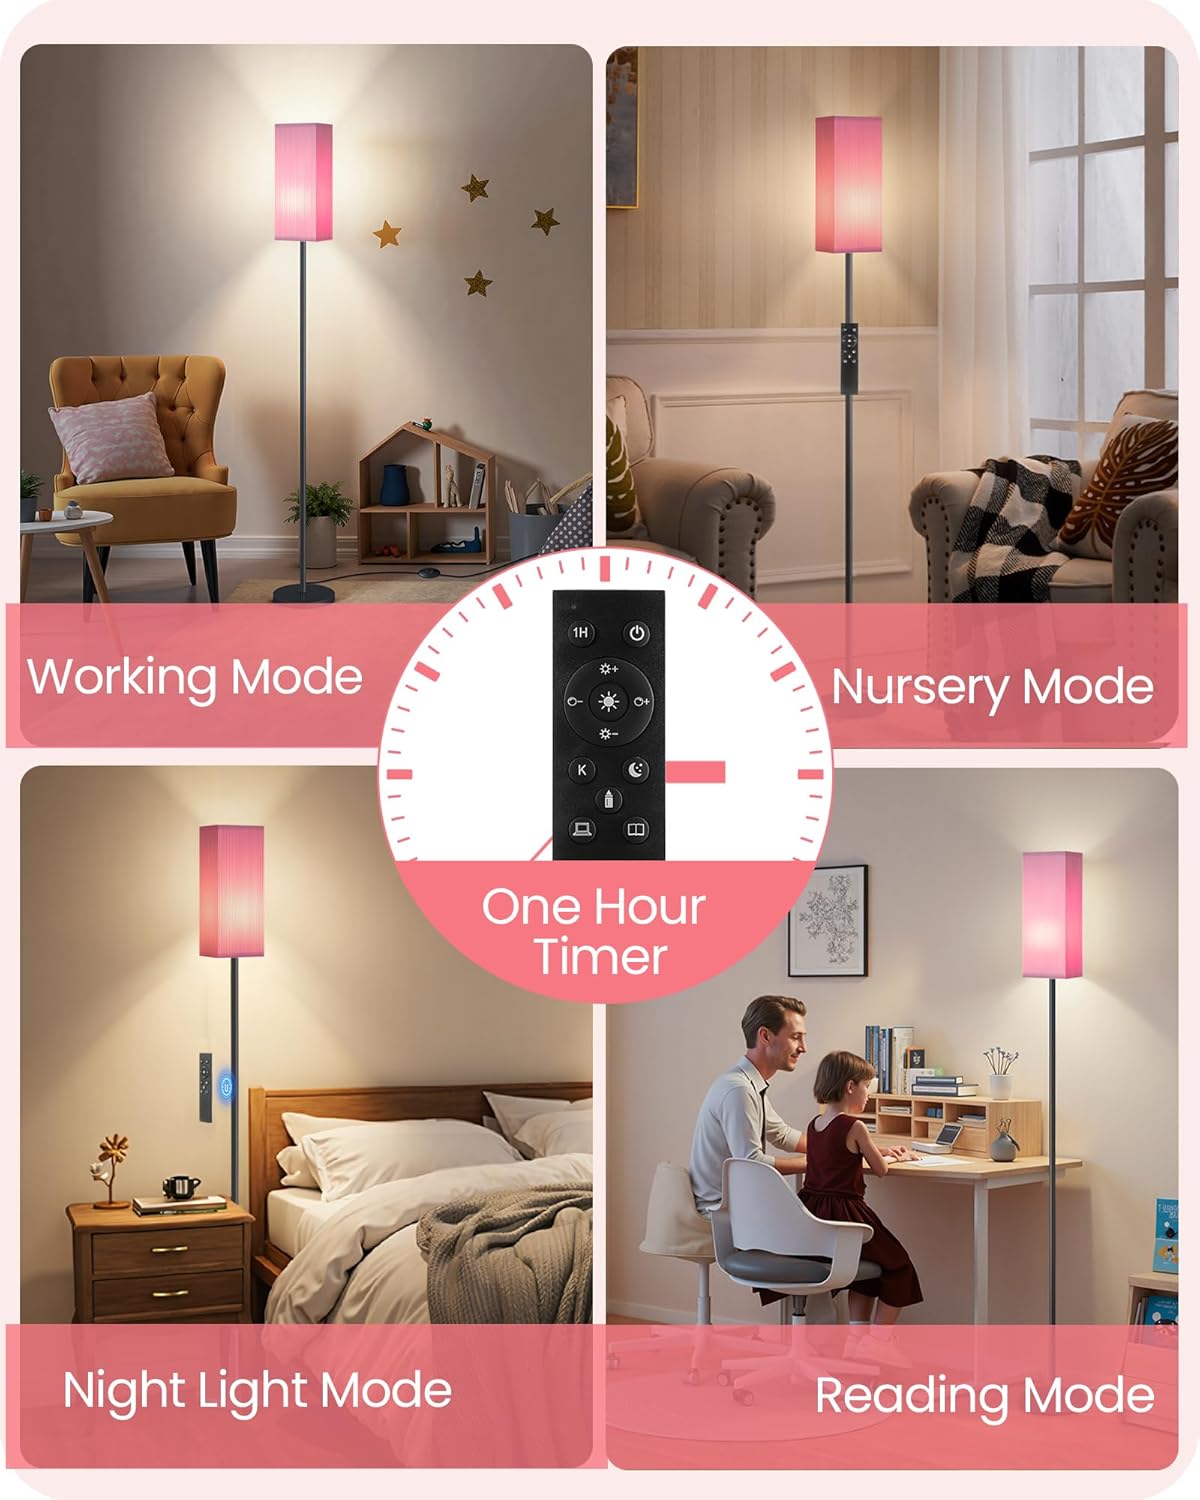
Image: Remote control displaying buttons for different lighting modes and a 1-hour timer.
Small Table Lamp Operation
The small table lamp is operated via an inline switch on its power cord. Press the switch to turn the lamp ON or OFF.
Maintenance
- Cleaning: Disconnect the lamp from power before cleaning. Wipe the lamp and shade with a soft, dry cloth. Do not use abrasive cleaners or solvents.
- Bulb Replacement: Ensure the lamp is unplugged and the bulb has cooled before attempting to replace it. Unscrew the old bulb and screw in a new E26 base bulb (up to 60W for the floor lamp, refer to table lamp specifications for its maximum wattage).
Troubleshooting
| Problem | Possible Cause | Solution |
|---|---|---|
| Lamp does not turn on. | No power, loose bulb, faulty bulb, remote battery dead. | Check power outlet, ensure plug is fully inserted. Tighten or replace bulb. Replace remote batteries. |
| Remote control not working. | Remote batteries are dead or incorrectly inserted. Remote is too far from the lamp. | Replace remote batteries, ensuring correct polarity. Move closer to the lamp. |
| Light flickers or dims unexpectedly. | Loose bulb, unstable power supply, incompatible bulb. | Tighten bulb. Check power source. Ensure bulb is compatible with dimming function. |
Specifications
- Brand: GOEBLESON
- Model: P17LD05-MP07TL05
- Floor Lamp Height: 64.2 inches (163 cm)
- Floor Lamp Shade Dimensions: 5.5 inches (14 cm) width x 12.2 inches (31 cm) height
- Floor Lamp Base Diameter: 7.9 inches (20 cm)
- Bulb Type (Floor Lamp): A19 LED (included)
- Bulb Base: E26 (Standard)
- Max Wattage (Floor Lamp): Up to 60W (LED equivalent recommended)
- Color Temperatures (Floor Lamp): 3000K (Warm White), 4500K (Natural White), 6500K (Daylight)
- Dimming Range (Floor Lamp): 10% - 100%
- Control Method (Floor Lamp): Magnetic Remote Control, Foot Switch
- Control Method (Table Lamp): Inline Switch
- Material: Metal, Fabric (Linen), Wood
Warranty and Support
GOEBLESON products are designed for quality and reliability. For warranty information or technical support, please refer to the contact details provided with your purchase documentation or visit the official GOEBLESON website. Please have your model number (P17LD05-MP07TL05) ready when contacting support.