1. Introduction
This manual provides essential information for the safe and correct installation, operation, and maintenance of your new Generic replacement heating element. This heating element is designed for compatibility with Kenmore Dryer Model 110.96585200. Please read these instructions thoroughly before proceeding with installation or any maintenance.
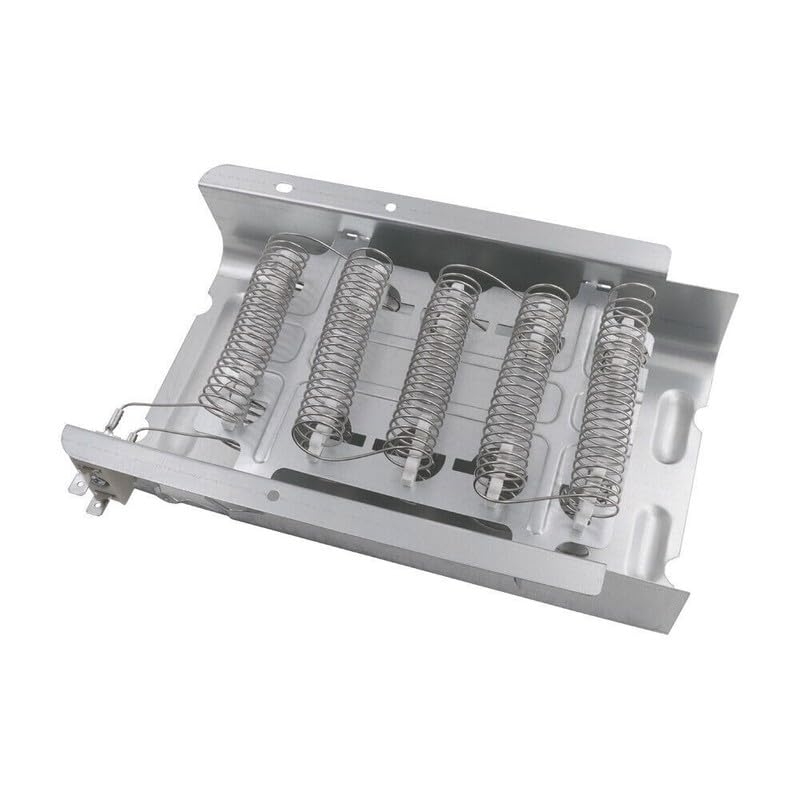
This image displays the replacement heating element. It features multiple coiled heating wires supported by ceramic insulators within a galvanized metal frame. Electrical terminals are visible at one end for connection.
2. Safety Information
WARNING: Risk of Electric Shock, Fire, or Injury.
- Always disconnect power to the dryer at the circuit breaker or fuse box before attempting any installation, repair, or maintenance.
- Installation should only be performed by a qualified technician or a person with adequate electrical and appliance repair experience.
- Wear appropriate personal protective equipment, including gloves and eye protection, during installation.
- Ensure all electrical connections are secure and correctly wired according to the dryer's wiring diagram.
- Do not operate the dryer if any part is damaged or improperly installed.
- Keep flammable materials away from the dryer.
3. Package Contents
Verify that all components are present upon opening the package:
- 1 x Generic Replacement Heating Element (Part Number: FENE-MJP-HEA-PL-121125-16202)
4. Specifications
| Manufacturer | Feneparts |
| Part Number | FENE-MJP-HEA-PL-121125-16202 |
| Compatible Dryer Model | Kenmore 110.96585200 |
| Size | Fixed |
| Color | White/Black/Gray |
| Item Package Quantity | 1 |
| Number Of Pieces | 1 |
5. Installation (Setup)
IMPORTANT: Always refer to the specific service manual for your Kenmore dryer model 110.96585200 for detailed disassembly and reassembly instructions, as procedures may vary. The following is a general guide.
Tools You May Need:
- Screwdrivers (Phillips and flathead)
- Nut drivers or wrenches
- Pliers
- Multimeter (for testing, optional but recommended)
Installation Steps:
- Disconnect Power: Unplug the dryer from the electrical outlet or turn off the circuit breaker supplying power to the dryer. Verify power is off using a voltage tester.
- Access the Heating Element: Depending on your dryer model, you may need to remove the back panel, front panel, or top panel to access the heating element housing. Carefully follow your dryer's service manual for this step.
- Locate and Disconnect Old Element: Identify the heating element assembly. Disconnect the electrical wires attached to the heating element terminals. Note their positions for correct reattachment.
- Remove Old Element: Unfasten any screws, clips, or brackets holding the old heating element in place. Carefully remove the old element from its housing.
- Install New Element: Position the new Generic replacement heating element into the housing, ensuring it sits correctly and securely. Fasten it with the screws, clips, or brackets removed earlier.
- Reconnect Wires: Reattach the electrical wires to the terminals of the new heating element, ensuring they are secure and match the original configuration. Double-check all connections.
- Reassemble Dryer: Carefully reassemble the dryer panels, ensuring all screws and fasteners are tightened.
- Test Operation: Plug the dryer back into the electrical outlet or restore power at the circuit breaker. Run a short cycle with no load to confirm the dryer heats properly and operates without unusual noises or smells. Monitor for the first few minutes.
6. Operation
The heating element functions automatically as part of the dryer's normal operation. Once installed, it requires no direct user interaction. The dryer's control panel will manage the heating cycles based on the selected settings. Ensure proper airflow by regularly cleaning the lint filter and dryer vent to maintain optimal performance and longevity of the heating element.
7. Maintenance
Regular maintenance of your dryer helps extend the life of the heating element and ensures efficient operation:
- Clean Lint Filter: Clean the lint filter before or after every load to prevent lint buildup, which can restrict airflow and cause the heating element to overheat.
- Inspect Dryer Vent: Periodically inspect and clean the dryer vent system (from the dryer to the exterior of your home) to remove lint accumulation. A clogged vent can lead to overheating and potential fire hazards.
- Visual Inspection: During routine dryer cleaning or maintenance, visually inspect the heating element for any signs of damage, such as broken coils or discoloration. If damage is observed, disconnect power and consult a qualified technician.
8. Troubleshooting
If your dryer is experiencing issues related to heating, consider the following common troubleshooting steps. Always disconnect power before inspecting internal components.
| Problem | Possible Cause | Solution |
|---|---|---|
| Dryer produces no heat |
|
|
| Dryer takes too long to dry |
|
|
If troubleshooting does not resolve the issue, it is recommended to contact a qualified appliance repair technician for diagnosis and repair.
9. Warranty and Support
For information regarding warranty coverage, returns, or technical support for this Generic replacement heating element, please contact the seller or manufacturer (Feneparts) directly. Keep your purchase receipt as proof of purchase.