1. Important Safety Information
Please read all instructions carefully before using the appliance and retain them for future reference. Failure to follow these instructions may result in electric shock, fire, or serious injury.
- Do not immerse the appliance, cord, or plug in water or other liquids to prevent electric shock.
- Ensure the voltage indicated on the appliance corresponds to your local mains voltage before connecting.
- Always supervise children when the appliance is in use.
- Do not operate the appliance if the plug, power cord, or the appliance itself is damaged.
- Place the appliance on a stable, heat-resistant surface, away from walls or other appliances to allow adequate air circulation.
- Do not cover the air inlet or outlet vents during operation.
- Automatic Power-Off: The appliance features an automatic power-off function when the pot is removed, enhancing safety during operation.
- Always unplug the appliance when not in use and before cleaning. Allow it to cool down completely before handling.
- Do not use accessories not recommended by the manufacturer.
2. Product Overview
The Generic 3L Smart Air Fryer is designed to cook a variety of foods using hot air circulation, reducing the need for oil. It features an intuitive LED touchscreen for easy operation.
Key Features:
- Oil-Free Technology: Cooks food with minimal to no oil, promoting healthier eating.
- Spacious 3L Capacity: The 3-liter pot can accommodate up to 10 chicken wings, suitable for families or entertaining.
- Fast and Efficient: 1100 watts of power allows for quick cooking without preheating, saving time and energy.
- Versatile Cooking: Capable of preparing various dishes, including French fries, fried chicken, grilled fish, and pizza.
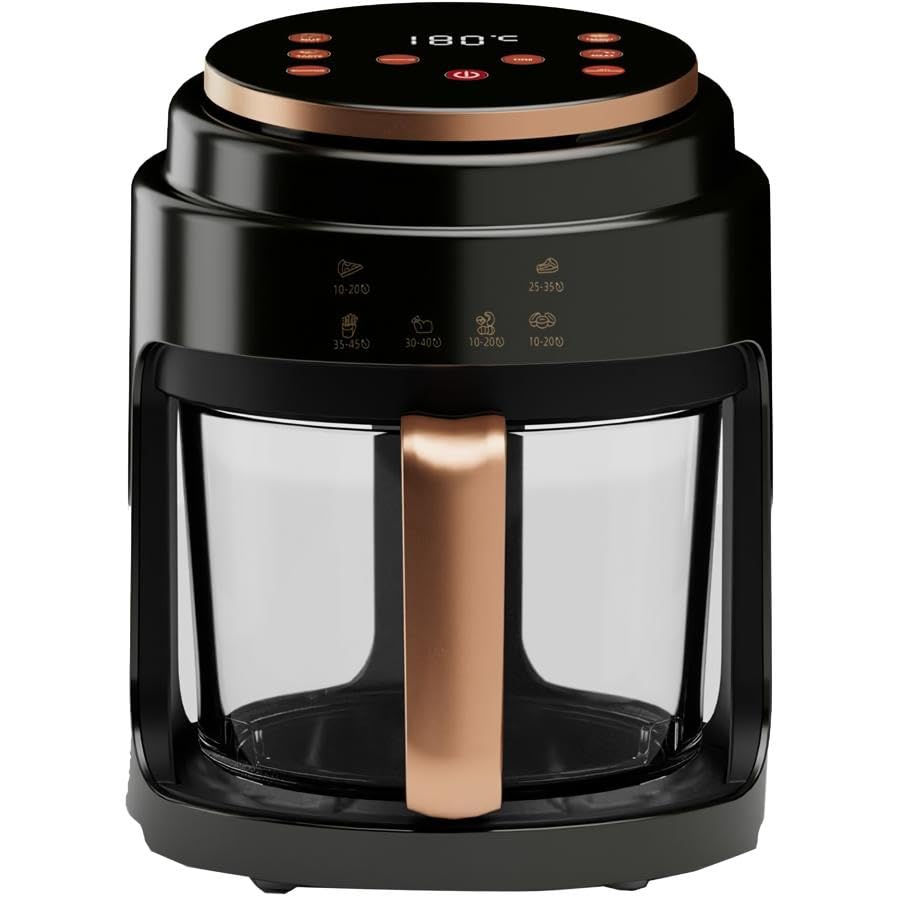
Figure 2.1: Front view of the Generic 3L Smart Air Fryer.
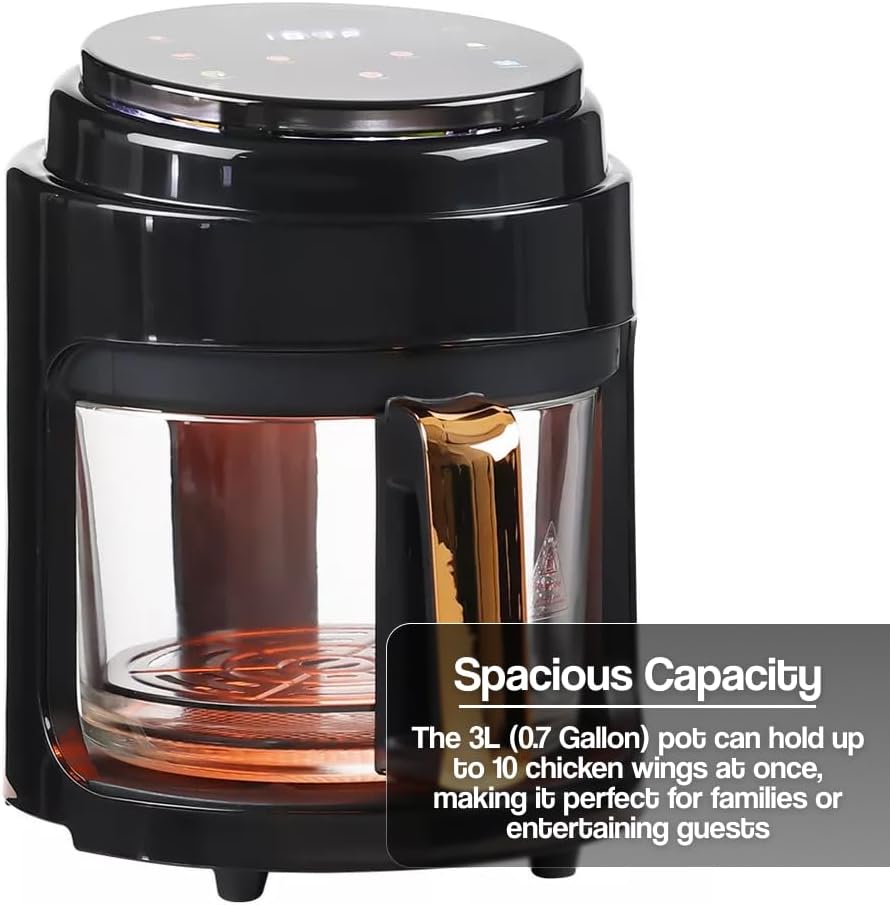
Figure 2.2: The spacious 3L pot, capable of holding multiple food items like chicken wings.
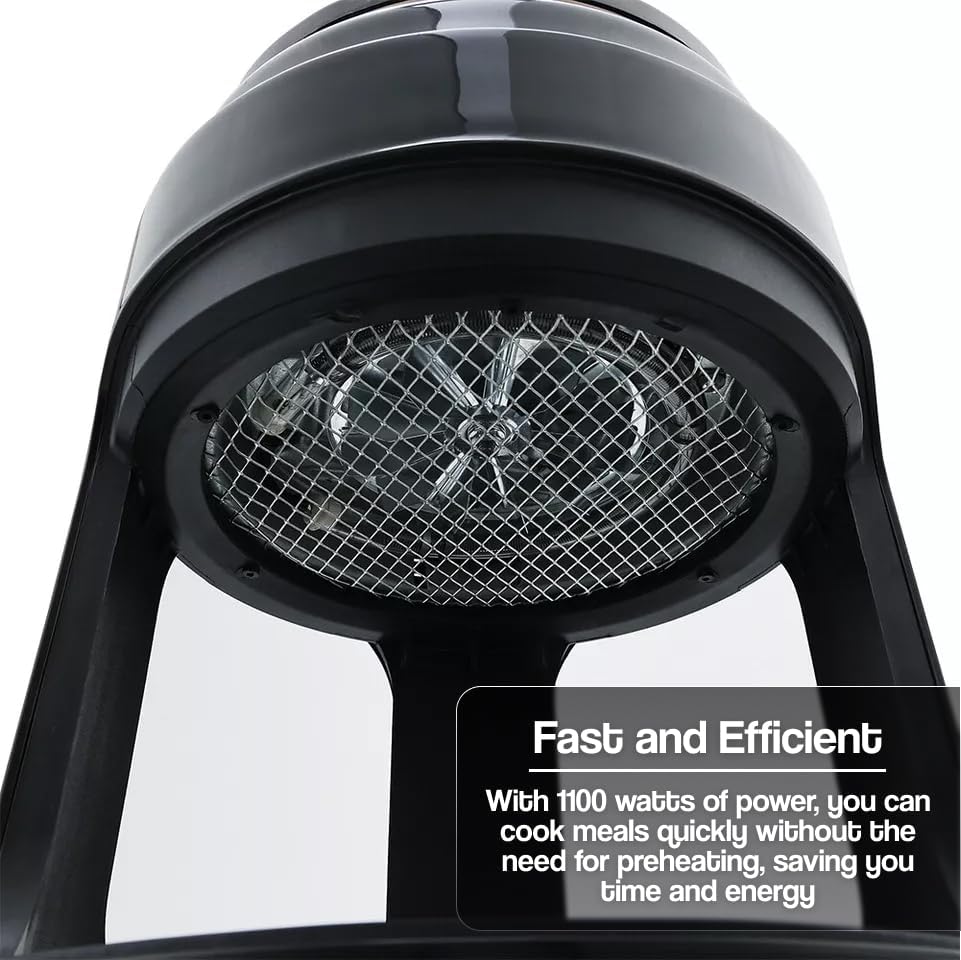
Figure 2.3: View of the 1100-watt heating element for fast and efficient cooking.
3. Setup and First Use
3.1 Unpacking
- Carefully remove the air fryer and all packaging materials from the box.
- Remove any stickers or labels from the appliance.
- Check that all components are present and undamaged.
3.2 Initial Cleaning
- Wipe the exterior of the air fryer with a damp cloth.
- Clean the pot and frying basket with hot water, dish soap, and a non-abrasive sponge. Rinse thoroughly and dry completely.
- Note: The pot and basket are not dishwasher safe.
3.3 Placement
- Place the air fryer on a stable, level, and heat-resistant surface.
- Ensure there is at least 10 cm (4 inches) of free space around the back and sides of the appliance to allow for proper ventilation.
- Do not place the appliance near flammable materials or heat sources.
4. Operating Instructions
4.1 Powering On and Basic Operation
- Plug the power cord into a grounded wall outlet. The appliance will beep, and the display will light up briefly.
- Press the Power button to turn on the display.
- Place food into the frying basket, then slide the pot back into the air fryer until it clicks into place.
4.2 Setting Temperature and Time
- Use the Temperature and Time buttons on the LED touchscreen to adjust settings.
- Press the Temperature button, then use the + and - icons to set the desired temperature (e.g., 180°C).
- Press the Time button, then use the + and - icons to set the cooking duration.
- The air fryer also features preset cooking modes for common foods, accessible via dedicated icons on the touchscreen.
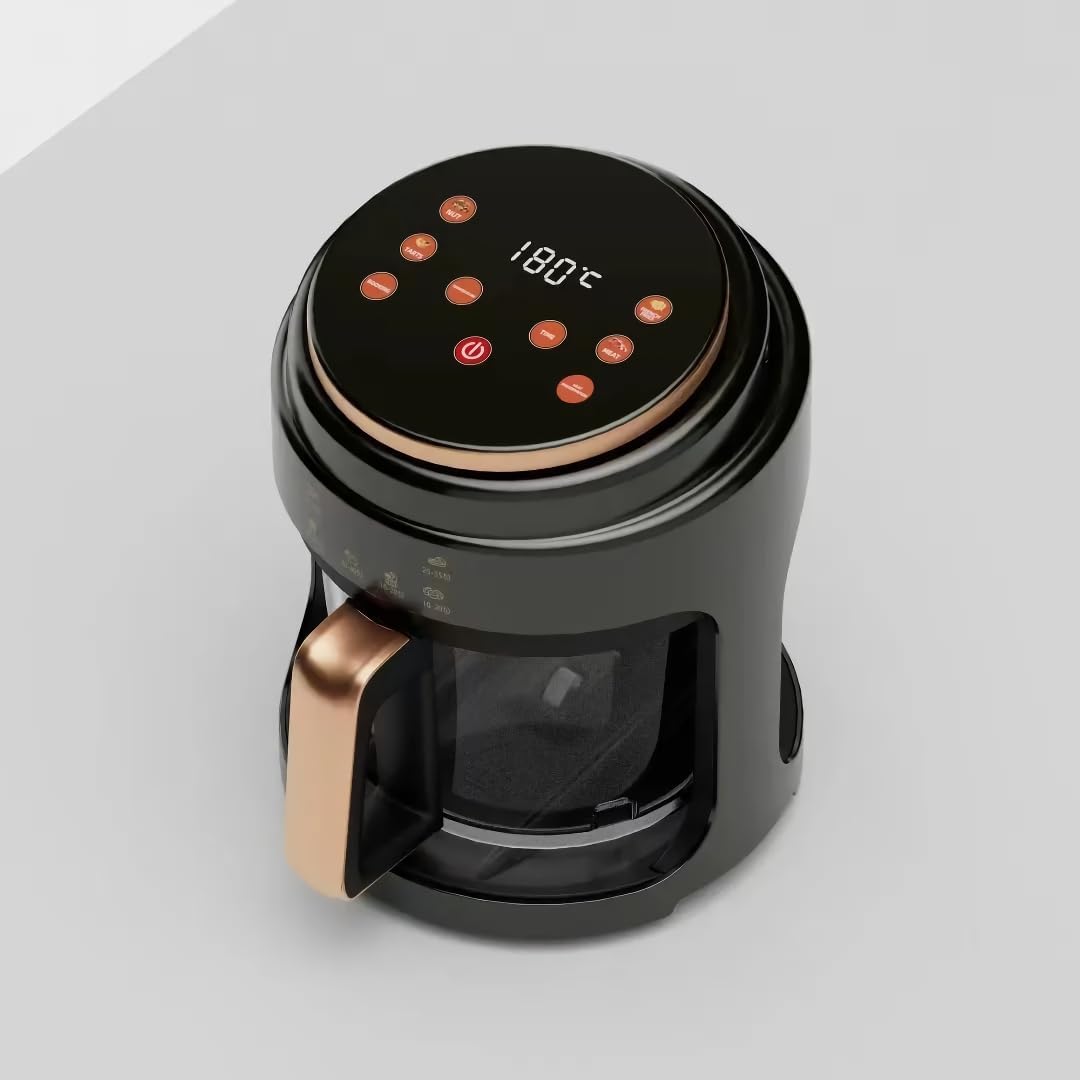
Figure 4.1: The intuitive LED touchscreen control panel for setting temperature, time, and selecting presets.
4.3 Starting and Pausing Cooking
- After setting the temperature and time, press the Start/Pause button to begin cooking.
- To pause cooking, simply pull out the pot. The air fryer will automatically pause. Insert the pot back to resume.
- To stop cooking completely, press and hold the Power button.
4.4 Cooking Tips
- For best results, shake the basket halfway through cooking for items like fries or chicken nuggets.
- Some foods may require a small amount of oil for crispiness, but significantly less than traditional frying.
- Refer to a reliable air fryer recipe guide for specific cooking times and temperatures for various foods.
5. Maintenance and Cleaning
Regular cleaning ensures optimal performance and extends the lifespan of your air fryer.
5.1 Cleaning the Pot and Basket
- Unplug the air fryer and allow it to cool completely before cleaning.
- Remove the pot and basket from the appliance.
- Wash the pot and basket with hot water, dish soap, and a non-abrasive sponge. The basket features a food-grade non-stick coating for easy cleaning.
- Important: The pot and basket are not dishwasher safe. Hand wash only.
- For stubborn food residue, soak the pot and basket in warm, soapy water for about 10-15 minutes before cleaning.
- Rinse thoroughly and dry completely before reassembling or storing.
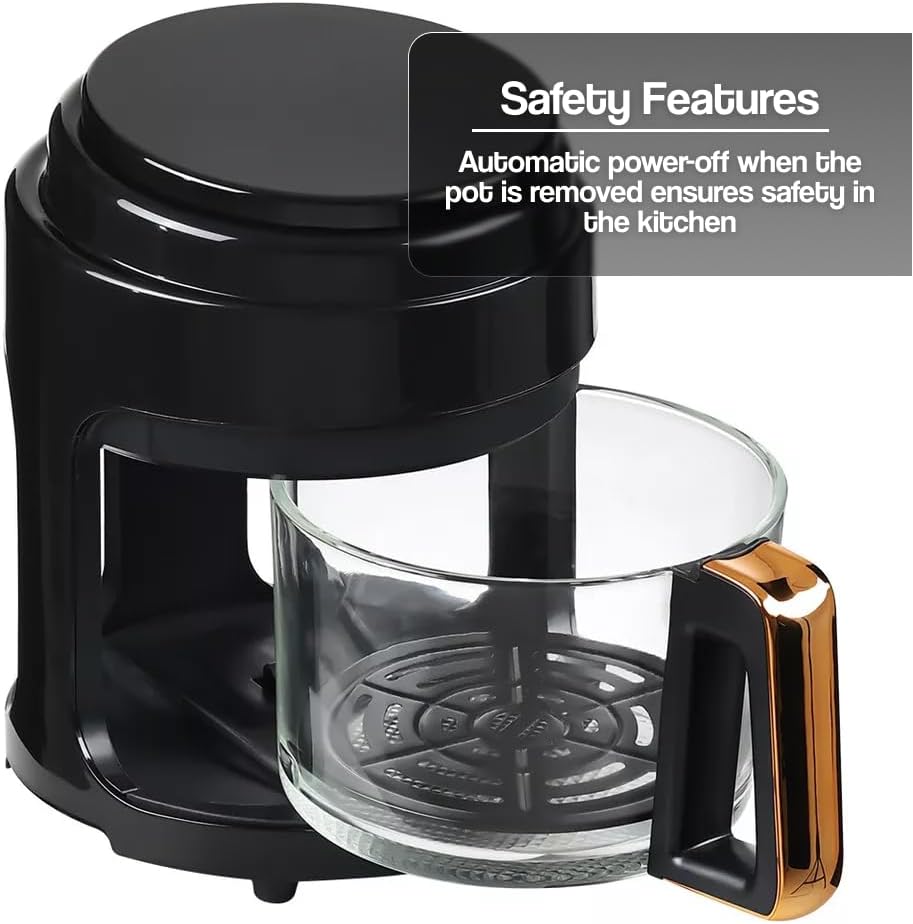
Figure 5.1: The removable pot, which triggers the automatic power-off safety feature.
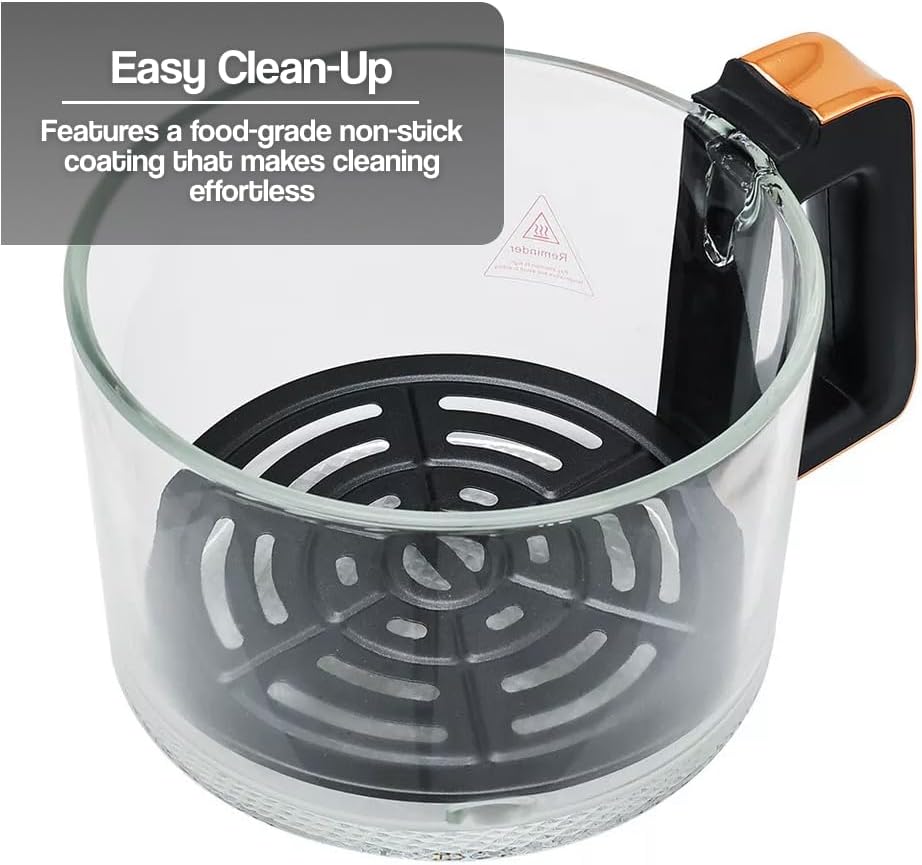
Figure 5.2: The non-stick coated frying basket, designed for easy cleaning.
5.2 Cleaning the Exterior and Interior
- Wipe the exterior of the air fryer with a damp cloth. Do not use abrasive cleaners.
- Clean the interior of the appliance with a damp cloth and mild detergent if necessary. Ensure no water enters the electrical components.
- Clean the heating element with a cleaning brush to remove any food residue.
6. Troubleshooting
| Problem | Possible Cause | Solution |
|---|---|---|
| Air fryer does not turn on. | Not plugged in; power outlet malfunction; pot not inserted correctly. | Ensure the power cord is securely plugged in. Test the outlet with another appliance. Make sure the pot is fully inserted until it clicks. |
| Food is not cooked evenly. | Basket overloaded; food not shaken. | Do not overload the basket. Shake the basket halfway through cooking for even results. |
| White smoke coming from the appliance. | Grease residue from previous use; high-fat food. | Clean the pot and basket thoroughly after each use. For high-fat foods, drain excess oil from the pot during cooking. |
| Food is not crispy. | Too much moisture; insufficient cooking time/temperature. | Pat food dry before air frying. Increase cooking time or temperature slightly. Consider adding a small amount of oil. |
7. Product Specifications
| Feature | Specification |
|---|---|
| Model | 3L Smart Air Fryer |
| Brand | Generic |
| Capacity | 3 Liters |
| Output Wattage | 1100 Watts |
| Voltage | 120 Volts |
| Control Method | Touch (LED Touchscreen) |
| Material | Plastic |
| Non-stick Coating | Yes |
| Dishwasher Safe | No (Pot and Basket) |
| Product Dimensions (D x W x H) | 9.9"D x 9.9"W x 11.3"H (25.2cm x 25.2cm x 28.8cm) |
| Item Weight | 6.17 Pounds (2.8 kg) |
| Special Feature | BBQ Grill Rack (Included) |

Figure 7.1: Product dimensions of the Generic 3L Smart Air Fryer.
8. Warranty and Support
For warranty information, technical support, or customer service inquiries, please refer to the contact details provided with your purchase or visit the manufacturer's official website.
Please have your model number (3L Smart Air Fryer) and purchase date available when contacting support.


