ONESPORT OT12
ONESPORT OT12 Electric Trekking Bike User Manual
Model: OT12
Introduction
Thank you for choosing the ONESPORT OT12 Electric Trekking Bike. This manual provides essential information for the safe assembly, operation, and maintenance of your ebike. Please read it thoroughly before your first ride and keep it for future reference.
Safety Warnings
- Always wear a helmet and appropriate safety gear when riding.
- Familiarize yourself with local traffic laws and regulations.
- Perform a pre-ride safety check before each use, including brakes, tires, and battery.
- Do not ride under the influence of alcohol or drugs.
- Avoid riding in extreme weather conditions or on excessively rough terrain if not designed for it.
- Ensure all components are securely fastened before riding.
Package Contents
Your ONESPORT OT12 Electric Trekking Bike package includes the following items:
- ONESPORT OT12 Electric Bike (80% pre-assembled)
- 36V 13Ah Lithium Battery
- 42V 2A Charger
- Accessory Kit (Saddle, Accelerator Handle, Pedals, Quick Release Skewer, Pump, Multi-function Tools, Phone Bag)
- User Manual

Setup and Assembly
Your ONESPORT OT12 ebike comes 80% pre-assembled. Follow these steps to complete the assembly and prepare for your first ride.
1. Handlebar Installation
- Carefully unbox the bike and remove all packaging materials.
- Attach the handlebar to the stem, ensuring it is centered and the brake levers and shifters are in a comfortable position.
- Tighten the stem bolts securely.
2. Saddle Installation
- Insert the seat post into the seat tube.
- Adjust the saddle height to ensure your feet can comfortably touch the ground when stopped, or slightly touch with toes when seated.
- Secure the quick-release lever or seat post clamp.
3. Pedal Installation
- Identify the left (L) and right (R) pedals.
- Thread the right pedal (R) clockwise into the right crank arm.
- Thread the left pedal (L) counter-clockwise into the left crank arm.
- Tighten both pedals firmly with a wrench.
4. Battery Installation and Charging
The 36V 13Ah lithium battery is removable for convenient charging. Ensure the battery is fully charged before your first ride.
- Installation: Insert the battery into its designated compartment on the bike frame. Secure it with the key lock mechanism to prevent theft and ensure it's firmly seated.
- Charging: Connect the 42V 2A charger to the battery's charging port, then plug the charger into a standard wall outlet. The charging time is approximately 6-8 hours. The charger indicator light will change when charging is complete.
- Removal: Use the key to unlock the battery and carefully slide it out for off-bike charging or storage.

Operating Instructions
1. Power On/Off
- To power on the ebike, press and hold the power button on the LCD display for a few seconds.
- To power off, press and hold the power button again until the display turns off.
2. LCD Display and Assistance Levels
The 6-wire LCD display shows essential information such as current speed, battery level, and assistance level. It also features a USB port for charging devices.
- The ONESPORT OT12 offers 4 levels of pedal assistance (0-3).
- Use the '+' and '-' buttons on the display control panel to cycle through assistance levels.
- Level 0: No electrical assistance (pure pedal power).
- Level 1-3: Increasing levels of motor assistance.
- The integrated speed sensor ensures smooth and precise assistance delivery.
3. Gear Shifting
The ebike is equipped with a Shi-mano 7-speed derailleur system for adapting to various terrains.
- Use the shifter on the handlebar to change gears.
- Shift to lower gears for climbing hills and higher gears for flat terrain or descents.
- Always pedal lightly when shifting gears to ensure smooth transitions and prevent damage to the drivetrain.
4. Braking System
The ONESPORT OT12 features dual 160mm disc brakes with motor cut-off for reliable stopping power.
- Apply both brake levers simultaneously for balanced and effective braking.
- The motor cut-off feature disengages the motor assistance when brakes are applied, enhancing safety.
- Test your brakes before each ride to ensure they are functioning correctly.

Maintenance
Regular maintenance ensures the longevity and safe operation of your ONESPORT OT12 ebike.
1. General Cleaning
- Clean your ebike regularly with a damp cloth and mild soap. Avoid high-pressure washing, especially near electrical components.
- Dry the bike thoroughly after cleaning.
2. Battery Care
- Charge the battery fully after each ride, or at least once a month if not in use, to prolong its lifespan.
- Store the battery in a cool, dry place, away from direct sunlight and extreme temperatures.
- Do not expose the battery to water or moisture.
3. Tire Pressure
- Check tire pressure before each ride. The recommended pressure for the 27.5x2.25" anti-slip tires is usually indicated on the tire sidewall.
- Proper tire pressure improves ride comfort, efficiency, and reduces the risk of punctures.

4. Brake Inspection
- Regularly inspect brake pads for wear and replace them when necessary.
- Ensure brake levers are firm and responsive. Adjust cable tension if needed.
5. Chain Lubrication
- Keep the chain clean and lubricated to ensure smooth gear changes and prevent rust.
- Apply bicycle-specific chain lubricant periodically, especially after riding in wet conditions.
Troubleshooting
This section addresses common issues you might encounter with your ONESPORT OT12 ebike.
| Problem | Possible Cause | Solution |
|---|---|---|
| Ebike does not power on. | Battery not charged or not properly installed. Loose electrical connection. | Ensure battery is fully charged and securely locked in place. Check all visible cable connections. |
| Motor assistance is not working. | Assistance level set to 0. Brake levers engaged. Loose motor cable. | Increase assistance level on the display. Release brake levers completely. Check motor cable connection. |
| Gears are not shifting smoothly. | Dirty or unlubricated chain. Derailleur adjustment needed. | Clean and lubricate the chain. If issue persists, consult a bike mechanic for derailleur adjustment. |
| Brakes feel weak or spongy. | Worn brake pads. Loose brake cable. Air in hydraulic system (if applicable). | Inspect and replace worn brake pads. Adjust brake cable tension. For hydraulic brakes, professional service may be required. |
If you encounter issues not listed here or require further assistance, please contact customer support.
Technical Specifications
| Feature | Detail |
|---|---|
| Model Number | OT12 |
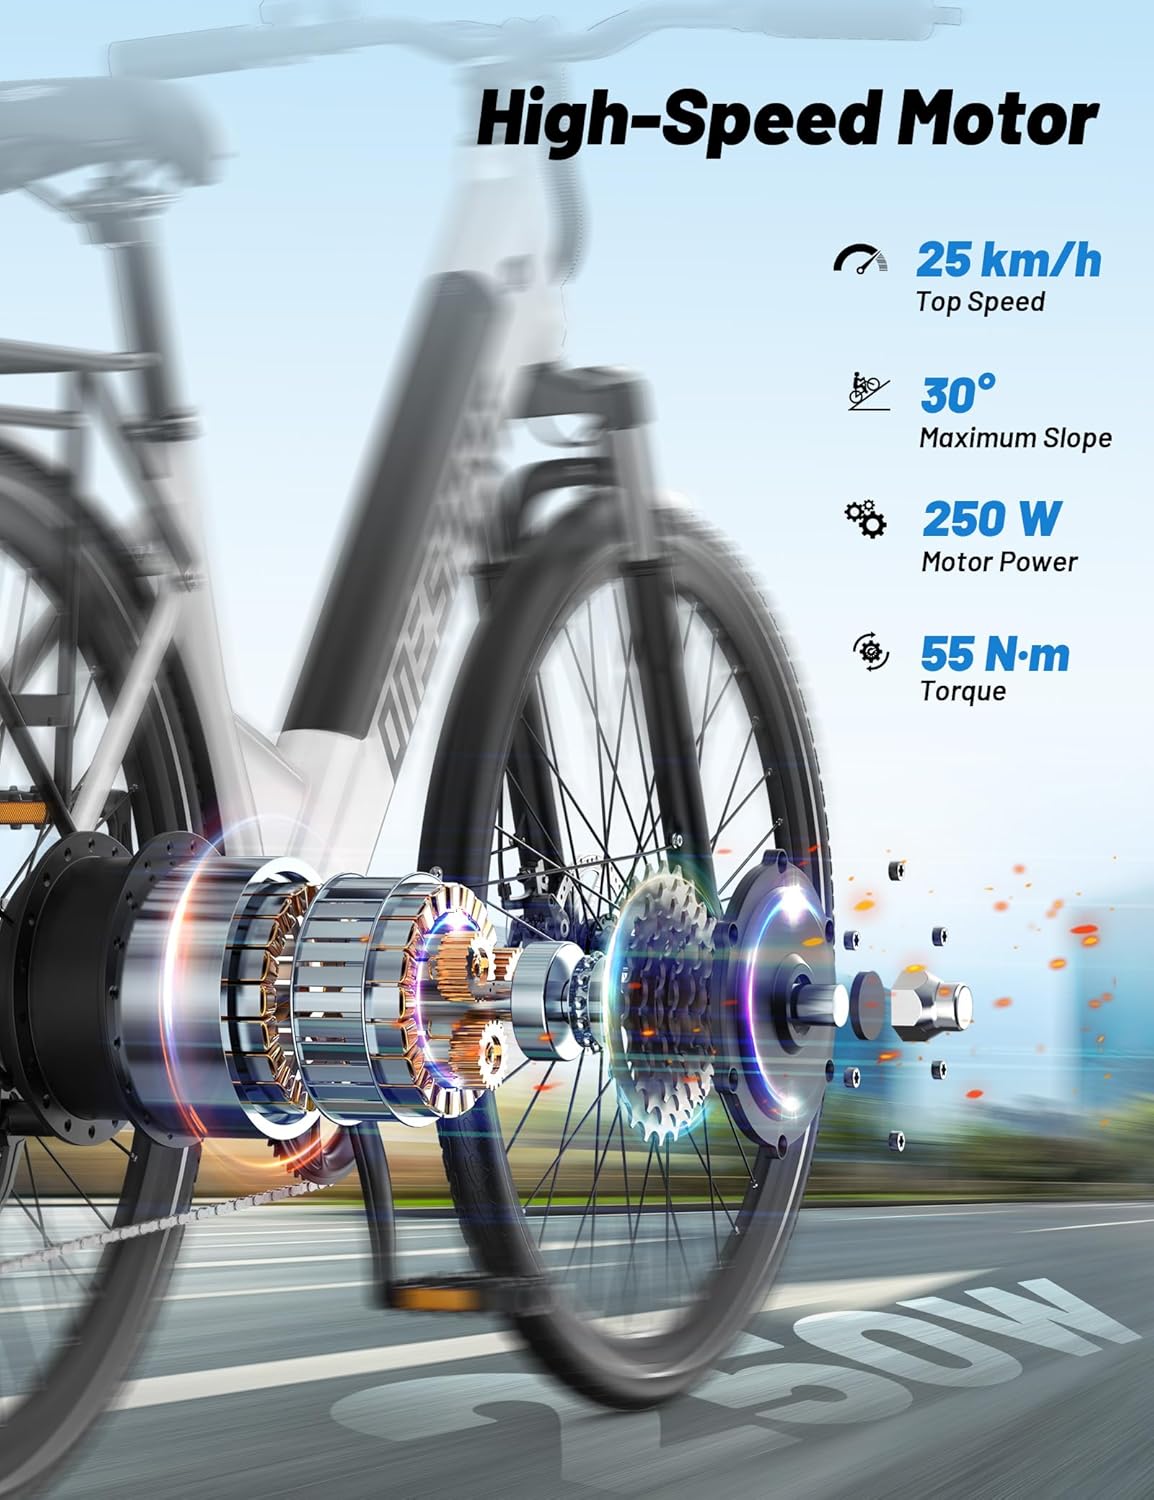
| Motor | 250W Brushless Motor, 44 N·m Torque |
| Max Assisted Speed | 25 km/h |
| Battery | 36V 13Ah Removable Lithium-ion |
| Range (Pure Electric) | Up to 40 km |
| Range (Pedal Assist) | Up to 65 km |
| Charger | 42V 2A |
| Charging Time | 6-8 hours |
| Display | 6-wire LCD (Speed, Assistance Level, Battery) |
| Assistance Levels | 4 levels (0-3) |
| Gears | Shi-mano 7-speed Derailleur |
| Frame Material | Steel |
| Wheels | 27.5 inches |
| Tires | 27.5×2.25" Anti-slip |
| Brakes | Dual 160mm Disc Brakes with Motor Cut-off |
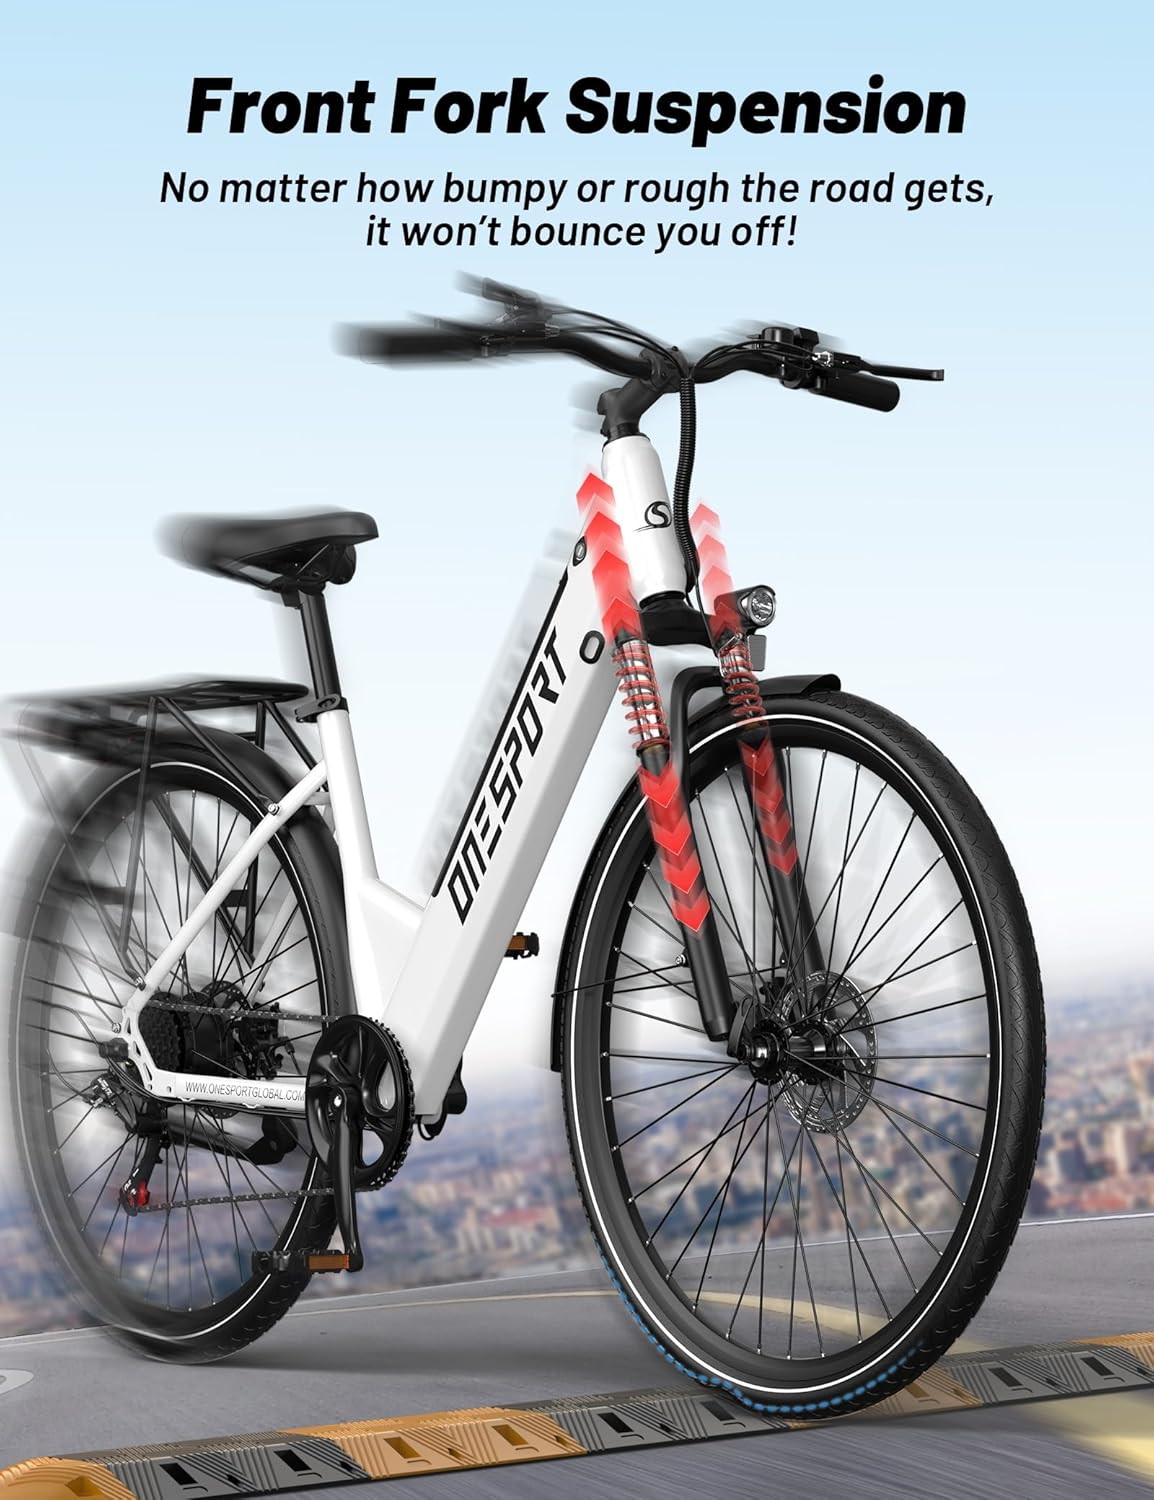
| Suspension | Front Steel Fork, 85mm Travel (non-adjustable) |
| Dimensions (L x W x H) | 1800 x 680 x 1100 mm |
| Handlebar Width | 64 cm |
| Net Weight | 27.8 kg |
| Gross Weight | 34 kg |
| Recommended Rider Height | 160-200 cm |
| Maximum Load Capacity | 100 kg |
| Waterproof Rating | IPX4 |
| Special Features | Digital Display, Dual Disc Brakes, Front Suspension, Multiple Speeds, Adjustable Saddle, Front and Rear K-code Lighting, Fenders, Full Steel Luggage Rack |

Warranty and Support
ONESPORT is committed to providing excellent customer service. For technical assistance or any inquiries regarding your ONESPORT OT12 ebike, please contact our support team.
- Technical Support: Assistance is available via email. Our team aims to respond within 24 hours.
- Please refer to your purchase documentation for specific warranty terms and conditions.