Introduction
Thank you for choosing the Jocoevol Upholstered Full LED Bed Frame. This manual provides essential information for the safe assembly, operation, and maintenance of your new bed frame. Please read these instructions carefully before beginning assembly and retain them for future reference.
Safety Information
- Maximum Weight Capacity: Do not load more than 800 pounds (363 kg) on the bed frame. Exceeding this limit may cause damage or injury.
- Sharp Edges: Exercise caution around the headboard and footboard during assembly and use to avoid injury from potential sharp edges.
- Assembly: Ensure all components are correctly assembled and tightened according to the instructions to maintain structural integrity.
- Electrical Components: Only use the integrated charging station as intended. Do not overload the outlets.
Setup and Assembly
The Jocoevol Full LED Bed Frame requires assembly. All necessary tools, hardware, and detailed instructions are included. Each screw and accessory is labeled with corresponding numbers for ease of installation.
Before You Begin
- Unpack all components and verify against the parts list (provided in the separate assembly guide).
- Ensure you have sufficient space for assembly.
- It is recommended to have two people for assembly due to the size and weight of some components.
Assembly Steps Overview
- Assemble the headboard components, including the hidden storage and charging station.
- Attach the side rails to the headboard and footboard.
- Install the center support beam and legs.
- Place the wooden slats onto the bed frame and secure them, ensuring the Velcro-secured slats are properly aligned for quick installation and noise reduction.
- Connect the power cord for the LED lighting and charging station to a suitable power outlet.
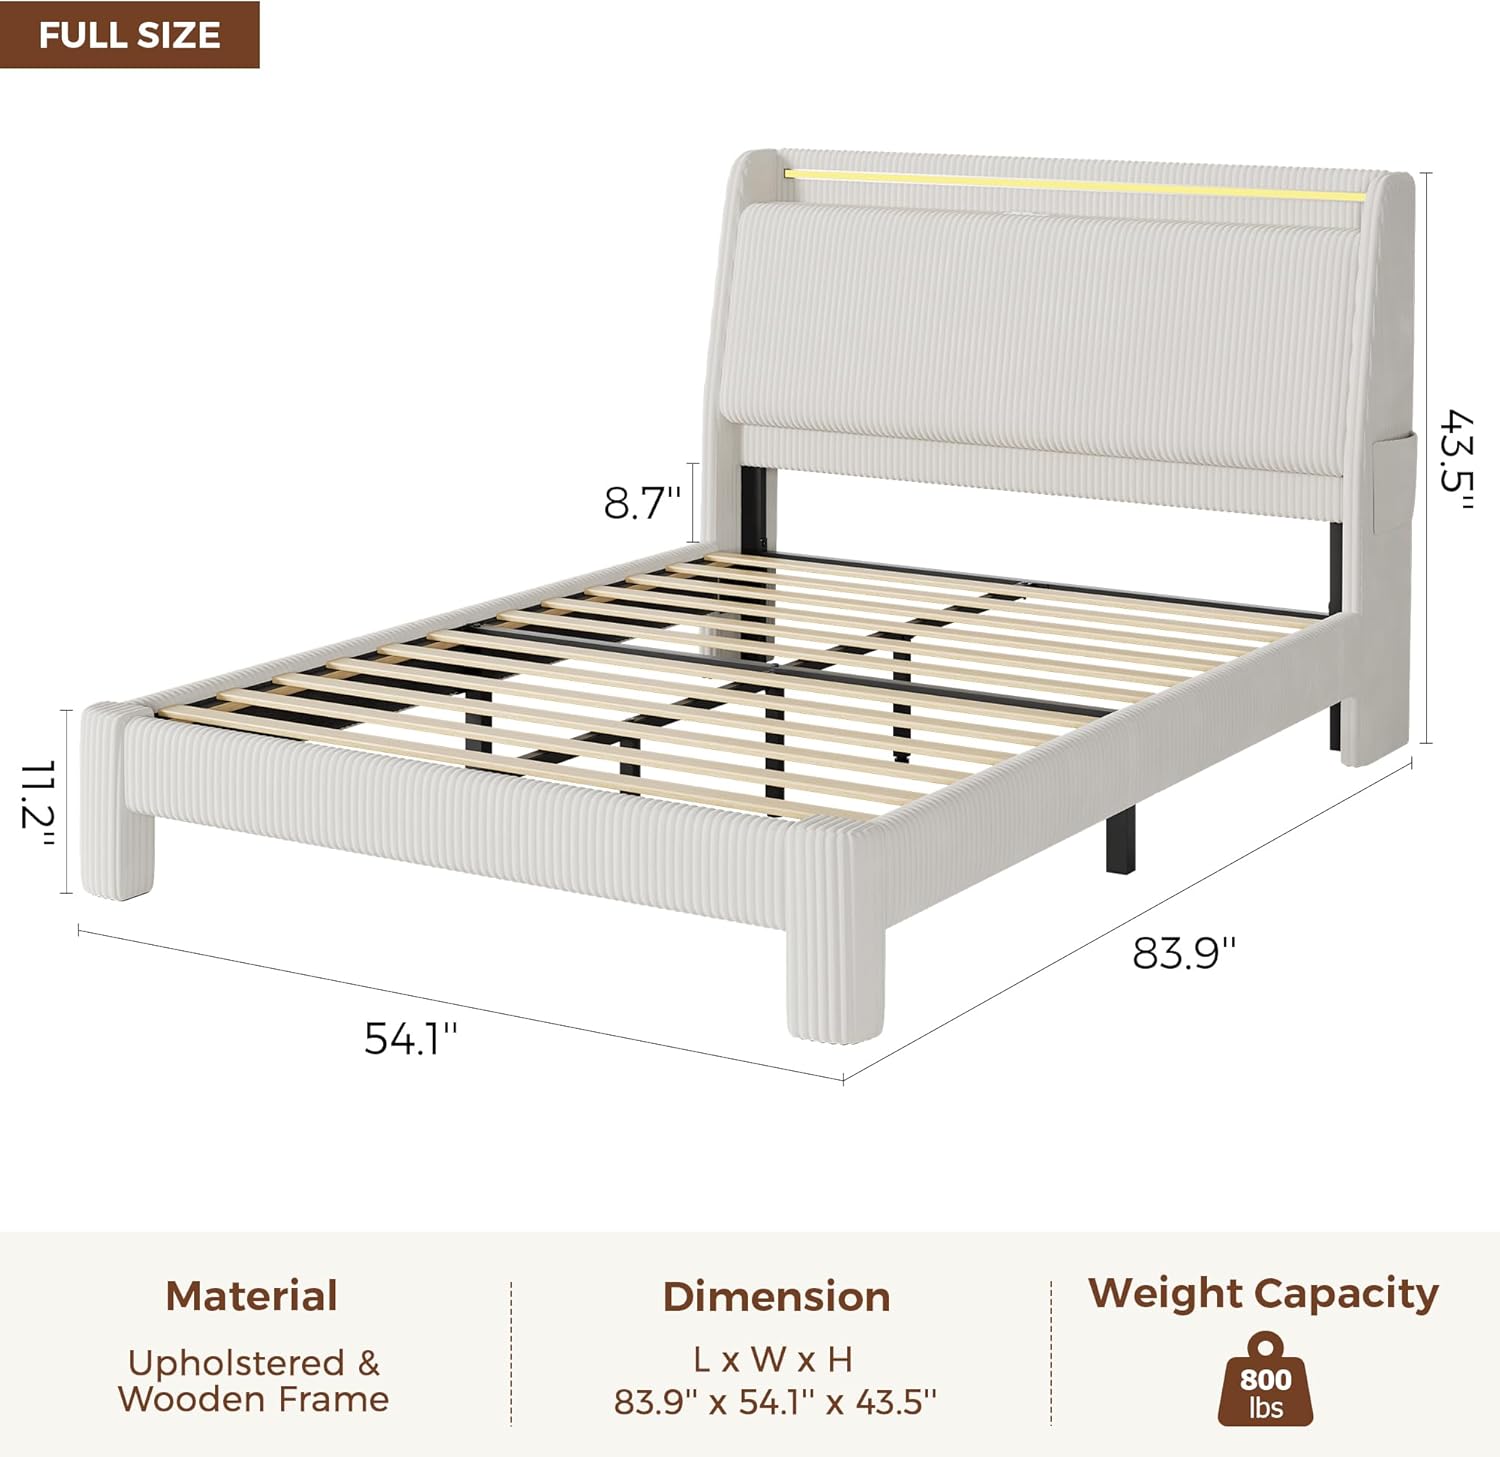
Figure 1: Overall dimensions of the Jocoevol Full LED Bed Frame.

Figure 2: Detail of Velcro-secured slats for easy installation and noise-free structure with EVA padding.
Operating Instructions
Charging Station
The headboard features a built-in charging station for your convenience. It includes:
- 2 AC Outlets (125V / 12A)
- 1 USB-A Port (5V / 2A)
- 1 USB-C Port (5V / 2A)
To use, simply plug the bed frame's power cord into a wall outlet. Then, connect your devices to the appropriate ports on the headboard.
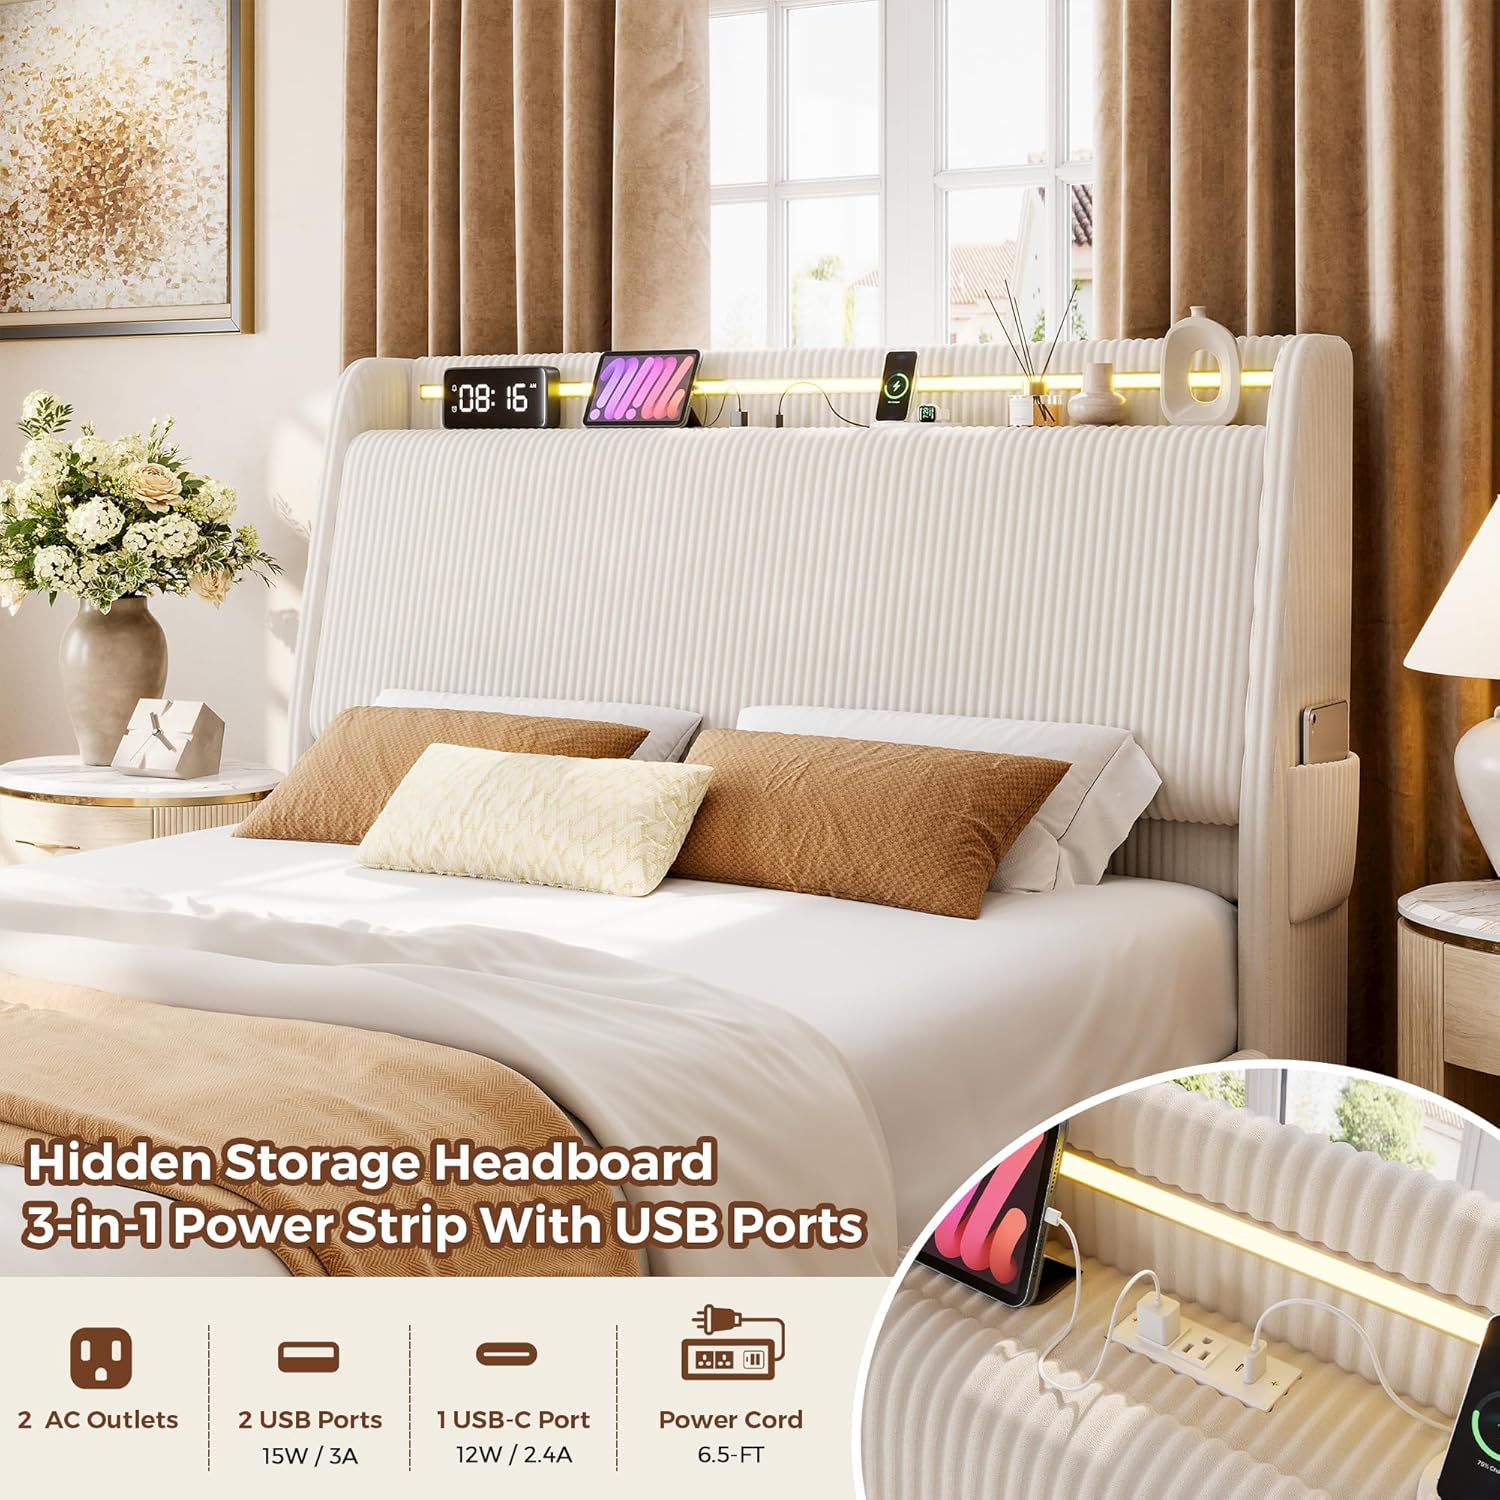
Figure 3: Integrated charging station with AC, USB-A, and USB-C ports.
RGB LED Lighting
The headboard is equipped with RGB LED lighting, offering over 16 million colors and 20+ light effects. The lighting can be controlled via a dedicated mobile application or the included remote control.
- App Control: Download the specified mobile application (details in the separate LED light manual) to access full customization, including color selection, dynamic modes, and music sync features.
- Remote Control: Use the provided remote to turn the lights on/off, change colors, adjust brightness, and select preset modes.
- Music Sync: The lights can synchronize with music beats, creating a dynamic ambiance. This feature is typically controlled via the mobile app.

Figure 4: RGB LED lighting features and control options.
Hidden Storage Headboard
The headboard features a 6.9-inch deep by 13.2-inch high hidden storage compartment with one shelf. To access, gently lift the front panel of the headboard. Side pockets on the wingback provide additional storage for small items like books or tablets.

Figure 5: Hidden storage compartment within the headboard.
Maintenance
Cleaning the Corduroy Upholstery
The bed frame is upholstered with corduroy material, known for being skin-friendly, soft, and breathable. To maintain its appearance:
- Regular Cleaning: Vacuum regularly using an upholstery attachment to remove dust and debris.
- Spot Cleaning: For spills, blot immediately with a clean, dry cloth. For stubborn stains, use a mild fabric cleaner specifically designed for corduroy, testing on an inconspicuous area first. Avoid excessive moisture.
- Avoid Harsh Chemicals: Do not use harsh detergents, bleach, or abrasive cleaners, as these can damage the fabric.

Figure 6: Corduroy material characteristics.
Frame Maintenance
- Tighten Connections: Periodically check all bolts and screws to ensure they remain tight. Loose connections can lead to instability and noise.
- Slat Inspection: Ensure the wooden slats are properly seated and secured. The EVA padding on the slats helps absorb movement and reduce noise; ensure it is intact.
- Electrical Components: Inspect the power cord and charging ports for any signs of damage. Discontinue use if damage is observed and contact support.
Troubleshooting
| Problem | Possible Cause | Solution |
|---|---|---|
| Bed frame is noisy or wiggly. | Loose bolts or improperly seated slats. | Re-tighten all assembly bolts. Ensure all wooden slats are correctly positioned and secured. Check if EVA padding is intact. |
| LED lights are not working. | Power connection issue, remote/app malfunction, or LED strip damage. | Verify the bed frame's power cord is securely plugged into a working outlet. Check the connection of the LED strip to the power source. Ensure remote control batteries are functional or the mobile app is correctly paired. If issues persist, contact support. |
| Charging ports are not providing power. | Bed frame not powered, or port malfunction. | Confirm the bed frame's power cord is plugged in and receiving power. Test with different devices and cables. If only specific ports are affected, contact support. |
Specifications
| Feature | Detail |
|---|---|
| Model Number | C-1667 |
| Size | Full |
| Product Dimensions (L x W x H) | 83.86" x 54.13" x 43.5" |
| Material | Corduroy, Engineered Wood, Metal |
| Color | Light Beige |
| Weight Capacity | 800 lbs (363 kg) |
| Item Weight | 98.7 lbs (44.8 kg) |
| Headboard Features | Hidden Storage, Charging Station (2 AC, 1 USB-A, 1 USB-C), RGB LED Lighting, Wingback Design |
| Assembly Required | Yes |
| Box Spring Needed | No |

Figure 7: Summary of product specifications.
Warranty and Support
Customer Support
If you have any questions or encounter issues before or after purchase, our dedicated support team is available to assist you. Please contact us through the retailer's customer service portal or the contact information provided with your purchase. We aim to respond to all inquiries within 24 hours.
Warranty Information
Specific warranty details for this product are typically provided with your purchase documentation. Please refer to the warranty card or contact customer support for information regarding warranty coverage and claims.