1. Introduction
Thank you for choosing the DreamQuest Mini Plus Mini PC. This compact and powerful desktop computer is designed for efficiency and versatility, preloaded with Windows 11 Pro and powered by the 12th Gen Intel Alder Lake N95 processor. It features 12GB DDR5 RAM and a 512GB M.2 SSD, ensuring smooth performance for various tasks. With extensive connectivity options including dual USB-C, dual HDMI, multiple USB 3.2 ports, LAN, WiFi 6, and Bluetooth 5.3, it supports up to triple 4K@60Hz displays. This manual provides essential information for setting up, operating, maintaining, and troubleshooting your new Mini PC.
2. Package Contents
Please check the box for the following items:
- DreamQuest Mini Plus Mini PC
- User Manual
- HDMI Cable
- Power Adapter
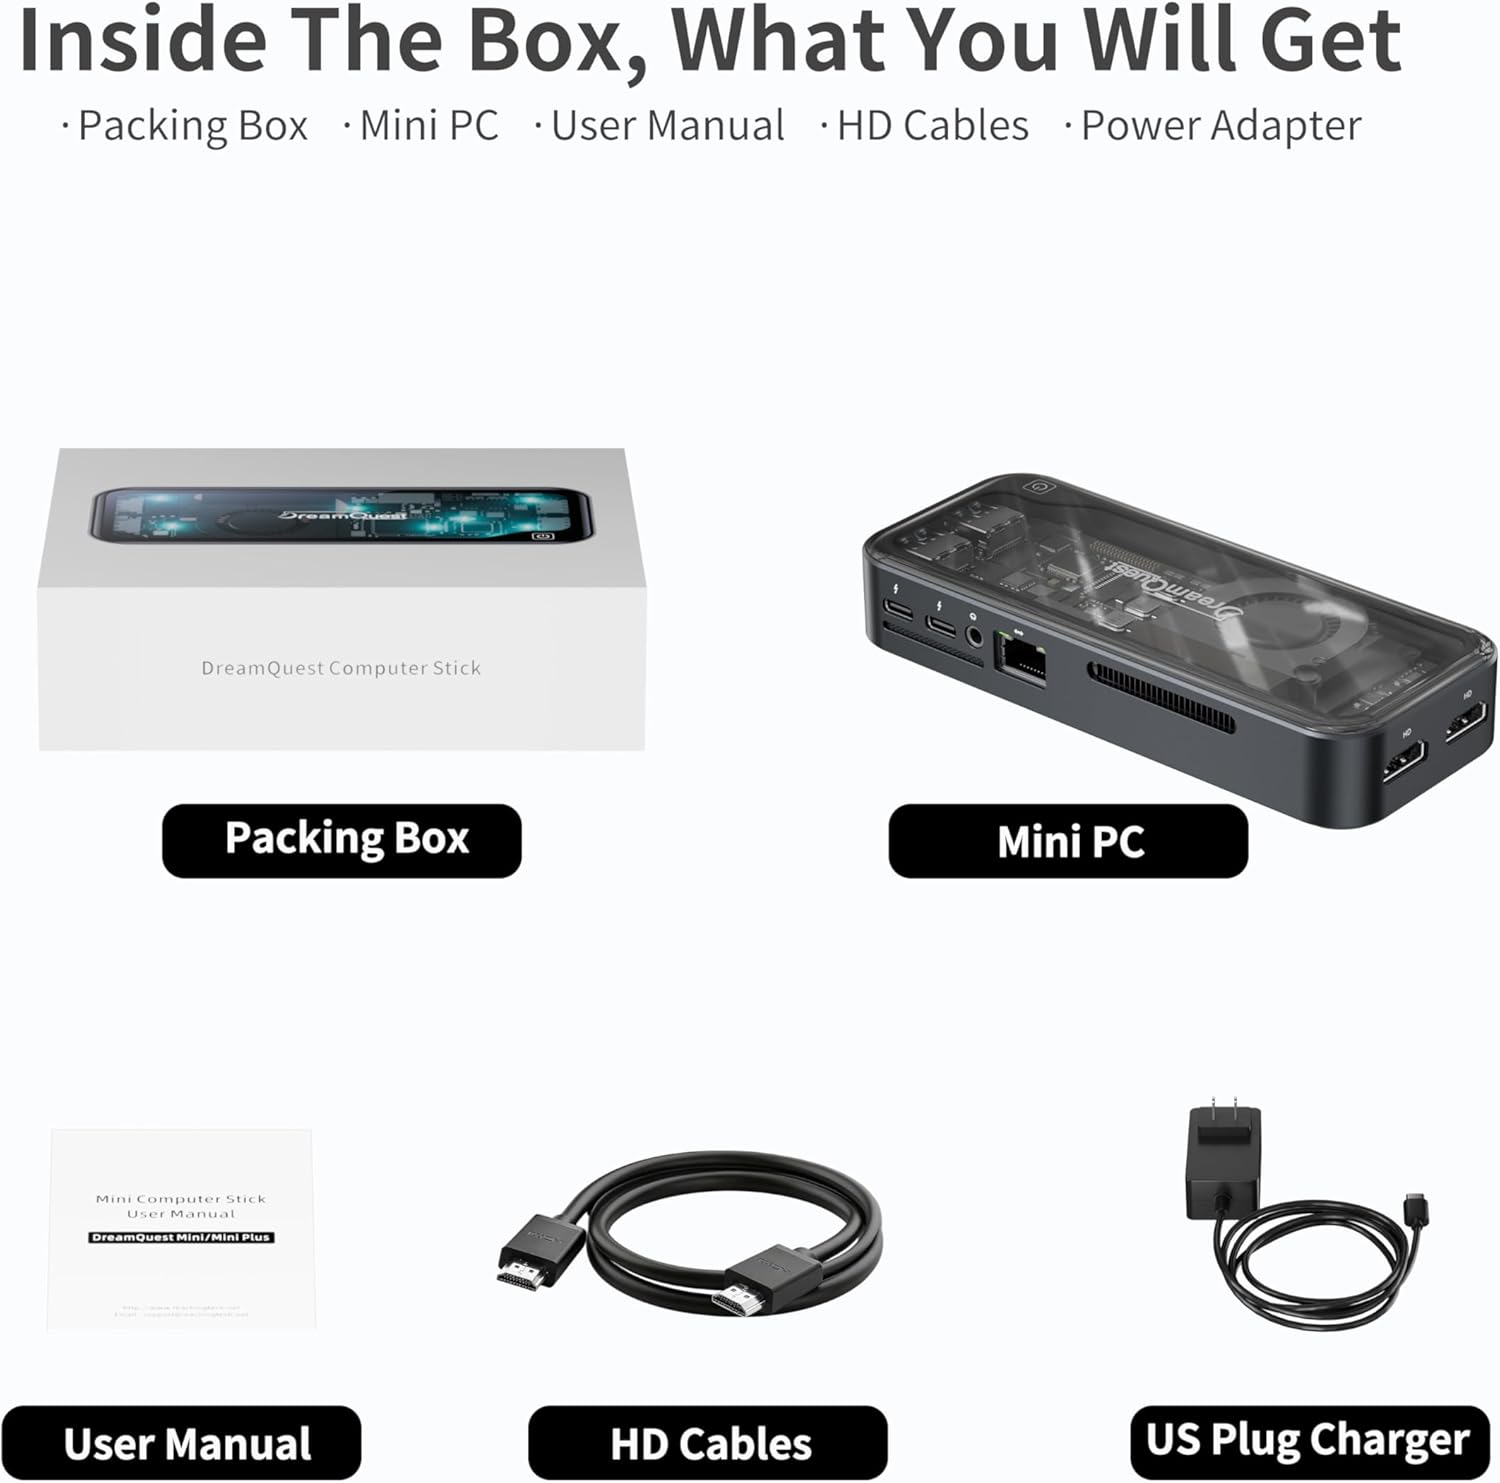
Figure 2.1: Contents of the DreamQuest Mini Plus Mini PC package.
3. Physical Overview
Familiarize yourself with the ports and features of your DreamQuest Mini Plus Mini PC.

Figure 3.1: Front and back ports of the Mini PC.
- Front Panel: Power button, 2x USB-C (full-function: fast charging, data transfer, video output), 2x USB 3.2 ports.
- Rear Panel: 2x HDMI ports (supports 4K@60Hz), LAN port (Gigabit Ethernet), additional USB 3.2 ports, power input.
- Cooling System: Built-in smart fan for efficient heat dissipation, maintaining CPU temperature between 25-40°C with low noise (30-35dB).
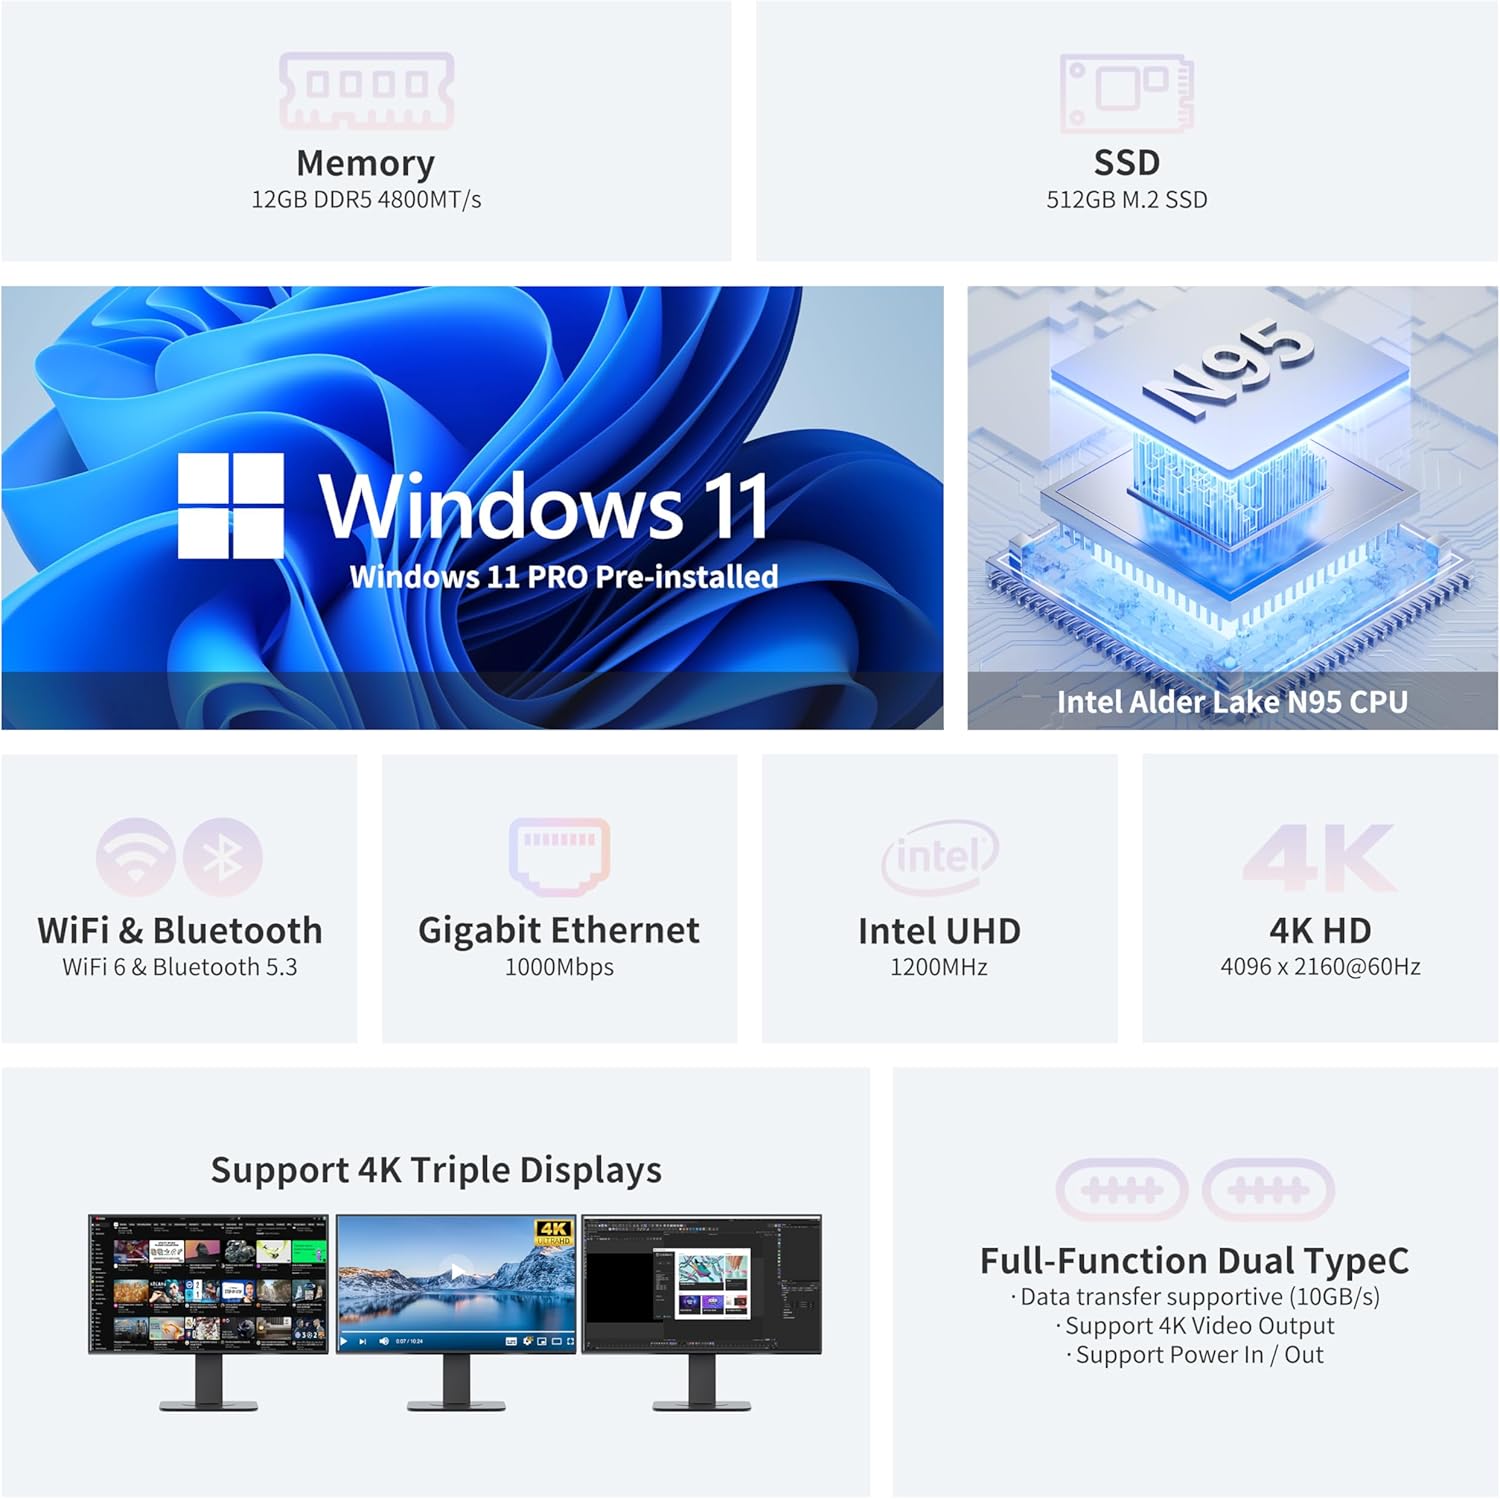
Figure 3.2: Detailed view of the Mini PC's ports and cooling system.
4. Setup Instructions
Follow these steps to set up your DreamQuest Mini Plus Mini PC:
- Connect Peripherals: Connect your USB keyboard and mouse to the available USB 3.2 ports on the front or rear panel.
- Connect Display: Use the provided HDMI cable to connect your monitor(s) to the HDMI ports on the rear panel. The Mini PC supports dual 4K@60Hz displays. You can also use the full-function USB-C ports for video output to portable displays or projectors.
- Connect Network: For a stable internet connection, connect an Ethernet cable to the LAN port on the rear panel. Alternatively, the device supports WiFi 6 for wireless connectivity.
- Connect Power: Plug the power adapter into the DC input port on the rear panel, then plug the adapter into a power outlet.
- Power On: Press the power button on the front panel of the Mini PC. The system will boot up.
- Initial Windows 11 Pro Setup: Follow the on-screen instructions to complete the Windows 11 Pro setup. It is recommended to allow all updates to complete for optimal performance.

Figure 4.1: Multi-display setup with the Mini PC.
5. Operating Instructions
Your DreamQuest Mini Plus Mini PC comes preloaded with Windows 11 Pro, offering a familiar and intuitive user experience. It also supports Linux, PXE, and Ubuntu. Key operating features include:
- Multi-Display Support: Utilize the dual HDMI ports and dual full-function USB-C ports to connect up to three 4K@60Hz displays simultaneously for enhanced productivity or entertainment.
- USB-C Functionality: The full-function USB-C ports support fast charging, high-speed data transfer, and video output, making them versatile for various accessories.
- Wireless Connectivity: Integrated WiFi 6 provides fast and reliable wireless internet access, while Bluetooth 5.3 allows for seamless connection to wireless peripherals like headphones and speakers.
- BIOS Settings: The system supports Wake On LAN, RTC Wake, and Auto Power On, configurable within the BIOS settings.
6. Upgrading RAM and SSD
The DreamQuest Mini Plus Mini PC offers convenient upgrade options for both RAM and storage to enhance performance and capacity.
- RAM: The device is equipped with 12GB DDR5 memory. Consult the specifications for maximum supported RAM and available slots for potential upgrades.
- SSD: A 512GB M.2 2280 SSD is pre-installed. This can be replaced with a higher capacity M.2 SSD, up to 2TB, if more storage space is required.
For detailed visual instructions on how to upgrade RAM or SSD, please refer to the official DreamQuest support resources or consult a qualified technician.
7. Technical Specifications
| Feature | Specification |
|---|---|
| Processor | 12th Gen Intel Alder Lake N95 (Up to 3.4GHz) |
| RAM | 12GB DDR5 |
| Storage | 512GB M.2 2280 SSD (Up to 2TB upgradeable) |
| Operating System | Windows 11 Pro (Supports Linux, PXE, Ubuntu) |
| Graphics Coprocessor | Intel UHD Graphics 630 |
| Video Output | 2x HDMI, 2x USB-C (4K@60Hz Triple Display Support) |
| USB Ports | 4x USB 3.2, 2x USB-C (full-function) |
| Network | WiFi 6, Bluetooth 5.3, Gigabit Ethernet (LAN) |
| Item Weight | 1.21 pounds |
| Package Dimensions | 6.65 x 5.63 x 2.68 inches |
| Special Features | Wake On LAN, RTC Wake, Auto Power On |
8. Maintenance
To ensure the longevity and optimal performance of your Mini PC, follow these maintenance guidelines:
- Cleaning: Regularly clean the exterior with a soft, dry cloth. Use compressed air to clear dust from ventilation holes.
- Ventilation: Ensure the Mini PC is placed in a well-ventilated area to prevent overheating. Do not block the air vents.
- Power Management: Always shut down the system properly through the operating system. Avoid sudden power disconnections.
- Software Updates: Keep your Windows 11 Pro operating system and drivers updated to ensure security and performance.

Figure 8.1: Internal smart fan cooling system.
9. Troubleshooting
If you encounter issues with your DreamQuest Mini Plus Mini PC, try the following steps:
- No Power: Ensure the power adapter is securely connected to both the Mini PC and a working power outlet. Try a different outlet if necessary.
- No Display: Verify that the HDMI or USB-C cables are securely connected to both the Mini PC and the monitor(s). Ensure the monitor is powered on and set to the correct input source.
- No Internet Connection: For wired connections, check the Ethernet cable and router. For Wi-Fi, ensure Wi-Fi is enabled in Windows settings and you are connected to the correct network.
- Slow Performance: Close unnecessary applications, check for Windows updates, and ensure sufficient free storage space. Consider upgrading RAM or SSD if performance issues persist.
- Peripheral Issues: Ensure USB devices are properly connected. Try connecting them to different USB ports.
10. Warranty and Support
The DreamQuest Mini PC comes with a 1-year warranty. For warranty service or technical support, please follow these instructions:
- Login to your account on the platform where you purchased the product.
- Navigate to "My orders".
- Find the order ID for your DreamQuest Mini PC.
- Click "Contact seller" to reach DreamQuest customer support.


