1. Product Overview
The PEKOKO L4pro is a 5W handheld portable laser marking machine designed for precise and permanent marking on a wide range of materials. Its compact and lightweight design, combined with a 5-inch full-color touch screen, makes it suitable for various applications.
Key Features
- Intelligent Control Screen: Features a 5-inch full-color touch screen with independent software for intuitive and easy operation. The device weighs 1.1KG, ensuring portability.
- Precision Red Light Positioning: Utilizes projection border and graphics two-positioning preview modes to quickly and accurately determine the marking position on the material.
- Long Battery Lifetime: Equipped with two DC7.4V removable batteries (9000MAH each), providing convenience for outdoor work and extended use.
- Ink-Free Operation: This non-consumable intelligent coding machine eliminates the need for traditional ink, offering a clean and efficient marking solution.
- Multi-material Compatibility: Suitable for marking on a diverse range of materials including plastic, wood, cardboard, canvas, leather, glass, carton, and painted metal products.
- Speed Coding System: Features an independently developed operating system that ensures clearer and faster coding, significantly reducing marking time.
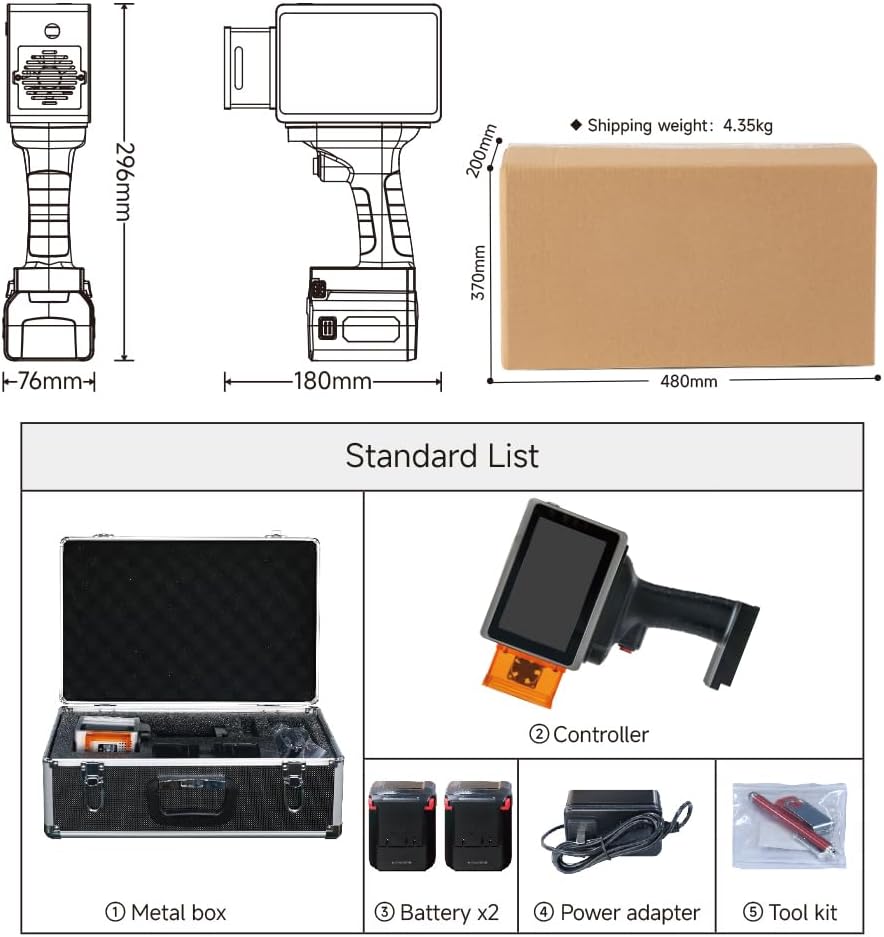
2. Package Contents
Verify that all items listed below are included in your PEKOKO L4pro package.

- Metal Box
- Controller (Main Unit)
- Battery x2
- Power Adapter
- Tool Kit
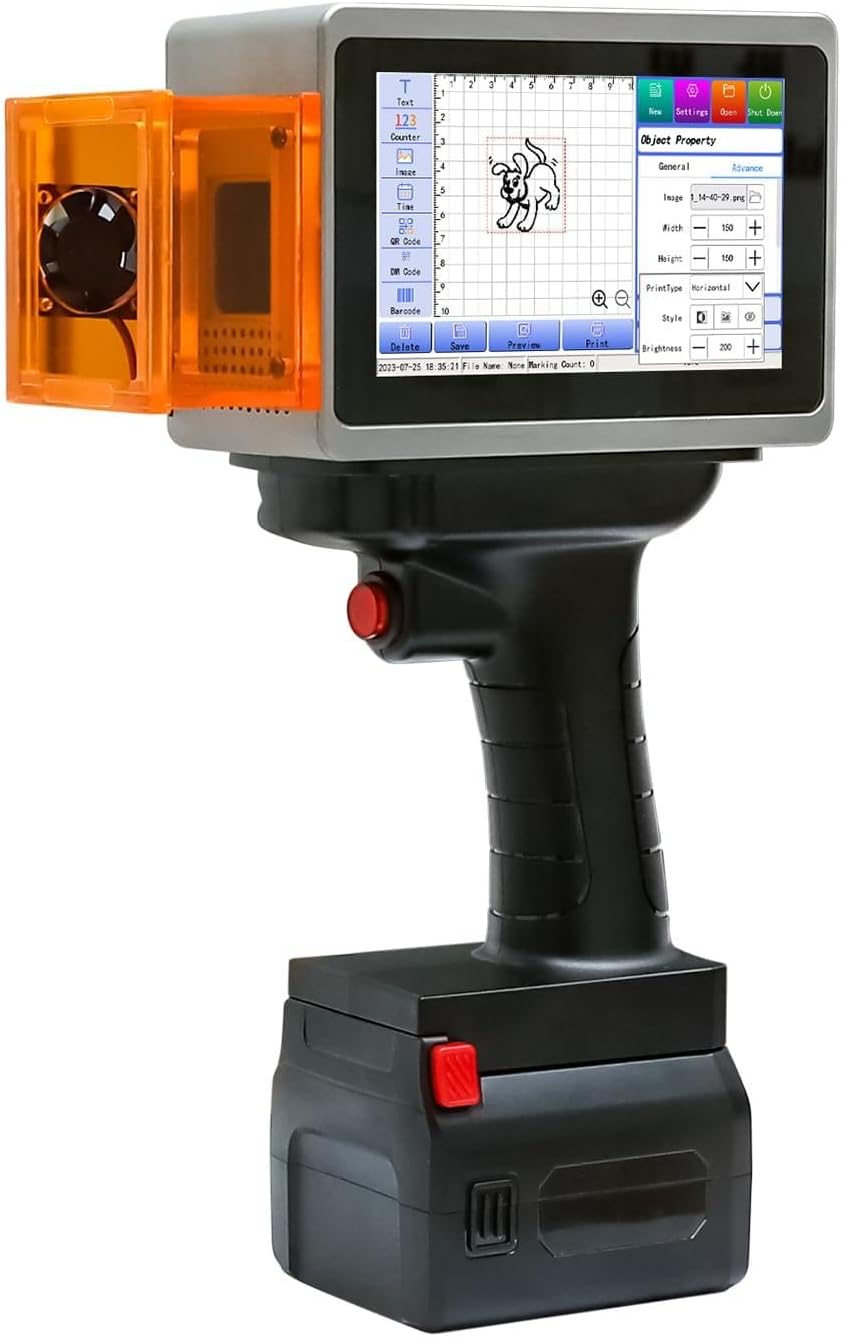
3. Device Components
Familiarize yourself with the main parts of your PEKOKO L4pro handheld laser marking machine.

- Host: The main body of the laser marking machine.
- Battery: Removable power source for portable operation.
- Protection Shield: Safety component to protect against laser exposure.
- Fan: Provides cooling for internal components.
- USB Interface: Port for data transfer and connectivity.
- Trigger Button: Activates the laser marking process.
- Main Control Screen: 5-inch touch screen for operating the device.
- Power Switch: Turns the device on or off.
4. Setup
4.1 Battery Installation
To install the battery, align it with the battery compartment at the base of the device and slide it in until it clicks securely into place. Ensure the red release button is facing outwards.

4.2 Powering On/Off
Locate the power switch (component 8 in the Device Components diagram) and press it to turn the device on. The main control screen will illuminate. To power off, press the switch again.
4.3 Initial Configuration
Upon first power-on, the device may guide you through initial language and time settings on the 5-inch touch screen. Follow the on-screen prompts to complete the setup.
This video provides a detailed look at the contents of the PEKOKO L4pro package and guides you through the initial steps of setting up the device.
5. Operating Instructions
5.1 User Interface Navigation
The 5-inch full-color touch screen provides an intuitive interface for creating and managing marking tasks. Navigate through options for text, images, serial numbers, dates, barcodes, and QR codes.
5.2 Creating a Marking Project
Use the touch screen to select the desired marking type (text, image, barcode, QR code, etc.). Input your content or upload an image via the USB interface. Adjust parameters such as font size, position, and marking intensity as needed.
This comprehensive video demonstrates the process of creating a new marking project, inputting text or selecting images, and adjusting various settings on the PEKOKO L4pro.
Watch this video for a step-by-step guide on using the PEKOKO L4pro portable laser marking printer, focusing on its core operational features.
5.3 Positioning and Preview
Before marking, utilize the precision red light positioning feature. This projects the marking area onto your material, allowing for accurate alignment. The device offers both border and graphics preview modes.

5.4 Executing a Mark
Once the content is prepared and positioned, press the trigger button (component 6) to initiate the laser marking process. Maintain a steady hand and consistent speed for optimal results.
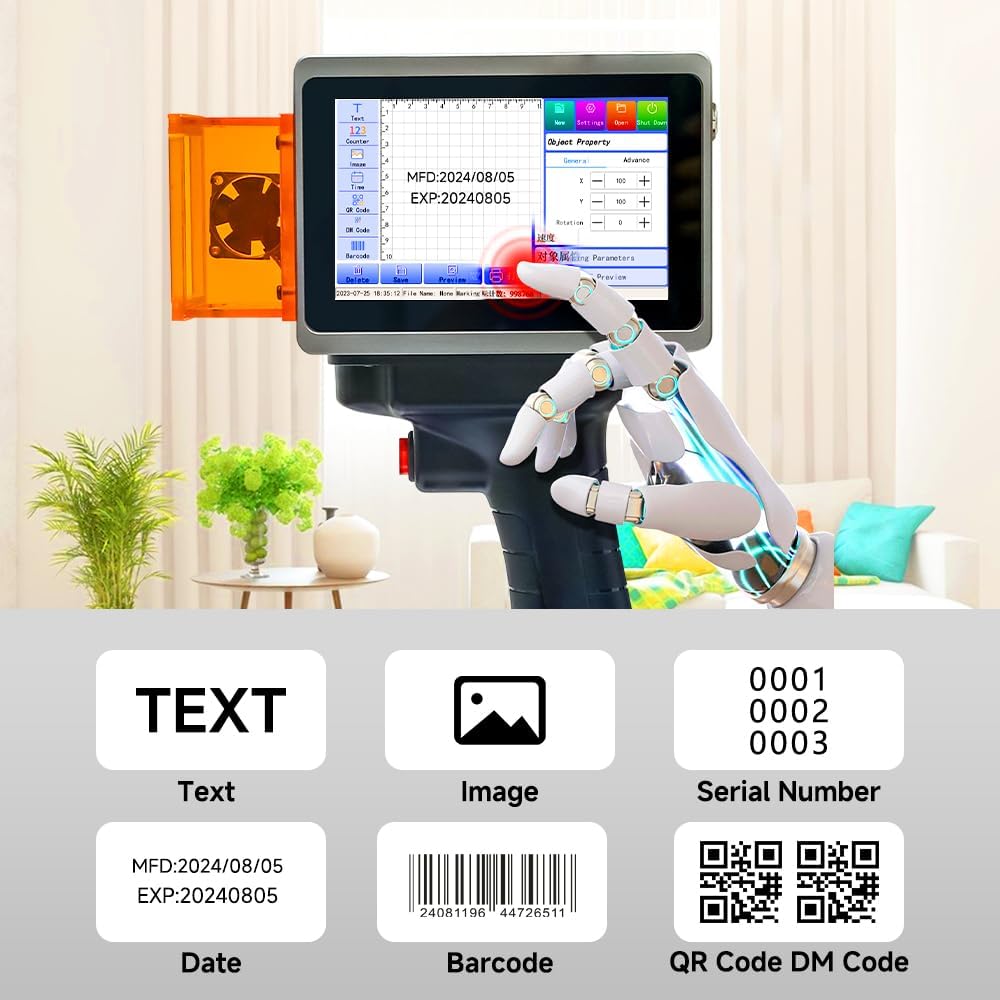
5.5 Supported Marking Types
The PEKOKO L4pro supports various marking types, including plain text, images, sequential serial numbers, dates, barcodes, QR codes, and DM codes.
5.6 Material Compatibility
The device is compatible with a wide array of materials. Test on a small, inconspicuous area first to ensure desired results.
This brief video illustrates the PEKOKO L4pro's capability to print identification marks on car windows.
This video highlights the wide range of applications for the PEKOKO L4pro, demonstrating its use on multiple material types.
This video provides a creative idea for customizing gifts using the PEKOKO L4pro on materials like wood and paper.
6. Maintenance
The PEKOKO L4pro is designed for low maintenance due to its non-consumable laser marking technology, eliminating the need for ink cartridges.
6.1 Cleaning
Regularly clean the device's exterior and the laser output window with a soft, dry, lint-free cloth. Ensure no dust or debris obstructs the laser path. Do not use abrasive cleaners or solvents.
6.2 Battery Care
To prolong battery life, fully charge the batteries before first use and store them in a cool, dry place when not in use for extended periods. Avoid exposing batteries to extreme temperatures or physical damage.
7. Troubleshooting
7.1 Common Issues and Solutions
Device Not Powering On
- Ensure the batteries are correctly installed and fully charged.
- Verify the power switch is in the 'On' position.
- If using the power adapter, ensure it is securely connected to both the device and a working power outlet.
Marking Not Appearing or Faint
- Check the laser output window for any obstructions or dirt.
- Ensure the material is compatible with laser marking. Some materials may require specific settings or may not be suitable.
- Adjust marking parameters such as laser power and speed in the software. Higher power or slower speed may be needed for certain materials.
- Verify the focus distance if adjustable.
Positioning Inaccuracy
- Re-calibrate the red light positioning system if the option is available in the device settings.
- Ensure the device is held steady and perpendicular to the marking surface during the marking process.
- Confirm that the preview matches the intended marking area before triggering the laser.
8. Specifications
| Feature | Detail |
|---|---|
| Brand | PEKOKO |
| Model Name | L4pro |
| Connectivity Technology | USB |
| Printing Technology | Laser |
| Special Features | Lightweight, Permanent marking, No consumables, Projection border & graphics two positioning preview mode, Touch Screen, Two batteries for outdoor marking, Handheld laser marking machine |
| Color | Silver |
| Printer Output | Monochrome |
| Maximum Print Speed (Color/Monochrome) | 12000.0 pages per minute |
| Item Weight | 1.1 Kilograms |
| Printer Type | Laser |
| Print Media | Labels (and various other materials) |
| Additional Printer Functions | Print Only |
| Maximum Sheet Capacity | 50 (for certain applications) |
| Duplex Printing | Simplex (No dual-sided printing) |
| Specific Uses For Product | Marking and coding on various materials (plastic, wood, cardboard, canvas, leather, glass, carton, painted metal), QR codes, barcodes, dates, numbers, logos, and images |
| Manufacturer | PEKOKO |
| Total USB Ports | 1 |
9. Warranty Information
The PEKOKO L4pro comes with a 1-year warranty from the manufacturer. For detailed warranty terms and conditions, please refer to the documentation included with your product or contact customer support.
Optional Protection Plans
Additional protection plans may be available for purchase to extend coverage beyond the standard manufacturer's warranty:
- 4-Year Protection Plan: Provides extended coverage for 48 months.
- Complete Protect: A monthly subscription plan covering eligible past and future purchases.
10. Customer Support
For technical assistance, troubleshooting, or warranty claims, please contact PEKOKO customer support.
Visit the PEKOKO Store on Amazon for more information and to contact the seller directly.
You can also find answers to frequently asked questions on the PEKOKO brand page. For general inquiries or product information, you may visit the manufacturer's website: www.cnkailan.com.