1. Important Safety Information
Before operating your RPINT E14 electric bike, please read this manual thoroughly. Failure to follow instructions can result in serious injury or property damage. Always prioritize your safety and the safety of others.
- Always wear a helmet that meets safety standards.
- Familiarize yourself with local laws and regulations regarding electric bicycles.
- Perform a pre-ride inspection before each use, checking brakes, tires, battery, and all fasteners.
- Do not ride under the influence of alcohol or drugs.
- Avoid riding in adverse weather conditions (heavy rain, snow, ice) or on slippery surfaces.
- Maintain a safe speed and distance from other vehicles and pedestrians.
- Ensure the battery is securely locked in place before riding.
2. Package Contents
Your RPINT E14 electric bike package includes the following items:
- RPINT E14 Foldable Electric Bike (partially assembled)
- 48V 10AH Removable Battery
- Battery Charger
- User Manual (this document)
- Assembly Tools (wrenches, screws)
- Pedals
- Front Fender
3. Setup and Assembly
Your RPINT E14 electric bike comes partially assembled. Follow these steps to complete the assembly:
3.1 Unpacking and Initial Inspection
Carefully remove all components from the packaging. Inspect for any damage during transit. Keep all packaging materials until assembly is complete and you are satisfied with the product.
3.2 Front Wheel Installation
Attach the front wheel to the front fork. Ensure the brake disc aligns correctly with the caliper. Secure the wheel using the provided axle and nuts, ensuring all washers and hooks are correctly positioned as shown in the video.
Video: Detailed instructions on how to install the front wheel of the e-bike.
3.3 Handlebar and Seat Installation
Insert the handlebar stem into the main frame and secure it with the quick-release lever. Adjust the height to a comfortable riding position. Similarly, insert the seat post and secure it. Ensure both are tightened firmly to prevent movement during riding.

Image: The RPINT E14 features adjustable handlebars and seat for rider comfort.
3.4 Pedal Installation
Attach the pedals to the crank arms. Note that pedals are typically marked 'L' for left and 'R' for right. The left pedal tightens counter-clockwise, and the right pedal tightens clockwise. Use a wrench to ensure they are securely fastened.
3.5 Front Fender Installation
Install the front fender over the front wheel, securing it with the provided screws and brackets. This helps protect against splashes and debris.
Video: A comprehensive guide on setting up the RPINT E14 electric bike, including various assembly steps.
4. Operating Instructions
4.1 Powering On/Off
Insert the key into the ignition and turn it to the 'ON' position to power on the bike. The LED display will illuminate. To power off, turn the key to the 'OFF' position and remove it.
4.2 Riding Modes
The RPINT E14 offers three distinct riding modes:
- Pedal Mode: Ride the bike like a traditional bicycle, using only pedal power.
- Pedal Assist System (PAS) Mode: The motor provides assistance as you pedal. The E14 has 3 levels of pedal assist, adjustable via the controls on the handlebar.
- Pure Electric Mode: Use the throttle to engage the motor and ride without pedaling.
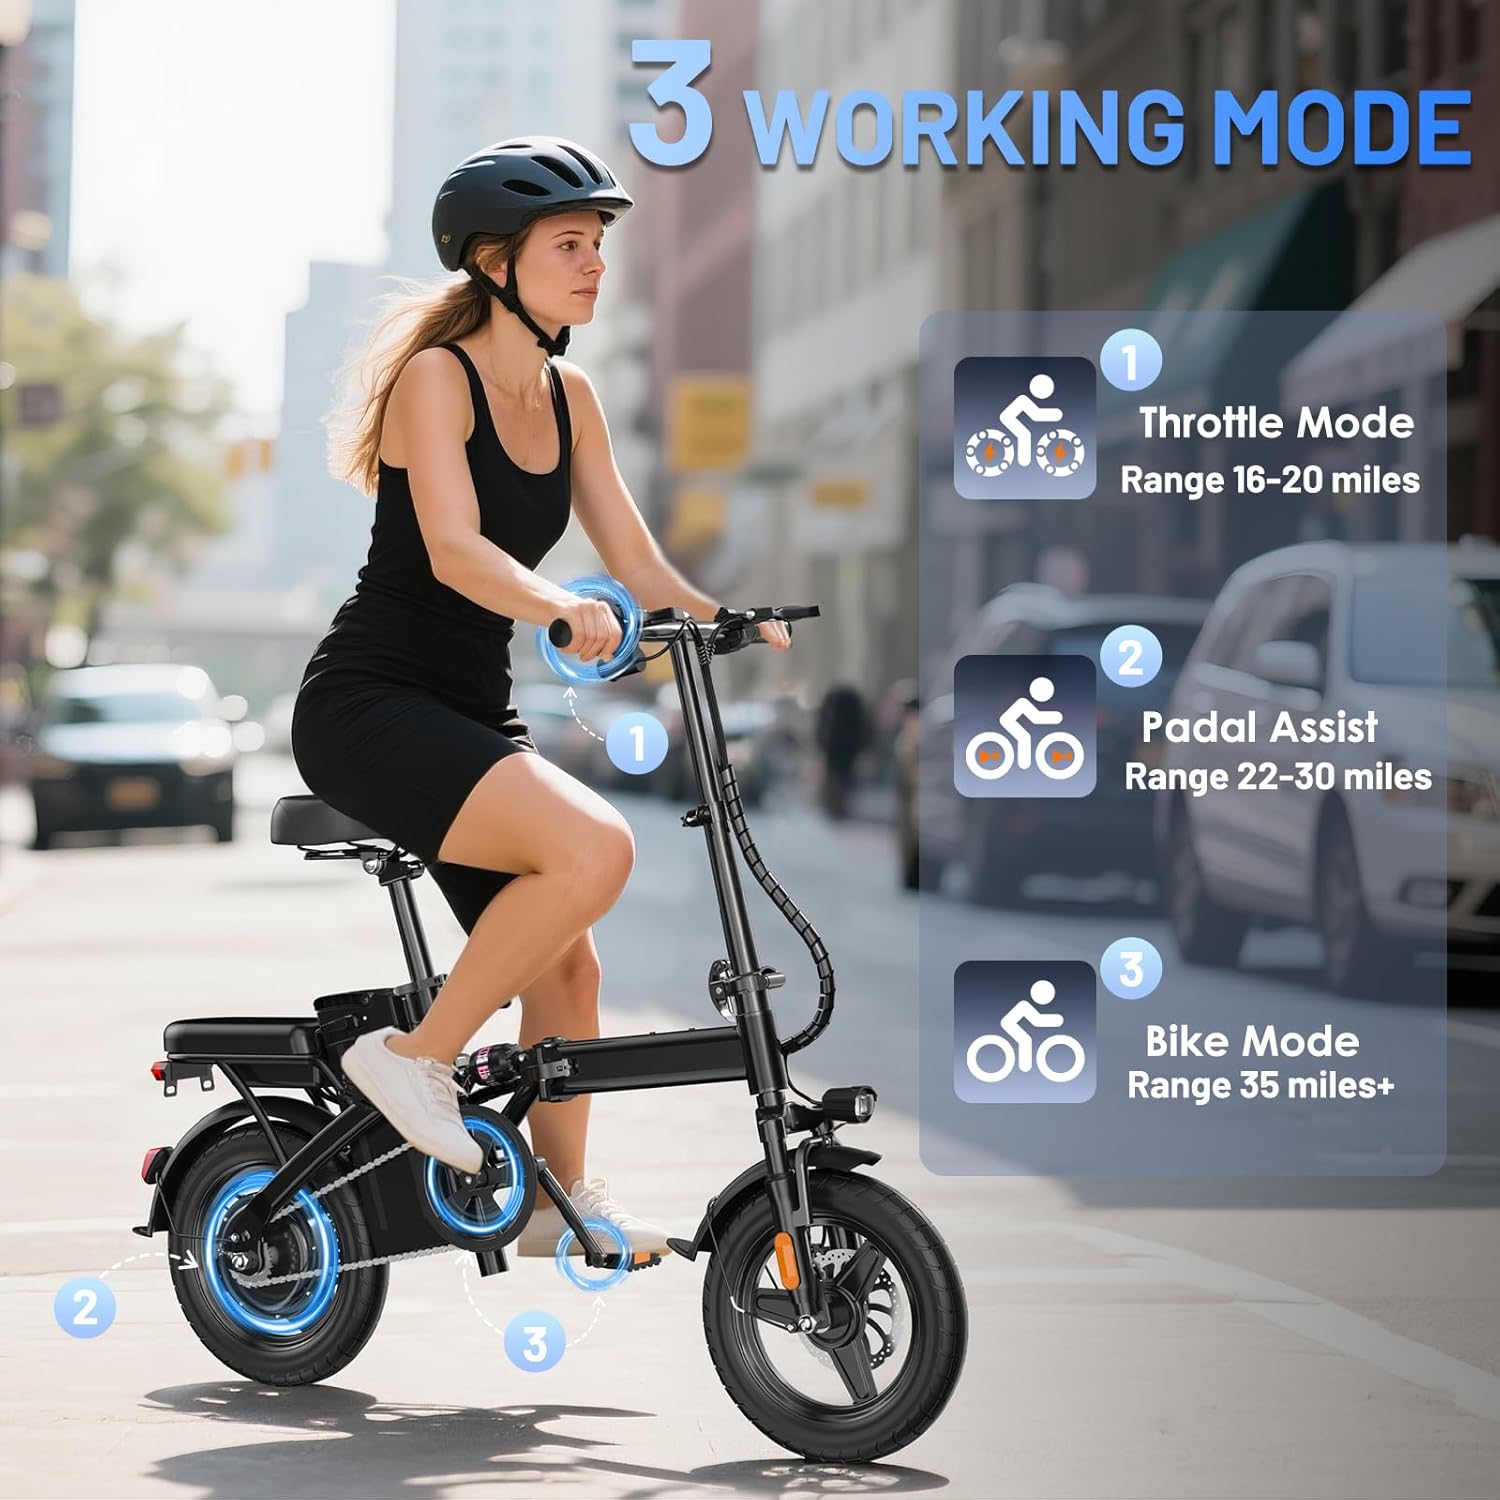
Image: Visual representation of the three working modes: Throttle, Pedal Assist, and Pedal.
4.3 LED Display and Controls
The handlebar features an LED display showing battery level and other essential information. Controls for headlights, taillights, and riding modes are also located on the handlebar. Familiarize yourself with these controls before riding.

Image: Detailed view of the LED display and various controls on the handlebar, including light switches and gear selection.
4.4 Braking
The RPINT E14 is equipped with front and rear mechanical disc brakes. Apply both brakes simultaneously for effective stopping. Test the brakes before each ride.

Image: Illustration of the front and rear disc brakes and the front suspension system.
4.5 Folding and Unfolding
The RPINT E14 features a foldable design for easy storage and transport. To fold, release the quick-release levers on the frame and handlebar stem, then carefully fold the bike. Reverse the process to unfold, ensuring all levers are securely locked before riding.
Video: Demonstrates the folding mechanism of the 14-inch electric bike for compact storage.
5. Charging the Battery
The RPINT E14 is equipped with a removable 48V 10AH battery. It takes approximately 5-6 hours for a full charge, providing a PAS range of 20-25 miles.
- To charge, you can either charge the battery while it's installed on the bike or remove it for charging.
- Connect the charger to the battery's charging port, then plug the charger into a standard wall outlet.
- The charger indicator light will typically turn from red to green when fully charged.
- Avoid overcharging the battery.
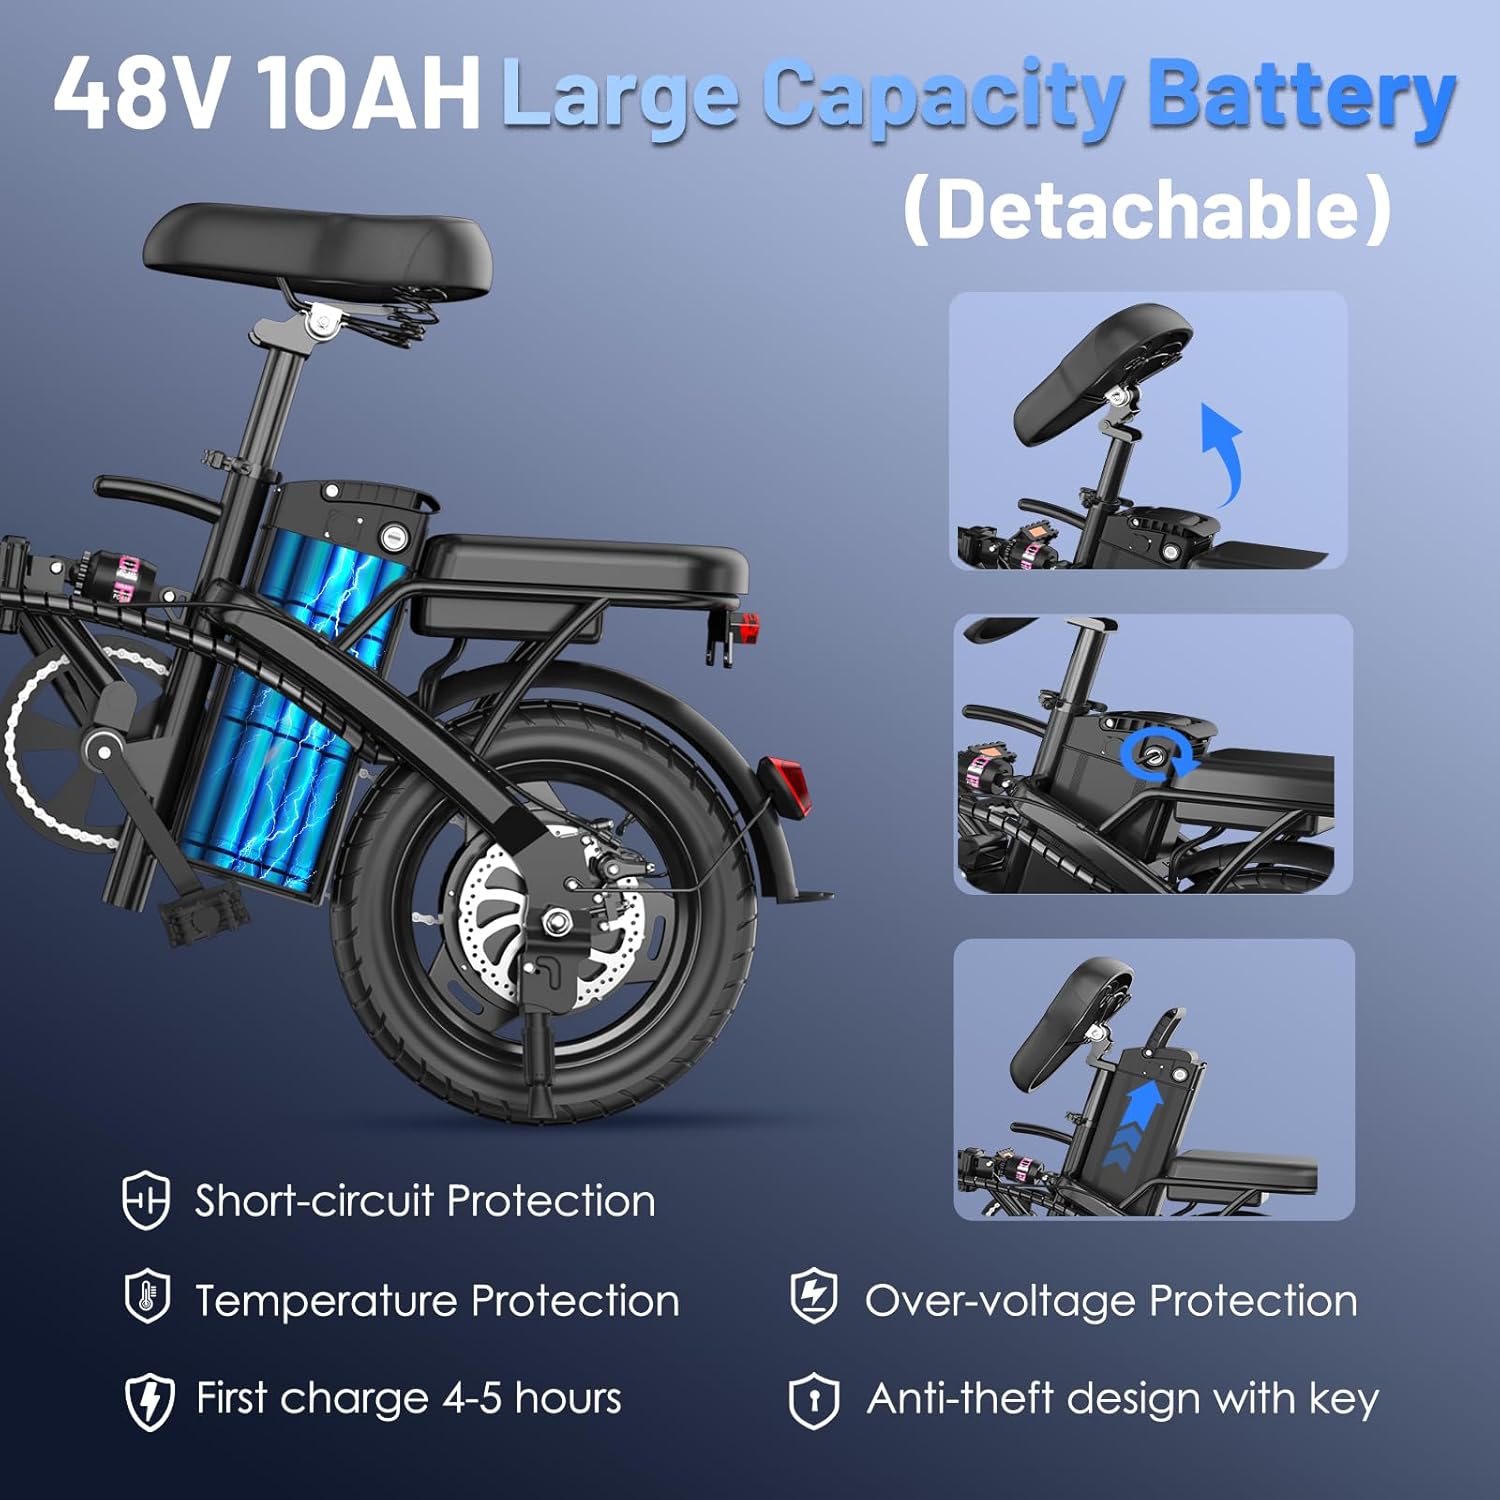
Image: Details of the 48V 10AH removable battery, highlighting short-circuit, temperature, and over-voltage protection, along with anti-theft design.
6. Maintenance
Regular maintenance ensures the longevity and safe operation of your RPINT E14 electric bike.
- Tires: Check tire pressure regularly. The 14" tubeless tires are designed for durability, but proper inflation is crucial for performance and safety.
- Brakes: Inspect brake pads and cables periodically. Adjust or replace as needed to ensure responsive braking.
- Chain: Keep the chain clean and lubricated to prevent rust and ensure smooth operation.
- Fasteners: Regularly check all nuts, bolts, and quick-release levers to ensure they are tight and secure.
- Cleaning: Clean the bike with a damp cloth. Avoid using high-pressure water jets directly on electrical components.

Image: Illustrates the robust construction of the 14-inch tubeless tires, designed for stability and handling on various terrains.
7. Troubleshooting
Here are some common issues and their potential solutions:
| Problem | Possible Cause | Solution |
|---|---|---|
| Bike does not power on | Battery not charged; Key not in 'ON' position; Loose battery connection | Charge battery; Turn key to 'ON'; Secure battery connection |
| Motor not assisting | PAS level too low; Throttle not engaged; Brake levers engaged | Increase PAS level; Twist throttle; Ensure brake levers are released |
| Brakes feel weak | Brake pads worn; Brake cables loose | Inspect and replace brake pads; Adjust brake cable tension |
| Unusual noises during riding | Loose components; Dry chain; Tire rubbing | Check all fasteners; Lubricate chain; Inspect tire and fender alignment |
If you encounter issues not listed here or if solutions do not resolve the problem, please contact customer support.
8. Specifications
| Feature | Detail |
|---|---|
| Bike Type | Commuting Bike, Electric Bike |
| Motor | 500W Peak Motor |
| Top Speed | 20 MPH |
| Battery | 48V 10AH Removable Lithium Battery (480 Watt Hours) |
| PAS Range | 20-25 Miles |
| Charging Time | 5-6 Hours |
| Working Modes | PAS (3 levels), Pure Electric (Throttle), Pedal |
| Wheel Size | 14 Inches |
| Tires | Puncture Resistant, Tubeless |
| Brake Style | Front and Rear Mechanical Disc Brakes |
| Frame Material | High Carbon Steel |
| Suspension Type | Front |
| Special Features | Adjustable Handlebars, Adjustable Seat, Foldable, Lightweight, Rechargeable |
| Item Weight | 55 Pounds |
| Maximum Weight Recommendation | 260 Pounds |
| Manufacturer | Huizhou ENSMAI Intelligent Technology Co., Ltd |
9. Warranty Information
This RPINT E14 electric bike comes with a limited manufacturer's warranty. Please refer to the warranty card included in your package for specific terms, conditions, and duration of coverage. Keep your proof of purchase for warranty claims.
10. Customer Support
For any questions, technical assistance, or warranty claims, please contact the seller, ESM EBike, through your purchase platform or the contact information provided in your product documentation. Please have your model number (E14) and proof of purchase ready when contacting support.


