Important Safety Instructions
Please read all instructions carefully before using the SUNSMAI B75-2-Pro Steam Mop Cleaner. Failure to follow these instructions may result in electric shock, fire, or serious injury.
- Always ensure the appliance is unplugged from the power outlet before cleaning or performing maintenance.
- Do not immerse the appliance in water or other liquids.
- Use only as described in this manual. Use only manufacturer's recommended attachments.
- Do not use on unsealed wood floors. Test in an inconspicuous area first if unsure of floor material.
- Keep hair, loose clothing, fingers, and all parts of body away from openings and moving parts.
- Do not use without water in the clean water tank.
- Do not add any detergents, chemicals, or essential oils to the water tank, as this may damage the appliance or create hazardous fumes.
- This appliance is for household use only.
- Supervise children to ensure they do not play with the appliance.
- If the supply cord is damaged, it must be replaced by the manufacturer, its service agent, or similarly qualified persons in order to avoid a hazard.
Product Overview
The SUNSMAI B75-2-Pro Steam Mop Cleaner is a versatile 4-in-1 cleaning device designed for sealed hard floors. It combines sweeping, mopping, steam cleaning, and self-cleaning functions.
Key Features:
- 4-in-1 Functionality: Sweeps, mops, steam cleans, and self-cleans.
- Deep Steam Cleaning: Heats up to 212°F (100°C) for chemical-free cleaning.
- Self-Cleaning Roller Brush: Automated cleaning cycle for the brush.
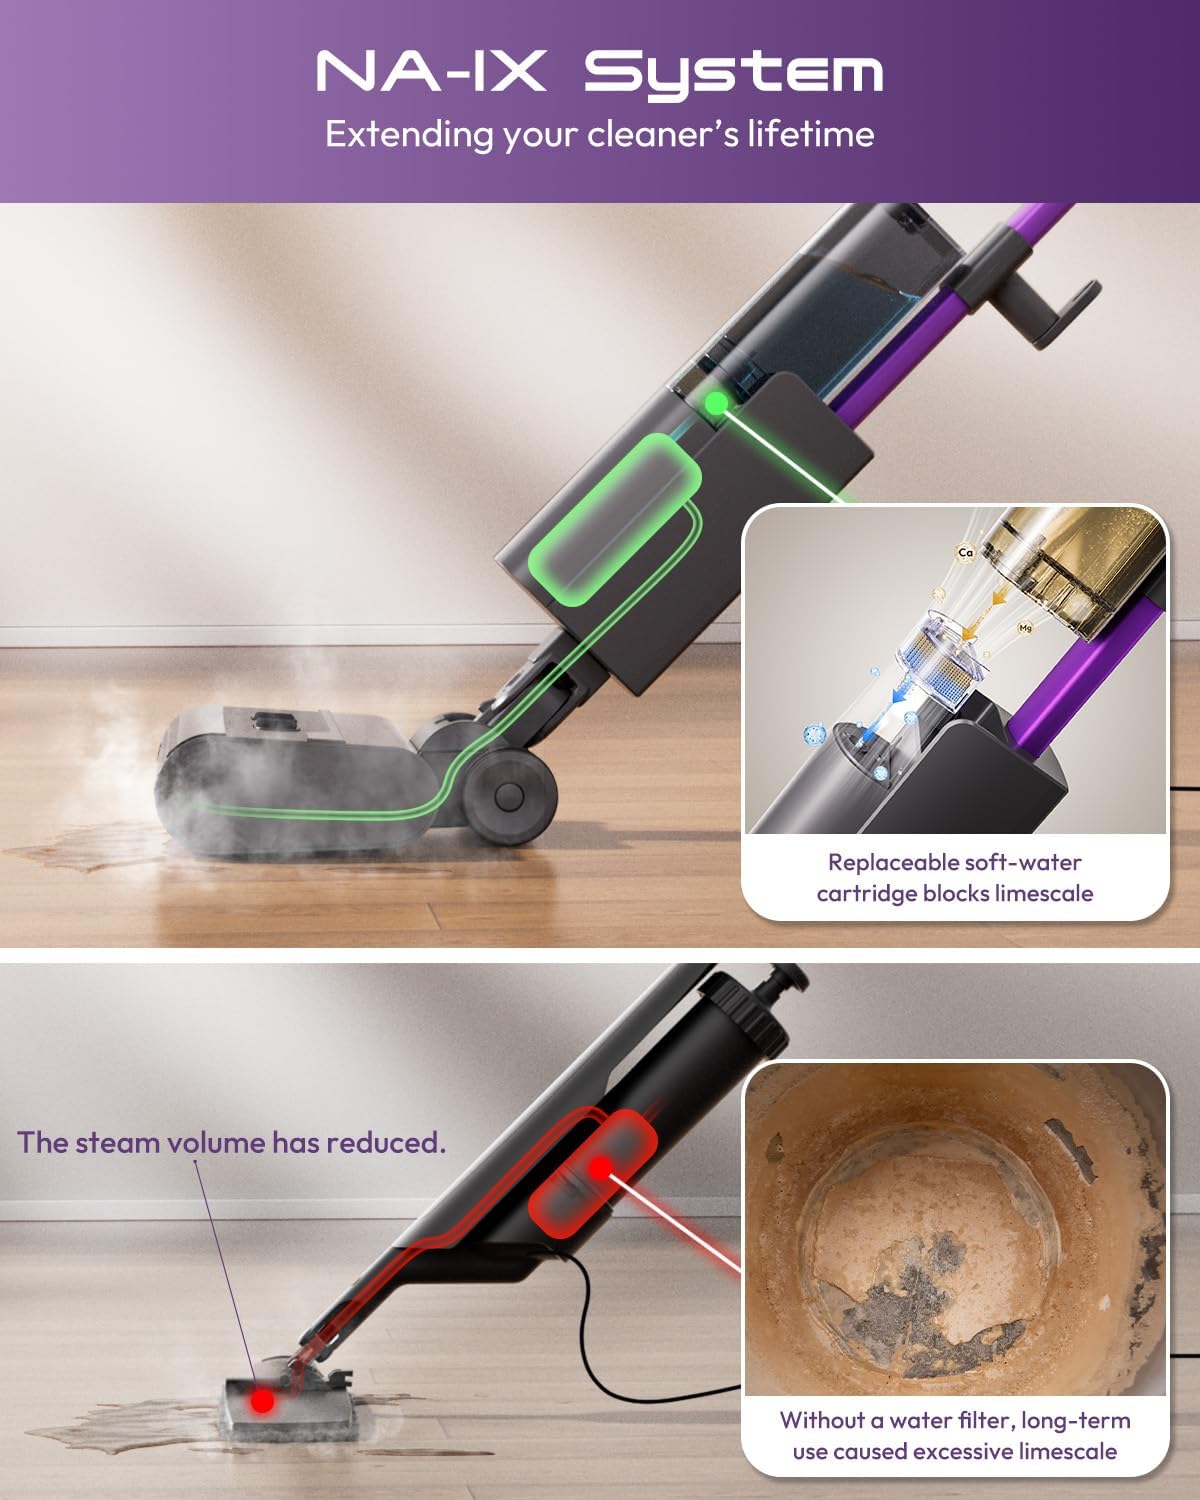
- NA-IX Anti-Scale Technology: Replaceable soft water filter cartridge to prevent limescale buildup.
- Dry-Wet Separation Dustbin: Detachable bin for easy disposal of debris.
- Versatile Floor Compatibility: Suitable for sealed hardwood, laminate, tile, stone, marble, and vinyl floors.
- User-Centered Design: Lightweight (7.28 lbs), 180° lie-flat capability, power-assisted drive, 6-meter power cord, and LED mop head illumination.
What's Included:

Main Body

Handle

Extension Aluminum Tube
Charging Base
Clean Water Tank

Additional Water Softening Box
Setup Guide
Follow these steps to assemble your SUNSMAI B75-2-Pro Steam Mop Cleaner.
1. Handle Assembly
Connect the handle components as shown in the video. Ensure the electrical connectors are properly aligned and secured before fastening with the provided screws.
Video: B75-2 Steam Mop Assembly Guide. This video demonstrates the step-by-step process of assembling the steam mop handle and connecting it to the main body.
2. Filter and Water Tank Installation
The anti-scale filter is pre-installed. An additional replacement filter is included. Slide the clean water tank onto the main body. No tools are required for this step.
Video: B75-2 Steam Mop Assembly Guide. This video also shows the installation of the water tank and mentions the pre-installed filter.
3. Mop Roller Installation
Lock the mop roller into its designated slot on the mop head. Ensure it is securely in place.
Video: B75-2 Steam Mop Assembly Guide. This video demonstrates how to install the mop roller and secure the dirty water tank.
Operating Instructions
Filling the Water Tank
- Ensure the appliance is unplugged.
- Remove the clean water tank from the main body.
- Fill the tank with clean tap water. Do not exceed the MAX fill line.
- Reattach the clean water tank securely to the main body.
Note: Using distilled or RO water is recommended to further reduce limescale buildup, though the included filter is designed to manage tap water. Do not add any cleaning solutions or chemicals to the water tank.
Powering On and Steam Generation
- Plug the power cord into a suitable electrical outlet.
- Press the power button on the handle. The mop will begin to heat up.
- Wait approximately 3 seconds for steam to generate. The LED lights on the mop head will illuminate.
Video: A lightweight and easy-to-use steam mop. This video demonstrates the steam mop in action, showing steam generation and floor cleaning.
Cleaning Modes
The SUNSMAI B75-2-Pro offers two cleaning modes:
- Steam Mop Mode: For deep cleaning and dissolving stubborn stains. The mop head releases steam while the roller brush cleans.
- Dry-Sweep Mode: For quick pickup of dry debris. The roller brush operates without steam.
Switch between modes using the controls on the handle. The LED lights on the mop head assist in illuminating dark areas during cleaning.

Image: The steam mop effectively cleaning various sealed hard floor types, including hardwood, marble, tile, stone, laminate, and vinyl.

Image: The steam mop's user-friendly design, featuring a lightweight build, low-noise operation, and an LED spotlight for enhanced visibility under furniture.
Maintenance
Self-Cleaning Cycle
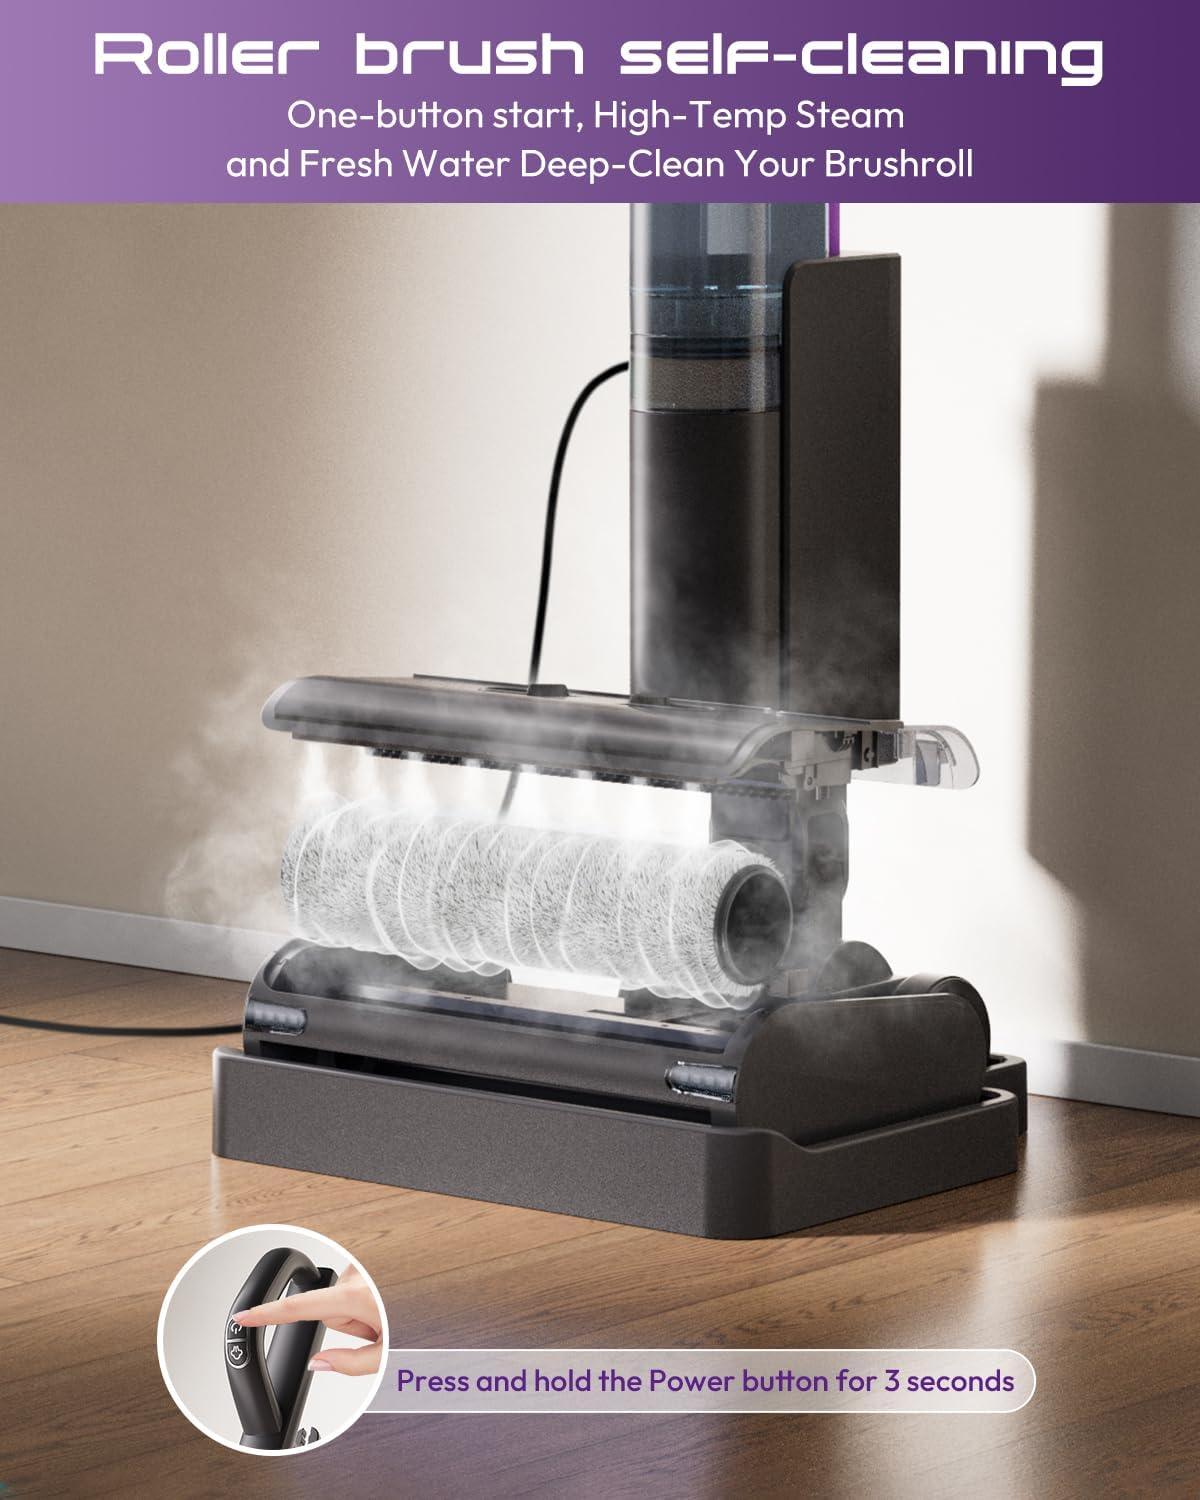
After each use, place the mop on its charging base. Press and hold the power button for 2-3 seconds to activate the self-cleaning cycle. The mop will automatically rinse the roller brush with water, steam-sanitize it, and squeegee it dry in approximately 105 seconds.

Image: The steam mop's self-cleaning function, showing the roller brush being cleaned with high-temperature steam and fresh water.
Emptying and Cleaning the Dirty Water Tank
The dirty water tank should be emptied and cleaned after each use to prevent odors and maintain hygiene. The tank can be easily removed for direct cleaning.

Image: Instructions for quick emptying of the dry-wet separation dustbin.

Image: Detailed steps for post-self-cleaning maintenance, including rinsing and air drying components to prevent odors and extend lifespan.
Replacing the Soft Water Filter Cartridge
The soft water filter cartridge should be replaced every 6 months under normal use. In areas with very hard water (>180 mg/L), replace every 3 months. Refer to the product overview section for the location of the filter.
Troubleshooting
| Problem | Possible Cause | Solution |
|---|---|---|
| Red light is on/flashing |
|
|
| No steam |
|
|
| Won't power on |
|
|
| Can I add detergent? | Not recommended. | Do not add any detergents or chemicals to the water tank. Use only water for steam cleaning. |
| Is this a vacuum? | It's a 3-in-1 cleaner that steams, sweeps, and mops. | A rotating roller lifts and collects debris while the surface is cleaned. It does not use vacuum suction, so it runs very quietly. |
| Tank size and runtime? | 450 ml clean-water tank. | The 450 ml clean-water tank lasts about 20 minutes in steam mode and is easy to refill. |
Note: Due to differences in production batches, the water tank cleaning brush may be missing. If not included, contact customer service for a free replacement. This does not affect normal use.
Specifications
| Brand: | SUNSMAI |
| Model Name: | B75-2-Pro |
| Special Feature: | Lightweight |
| Surface Recommendation: | Sealed hard floor (hardwood, laminate, tile, stone, marble, vinyl) |
| Wattage: | 1050 watts |
| Voltage: | 120 Volts |
| Item Weight: | 7.27 pounds |
| Capacity (Water Tank): | 450 Milliliters |
| Maximum Temperature: | 212 Degrees Fahrenheit (100°C) |
| Product Dimensions: | 9.25"D x 9.53"W x 41.92"H |
| Color: | Dark Gray and Purple |
Warranty and Support
For warranty information or customer support, please refer to the contact details provided in your product packaging or visit the official SUNSMAI website. Keep your purchase receipt for warranty claims.
Protection plans are available for purchase separately:
- 2-Year Protection Plan
- 3-Year Protection Plan
- Complete Protect: One plan covers all eligible past and future purchases