1. Safety Information
Please read all safety instructions carefully before using the Ymiko Food Vacuum Sealer Machine. Retain this manual for future reference.
- Do not immerse the appliance, power cord, or plug in water or other liquids.
- Keep the appliance out of reach of children.
- Do not operate the appliance with a damaged cord or plug. Contact customer support for assistance.
- Use only Ymiko-approved vacuum bags or compatible bags designed for vacuum sealing.
- Unplug the appliance from the power outlet when not in use and before cleaning.
- Avoid touching hot sealing strips immediately after use.
- Ensure the appliance is placed on a stable, flat, and dry surface during operation.
2. Product Overview
The Ymiko Food Vacuum Sealer Machine is designed to preserve food freshness by removing air from specially designed bags and sealing them. It features a powerful 60KPA suction, dry and wet food modes, and a compact design for home kitchen use.
2.1 Components
- Vacuum Sealer Main Unit
- 20 x Vacuum Sealer Bags
- User Manual (this document)
- Sticker
2.2 Key Features
- Powerful 60KPA Suction: Ensures quick and effective air removal for optimal food preservation.
- Dry and Wet Modes: Specialized settings for sealing both dry and moist foods, preventing liquid ingress during sealing.
- User-friendly Design: Compact and lightweight with a digital display for easy operation.
- Extended Freshness: Helps keep food fresh up to 7 times longer than traditional storage methods.

Figure 1: Overview of the Ymiko Food Vacuum Sealer's key features.
3. Setup
- Unpack the Appliance: Carefully remove the vacuum sealer and all accessories from the packaging.
- Inspect for Damage: Check the appliance and power cord for any signs of damage. Do not use if damaged.
- Clean the Appliance: Wipe the exterior of the vacuum sealer with a damp cloth. Ensure the sealing strip and vacuum channel are clean and dry.
- Position the Appliance: Place the vacuum sealer on a flat, stable, and dry surface near a power outlet.
- Plug In: Connect the power cord to the appliance and then to a standard 110V US power outlet. The digital display should illuminate.
4. Operating Instructions
4.1 Preparing the Bag
- Place the food item into a vacuum sealer bag, ensuring there is at least 2-3 inches of space between the food and the top of the bag.
- Ensure the open end of the bag is clean, dry, and free of wrinkles.
4.2 Vacuum Sealing Food
- Open the lid of the vacuum sealer.
- Place the open end of the bag into the vacuum channel, ensuring it lies flat across the sealing strip.
- Close the lid firmly until you hear a click, indicating it is locked.
- Select the appropriate mode on the digital display:
- Dry Mode: For dry foods like grains, nuts, or dried fruits.
- Wet Mode: For moist foods like meats, fish, or marinated items. The intelligent design prevents liquid from being drawn into the machine.
- Press the corresponding button (e.g., 'Vacuum Seal' or 'Dry/Wet' button) to start the vacuuming and sealing process. The machine will automatically vacuum the air and then seal the bag.
- Once the process is complete, the indicator light will turn off. Press the release buttons on the sides (if applicable) to open the lid and remove the sealed bag.

Figure 2: LED Smart Display showing control options.

Figure 3: Demonstrating Dry and Wet Mode operation.

Figure 4: Vacuum sealing a large item, showcasing the 210mm sealing width.
4.3 Sealing Only (No Vacuum)
This mode is useful for sealing bags without removing air, such as for snack bags or delicate items.
- Place the open end of the bag across the sealing strip.
- Close the lid firmly.
- Press the 'Single Seal' button. The machine will heat and seal the bag without vacuuming.
- Once complete, open the lid and remove the sealed bag.
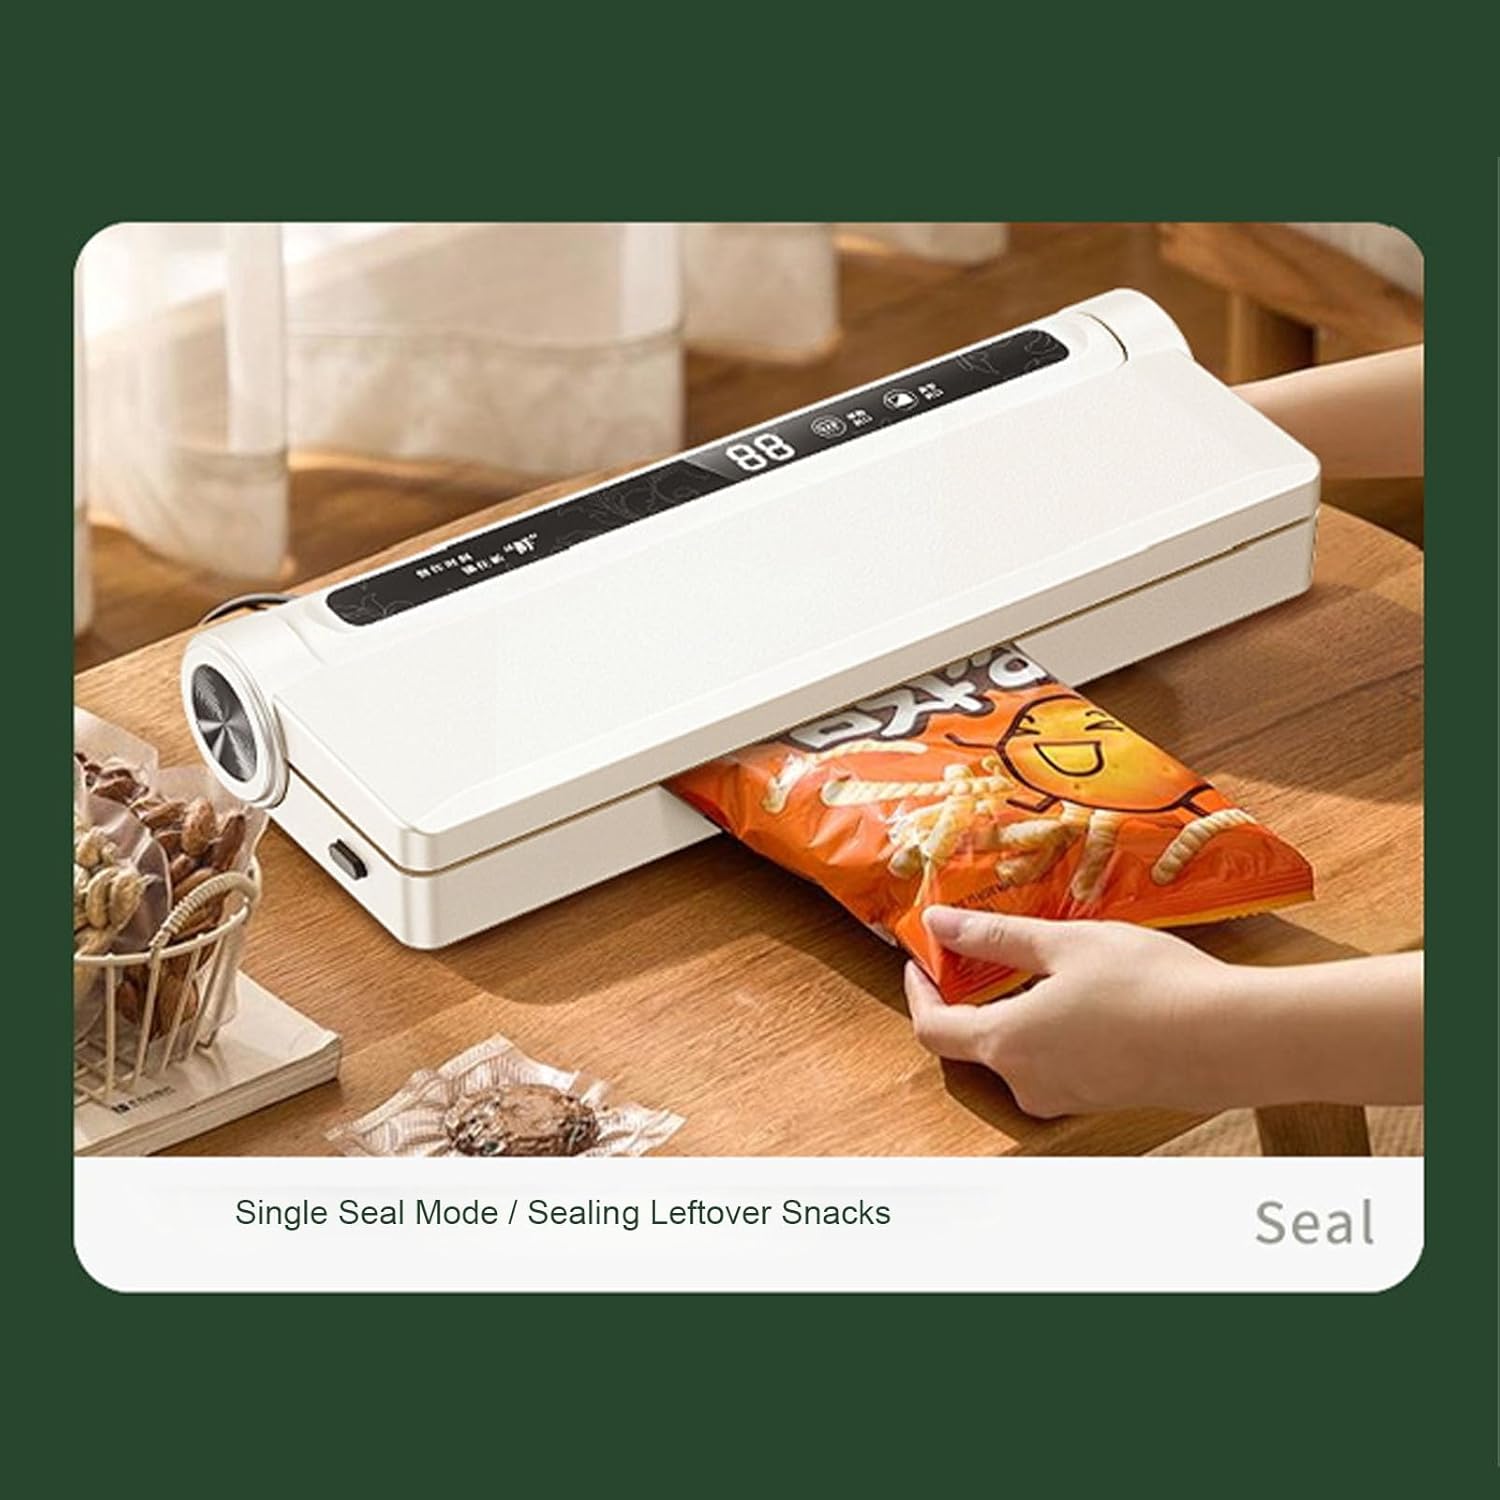
Figure 5: Using the Single Seal Mode for snacks.
5. Maintenance
5.1 Cleaning
- Always unplug the appliance before cleaning.
- Wipe the exterior of the machine with a soft, damp cloth. Do not use abrasive cleaners or solvents.
- Clean the vacuum channel and sealing strip regularly to prevent food residue buildup. Use a mild detergent if necessary, then wipe dry.
- Ensure all parts are completely dry before storing or next use.
5.2 Storage
Store the vacuum sealer in a cool, dry place. For compact storage, ensure the lid is not fully latched to prevent compression of the sealing gaskets, which can affect performance over time.
6. Troubleshooting
| Problem | Possible Cause | Solution |
|---|---|---|
| Machine does not turn on. | Not plugged in; power outlet malfunction. | Ensure power cord is securely plugged into a working outlet. |
| Machine vacuums but does not seal. | Sealing strip dirty or wet; bag not positioned correctly; sealing strip worn. | Clean and dry the sealing strip. Reposition the bag. Contact support if strip is worn. |
| Machine seals but does not vacuum. | Lid not closed properly; vacuum channel blocked; bag punctured. | Ensure lid is firmly latched. Clear any obstructions in the vacuum channel. Check bag for holes. |
| Air leaks into the bag after sealing. | Bag not sealed properly; bag material incompatible; sharp food edges. | Reseal the bag. Use only vacuum sealer bags. Ensure no sharp edges are piercing the bag. |
7. Specifications
- Model: Ymiko0ixnguadm8-11
- Brand: Ymiko
- Material: ABS Plastic
- Rated Power: 130W
- Actual Vacuum Degree: 60KPA
- Rated Frequency: 60Hz
- Voltage: 110V (US Plug)
8. Warranty and Support
For warranty information or technical support, please refer to the documentation provided with your purchase or contact Ymiko customer service directly. Keep your purchase receipt as proof of purchase.
Customer Service: Please visit the official Ymiko website or contact your retailer for support contact details.