
Introduction
This manual provides detailed instructions for the installation, operation, and maintenance of your Glendan OPT07 Smart Toilet. Please read this manual thoroughly before installation and use to ensure proper function and safety.
Safety Information
- Ensure your bathroom has an accessible grounded AC 110V electrical outlet.
- Confirm the toilet is floor-mounted before purchasing and installation.
- Do not attempt to repair or modify the toilet yourself. Contact qualified personnel for service.
- Keep the remote control dry and away from water.
- The toilet features an 8-point safety shield system including power-on self-check, leakage current protection, seat temperature safeguard, isolated water-electricity, IPX4 waterproof rating, dry fire protection, flame retardant material, and short-circuit protection.

Image: The 8-point safety shield system ensures user comfort and security with features like power-on self-check and leakage current protection.
Product Specifications
| Feature | Detail |
|---|---|
| Color | White |
| Product Dimensions | 26.7"D x 16.3"W x 17"H |
| Material | High-density ceramic |
| Item Weight | 100 Pounds |
| Installation Type | Floor Mounted |
| Shape | Oval |
| Seat Material Type | High Density Polypropylene |
| Style | Built-in Bidet with Tank / UV-C Light / Foam Shield / Child Seat |
| Included Components | Child Seat, Complete Installation Kit, Foam Solution Bottle, Remote Control, User Manual |
| Power Requirement | Electrical Outlet Required (AC 110V) |

Image: Product dimensions and a comprehensive list of included accessories for the Glendan OPT07 Smart Toilet.
Installation Guide
For a visual guide, please refer to the official installation video below. Ensure all necessary components are present before beginning installation.
Video: Official Glendan Smart Toilet Installation Steps. This video demonstrates the complete installation process from unboxing to final setup.
Phase 1: Preparing the Floor and Drain
- Confirm installation environment: Ensure the angle valve is 10-16 inches above the ground, the wall socket is 16-20 inches above the ground, and the center of the sewage outlet is 11.81 inches away from the wall. The sewage outlet diameter should be 3.94 inches.
- Ensure there is at least 11.81 inches (30 cm) of space in front of the drain outlet for proper toilet placement.
Phase 2: Preparing the Toilet Base
- Position the fixing disk over the sewage outlet and mark the four drilling positions.
- Drill four holes at the marked positions.
- Clean the area around the holes.
- Insert the provided screws into the four drilled holes.
- Place the fixing disk back over the screws and attach the white snaps, tightening them with a wrench.
Phase 3: Placing and Securing the Toilet
- Install the flange ring onto the bottom of the toilet, ensuring a secure fit.
- Apply silicone sealant around the base of the toilet for a watertight seal.
- Carefully place the toilet onto the prepared fixing disk, aligning it with the sewage outlet.
- Install the decorative covers over the side screws to secure the toilet to the floor.
- Install the backup flush battery (for use during power outages) into its designated slot on the side of the toilet.
Phase 4: Connecting Water and Power
- Tighten the white adapter onto one port of the included angle valve.
- Insert the toilet's cleaning water inlet hose into the white adapter.
- Connect the other end of the angle valve to your wall's water supply.
- Turn on the angle valve switch to allow water to flow to the toilet.
- Remove the back cover of the toilet by pushing it out and lifting it up.
- Locate and remove the connecting tube from the empty foam bottle.
- Fill the empty bottle with tap water and add the two provided effervescent tablets to dissolve. (You can later use concentrated foam solution or diluted detergent).
- Reconnect the filled foam bottle and tighten it before placing it back into its slot.
- Plug the toilet's power cord into the grounded AC 110V outlet. Press the (RESET) button on the plug forcefully until you hear a "Di" sound.
- The toilet's display should light up, indicating it has power.
- After installation, please test all functions.
- Apply silicone sealant around the base of the toilet for a finished look.
- Install the remote control holder using the adhesive pad provided. Insert batteries into the remote control and place it in the holder.
Operating Instructions
The Glendan OPT07 Smart Toilet offers a range of features for enhanced comfort and hygiene. All functions can be managed via the wireless remote control or the side rotary knob.
Automatic Functions
- Auto Open & Close Lid/Seat: The lid automatically opens as you approach and closes/flushes when you leave.
- Foot Sensor: For added convenience, use the foot sensor at the base of the toilet to control lid operation and flushing.
- Off-Seat Auto Flush: The toilet flushes automatically after you leave the seat.
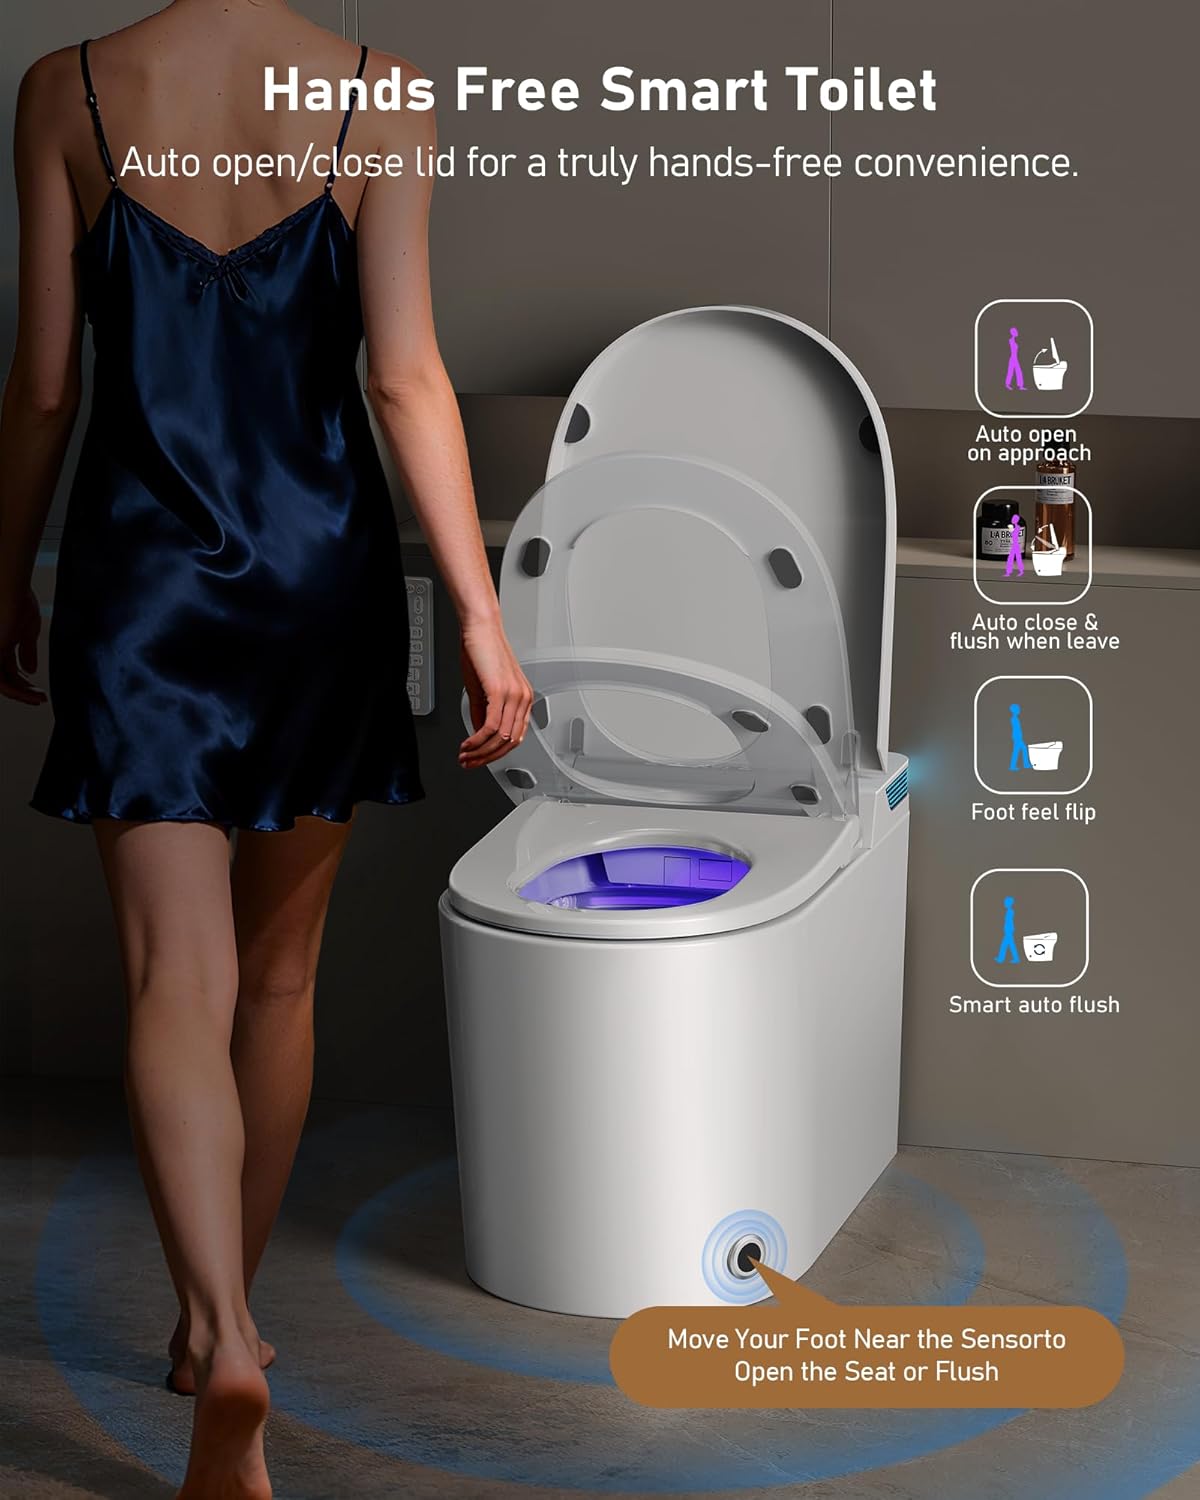
Image: Hands-free operation with auto-open lid and foot sensor for convenience.
Washing Modes
Experience personalized cleansing with instant warm water (0.1s heating, 93°F/99°F/104°F adjustable) and four modes:
- Rear Wash: Standard posterior cleansing.
- Front Wash: Gentle feminine cleansing.
- Oscillating Wash: Nozzle moves back and forth for a wider cleaning area.
- Self-Clean: Nozzle self-cleans before and after each use.
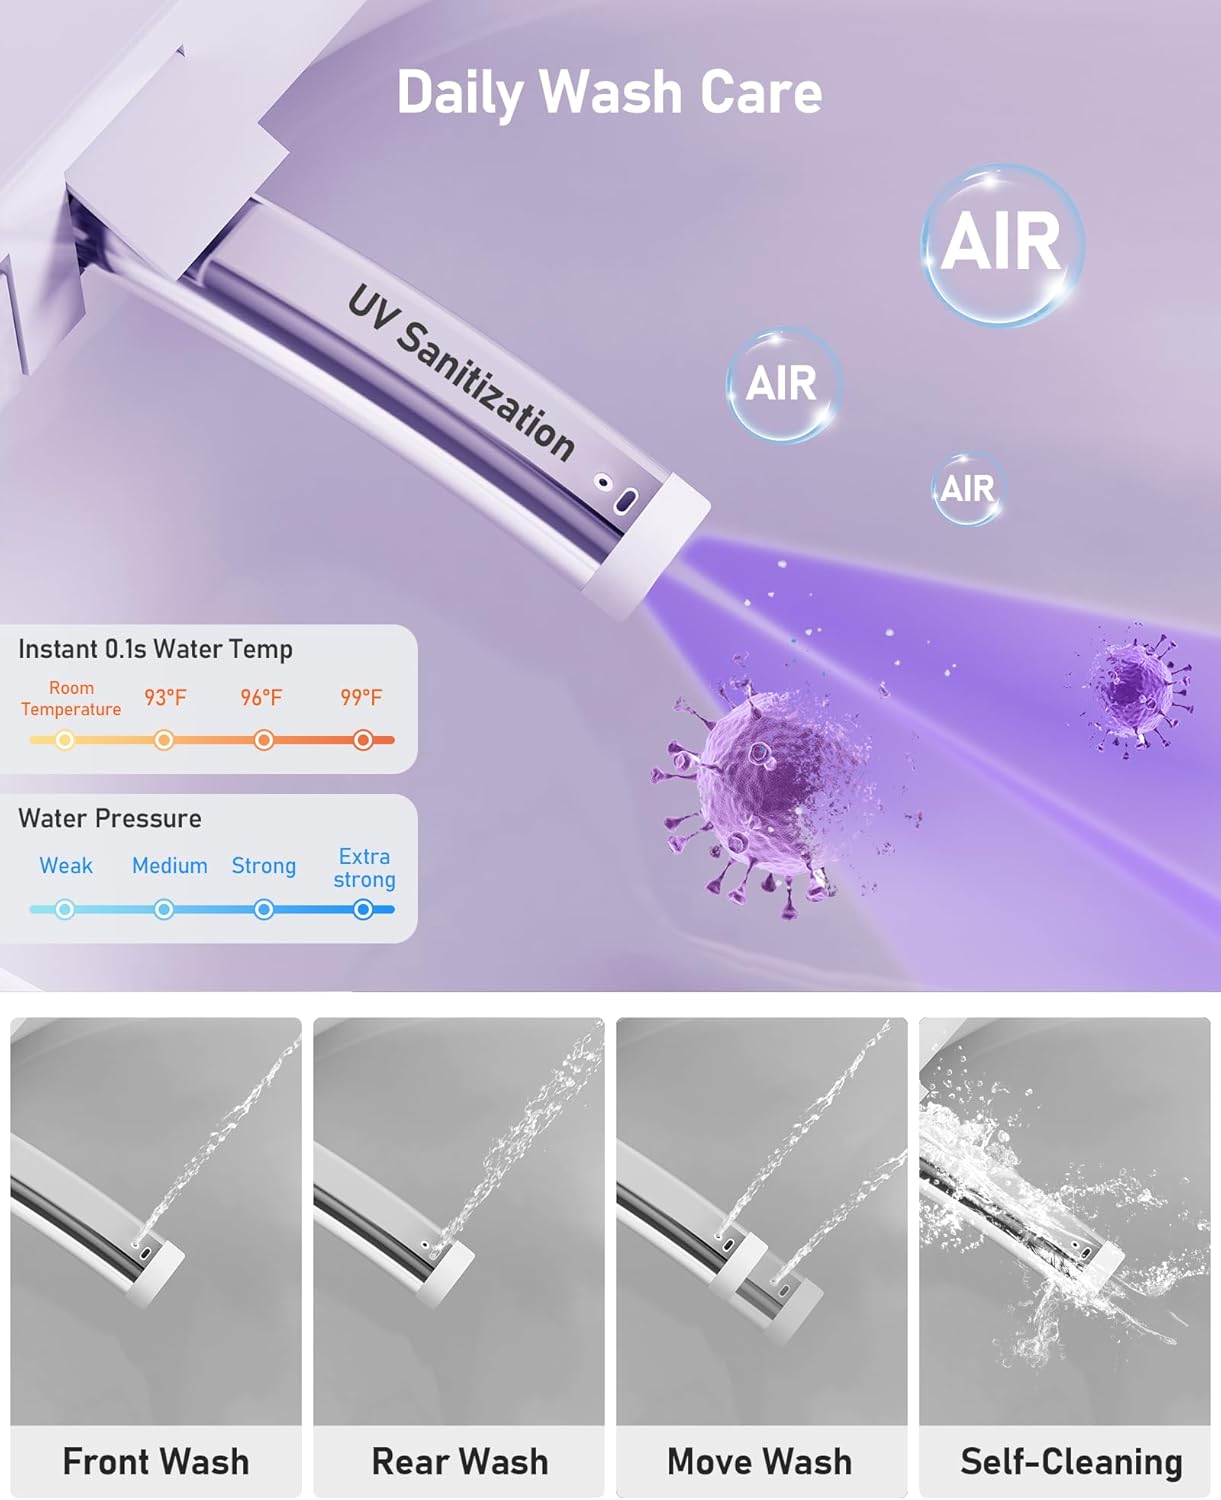
Image: Daily wash care features including UV sanitization, adjustable water temperature, water pressure, and various wash modes.
Comfort Features
- Heated Seat: Enjoy adjustable seat warming with 4 levels for all-season comfort.
- Warm Air Drying: A gentle dryer with 4 air temperature settings enhances comfort and reduces the need for toilet paper.
- Child Seat: A dedicated child seat is included for safe and comfortable use by children.
- Night Light: A soft LED night light provides visibility in the dark.

Image: Heated seat and warm air dryer features for enhanced comfort.

Image: The Glendan OPT07 Smart Toilet includes a child seat for safe and comfortable use by younger users.
Flushing System
- Powerful 360° Vortex Flush: Ensures thorough cleaning with a 1000G flush.
- Built-in Backup Battery: Guarantees flushing functionality during power outages.
- Auto Pre-wet: The bowl is automatically pre-wet to prevent waste adhesion.
- Foam Shield: Creates a foam layer to minimize splashes and odors.
- Multiple Flushing Methods: Includes side button flush, remote control flush, off-seat auto flush, and foot sensor flush.

Image: Powerful and efficient flush system with built-in water tank and backup battery.

Image: Four flushing methods for user convenience.
Smart Display & Remote Control
- LED Display: Shows real-time seat, water, and dryer temperatures.
- Wireless Remote Control: Easily manage all functions.
- Side Rotary Knob: Provides an alternative control option.

Image: The remote control for the Glendan OPT07 Smart Toilet, detailing its various function buttons.
Maintenance
- UV-C Light: The integrated UV-C light provides sterilization for enhanced hygiene.
- Nozzle Self-Clean: The bidet nozzle automatically cleans itself before and after each use.
- Foam Shield Refill: Regularly check the foam solution bottle and refill with effervescent tablets, concentrated foam solution, or diluted detergent as needed.
- General Cleaning: Use mild, non-abrasive cleaners for the ceramic surfaces. Avoid harsh chemicals that may damage the finish or electronic components.
Troubleshooting
If you encounter any issues, please refer to the following common solutions. For persistent problems, contact customer support.
- No Power: Ensure the power cord is securely plugged into a grounded AC 110V outlet and the RESET button on the plug has been pressed until a "Di" sound is heard. Check your home's circuit breaker.
- No Flush: Verify the water supply angle valve is open. If there's a power outage, the built-in backup battery should provide flushing capability.
- Bidet Not Working: Check water supply. Ensure the nozzle is not obstructed.
- Remote Control Issues: Replace batteries if the remote is unresponsive. Ensure there are no obstructions between the remote and the toilet's sensor.
- Lid/Seat Not Opening/Closing Automatically: Ensure the sensor is clean and unobstructed. Check for any objects blocking the lid's path.
Warranty and Support
Glendan offers lifetime quality support for your smart toilet. For any inquiries, technical assistance, or warranty claims, please contact Glendan customer service. Refer to your purchase documentation for specific contact details.
Next-day shipping is available for parts and replacements.
Additional Product Information
Video: Glendan Smart Toilet Overview. This video provides a general overview of the smart toilet's features and benefits.


