1. Introduction
Thank you for choosing the Homtronics Rechargeable Fabric Shaver. This device is designed to effectively remove lint, fuzz, and pills from various fabrics, restoring them to a like-new condition. Featuring a powerful motor, multiple speed settings, an LED display, and a built-in LED light, this fabric shaver offers a convenient and efficient solution for fabric care. Please read this manual thoroughly before use to ensure proper operation and maintenance.
2. Package Contents
Verify that all items are present in your package:
- 1 x Homtronics Electric Fabric Shaver
- 4 x Replaceable 6-Leaf Blades (1 pre-installed + 3 extra)
- 1 x Type-C Charging Cable
- 1 x Cleaning Brush
- 1 x Instruction Manual
3. Product Overview
The Homtronics Fabric Shaver is engineered for efficient and safe fabric care. Key features include:
- Six-Blade Design: Equipped with sharp, durable six-leaf blades for superior lint removal compared to standard three or four-blade models.
- LED Display: Provides real-time information on battery level, selected speed, and charging status.
- Built-in LED Light: Illuminates the fabric surface to help identify and remove even small, hard-to-see fuzz balls.
- Three Speed Settings: Adjustable speeds (up to 9000 RPM) to suit various fabric types, from delicate to heavy textiles.
- Safety Lock: Automatically stops operation if the blade cover is open or loose, preventing accidental injury and protecting garments.
- Large Lint Collector: A transparent, removable container designed to hold a significant amount of lint, reducing the frequency of emptying.
- Type-C Rechargeable Battery: A 2000mAh high-capacity battery offers extended use and fast charging capabilities.
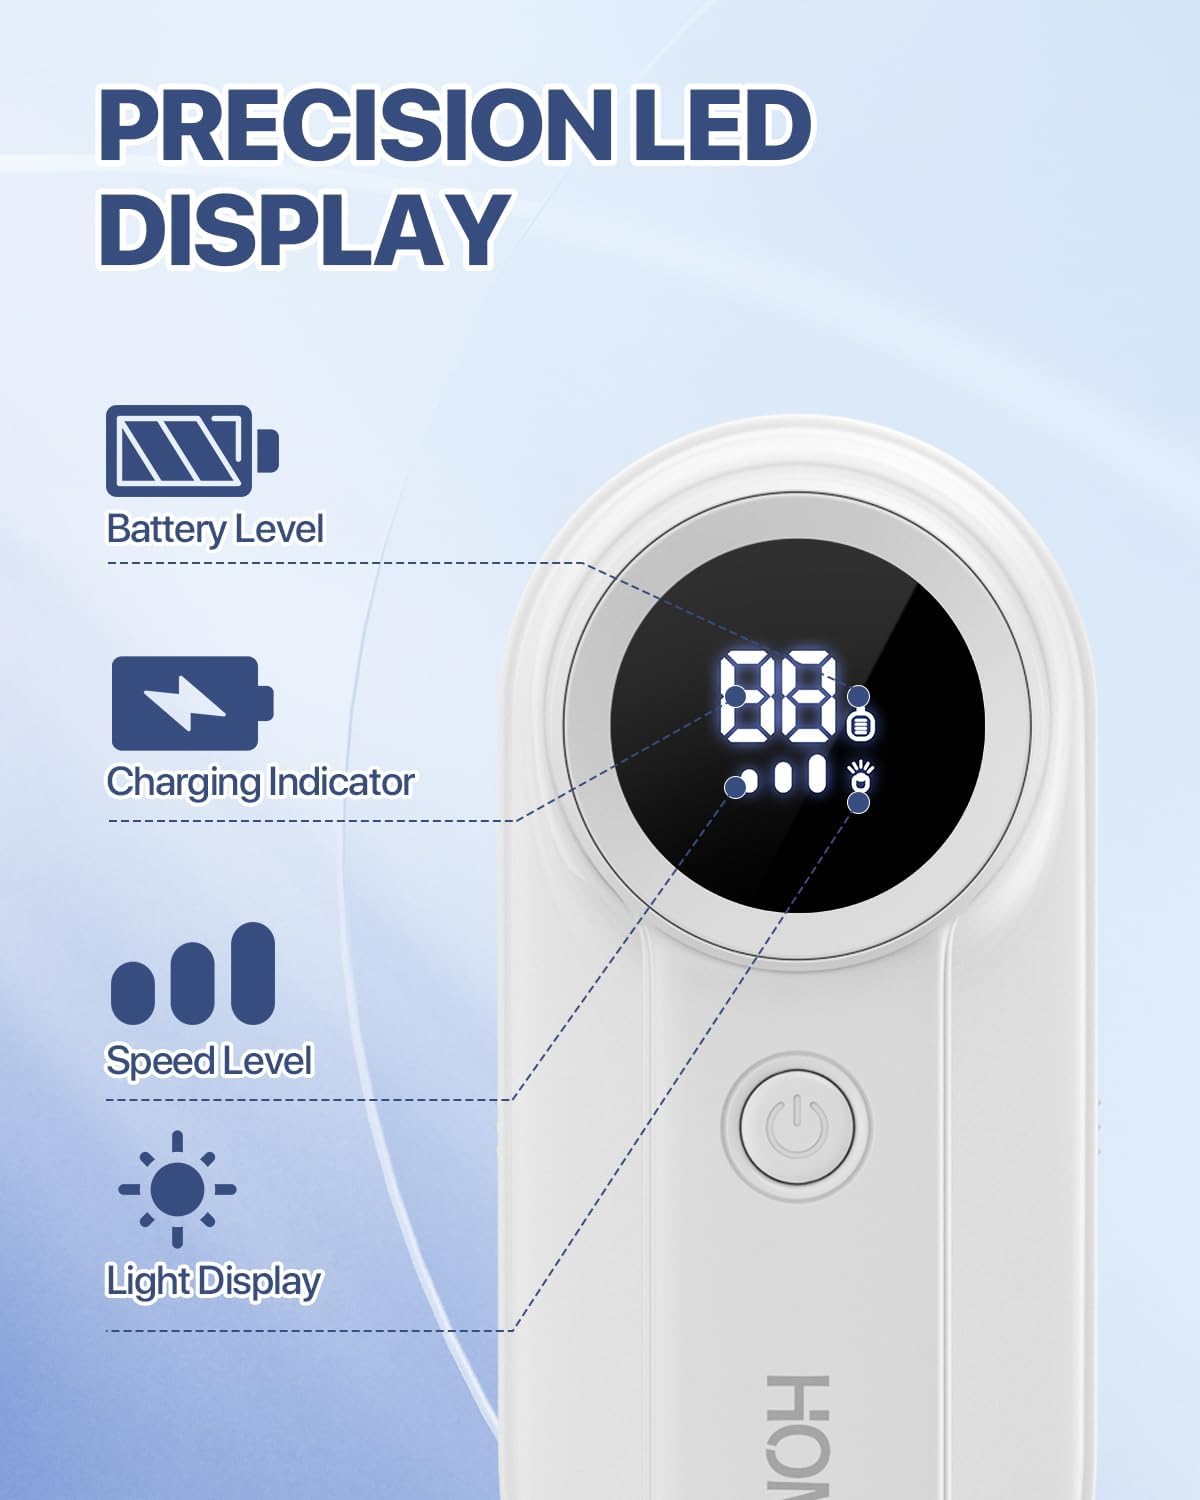
Figure 1: Precision LED Display

Figure 2: Powerful, Versatile, Safe Design
4. Setup
4.1 Charging the Device
Before first use, fully charge the fabric shaver. Connect the provided Type-C charging cable to the device and a compatible USB power source (e.g., power bank, laptop, wall adapter). The LED display will indicate the charging status and battery level. A full charge typically takes 2 hours and provides 2-3 hours of operation.

Figure 3: Type-C Charging
4.2 Blade Installation
The device comes with one 6-leaf blade pre-installed. If you need to replace a blade, refer to the 'Maintenance' section for detailed instructions.
5. Operating Instructions
5.1 Power On/Off
Press and hold the power button to turn the device on or off. The LED display will activate upon powering on.
5.2 Adjusting Speed Settings
Once powered on, press the power button briefly to cycle through the three speed settings. The LED display will show the current speed level:
- Low Speed (Gear 1, 7000 RPM): Ideal for delicate fabrics such as cashmere, silk, and thin sweaters.
- Medium Speed (Gear 2, 8000 RPM): Suitable for daily wear items like cotton, linen, coats, and sportswear.
- High Speed (Gear 3, 9000 RPM): Best for heavy textiles including wool coats, sofa covers, curtains, and carpets.
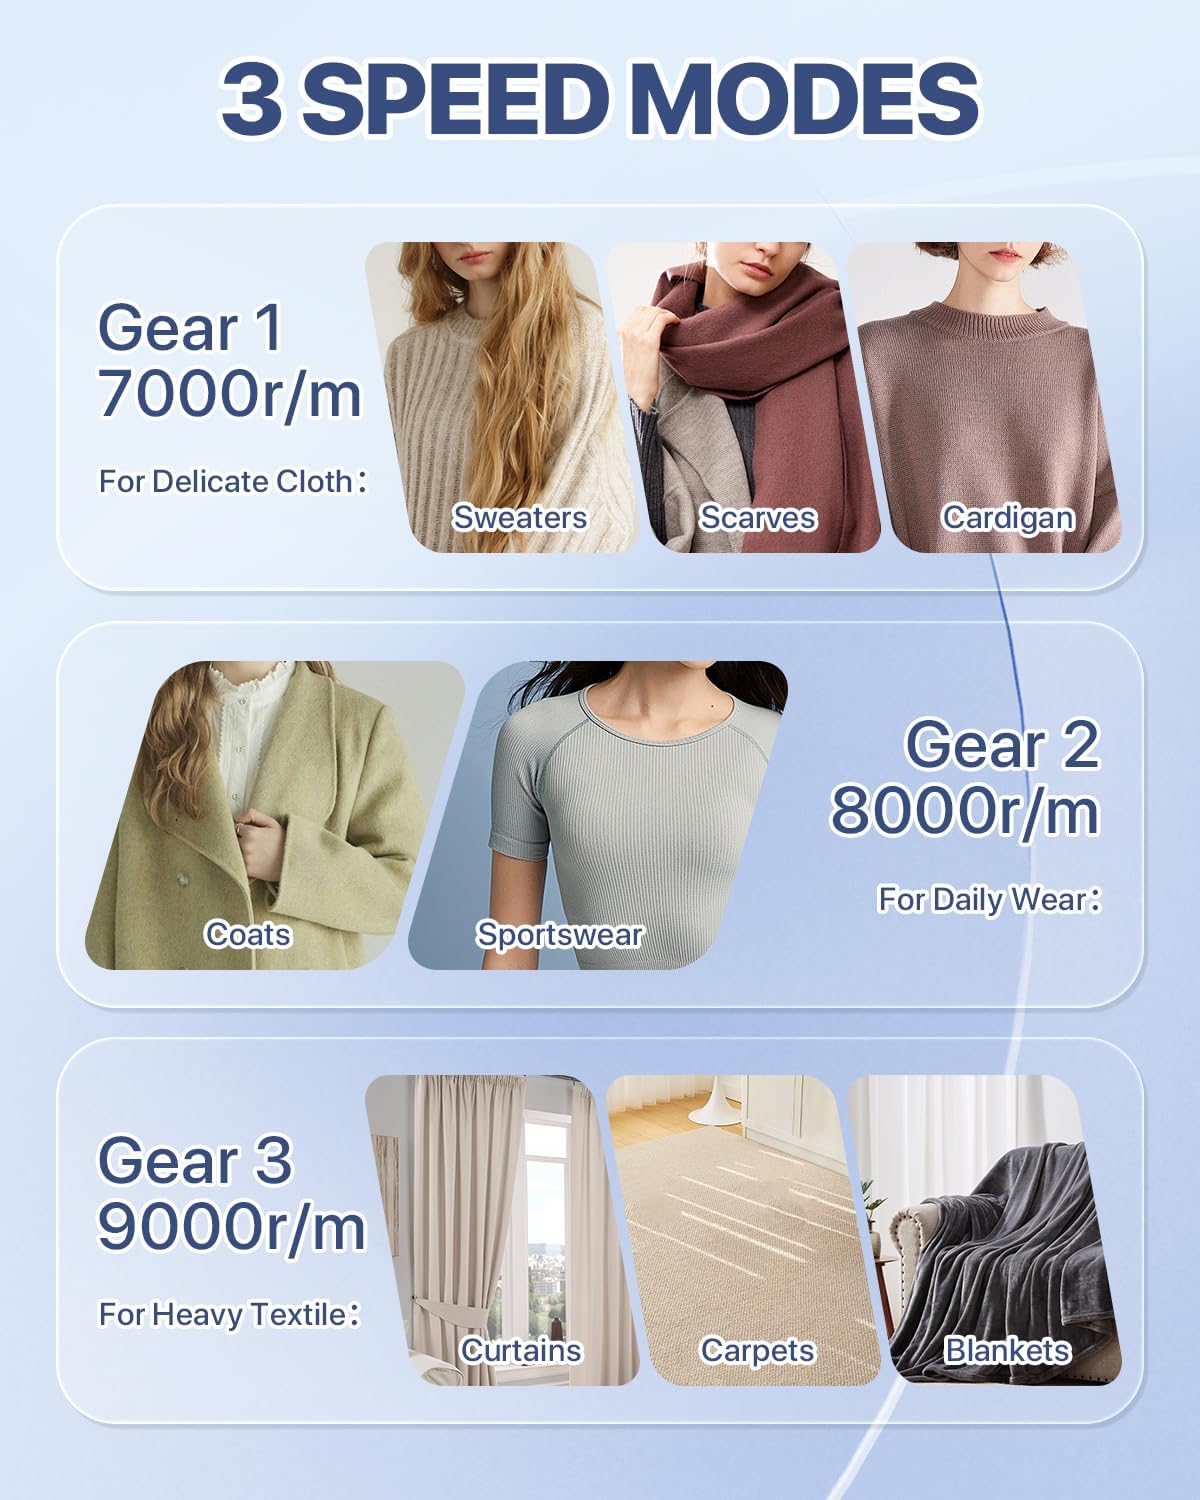
Figure 4: Three Speed Modes for Diverse Fabrics
5.3 Using the LED Light
The built-in LED light can be activated or deactivated by pressing and holding the power button. This feature is particularly useful in dimly lit areas to ensure no lint or fuzz is missed.

Figure 5: Bright LED Light for Precision
5.4 Fabric Shaving Technique
Lay the fabric flat on a hard, even surface. Gently press the shaver head against the fabric and move it in small, circular motions. Avoid excessive pressure to prevent damage to the fabric. Regularly check the lint collector and empty it when full.
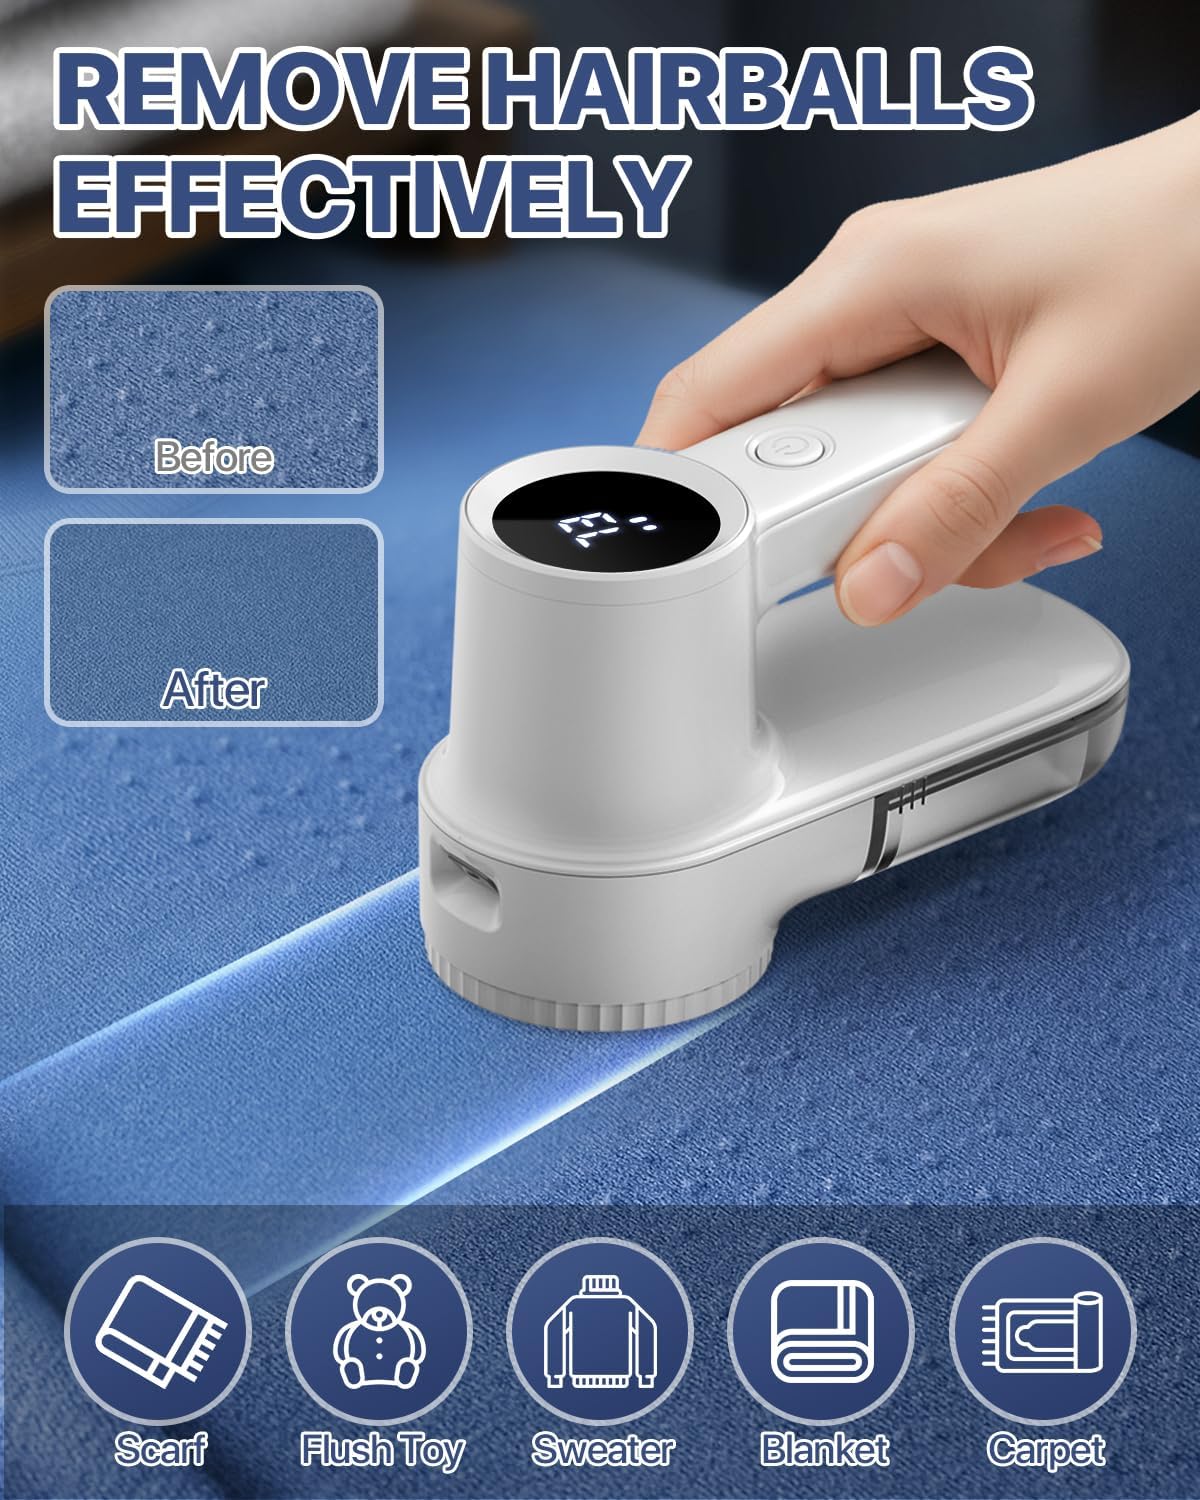
Figure 6: Effective Lint Removal
6. Maintenance
6.1 Cleaning the Lint Collector
To maintain optimal performance, empty the transparent lint collector regularly. Grip both sides of the collector and pull it down to detach. Dispose of the collected lint. Reattach the collector by aligning it and pushing it upwards until it clicks into place.
6.2 Cleaning the Blades and Mesh
After detaching the lint collector, gently rotate the blade cover counter-clockwise to remove it. Carefully remove the blade assembly. Use the provided cleaning brush to remove any residual lint or debris from the blades, the mesh, and the interior of the device. Ensure all parts are dry before reassembling.
6.3 Replacing Blades
When the blades become dull or damaged, replace them with one of the three extra 6-leaf blades provided. To replace, remove the blade cover and old blade as described in section 6.2. Carefully place a new blade onto the spindle, ensuring it is securely seated. Reattach the blade cover by aligning and rotating clockwise until it locks.

Figure 7: Easy Cleaning and Maintenance
7. Troubleshooting
- Device not turning on: Ensure the device is charged. Check if the blade cover is securely attached; the safety lock prevents operation if it's loose.
- Poor lint removal: The blades may be dull and require replacement. Clean the blade assembly and lint collector to remove any blockages. Ensure you are using the appropriate speed setting for the fabric type.
- Device stops unexpectedly: The battery may be low and requires charging. The safety lock may have been triggered if the blade cover became loose during operation.
- Excessive vibration or noise: Check if the blade is properly installed and not damaged. Ensure the blade cover is securely fastened.
8. Specifications
| Feature | Specification |
|---|---|
| Brand | Homtronics |
| Model Number | USHLR3W |
| Material | Plastic |
| Color | White |
| Battery Capacity | 2000mAh |
| Charging Type | Type-C |
| Blade Type | 6-Leaf |
| Speed Settings | 3 (up to 9000 RPM) |
9. Safety Information
- Keep out of reach of children.
- Do not use on wet fabrics.
- Ensure the blade cover is securely attached before operation.
- Do not touch the blades directly.
- Unplug the device before cleaning or replacing blades.
- Do not immerse the device in water or any other liquid.
- Use only the provided charging cable or a certified Type-C cable.
10. Warranty and Support
Homtronics products are designed for quality and reliability. For warranty information, technical support, or any inquiries regarding your product, please refer to the contact information provided on the product packaging or visit the official Homtronics website. Please retain your proof of purchase for warranty claims.