1. Introduction
Thank you for choosing the MIMOFPET X3 Wireless Dog Fence and Training Collar. This 2-in-1 system is designed to provide a safe and effective way to contain your dog within a designated area and assist with behavior training. Please read this manual thoroughly before use to ensure proper operation and the safety of your pet.
2. Package Contents
- 1 x Wireless Transmitter/Remote Control
- 2 x Receiver Collars
- 2 x Adjustable Nylon Straps
- 4 x Short Contact Points
- 4 x Long Contact Points
- 1 x USB Charging Cable (Dual-head)
- 1 x Test Light Tool
- 1 x User Manual

Image: The complete MIMOFPET Wireless Dog Fence and Training Collar system, including the remote transmitter and two receiver collars.
Video: An official product video demonstrating the MIMOFPET Wireless Dog Fence system, showing its components and basic functionality.
3. Product Overview
The MIMOFPET X3 system combines a wireless dog fence and a remote training collar. The transmitter acts as both the central unit for the wireless fence and the remote for training. The receiver collars are worn by your dogs and respond to signals from the transmitter.
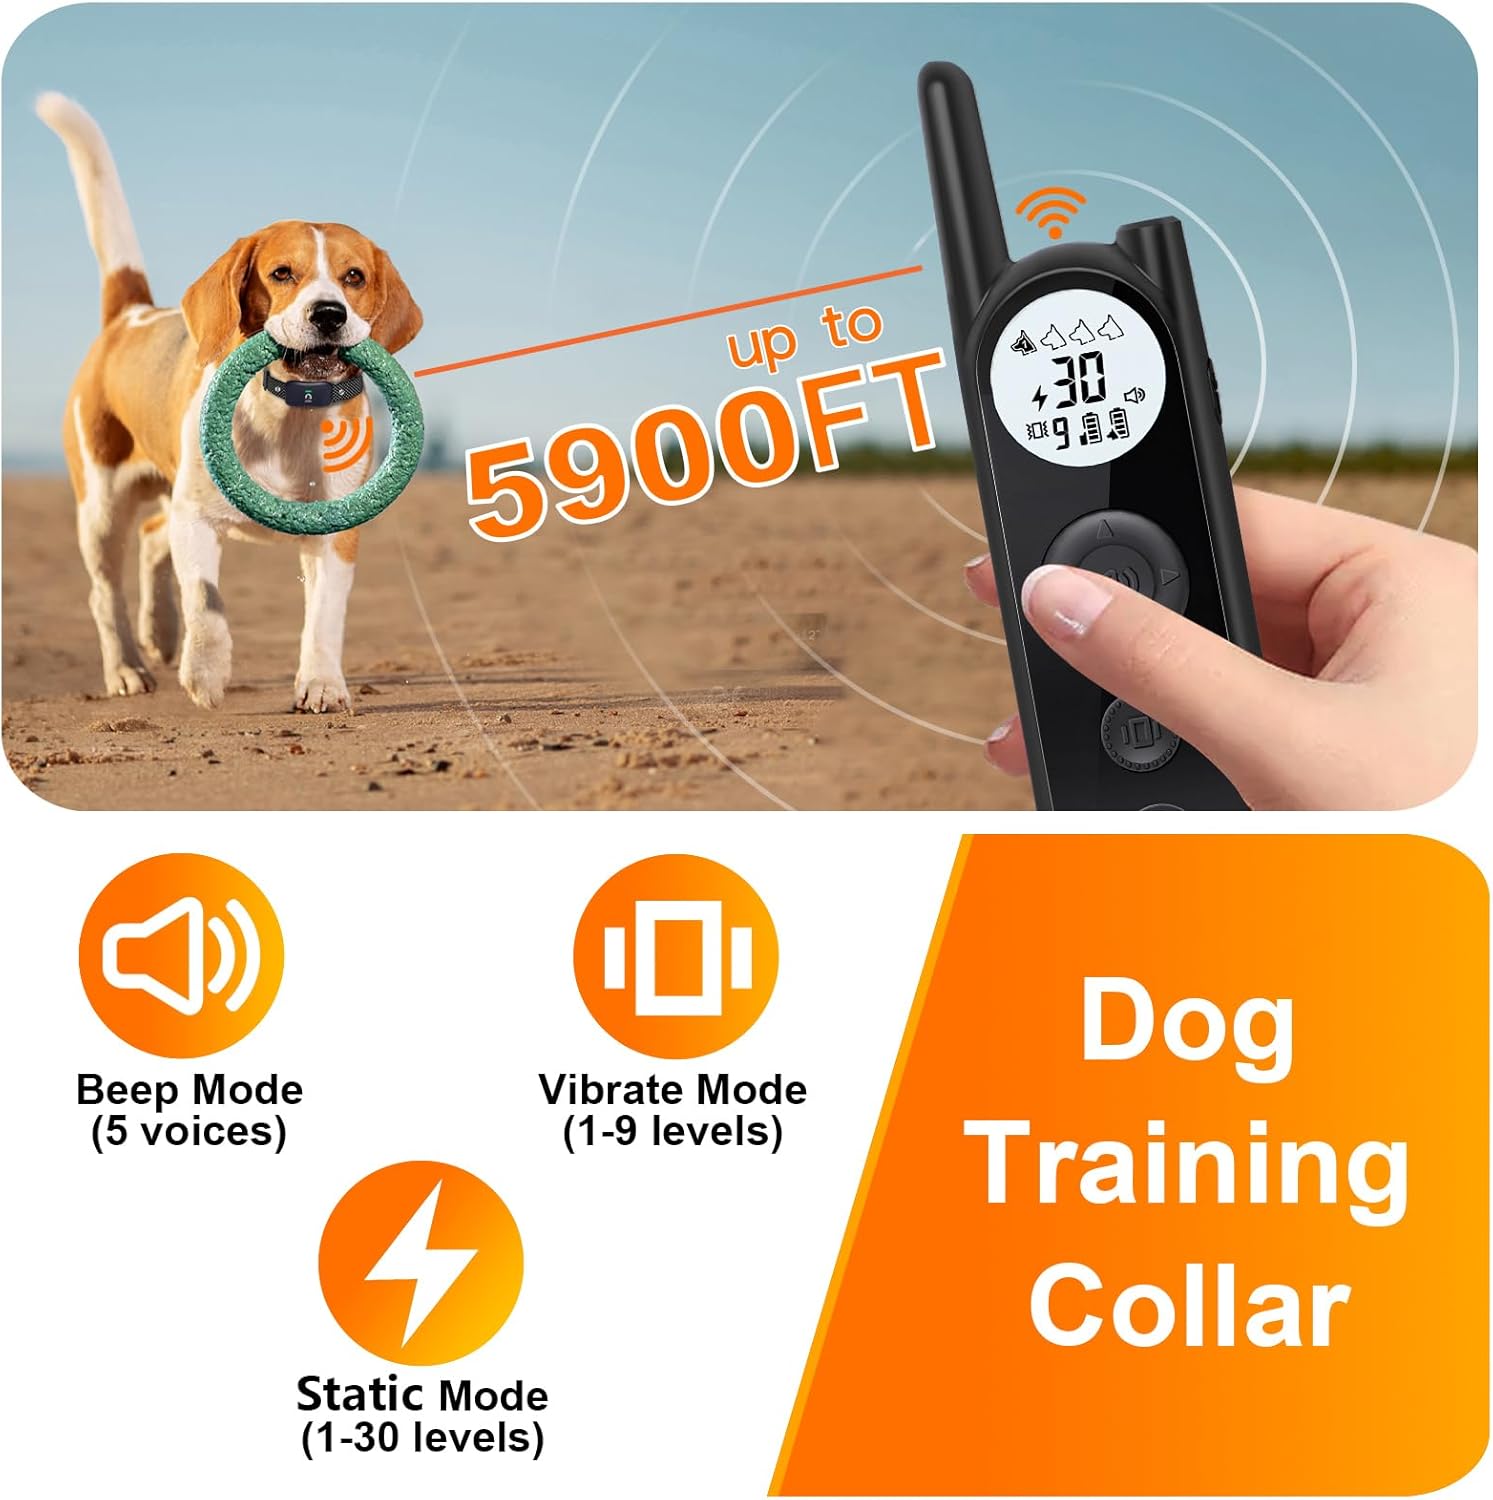
Image: A close-up image of the MIMOFPET training remote control and a dog wearing the receiver collar, highlighting the training range up to 5900 feet and the beep, vibrate, and static modes.
4. Setup
4.1 Charging the Devices
Before first use, fully charge the transmitter and receiver collars. Use the provided USB charging cable. The charging indicator will show charging status and turn off when fully charged. A full charge takes approximately 2.5 hours.
4.2 Attaching the Collar
- Select the appropriate contact points (short for short-haired dogs, long for long-haired dogs) and screw them into the receiver collar.
- Thread the adjustable nylon strap through the receiver.
- Place the collar around your dog's neck, ensuring the contact points touch the skin. The collar should be snug enough that only one finger can fit between the strap and your dog's neck.
- Trim any excess strap if necessary.
4.3 Pairing the Collar and Remote
The devices are typically pre-paired. If re-pairing is needed:
- Turn on the receiver collar.
- Press and hold the power button on the receiver collar until the indicator light flashes rapidly.
- On the remote, select the desired channel (1 or 2 for each dog).
- Press any training mode button (Beep, Vibrate, or Static) on the remote. The receiver collar light will stop flashing and remain solid, indicating successful pairing.
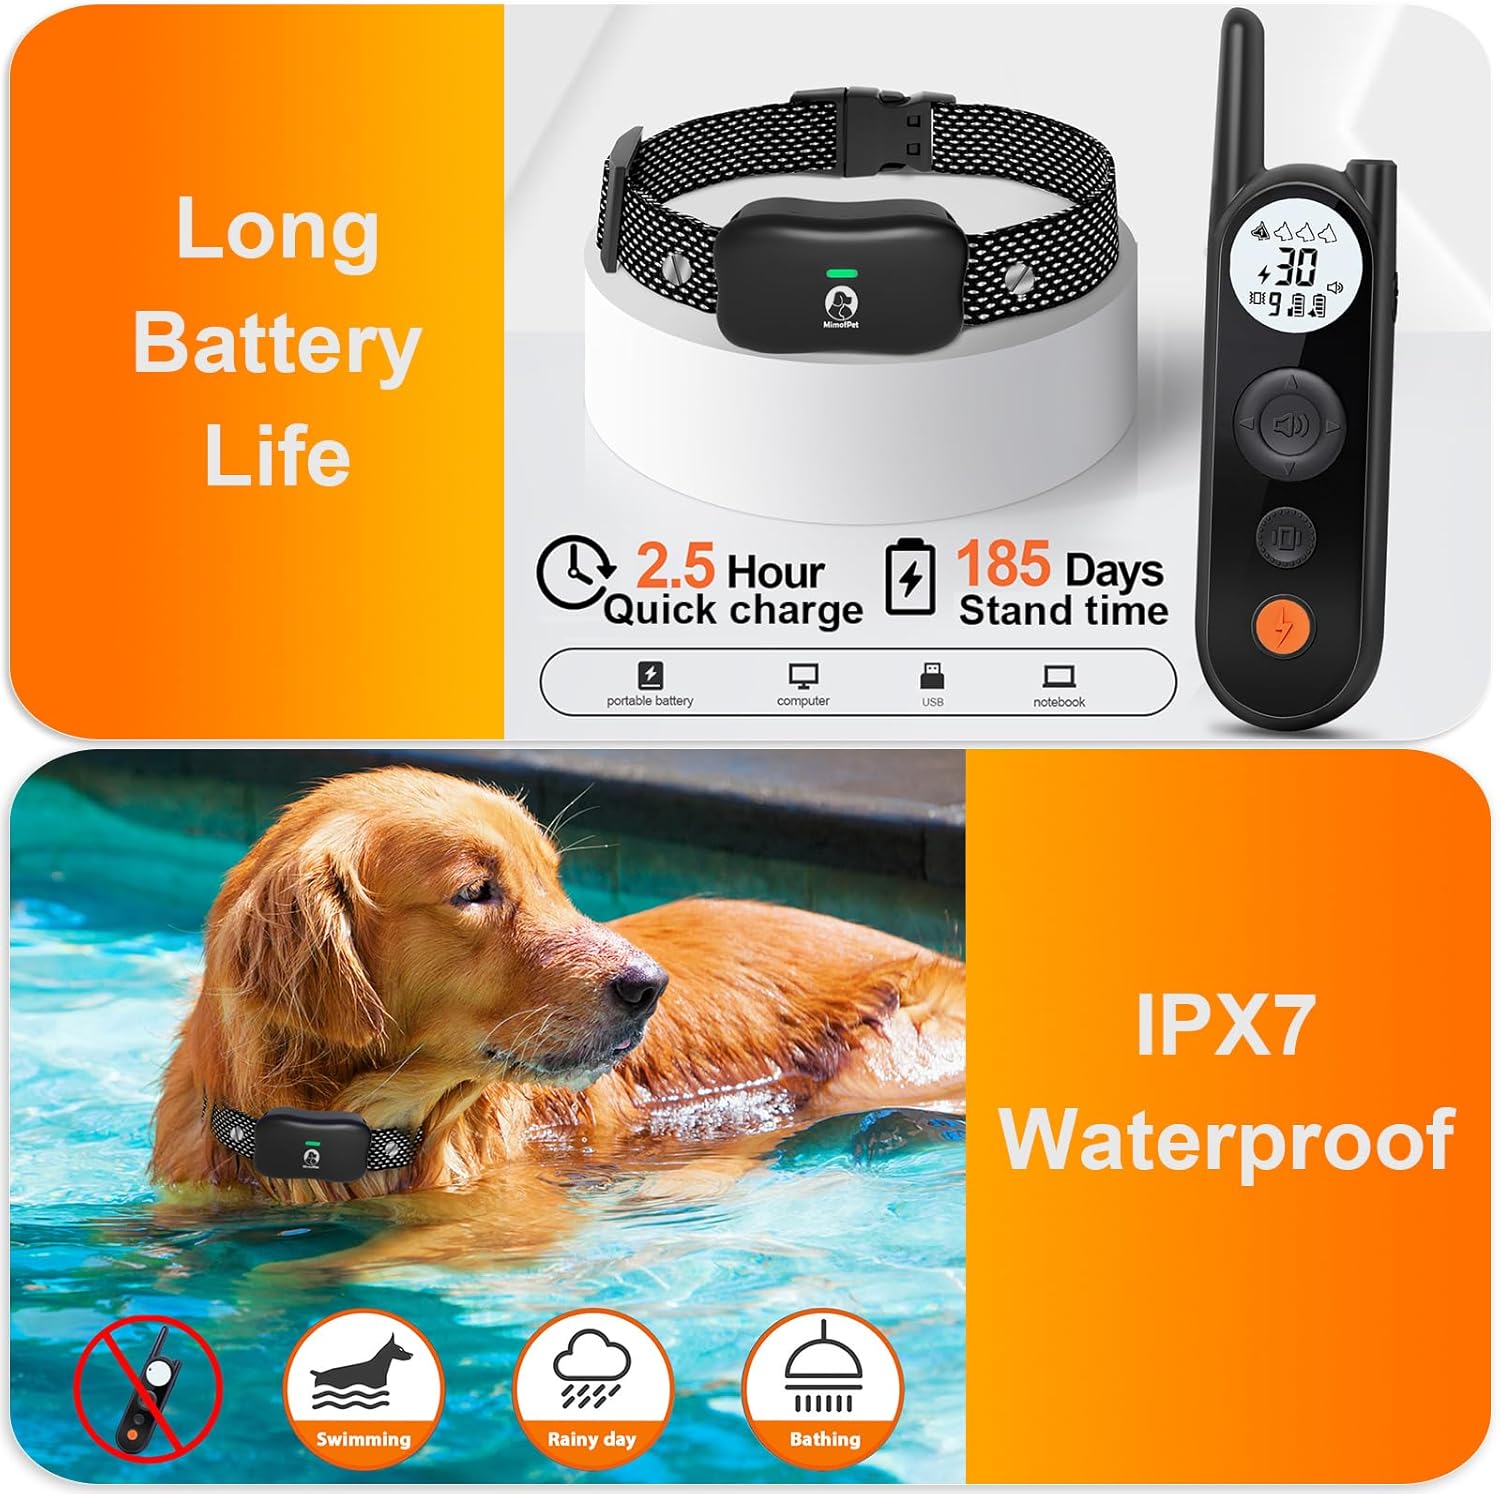
Image: This image details the long battery life of the MIMOFPET system, including 2.5-hour quick charge and 185 days standby time, alongside an illustration of the IPX7 waterproof receiver collar submerged in water.
5. Wireless Fence Operation
5.1 Setting the Boundary
The wireless fence creates a circular boundary around the transmitter. The range is adjustable from 25 feet to 3500 feet (14 levels). To set the boundary:
- Place the transmitter in a central location within the desired containment area, ensuring it is elevated and away from large metal objects.
- Adjust the range level on the transmitter to achieve the desired boundary size. Start with a smaller range and gradually increase it.
- Walk the perimeter with your dog to identify the exact boundary line where the collar triggers a warning.
5.2 Boundary Warning System
When your dog approaches the set boundary, the receiver collar will automatically emit a warning beep. If the dog continues to move past the boundary, it will trigger a vibration. The system prioritizes dog safety and does not use automatic static correction for the wireless fence function.

Image: A visual representation of the wireless dog fence's adjustable boundary, showing a central transmitter and a dog within the defined circular area, with warnings for crossing the boundary.
Video: An official product video showcasing the effectiveness of the MIMOFPET wireless dog fence in real-world use, demonstrating how it keeps a dog within a set boundary.
6. Dog Training Collar Operation
The remote control allows you to train your dog with three distinct modes up to a range of 5900 feet.
6.1 Training Modes
- Beep Mode: Emits an audible tone. There are 5 different beep sounds to choose from.
- Vibrate Mode: Delivers a vibration. Adjustable from 1 to 9 intensity levels.
- SAFE Static Mode: Provides a static correction. Adjustable from 1 to 30 intensity levels. Always start at the lowest level and increase gradually if needed.
6.2 Adjusting Intensity Levels
Use the up/down buttons on the remote to adjust the intensity level for Vibrate and Static modes. The current level will be displayed on the remote's screen.
6.3 Keypad Lock
The remote features a keypad lock to prevent accidental operations. Press the lock button to activate/deactivate. This ensures that you only send commands when intended.
6.4 Flashlight Function
The remote includes a built-in LED flashlight with two modes: Normal and SOS. This can be useful for visibility in low-light conditions or to locate your dog in the dark.

Image: This image showcases the three training modes of the MIMOFPET collar: Beep (5 voices), Vibrate (1-9 levels), and SAFE Static (1-30 levels), with corresponding icons.

Image: This image demonstrates the security keypad lock feature on the remote to prevent accidental operations, and the built-in LED flashlight with normal and SOS modes for visibility in the dark.
Video: An official product video illustrating the ease of use and effectiveness of the MIMOFPET dog training collar, demonstrating its various training modes.
7. Training Guidelines
Effective training requires patience and consistency. Always use positive reinforcement and keep training sessions short and fun. Introduce the collar gradually and allow your dog to get accustomed to wearing it before activating any correction modes.
- Start with the lowest correction levels and only increase if necessary.
- Use the beep or vibration as a warning before applying static correction.
- Never leave the collar on your dog for more than 12 hours a day.
- Regularly check your dog's neck for any signs of irritation from the contact points.
8. Maintenance
8.1 Cleaning
Wipe the transmitter and receiver collars with a soft, damp cloth. Do not use harsh chemicals or abrasive cleaners. Ensure contact points are clean and free of debris.
8.2 Battery Care
To prolong battery life, fully charge the devices before long periods of inactivity. If the electronic fence function is not in use, turn it off to save power. The receiver collars are IPX7 waterproof, meaning they can withstand submersion in water up to 1 meter for 30 minutes, making them suitable for rainy conditions or swimming.

Image: A close-up of the MIMOFPET receiver collar, highlighting its IPX7 waterproof rating, suitable for swimming and rainy conditions.
9. Troubleshooting
| Problem | Possible Cause | Solution |
|---|---|---|
| Collar not responding to remote. | Low battery; Not paired; Out of range. | Charge devices; Re-pair collar; Ensure within 5900ft range. |
| Wireless fence not working. | Transmitter off; Range set too low; Interference. | Turn on transmitter; Increase range; Relocate transmitter away from metal objects. |
| Dog not responding to correction. | Collar too loose; Contact points too short; Intensity level too low. | Tighten collar; Use longer contact points; Increase intensity gradually. |
| Accidental corrections. | Keypad lock not engaged. | Engage keypad lock on remote when not actively training. |
10. Specifications
| Feature | Detail |
|---|---|
| Model Number | X3 |
| Wireless Fence Range | 25 to 3500 feet (14 adjustable levels) |
| Training Remote Range | Up to 5900 feet |
| Training Modes | Beep (5 voices), Vibrate (1-9 levels), SAFE Static (1-30 levels) |
| Battery Type | Lithium Polymer (included) |
| Charging Time | Approx. 2.5 hours |
| Receiver Standby Time | Up to 185 days |
| Wireless Fence Usage Time | Approx. 85 hours (continuous use) |
| Waterproof Rating | IPX7 (Receiver Collar) |
| Dog Breed Size | All |
| Material | Plastic |
| Manufacturer | Shenzhen Saiku Electronic Co.,Ltd. |
11. Warranty and Support
This MIMOFPET product comes with a 1 Year Manufacturer Warranty. For warranty claims, technical support, or any questions regarding the product, please contact the manufacturer directly or refer to the contact information provided with your purchase. Keep your proof of purchase for warranty validation.

