Introduction
This instruction manual provides essential information for the safe and correct installation, operation, and maintenance of the Generic replacement gas range oven ignitor, model drypart#5103536. This component is designed as a replacement part for Whirlpool SF111PXSQ1 gas range ovens. Please read this manual thoroughly before proceeding with any installation or repair work.
Important Safety Information
WARNING: Risk of Electric Shock, Fire, or Explosion.
- Always disconnect power to the appliance at the circuit breaker or fuse box before attempting any service or installation.
- Shut off the gas supply to the appliance before beginning any work.
- Gas appliance installation and service should be performed by a qualified installer, service agency, or gas supplier.
- Wear appropriate personal protective equipment, including gloves and eye protection.
- Ensure all gas connections are properly sealed and tested for leaks after installation.
- Do not operate the appliance if you smell gas. Immediately follow gas leak safety procedures.
Compatibility Verification
Before installation, it is crucial to verify that this replacement ignitor (model drypart#5103536) is compatible with your specific appliance model. This ignitor is designed for Whirlpool SF111PXSQ1 gas range ovens. Please compare the physical appearance, dimensions, and electrical connector of this part with your original ignitor and consult your appliance's service manual if necessary.
Note: Package includes one (1) ignitor only.
Setup and Installation
The following steps outline the general procedure for replacing a gas oven ignitor. Specific steps may vary slightly depending on your oven model. Refer to your appliance's service manual for detailed instructions.
Tools Required:
- Screwdriver (Phillips and/or Flathead)
- Wrench or Nut Driver
- Pliers
- Multimeter (for testing, optional)
- Flashlight
Installation Steps:
- Prepare the Appliance:
- Disconnect the oven from its electrical power supply.
- Turn off the gas supply to the oven.
- Allow the oven to cool completely if it has been in use.
- Access the Ignitor:
- Open the oven door and remove oven racks.
- Locate and remove the screws holding the oven bottom panel in place. Lift out the bottom panel.
- Identify the ignitor, typically located near the gas burner tube at the bottom of the oven cavity.
- Disconnect the Old Ignitor:
- Carefully disconnect the electrical connector leading to the ignitor.
- Remove the screws or nuts securing the ignitor to its mounting bracket.
- Gently remove the old ignitor, being careful not to damage other components.
- Install the New Ignitor:
- Position the new ignitor (drypart#5103536) onto the mounting bracket.
- Secure it with the screws or nuts removed earlier. Do not overtighten.
- Connect the electrical connector firmly. Ensure a secure connection.
- Reassemble and Test:
- Replace the oven bottom panel and secure it with its screws.
- Restore the gas supply to the oven.
- Restore electrical power to the oven.
- Test the oven by setting it to bake at a moderate temperature. Observe the ignitor. It should glow bright orange and then ignite the gas within a few seconds.
- Check for any gas leaks around connections using a soapy water solution (bubbles indicate a leak).
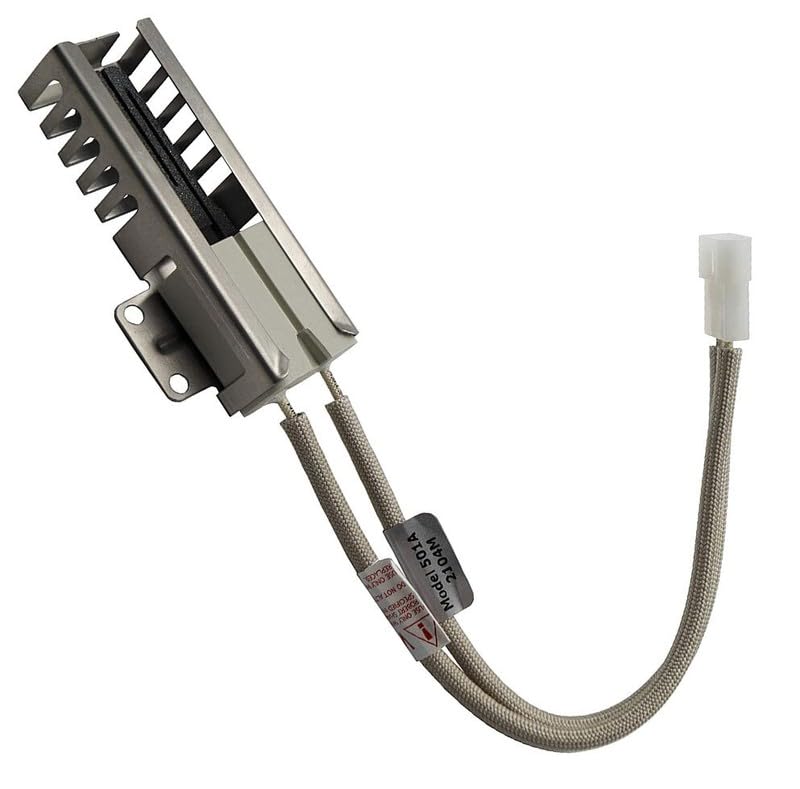
This image displays the replacement gas range oven ignitor. It features a grey ceramic ignitor element housed within a metal bracket, designed for secure mounting. Two insulated wires extend from the ignitor, terminating in a white electrical connector. A label on the wires indicates 'Model 501A 2104M'.
Operating Principles
The gas oven ignitor functions as a safety device and an ignition source. When the oven is set to bake, the control board sends voltage to the ignitor. The ignitor heats up, drawing current, and eventually glows bright orange. This heat not only ignites the gas flowing from the burner but also acts as a sensor. Once the ignitor draws sufficient current, indicating it's hot enough, a gas valve opens, allowing gas to flow to the burner, which is then ignited by the hot ignitor. If the ignitor fails to heat sufficiently, the gas valve will not open, preventing unignited gas from accumulating in the oven cavity.
Maintenance
The oven ignitor is a wear-and-tear component and generally does not require routine maintenance. However, proper care of your oven can extend the life of its components:
- Keep Oven Clean: Regularly clean your oven to prevent grease and food debris buildup, which can interfere with ignitor operation or cause premature failure.
- Avoid Physical Damage: Be careful when cleaning or moving oven racks to avoid striking the ignitor, as it is a fragile ceramic component.
- Professional Inspection: If you suspect issues with your oven's ignition system, consider having a qualified technician inspect it.
Troubleshooting
If your oven is not heating or igniting properly, the ignitor may be a contributing factor. Here are some common symptoms and potential solutions:
| Symptom | Possible Cause | Solution |
|---|---|---|
| Ignitor glows but gas does not ignite. | Ignitor is weak (not drawing enough current to open gas valve). | Replace the ignitor. |
| Ignitor does not glow at all. | No power to ignitor, faulty ignitor, or wiring issue. | Check power supply. Inspect wiring for damage. Test ignitor for continuity (if comfortable and qualified). Replace ignitor if faulty. |
| Oven takes a long time to ignite. | Weak ignitor. | Replace the ignitor. |
| Oven cycles on and off frequently. | Ignitor not maintaining sufficient current. | Replace the ignitor. |
If troubleshooting steps do not resolve the issue, it is recommended to contact a qualified appliance service technician.
Specifications
- Model Number: drypart#5103536
- Part Type: Gas Range Oven Ignitor
- Compatibility: Designed for Whirlpool SF111PXSQ1 (and potentially other compatible models, verify before purchase)
- Package Contents: 1 x Oven Ignitor
- Manufacturer: Generic
Warranty and Support
For information regarding warranty coverage or technical support for this replacement part, please refer to the documentation provided by the retailer or manufacturer at the time of purchase. As this is a generic replacement part, specific warranty terms may vary.
Always ensure you are purchasing from a reputable supplier to guarantee product quality and support.