1. Introduction and Product Overview
This manual provides essential information for the safe and efficient operation, maintenance, and troubleshooting of your VELPAX Ultra Quiet Air Compressor, Model VX1300-30. Please read this manual thoroughly before using the compressor and retain it for future reference.
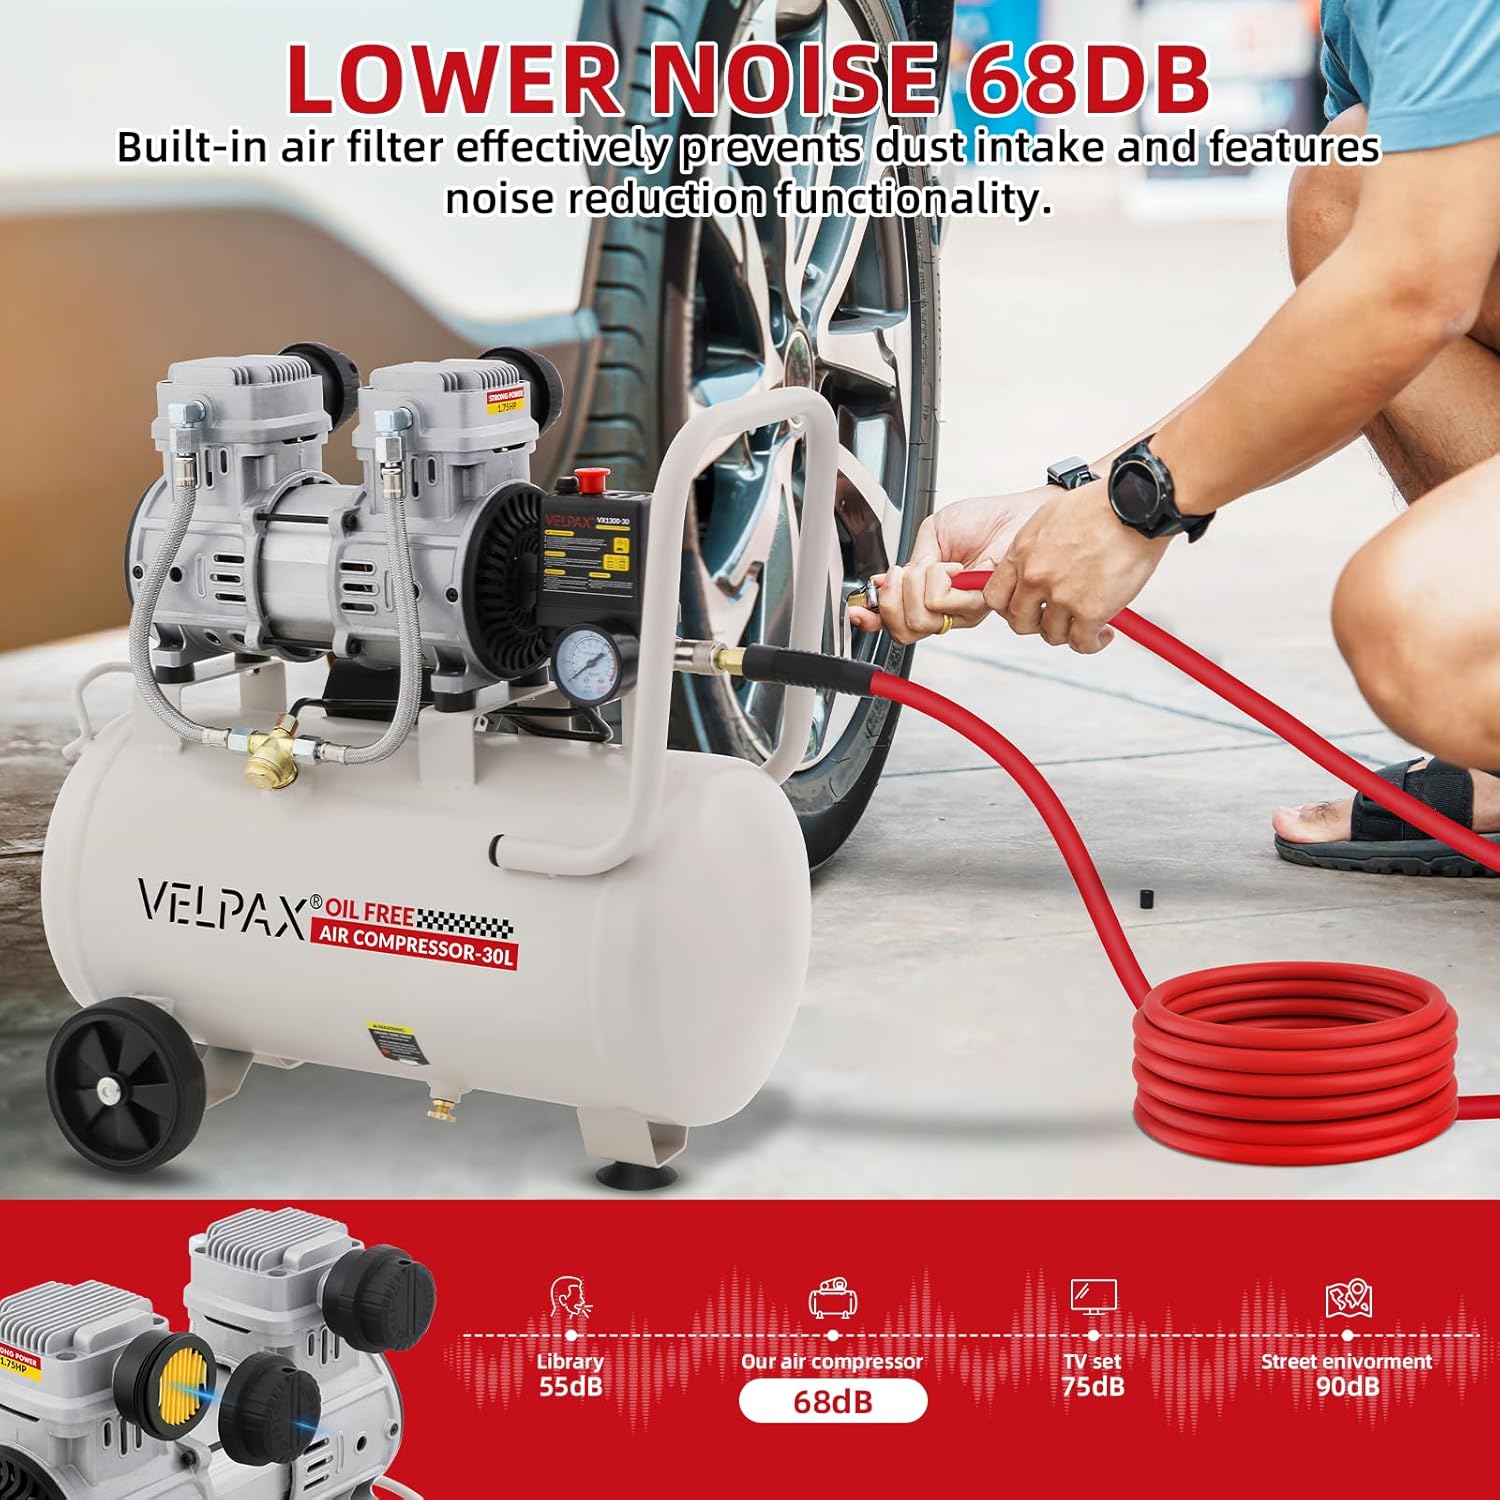
Key Features:
- Powerful and Ultra-Quiet 1.75HP Motor: Equipped with a 1300W (1.75HP) motor, operating at approximately 68 dB for reduced noise.
- Stable High-Pressure Performance: Provides a maximum working pressure of 115 PSI with a restart pressure of 72.5 PSI.
- Oil-Free and Low-Maintenance Design: The oil-free pump eliminates the need for compressor oil and routine filter replacements.
- Portable and Ready-to-Use Configuration: Features a compact design, integrated handle, standard G1/4 air outlet, pressure gauge, and condensate drain outlet.
- Integrated Safety and Protection Features: Includes a safety valve (opens at 128 PSI), overload protection, and a cooling fan system.

The VELPAX Ultra Quiet Air Compressor is designed for various applications including spray painting, auto repair, tire inflation, and woodwork nailing, offering a reliable and quiet air supply.
2. Safety Instructions
Always observe the following safety precautions to prevent personal injury and damage to the equipment.
- Read All Instructions: Familiarize yourself with the compressor's operation and safety features before use.
- Electrical Safety: Ensure the power supply matches the compressor's requirements (110V/60Hz). Use a grounded outlet and avoid using extension cords unless absolutely necessary and rated for the compressor's power.
- Pressure Safety: Never exceed the maximum operating pressure of any tool or accessory. Do not tamper with the safety valve.
- Personal Protective Equipment (PPE): Always wear safety glasses or goggles. Hearing protection is recommended, especially during prolonged use.
- Work Area: Operate the compressor in a well-ventilated area. Keep children and bystanders away. Do not operate in explosive atmospheres, such as in the presence of flammable liquids, gases, or dust.
- Maintenance: Disconnect the power supply and drain the air tank completely before performing any maintenance or repairs.
- Hot Surfaces: The compressor motor and pump can become hot during operation. Avoid contact with these areas.
- Storage: Store the compressor in a dry, secure location, out of reach of children.
3. Product Components
Understanding the different parts of your air compressor is crucial for proper setup and operation.

- All-copper motor (1300W/1.75HP): Provides power for air compression.
- Silencer and filter assembly: Reduces operational noise and filters incoming air.
- Overload protection: Automatically shuts off the motor to prevent damage from overheating.
- Safety valve: Releases excess pressure if the tank pressure exceeds a safe limit (0.88 MPa / 128 PSI).
- Portable mobile handle: For easy transportation of the unit.
- Quick connect: For attaching air hoses and pneumatic tools.
- Pressure gauge: Displays the current air pressure in the tank.
- 30L/8 Gallon air tank: Stores compressed air.
- Smooth rubber wheels: Facilitate movement of the compressor.
- Condensate drain outlet: For draining moisture from the air tank.
- Cooling fans: Help dissipate heat from the motor and pump.
- Stainless steel braided air hose: Connects the pump to the air tank.
4. Setup
4.1 Unpacking and Inspection
- Carefully remove the compressor from its packaging.
- Inspect the unit for any signs of shipping damage. If damage is found, do not operate the compressor and contact customer support.
- Ensure all components listed in the manual are present.
4.2 Placement
- Place the compressor on a firm, level surface to prevent tipping.
- Ensure adequate ventilation around the unit to prevent overheating. Maintain at least 12 inches (30 cm) of clear space around the compressor.
- Avoid placing the compressor near heat sources or in direct sunlight.
- Do not operate the compressor in wet or damp conditions.

4.3 Connecting Accessories
- Attach your air hose to the standard G1/4 quick connect fitting on the compressor.
- Ensure all connections are secure to prevent air leaks.
4.4 Power Connection
- Connect the compressor's power cord to a grounded 110V/60Hz electrical outlet.
- Do not use ungrounded adapters or modify the plug.
5. Operation
5.1 Starting the Compressor
- Ensure the power cord is securely plugged into a grounded outlet.
- Turn the power switch to the 'ON' position. The motor will start, and the tank will begin to fill with air.
- Monitor the pressure gauge. The compressor will automatically shut off when the maximum pressure (115 PSI) is reached.
5.2 Adjusting Air Pressure
- The compressor's output pressure can be regulated using the pressure regulator knob (if equipped). Turn clockwise to increase pressure, counter-clockwise to decrease.
- Always set the output pressure according to the requirements of your pneumatic tool.
5.3 Using Pneumatic Tools
- Connect your pneumatic tool to the quick connect fitting on the air hose.
- Ensure the tool is rated for the pressure supplied by the compressor.
- During continuous use, the compressor will automatically restart when the tank pressure drops to 72.5 PSI to maintain the desired pressure.
5.4 Shutting Down
- Turn the power switch to the 'OFF' position.
- Disconnect the air hose from the tool.
- Slowly open the drain valve at the bottom of the air tank to release all remaining air pressure. This is important for safety and to prevent moisture buildup.
- Unplug the power cord from the electrical outlet.
6. Maintenance and Care
Regular maintenance ensures the longevity and optimal performance of your air compressor.
6.1 Draining Condensate
Moisture accumulates in the air tank during operation. This condensate must be drained regularly to prevent rust and corrosion inside the tank.
- Ensure the compressor is turned off and unplugged.
- Place a suitable container under the condensate drain outlet at the bottom of the tank.
- Slowly open the drain valve to release the accumulated water and air.
- Close the drain valve tightly once all moisture has been expelled.

6.2 Air Filter Maintenance
The air filter prevents dust and debris from entering the compressor pump. Inspect and clean or replace the air filter as needed.
- Turn off and unplug the compressor.
- Locate the air filter assembly (refer to Figure 2).
- Remove the filter element and clean it with compressed air or replace it if heavily soiled or damaged.
- Reinstall the filter assembly securely.
6.3 General Cleaning
- Keep the exterior of the compressor clean and free of dust and debris.
- Use a damp cloth to wipe down surfaces. Avoid using harsh chemicals or solvents.
7. Troubleshooting Guide
This section addresses common issues you might encounter with your air compressor.
| Problem | Possible Cause | Solution |
|---|---|---|
| Compressor does not start | No power supply Overload protector tripped Faulty power switch | Check power cord and outlet Reset overload protector (allow to cool) Contact customer support |
| Compressor runs continuously or frequently | Air leak in system Pressure switch malfunction Heavy air demand | Check all connections for leaks Contact customer support Ensure tool CFM matches compressor output |
| Low air pressure output | Air leak Clogged air filter Pressure regulator set too low | Check for leaks Clean or replace air filter Adjust pressure regulator |
| Excessive noise or vibration | Loose components Compressor on uneven surface Internal issue | Check and tighten all fasteners Move to a level surface Contact customer support |
| Moisture in air line | Condensate not drained | Drain condensate regularly (see Section 6.1) |
8. Technical Specifications
Detailed specifications for the VELPAX Ultra Quiet Air Compressor VX1300-30.
| Specification | Value |
|---|---|
| Brand | VELPAX |
| Model Number | VX1300-30 |
| Power Source | Corded Electric |
| Voltage/Frequency | 110V/60Hz |
| Power | 1300W (1.75HP) |
| Noise Level | 68 Decibels |
| Capacity | 8 Gallons (30 Liters) |
| Air Flow Capacity | 4.2 CFM (Cubic Feet Per Minute) |
| Maximum Working Pressure | 115 PSI (0.8 MPa) |
| Restart Pressure | 72.5 PSI (0.5 MPa) |
| Safety Valve Opening Pressure | 128 PSI (0.88 MPa) |
| Air Outlet | G1/4 |
| Special Features | Pressure Detection, Portable, Oil-Free |
9. Warranty Information and Customer Support
VELPAX products are manufactured to high-quality standards. For specific warranty details, please refer to the warranty card included with your product or visit the official VELPAX website. Keep your purchase receipt as proof of purchase.
Customer Support:
If you have any questions, require technical assistance, or need to report a problem with your VELPAX Ultra Quiet Air Compressor, please contact VELPAX customer support through the retailer where the product was purchased or via the contact information provided on the official VELPAX website.
When contacting support, please have your model number (VX1300-30) and purchase date available.