1. Overview
The CBDZONE V168 Max Drone with GPS is an advanced unmanned aerial vehicle designed for capturing cinematic moments with ease and precision. Featuring 8K video capture resolution and a 12 MP effective still resolution, this drone offers high-quality imaging capabilities. Its lightweight material and advanced safety features ensure confident flights for users of all skill levels.
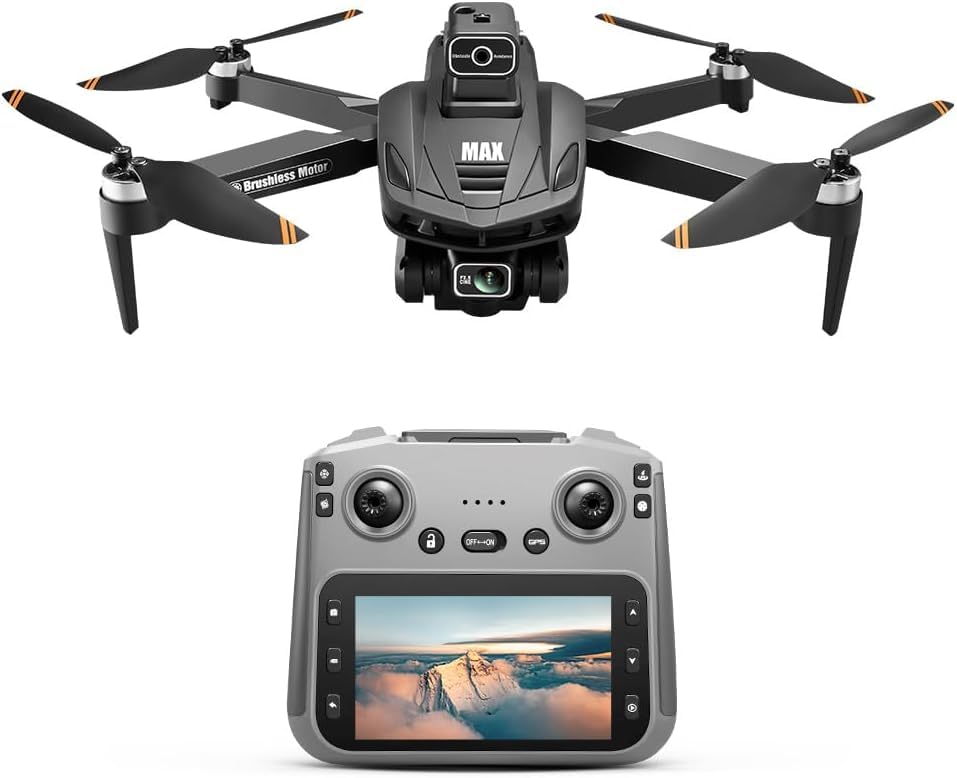
Image: The CBDZONE V168 Max Drone with GPS, showcasing its sleek design and integrated camera.
2. What's in the Box
Your CBDZONE V168 Max Drone package includes the following components:
- V168 Max Drone
- Remote Controller with 4.5-inch HD screen
- Battery (1 CR5 battery included)
- Spare blades (8 pieces)
- Screwdriver (1 piece)
- Type-C charging cables (2 pieces)
- Card reader (1 piece)
- Memory card (1 piece)

Image: All components included in the CBDZONE V168 Max Drone package, neatly arranged.
3. Product Specifications
| Feature | Specification |
|---|---|
| Brand | CBDZONE |
| Model Name | 168MAX |
| Video Capture Resolution | 8K |
| Effective Still Resolution | 12 MP |
| Connectivity Technology | Bluetooth, Wi-Fi |
| Skill Level | Beginner; All |
| Item Weight | 246 Grams (8.7 ounces) |
| Product Dimensions | 9.65"L x 11.37"W x 2.2"H |
| Battery Cell Composition | Lithium Ion |
4. Setup
4.1 Battery Charging
Ensure both the drone battery and the remote controller are fully charged before use. The drone battery features a visual indicator for its charge level. The remote controller battery is charged via USB-C.
- Drone Battery: Connect the Type-C charging cable. A flashing green icon indicates charging. A solid green icon indicates a full charge.
- Remote Controller Battery: Connect the Type-C charging cable. A solid red light indicates charging. The red light turns off when fully charged.
4.2 Remote Controller Setup
The remote controller comes with detachable control sticks for compact storage.
- Remove the control sticks from the back of the remote controller.
- Rotate and mount them onto the base of the sticks on the controller.
- Unfold the antennas to a 90-degree vertical position for optimal transmission performance.
4.3 Drone Unfolding
The V168 Max Drone features a foldable design for portability.
- Gently unfold the drone arms one by one until they lock into place.
- Insert the SD card into the drone for optimal image quality.
5. Calibration
Calibration is crucial for stable and accurate flight. It is recommended to perform calibration after any impact or before the first flight.
5.1 Compass Calibration
- Press the Calibration button on the remote controller.
- Operate the drone according to the on-screen prompts on the remote controller.
- The front LEDs will be steady on, and the rear LEDs will slow flash.
- A voice prompt will confirm "Compass calibration successful."
Video: Demonstrates the compass calibration process for a drone, including remote controller interaction and drone LED indicators.
5.2 Gyroscope Calibration
- Press the Gyro button on the remote controller. The remote controller will beep.
- The front LEDs will fast flash then become steady on, and the rear LEDs will slow flash.
- A voice prompt will confirm "Gyroscope calibration successful."
Video: A tutorial video demonstrating the gyroscope calibration process for a drone, including remote controller and drone responses.
6. Operating
6.1 Indoor Flight
After completing pairing and calibration, you can begin flying your drone. For indoor flights, ensure you are in a spacious area free from obstacles.
- Switch to Indoor Mode: Press and hold the GPS button on the remote controller. The remote will beep, and the flight mode will switch to "Indoor Optical Flow Mode."
- Unlock Drone: Position both control sticks downward and outward to form an inverted 'V' shape. The drone propellers will start spinning.
- Takeoff: Press the One Key Takeoff/Landing button (up arrow icon). The drone will automatically take off and hover.
- Landing: Press the One Key Takeoff/Landing button again. The drone will automatically land and stop its propellers.
6.2 Outdoor GPS Functions
For outdoor flights, ensure you have a clear, unobstructed view of the sky for GPS signal acquisition.
- Switch to Outdoor GPS Mode: Press and hold the GPS button on the remote controller. The remote will beep, and the display will show "GPS has been located" and "Outdoor GPS Mode."
- Unlock Drone: Position both control sticks downward and outward to form an inverted 'V' shape. The drone propellers will start spinning.
- Takeoff: Press the One Key Takeoff/Landing button. The drone will automatically take off and hover.
6.3 Flight Controls
Use the control sticks to maneuver the drone:
- Left Control Stick:
- Up: Drone ascends
- Down: Drone descends
- Left: Drone turns left
- Right: Drone turns right
- Right Control Stick:
- Up: Drone flies forward
- Down: Drone flies backward
- Left: Drone flies left
- Right: Drone flies right
Adjust flight speed using the dial at the upper left corner of the remote controller. The default speed is low.
6.4 Special Flight Modes
The drone offers several intelligent flight modes for enhanced creativity.
- Rocket Mode: Click to activate. The drone ascends rapidly like a rocket. Click again to cancel.
- Far Away Mode: Click to activate. The drone zooms out to capture wide scenery. Click again to cancel.
- Helix Mode: Click to activate. The drone performs a spiral flight pattern, gradually expanding. Click again to cancel.
- Circle Fly Mode: Click to activate. The drone turns 180 degrees and orbits a point. Push the right stick to adjust the orbit. Click again to cancel.
- GPS Follow Mode: Click to activate. The drone will follow the remote controller's movement. Click again to cancel.
7. Media Capture
7.1 Take Photos & Record Videos
The drone's camera angle can be adjusted using the dial at the upper right corner of the remote controller.
- To Take a Photo: Press the Photos/Video button (camera icon) or tap the shutter button on the right side of the flight interface.
- To Record a Video: Press and hold the Photos/Video button (video camera icon) or tap the switch icon on the right side of the remote controller to switch to recording mode, then tap the shutter button to start/stop recording.
7.2 View Photos/Videos
When the drone and remote controller are connected, you can view captured media.
- Tap "Albums" on the remote controller screen to access the media captured by the drone.
- You can view photos or videos stored on the drone or remote controller separately.
- Alternatively, remove the SD card from the drone and insert it into the remote controller or a computer to view content.
8. Remote Controller Introduction
The remote controller features an intuitive interface for easy drone operation.
- Flight Status/Mode: Displays current flight status and mode.
- Back: Click to return to the previous page.
- One Key Return: The drone automatically returns to the takeoff point.
- More: Click to open more function menus.
- Flight Distance/Height/Speed: Displays current flight metrics.
- Memory Card Slot: For SD card in controller (left) and SD card in drone (right).
- Remote Control Satellite Search Prompt: Displays the number of satellites found. Icon turns green when a GPS lock is acquired.
- Remote Control Battery Level: Displays the current battery level of the remote control.
- Wi-Fi Signal: Displays the current Wi-Fi signal strength.
- Geomagnetic Interference: Green icon indicates normal status. Red icon indicates magnetic interference.
- Drone Satellite Search Prompt: Displays the number of satellites the drone is connected to.
- Drone Battery Level: Displays the current drone battery level.
- Settings: Click to enter the settings menu.
- Switch Photo/Video: Tap to switch between Photo and Video mode.
- Photo/Video: Tap to take a photo or start recording.
- Memory Card Display: SD card in Controller (Left) / SD card in Drone (Right).
8.1 Settings Menu
The settings menu allows customization of flight and control parameters.
- Flight:
- Novice Mode: Turn Novice Mode on/off.
- Max Distance: Drag the slider to adjust the max flight distance, not exceeding 2000m. (Default value: 2000m)
- Max Altitude: Drag the slider to adjust the max altitude the drone can fly, up to a max of 100m. (Default value: 100m)
- Control:
- Unit: Select different units for display.
- Screen Brightness: Drag the slider to adjust the display brightness of the remote control screen. The maximum value cannot exceed 10. (Default value: 10)
- Gyroscope: Tap Calibrate to automatically calibrate the gyroscope.
- Compass: Tap Calibrate to begin calibrating the compass.
- Camera:
- Diagonal Lines: Displays two intersecting lines to create dynamic compositions and guide the viewer's eye.
- Center Point: Shows a central dot for precise positioning, ideal for symmetrical shots.
- Grid Lines: Overlays a 3x3 grid to help align elements and apply the rule of thirds.
- About: View information such as Screen Version, Flight Controller Version, Camera Version, etc.
9. Maintenance
Regular maintenance ensures the longevity and optimal performance of your drone.
- Propellers: Regularly inspect propellers for any damage (cracks, bends). Replace damaged propellers immediately using the provided spare blades and screwdriver.
- Battery: Store batteries in a cool, dry place. Avoid overcharging or completely draining the battery.
- Cleaning: Use a soft, dry cloth to clean the drone and remote controller. Avoid using liquids or harsh chemicals.
- Storage: When not in use, fold the drone arms and store all components in the provided carrying case to protect them from dust and damage.
10. Troubleshooting
If you encounter any issues, refer to the following common troubleshooting steps:
- Drone not powering on: Ensure the battery is fully charged and correctly inserted.
- Remote controller not connecting: Ensure both the drone and remote controller are powered on and within range. Re-attempt the pairing process.
- Unstable flight: Perform gyroscope and compass calibration. Check propellers for damage and replace if necessary. Ensure flight is in an open area away from strong magnetic interference.
- Poor image/video quality: Ensure the SD card is properly inserted and has sufficient storage. Clean the camera lens.
- GPS signal issues: Ensure you are flying outdoors in an open area with a clear view of the sky. Avoid flying near tall buildings or dense foliage.
11. Warranty and Support
For warranty information, technical support, or further assistance, please refer to the contact details provided in your product packaging or visit the official CBDZONE website. Keep your purchase receipt as proof of purchase for warranty claims.