1. Introduction
This manual provides detailed instructions for the setup, operation, and maintenance of your OROSAUR FireSeries Replacement Voice Remote Control. This remote is designed to replace original voice remotes for various streaming devices and smart TVs, offering voice control and dedicated shortcut buttons for enhanced user experience.
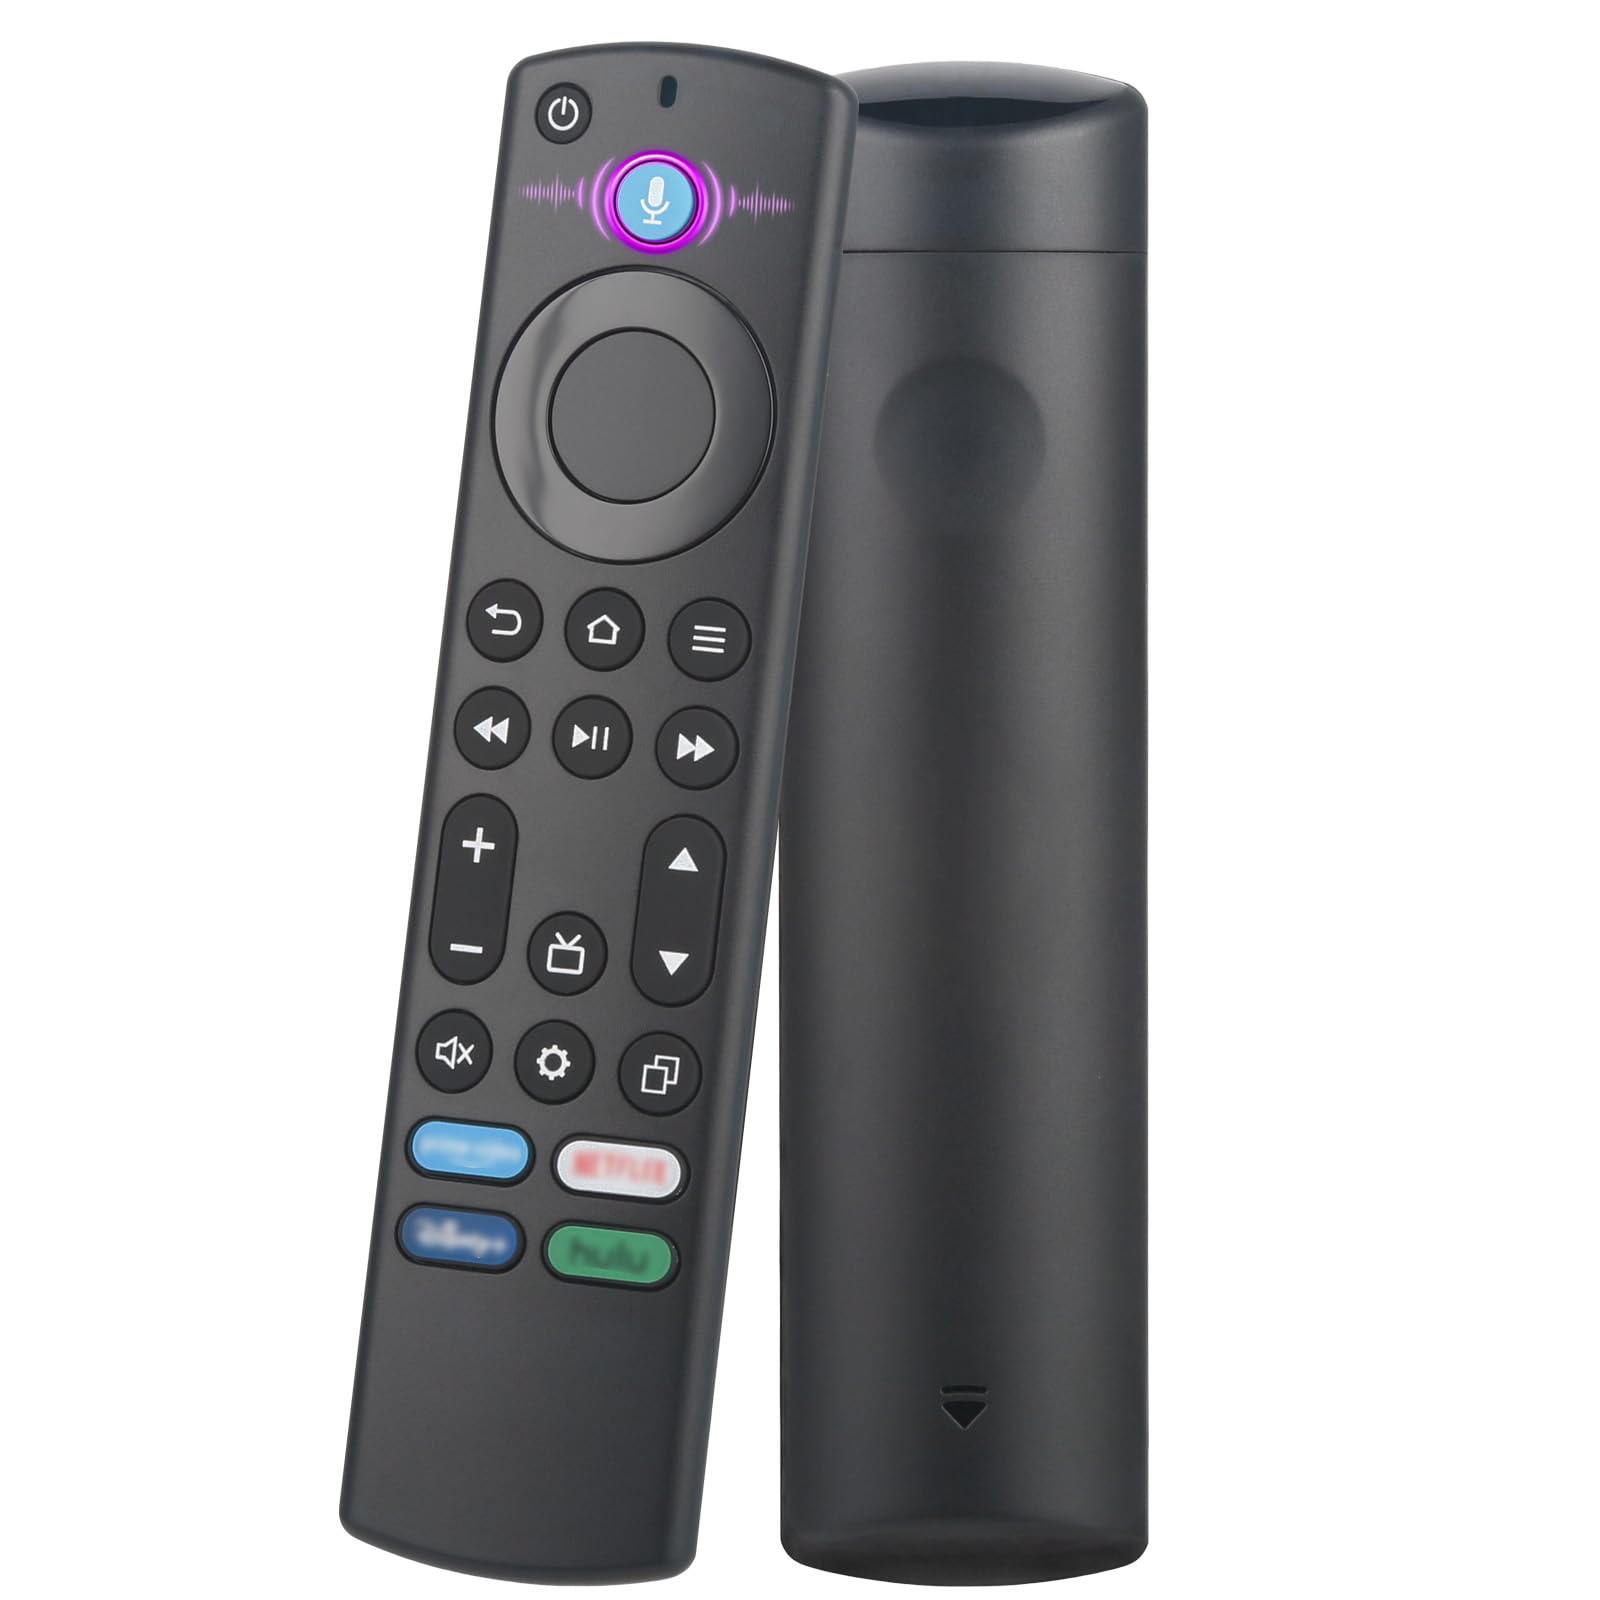
Image 1.1: The OROSAUR FireSeries Replacement Voice Remote Control, featuring a black finish and standard button layout including a microphone button for voice commands.
2. Compatibility
The OROSAUR FireSeries Replacement Voice Remote Control is compatible with a range of devices. Please review the following lists to ensure compatibility with your specific model.
2.1 Compatible Devices
- Fire Stick: 2nd Gen, 3rd Gen
- Fire TV Stick 4K: 1st Gen, 2nd Gen
- Fire TV Stick 4K Max: 1st Gen, 2nd Gen
- Fire TV Cube: 1st Gen, 2nd Gen, 3rd Gen
- Fire TV Stick Lite: 1st Gen, 2nd Gen
- Smart TV (3rd Gen Pendant Design)
- Smart TVs: Insignia, Toshiba, Pioneer, Omni

Image 2.1: Visual guide illustrating compatibility with various FireSmart TVs, TV Sticks, and Cubes, including specific generations.
2.2 Incompatible Devices
This remote control is not compatible with the following devices:
- Roku devices
- Samsung Smart TVs
- Fire Stick 1st Gen
- Smart TV 1st Gen
- Stick 2nd Gen (if referring to a non-Fire TV Stick)
- Element TV
- Westinghouse TV
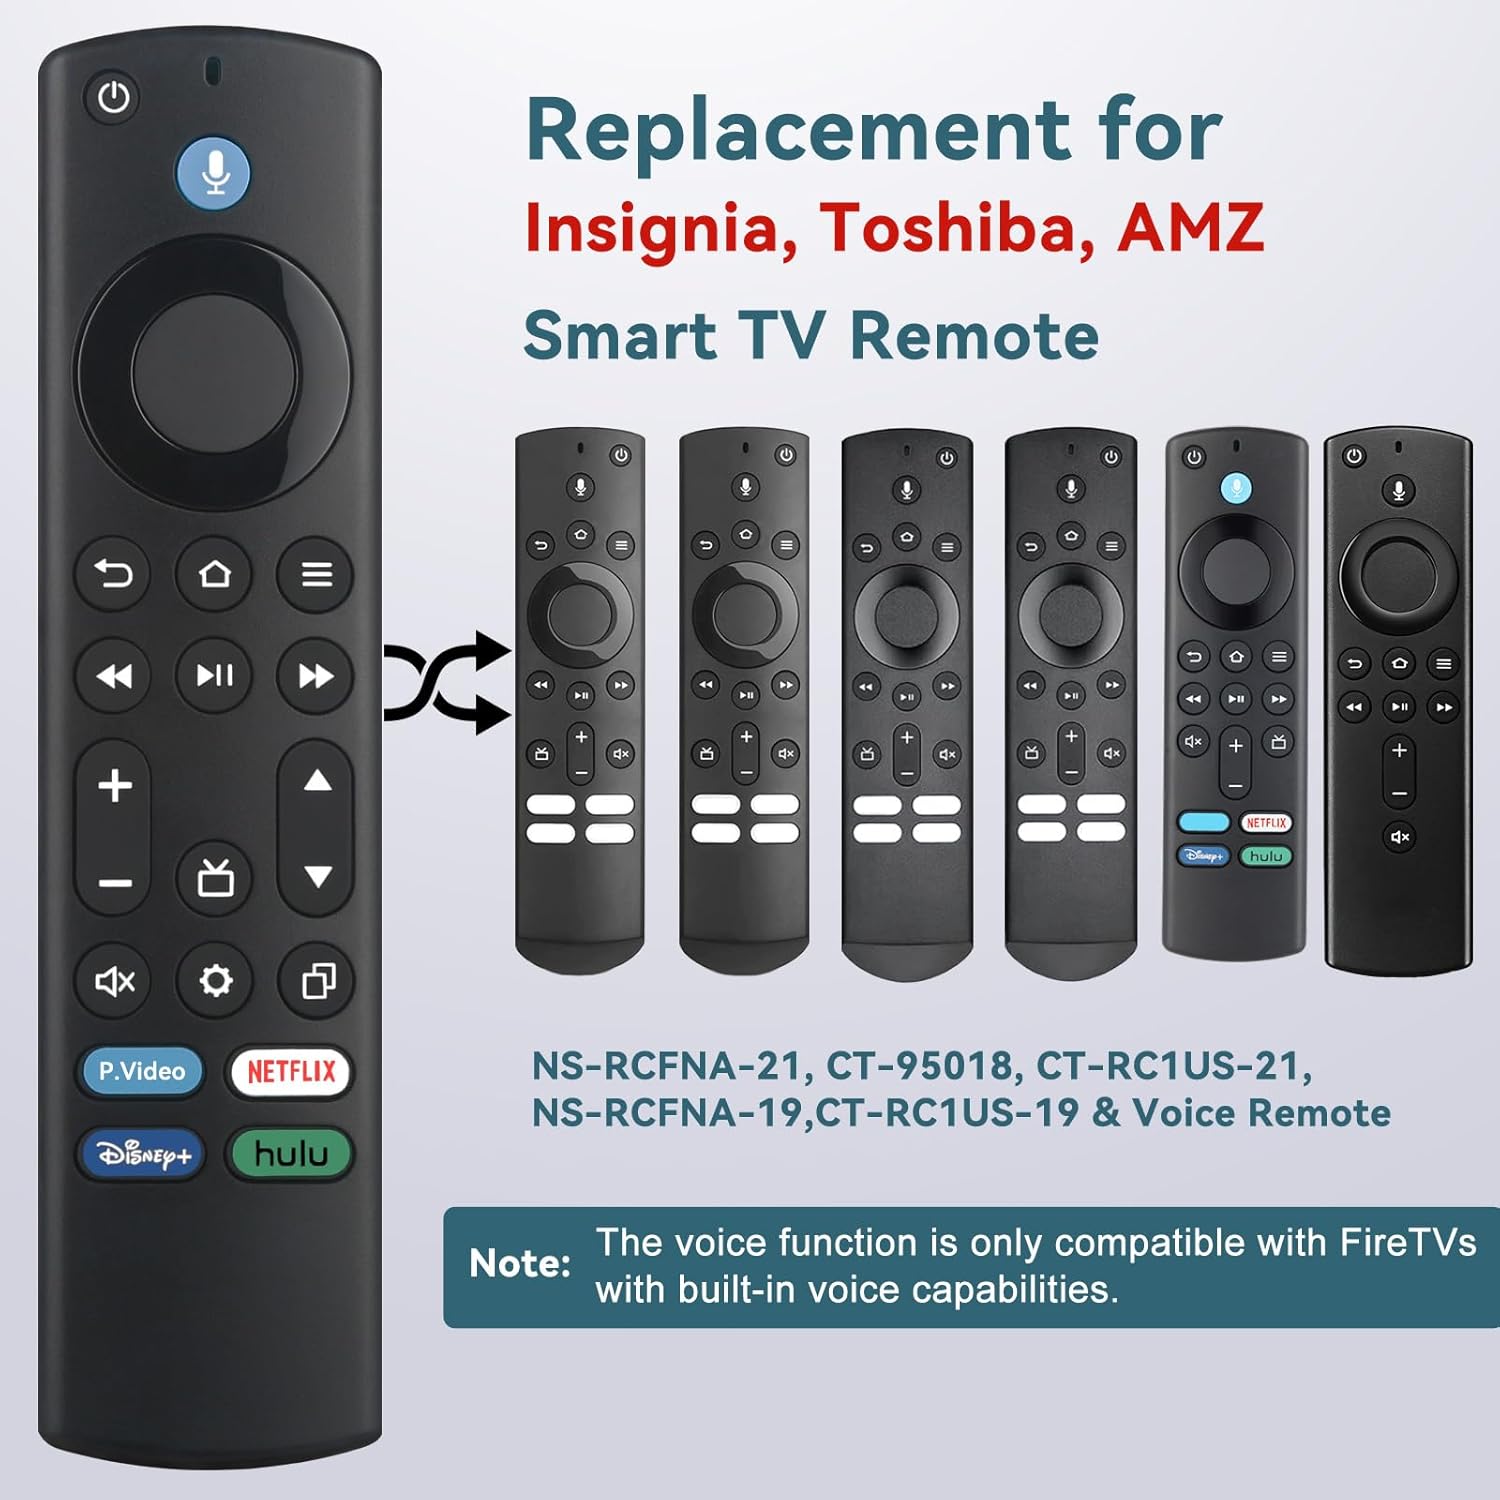
Image 2.2: Visual guide indicating devices that are not compatible with the OROSAUR FireSeries Replacement Voice Remote Control.
2.3 Replacement for Original Remotes
This remote serves as a replacement for various original Insignia, Toshiba, and AMZ Smart TV remotes, including models such as NS-RCFNA-21, CT-95018, CT-RC1US-21, NS-RCFNA-19, and CT-RC1US-19.

Image 2.3: The OROSAUR remote shown alongside several original remote models it is designed to replace.
3. Setup and Pairing
Follow these steps to pair your OROSAUR FireSeries Replacement Voice Remote Control with your compatible device.
- Install Batteries: Insert two (2) AAA alkaline batteries into the remote control. Ensure correct polarity.
- Power On TV: Turn on your television and the connected Fire TV device.
- Initiate Pairing: Press and hold the Home button (
 ) on the remote for approximately 10-15 seconds.
 - Release Button: Release the Home button once the LED light on the remote begins flashing rapidly.
- Automatic Pairing: Wait for about 60 seconds. The remote control should automatically pair with your device. A confirmation message, such as "Pairing Complete," may appear on your screen.
Note: If your TV is not compatible with voice control, the voice feature on the remote will not function.
Image 3.1: Step-by-step visual guide for pairing the OROSAUR remote control, showing the remote and a TV screen displaying "Pairing Complete".
4. Operating the Remote Control
This section details the functions of the buttons and features on your OROSAUR remote control.
4.1 Button Functions Overview

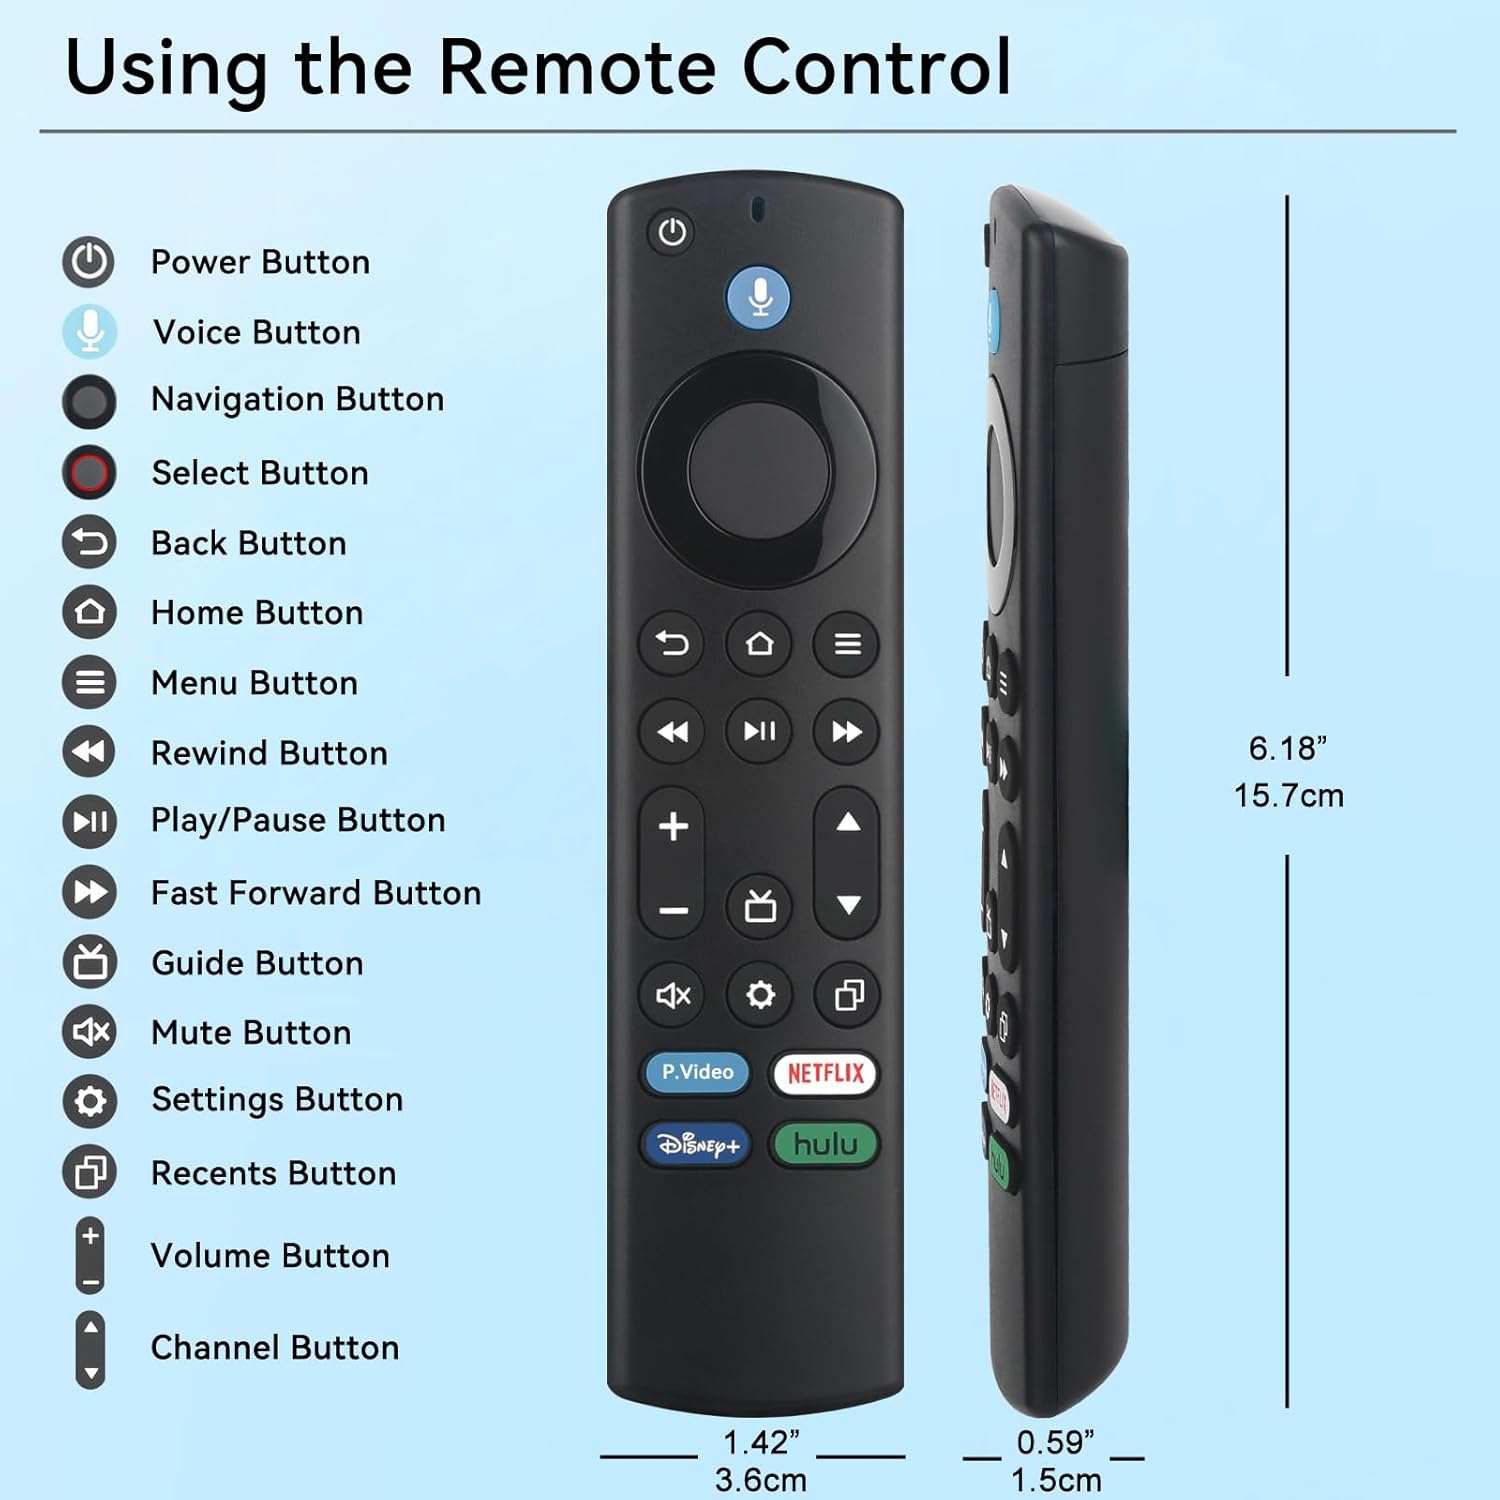
Image 4.1: Diagram illustrating the layout and function of each button on the OROSAUR FireSeries Replacement Voice Remote Control.
- Power Button: Turns the connected device on or off.
- Voice Button (Microphone Icon): Activates voice control for searching, launching apps, and adjusting settings.
- Navigation Button (Ring): Used to navigate menus and select items.
- Select Button (Center of Ring): Confirms selections.
- Back Button: Returns to the previous screen or menu.
- Home Button: Returns to the main home screen.
- Menu Button (Three Horizontal Lines): Opens context-sensitive menus.
- Rewind Button: Rewinds media playback.
- Play/Pause Button: Plays or pauses media playback.
- Fast Forward Button: Fast forwards media playback.
- Guide Button: Accesses the program guide.
- Mute Button: Mutes or unmutes audio.
- Settings Button (Gear Icon): Opens device settings.
- Recents Button: Displays recently used applications.
- Volume Up/Down Buttons: Adjusts audio volume.
- Channel Up/Down Buttons: Changes channels (if applicable).
4.2 Voice Control
The integrated voice control feature allows for hands-free operation. Press and hold the Voice Button (microphone icon) and speak your command clearly. You can search for content, launch applications, or control playback.

Image 4.2: Demonstration of the voice control feature, showing example commands like "Please open Prime video" and "Play the music".
4.3 Shortcut Buttons
The remote includes four dedicated shortcut buttons for quick access to popular streaming services:
- P.Video: Launches Prime Video.
- Netflix: Launches Netflix.
- Disney+: Launches Disney+.
- Hulu: Launches Hulu.

Image 4.3: Close-up view of the four dedicated shortcut buttons for Prime Video, Netflix, Disney+, and Hulu.
5. Maintenance
Proper maintenance ensures the longevity and optimal performance of your remote control.
5.1 Battery Replacement
When the remote's performance degrades or the LED indicator no longer flashes during use, it is time to replace the batteries. Use two (2) new AAA alkaline batteries. Ensure correct polarity when inserting them.
5.2 Cleaning
To clean the remote, gently wipe its surface with a soft, dry cloth. Avoid using liquid cleaners, aerosols, or abrasive materials, as these can damage the remote's finish or internal components.
5.3 Storage
Store the remote in a cool, dry place away from direct sunlight and extreme temperatures. If storing for an extended period, remove the batteries to prevent leakage.
6. Troubleshooting
If you encounter issues with your remote control, refer to the following troubleshooting steps.
- Remote Not Responding:
- Ensure batteries are correctly inserted and not depleted. Replace with new AAA batteries if necessary.
- Confirm the remote is within the operational range (up to 30 feet) of your device.
- Re-attempt the pairing process as described in Section 3.
- Voice Control Not Working:
- Verify that your connected device (Fire TV Stick, Smart TV) supports voice control.
- Ensure the remote is properly paired.
- Speak clearly and directly into the microphone on the remote.
- Check for any obstructions between the remote and the device.
- Specific Buttons Not Functioning:
- Clean the remote surface to ensure no debris is obstructing button presses.
- If only certain buttons are unresponsive, it may indicate a hardware issue.
- Remote Disconnects Frequently:
- Replace batteries with fresh ones.
- Ensure no strong interference sources (e.g., other Bluetooth devices, Wi-Fi routers) are too close to your device or remote.
- Re-pair the remote with your device.
7. Specifications
| Feature | Detail |
|---|---|
| Brand | OROSAUR |
| Model Name | FireStick Remote |
| Model Number | FireSeries Remote |
| Mfr Part Number | Stick Remote 0101 |
| Special Feature | Voice Search |
| Color | Black |
| Max Number of Supported Devices | 7 |
| Compatible Devices | Streaming Device, Television |
| Connectivity Technology | Bluetooth |
| Button Quantity | 20 |
| Controller Type | Button Control |
| Maximum Range | 30 Feet |
| Number of Batteries | 2 AAA batteries required |
| Battery Type | Alkaline AAA |
| Item Weight | 1.75 Ounces |
| Item Dimensions L x W x H | 1.46"L x 0.59"W x 4.7"H |
8. Warranty and Support
8.1 Warranty Information
This OROSAUR remote control comes with a 1-Year Replacement Warranty. Please retain your proof of purchase for warranty claims. For details regarding warranty service, refer to the product packaging or contact the manufacturer directly.
8.2 Customer Support
For further assistance, technical support, or inquiries not covered in this manual, please contact OROSAUR customer service. Contact information can typically be found on the product packaging or the official OROSAUR website.