1. Safety Instructions
Read all instructions carefully before installation and use. Failure to follow these instructions may result in electric shock, fire, or personal injury.
- Always disconnect power at the service panel before wiring or servicing the unit.
- Ensure all wiring complies with local electrical codes and standards.
- This unit must be properly grounded.
- Do not install this fan in a cooking area.
- Never place objects into the fan grille.
- Wear safety glasses and gloves during installation.
- Keep children away from the work area.
2. Product Overview
The VEVOR 80 CFM Bathroom Exhaust Fan with LED Light is designed to provide efficient ventilation and adjustable lighting for various indoor spaces. It features a low-noise AC motor and three color temperature options for the integrated LED light.
Key Features:
- Powerful Ventilation: Delivers 80 CFM airflow, suitable for areas up to 161 sq. ft. (15 m²).
- Quiet Operation: Operates at a low noise level of 1.5 sones (≤60dB).
- Adjustable LED Light: Offers 3000K (warm), 4000K (neutral), and 5000K (cool) color temperatures.
- Durable Construction: ETLus certified with a damp-resistant housing and cold-rolled steel material.
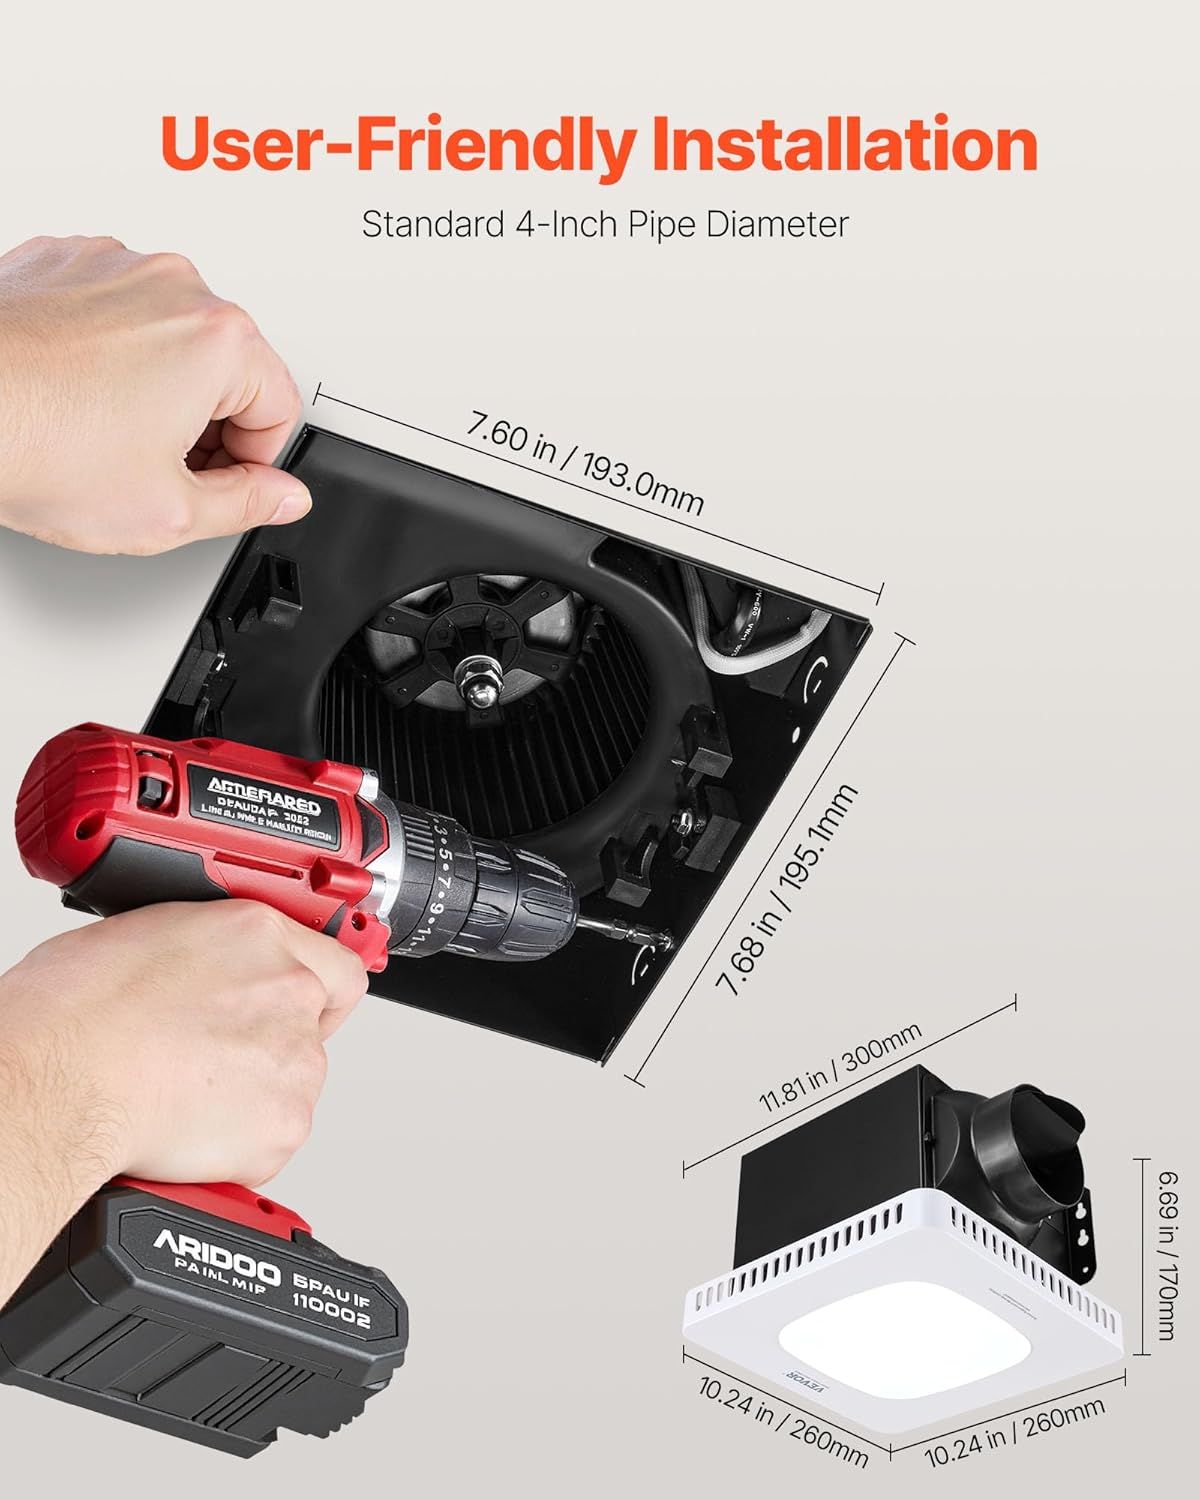
Image: The VEVOR exhaust fan installed in a bathroom ceiling, demonstrating its airflow for effective damp and odor removal.
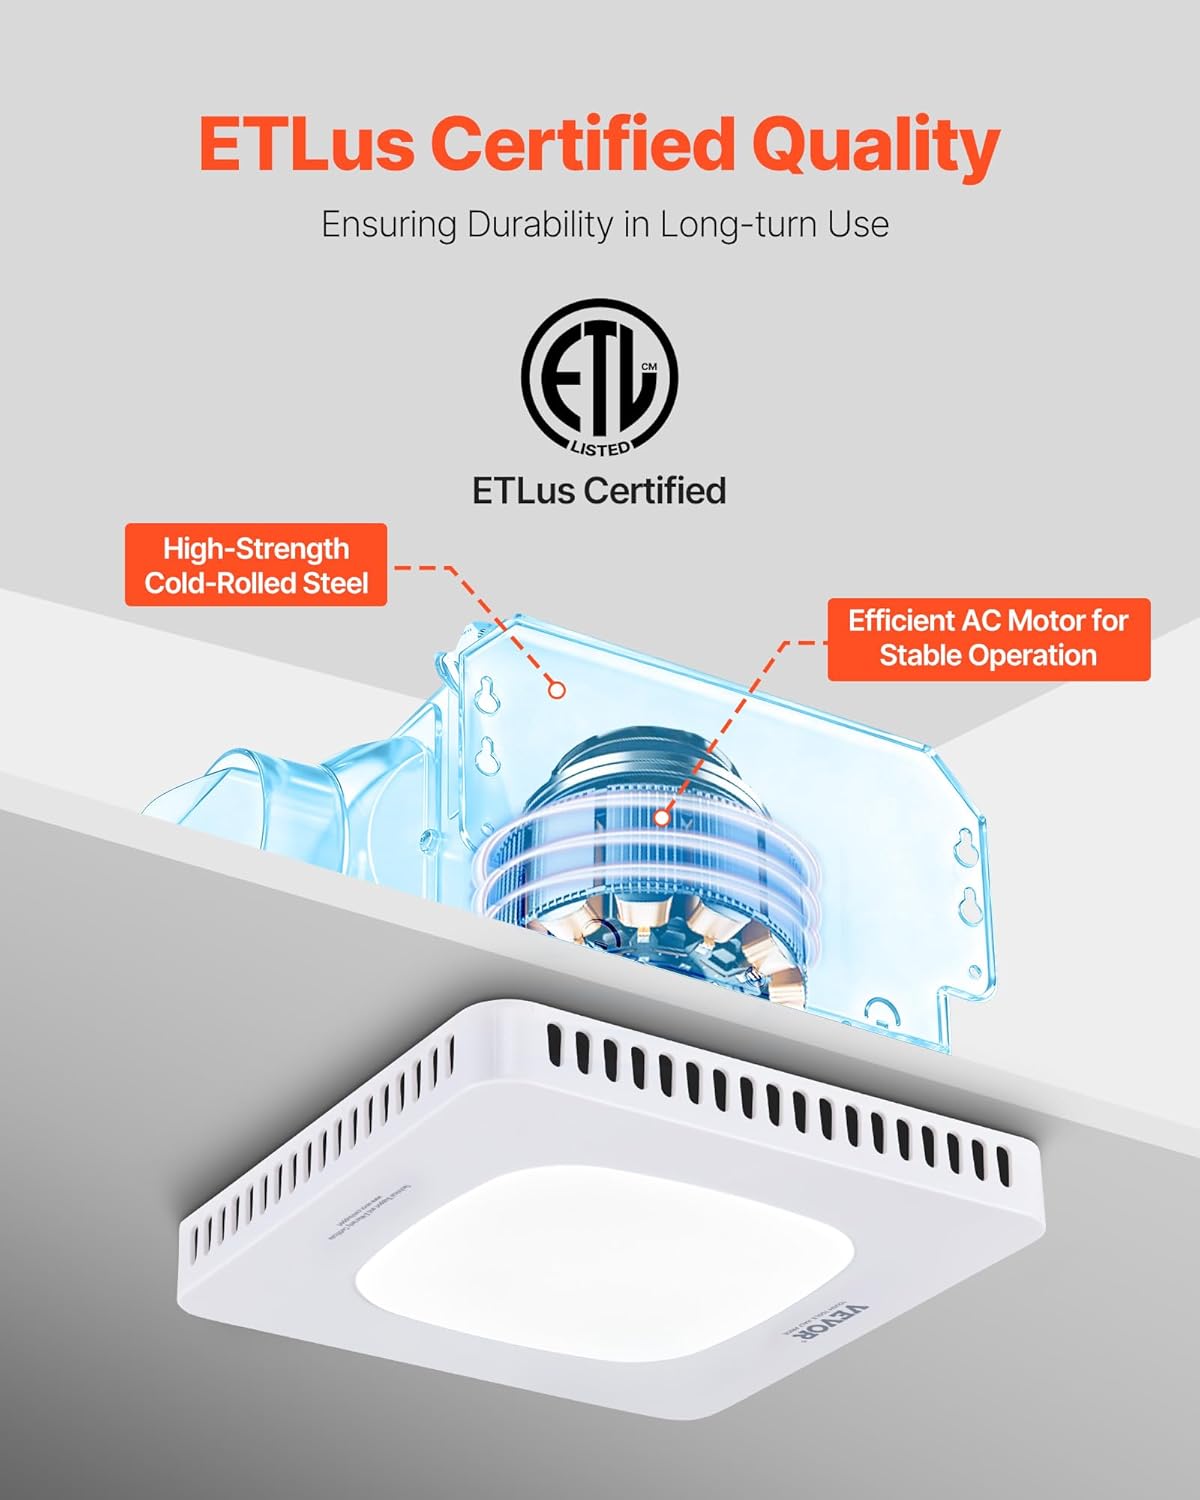
Image: A cutaway view of the fan's internal components, highlighting the efficient AC motor and the ETLus certification for quality assurance.
3. Package Contents
Verify that all components are present before beginning installation:
- 1 x VEVOR Bathroom Exhaust Fan with LED Light
- 4 x Large Flat Self-Tapping Screws
- 1 x Two-Way Switch
- 1 x User Manual (this document)
4. Specifications

Image: Detailed dimensions of the exhaust fan unit and a summary of its technical specifications.
| Specification | Value |
|---|---|
| Model Number | BT-BPT190CL |
| Power | 45W |
| Material | Cold-Rolled Steel |
| Airflow Capacity | 80 CFM |
| Pipe Diameter | 4 inch / 101.6 mm |
| Color Temperature | 3000K / 4000K / 5000K |
| Noise Level | ≤1.5 sones |
| Net Weight | 5.73 lbs / 2.6 kg |
| Item Dimensions (D x W x H) | 11.81" x 10.24" x 6.69" / 300 x 260 x 170 mm |
| Motor Type | AC Motor |
| Voltage/Frequency | 120V ~ 60Hz |
| Motor Speed | 950 r/min |
| Motor Power | 32W |
5. Installation
Follow these steps for proper installation of your exhaust fan. Professional installation is recommended if you are not familiar with electrical wiring.
Installation Steps:
- Prepare the Ceiling Opening: Confirm the ceiling cutout dimensions are approximately 7.68 x 7.60 inches (195.1 x 193.0 mm).
- Detach Wiring Box Lid: Locate and detach the lid of the wiring box on the fan unit.
- Connect Wiring: Connect the household electrical wires to the fan's quick connectors. Ensure correct connections: Black (Live), White (Neutral), Green (Ground).
- Install Ducting: Connect a standard 4-inch duct (not included) to the fan's exhaust port and seal it securely.
- Insert into Ceiling: Carefully insert the fan unit into the prepared ceiling opening.
- Secure the Fan: Pinch the installation springs on the fan housing and push the unit up until it fits snugly against the ceiling.
- Final Check: Ensure the fan is securely mounted and all connections are tight.

Image: A visual guide to the fan's dimensions and the use of a drill for securing the unit during installation.

Image: A diagram illustrating the seven key steps for installing the exhaust fan, from preparing the opening to securing the unit.
Installation Video:
Video: An official VEVOR video demonstrating the installation process for the bathroom exhaust fan with light.
6. Operation
The VEVOR exhaust fan features separate controls for the fan and the LED light, allowing independent operation and light color adjustment.
Fan Operation:
Use the designated fan switch on your wall control to turn the exhaust fan ON or OFF. The fan will operate at its standard 80 CFM setting.
LED Light Operation and Color Temperature Adjustment:
The LED light offers three color temperature options: 3000K (Warm), 4000K (Neutral), and 5000K (Cool). To cycle through these options:
- Turn the light switch ON. The light will illuminate at its last-used color temperature.
- To change the color temperature, quickly toggle the light switch OFF and then ON again. The light will switch to the next color temperature in the sequence.
- Repeat toggling the switch until your desired color temperature is achieved.

Image: Visual representation of the three adjustable light color temperatures (5000K, 4000K, 3000K) available with the fan's LED light.
7. Maintenance
Regular maintenance ensures optimal performance and longevity of your exhaust fan.
Cleaning the Grille:
- Disconnect Power: Always turn off power at the circuit breaker before cleaning.
- Remove Grille: Gently pull down the grille to detach it from the fan housing.
- Clean: Wash the grille with a mild detergent and warm water. Rinse thoroughly and dry completely before reattaching.
- Reattach Grille: Align the grille springs with the slots in the fan housing and push up until it snaps into place.
Cleaning the Fan Motor and Blades:
Periodically, inspect the fan motor and blades for dust buildup. If necessary, carefully wipe them with a damp cloth. Do not immerse electrical components in water.
8. Troubleshooting
If you encounter issues with your VEVOR exhaust fan, refer to the following common problems and solutions:
| Problem | Possible Cause | Solution |
|---|---|---|
| Fan does not turn on | No power supply Loose wiring connection Faulty switch | Check circuit breaker and wall switch Verify all wiring connections are secure (ensure power is off) Test or replace the switch |
| Light does not turn on | No power supply to light Loose wiring connection Faulty LED module | Check light switch and circuit breaker Verify wiring connections (ensure power is off) Contact customer support for LED module replacement |
| Fan is noisy | Dust buildup on blades Loose mounting Obstruction in ducting | Clean fan blades and motor Ensure fan is securely mounted to the ceiling Check ductwork for blockages |
| Poor ventilation | Blocked ducting Fan size inadequate for room Excessive air leakage | Clear any obstructions in the ductwork Ensure fan is correctly sized for the room area Seal any gaps around the fan housing or duct connections |
If the problem persists after attempting these solutions, please contact VEVOR customer support.
9. Warranty and Support
VEVOR products are designed for durability and performance. For warranty information or technical support, please refer to the warranty card included with your product or visit the official VEVOR website. Keep your purchase receipt as proof of purchase.