AIMILER ZB18-U09K6BC-F001
AIMILER Level 2 EV Charger (40A) User Manual
Model: ZB18-U09K6BC-F001
1. Introduction
This manual provides essential information for the safe and efficient operation of your AIMILER Level 2 Electric Vehicle (EV) Charger. This 40A EV charger is designed for home use, offering faster charging capabilities for compatible electric vehicles. Please read this manual thoroughly before installation and use, and retain it for future reference.
2. Safety Information
Important Safety Instructions:
- Always ensure the charger is installed by a qualified electrician in accordance with all local and national electrical codes.
- Do not attempt to open, disassemble, or modify the charger. This may result in electric shock, fire, or other hazards.
- Ensure the electrical circuit breaker meets the required amperage (e.g., a 50A circuit breaker for 40A charging).
- Keep the charging cable and connector away from water, heat, and sharp objects.
- Do not use the charger if it is damaged, cracked, or shows any signs of malfunction.
- In case of an emergency, press the emergency stop button on the side of the charger.
3. Package Contents
Verify that all items are present in the package:
- AIMILER Level 2 EV Charger (40A)
- 25ft Charging Cable with J1772 Connector
- NEMA 14-50 Plug (pre-attached to input cable)
- Wall Mounting Bracket
- Cable Management Bracket
- Mounting Hardware (screws, expansion bolts)
- User Manual
- Certificate of Conformity
4. Setup and Installation
The AIMILER Level 2 EV Charger offers flexible installation options, including direct wall mounting or pedestal mounting. Professional installation by a certified electrician is highly recommended to ensure safety and compliance with electrical codes.
4.1 Electrical Requirements
- Input Voltage: 240V AC
- Current Rating: 40 Amps (adjustable from 16A to 40A)
- Circuit Breaker: A dedicated circuit breaker of at least 50A is required for 40A charging. For 32A charging, a 40A circuit breaker is needed.
- Wiring: For 40A charging, a 6AWG power outlet cord is suggested for the 240V NEMA 14-50 plug-in socket.
4.2 Physical Installation
The charger unit is designed for easy installation. Follow these steps:
- Step 1: Fix the Backplate. Securely attach the wall mounting bracket (backplate) to your desired wall location using the provided screws and expansion bolts. Ensure the mounting surface is sturdy enough to support the charger's weight.
- Step 2: Mount the Charger. Slide the EV charger unit onto the fixed backplate. Once in place, tighten the security screws to firmly secure the charger to the bracket.
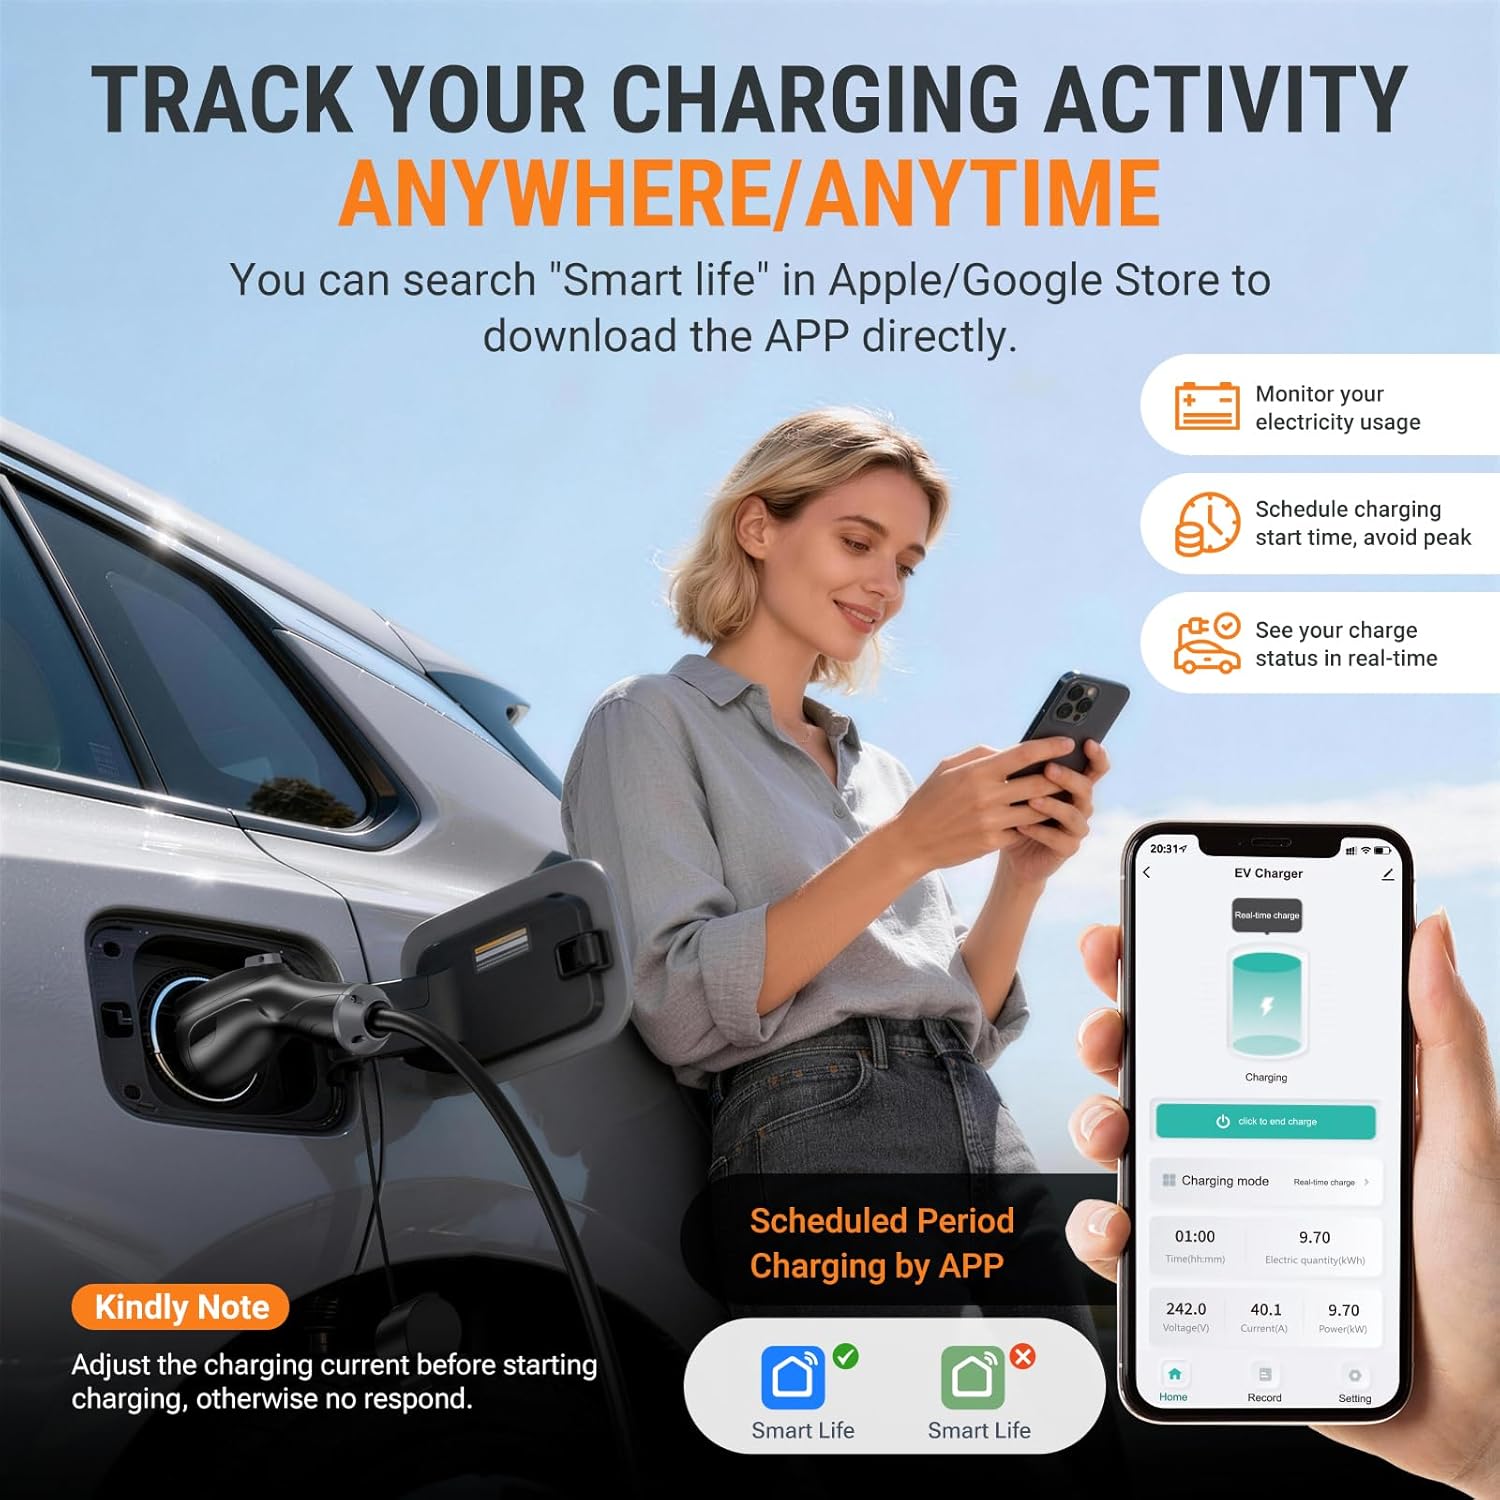
Figure 1: Easy two-step installation of the AIMILER EV Charger.
4.3 Cable Management
Install the provided cable management bracket near the charger to neatly store the 25ft charging cable and J1772 connector when not in use. This helps prevent damage and keeps the area tidy.
Video 1: Unboxing and installation overview of the Aimiler Level 2 Electric Vehicle Charger.
5. Operating Instructions
The AIMILER EV Charger offers two primary operating modes: Plug-and-Charge (default) and APP Start Mode.
5.1 Plug-and-Charge Mode
In the default Plug-and-Charge mode, simply connect the J1772 connector to your EV's charging port, and charging will begin automatically. The LED screen on the charger will display real-time charging information.
5.2 APP Control (SmartLife App)
For advanced control and monitoring, download the 'SmartLife - Smart Living' app from your device's app store. The app allows you to:
- Monitor electricity usage.
- Schedule charging start times to avoid peak rates.
- View real-time charging status.
- Adjust charging amperage.
- View charging history and costs.

Figure 2: SmartLife App interface for tracking charging activity.
5.3 Adjusting Amperage
You can adjust the charging amperage from 16A to 40A using either the physical buttons on the charger or through the SmartLife app.
- Using Buttons: Pull out the charging gun first. Long press the 'A' button to enter settings. Press 'A' to cycle through amperage options (16A, 24A, 32A, 40A). Long press 'A' or the 'Time' button for 2 seconds to confirm and exit.
- Using App: Adjust the current/amperage via the SmartLife app before initiating charging.

Figure 3: Charger display and control buttons for manual adjustments.
5.4 Emergency Stop
The charger is equipped with an emergency stop button for immediate power cut-off. Press the red 'E-stop' button on the side of the unit to stop charging. To resume, press the button again to recover its position, and the charger will return to its original state.
6. Compatibility
The AIMILER EV Charger features a J1772 connector, making it compatible with all North American J1772 EVs/PHEVs, including models from Ford, GM, Nissan, Audi, Kia (2024 and before), Honda, BMW, Hyundai, and Chevy. For Tesla EVs or vehicles with NACS connectors (e.g., Kia EV6 2025/EV9, Ariya 2025, Ioniq 5 2025), a J1772 to Tesla adapter is required.
7. Maintenance
To ensure the longevity and optimal performance of your AIMILER EV Charger, follow these maintenance guidelines:
- Cleaning: Regularly wipe the exterior of the charger with a soft, dry cloth. Do not use harsh chemicals or abrasive cleaners.
- Cable Care: Avoid kinking, twisting, or driving over the charging cable. Store the cable neatly on the cable management bracket when not in use.
- Environmental Protection: The charger has a NEMA Type 4 (IP66) rating, providing a certain degree of waterproof protection. However, prolonged exposure to direct sunlight or heavy rain is not recommended.
- Inspections: Periodically inspect the charger, cable, and plug for any signs of damage, wear, or loose connections. If any damage is found, discontinue use and contact customer support.
8. Troubleshooting
If you encounter issues with your AIMILER EV Charger, refer to the following troubleshooting tips:
8.1 Wi-Fi Connection Issues
If the device cannot be found on the app or after changing phones:
- Confirm your phone is connected to a 2.4GHz Wi-Fi network (not a 5GHz network).
- Ensure Wi-Fi and Bluetooth are enabled on your phone.
- Perform a Factory Reset/Wi-Fi Reset: Pull out the charging gun. Simultaneously long press the 'A' button and the 'Time' button on the product screen until "Factory Reset" appears.
- Restart your device and attempt to add it to the app again.
8.2 Charging Not Initiating
- Ensure the charging gun is fully inserted into the EV's charging port.
- Check if the emergency stop button is engaged. Disengage it if necessary.
- Verify that the circuit breaker for the charger is in the 'ON' position.
- If using the app, ensure the charging mode is set correctly (e.g., Real-time charging).
- If the issue persists, perform a factory reset as described above.
9. Specifications
| Feature | Specification |
|---|---|
| Brand | AIMILER |
| Model Number | ZB18-U09K6BC-F001 |
| Output Voltage | 240 Volts |
| Input Voltage | 240 Volts |
| Current Rating | 40 Amps (Adjustable 16A-40A) |
| Connector Type | J1772 |
| Cable Length | 25 feet |
| Plug Type | NEMA 14-50 |
| Protection Degree | NEMA Type 4 (IP66 waterproof) |
| Certifications | ETL, FCC |
10. Warranty and Support
The AIMILER Level 2 EV Charger comes with a 3-year warranty. For technical support, warranty claims, or any questions regarding your product, please contact AIMILER customer service through the official channels provided at the time of purchase or on the manufacturer's website.
Related Documents - ZB18-U09K6BC-F001
 |
Aimiler Portable EV Charger User Manual Comprehensive user manual for the Aimiler Portable EV Charger, covering installation, operation, safety, troubleshooting, and maintenance. Learn how to charge your electric vehicle efficiently and safely. |
 |
AIMILER EV Charger Troubleshooting Guide A comprehensive troubleshooting guide for AIMILER Level 2 Electric Vehicle (EV) Chargers, covering common faults and their solutions for issues like unable to turn on, unable to start, incomplete charge, screen display errors, and connectivity problems. |
 |
Aimiler EV Charger App Guide: Setup and Usage A comprehensive guide to setting up and using the Aimiler EV charger app, including device pairing, appointment scheduling, and charging instructions. |
 |
Aimiler Cargador Portátil de VE CA ZA05-E011K: Manual de Usuario Guía completa del cargador portátil de VE CA Aimiler modelo ZA05-E011K. Aprenda a usar, configurar y mantener su cargador de vehículo eléctrico de forma segura y eficiente con este manual de usuario. |
Ask a question about this manual
Ask about setup, troubleshooting, compatibility, parts, safety, or missing instructions. Manuals+ will review the question and use this page’s manual context to help answer it.