1. Product Overview
The MLEEDA HDMI KVM Switch allows you to control two computers using a single monitor, keyboard, and mouse. It also enables sharing of up to four USB 2.0 devices between the connected computers. This device supports high-resolution video output up to 4K@60Hz, ensuring a clear and vibrant display.

Image 1.1: MLEEDA HDMI KVM Switch. This image displays the compact black KVM switch unit with its various ports and two included USB cables.
Key Features:
- 2-Port HDMI KVM Switch: Seamlessly switch between two computers to share one HDMI monitor and a single set of wired or wireless keyboard and mouse.
- Ultra HD 4K@60Hz: Supports video resolutions up to 4K@60Hz, with backward compatibility for 4K@30Hz and 2560x1440@120Hz. Compatible with ultrawide monitors.
- 4 USB 2.0 Ports: Share up to four USB 2.0 devices such as printers, U disks, and other peripherals between the two connected computers. Supports data transfer speeds up to 480Mbps.
- Plug and Play: Driver-free installation for Windows, Mac OS, Linux, and Chrome OS.
- Wide Compatibility: Works with most HDMI source devices including PS5, PS4, TV Box, PCs, and Laptops.
2. Package Contents
Please verify that all items are present in your package:
- 1 x MLEEDA HDMI KVM Switch
- 2 x USB-A to USB-B Cables (1.5 meters each)
- 1 x User Manual (this document)

Image 2.1: Package Contents. This image shows the KVM switch, two USB-A to USB-B cables, and the user manual, along with the device dimensions.
3. Product Diagram
Familiarize yourself with the ports and indicators on your KVM switch:

Image 3.1: Connection Diagram. This diagram illustrates the rear and front panels of the KVM switch, showing HDMI input/output ports, USB-B ports for computers, and USB-A ports for peripherals.
- Front Panel:
- USB 2.0 Ports (x4): For connecting shared USB devices (keyboard, mouse, printer, U disk, etc.).
- Switch Button: Press to switch between Computer 1 and Computer 2.
- LED Indicators (1, 2): Indicate which computer is currently active.
- Rear Panel:
- Monitor HDMI Output (HD): Connects to your single monitor.
- PC 1 HDMI Input (HD 1): Connects to the HDMI output of Computer 1.
- PC 2 HDMI Input (HD 2): Connects to the HDMI output of Computer 2.
- PC 1 USB-B Port (USB 1): Connects to a USB-A port on Computer 1 using the provided USB cable.
- PC 2 USB-B Port (USB 2): Connects to a USB-A port on Computer 2 using the provided USB cable.
4. Setup Instructions
Follow these steps to connect your MLEEDA HDMI KVM Switch:
- Power Off Devices: Ensure both computers and the monitor are powered off before making any connections.
- Connect Monitor: Connect your monitor's HDMI input to the KVM switch's Monitor HDMI Output (HD) port.
- Connect Computer 1:
- Connect Computer 1's HDMI output to the KVM switch's PC 1 HDMI Input (HD 1) port.
- Connect one end of a provided USB-A to USB-B cable to Computer 1's USB-A port and the other end to the KVM switch's PC 1 USB-B Port (USB 1).
- Connect Computer 2:
- Connect Computer 2's HDMI output to the KVM switch's PC 2 HDMI Input (HD 2) port.
- Connect the second provided USB-A to USB-B cable to Computer 2's USB-A port and the other end to the KVM switch's PC 2 USB-B Port (USB 2).
- Connect USB Peripherals: Connect your keyboard, mouse, printer, or other USB devices to the USB 2.0 Ports on the front panel of the KVM switch.
- Power On: Power on your monitor, then power on Computer 1 and Computer 2.
Video 4.1: KVM Switch HDMI 2 Port Connection Guide. This video demonstrates the physical connection process for the KVM switch, showing how to plug in HDMI and USB cables from two computers to the switch, and then connect the monitor and peripherals to the switch.
5. Operating Instructions
Switching between computers is straightforward:
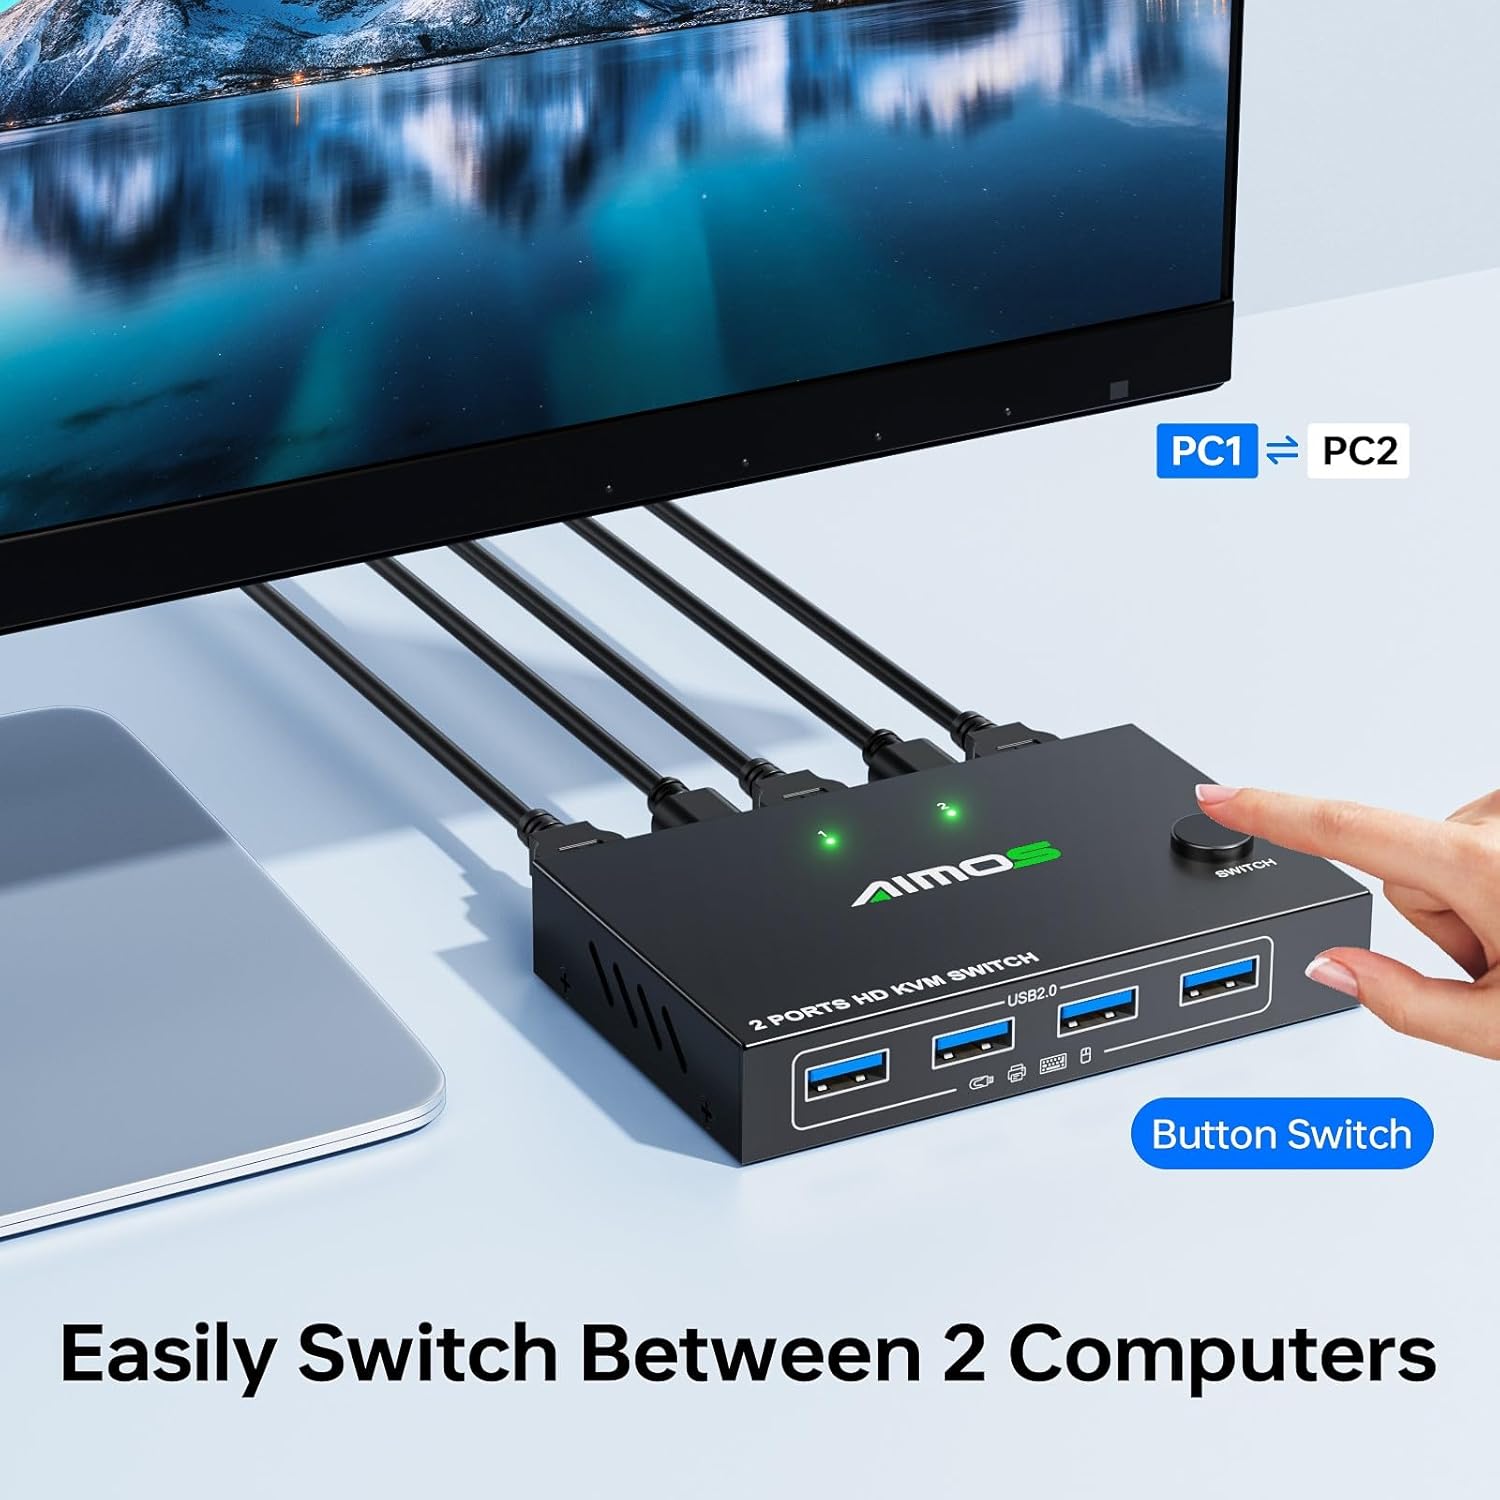
Image 5.1: Switching Between Computers. A hand is shown pressing the 'Switch' button on the KVM device, indicating the method for changing the active computer.
Switching Method:
- Front Panel Button: Press the 'Switch' button on the front panel of the KVM device to toggle between Computer 1 and Computer 2. The corresponding LED indicator (1 or 2) will illuminate to show which computer is currently active.
6. Compatibility
The MLEEDA HDMI KVM Switch is designed for broad compatibility:

Image 6.1: Compatibility Overview. This graphic displays the KVM switch and lists compatible operating systems (Windows, Mac OS, Chrome OS, Linux), device types (Desktops, Laptops), and USB devices (Hard Drive, Keyboard, Mouse, U disk, Printer, Scanning gun, Card reader, Headphones).
- Operating Systems: Windows, Mac OS, Linux, Chrome OS.
- Source Devices: PCs, Laptops, PS5, PS4, TV Boxes, and other HDMI-enabled devices.
- USB Peripherals: Keyboards, mice (wired and wireless), printers, U disks, hard drives, scanning guns, card readers, headphones, and other standard USB 2.0 devices.
7. Specifications
| Feature | Specification |
|---|---|
| Model Number | 2 PC 1 Monitor |
| Product Dimensions (L x W x H) | 3.94 x 2.56 x 0.71 inches (10.1 x 6.5 x 1.8 cm) |
| Weight | 5.11 ounces |
| Video Resolution Support | Up to 4K@60Hz, backward compatible with 4K@30Hz, 2560x1440@120Hz |
| USB Ports | 4 x USB 2.0 (for peripherals) |
| USB Data Transfer Rate | Up to 480Mbps |
| Operating Voltage | 5 Volts |
| Current Rating | 2 Amps |
| Operation Mode | ON-OFF (Switch Button) |
| Connector Type | Plug In (HDMI, USB-B, USB-A) |
| Material | Metal |
| Manufacturer | MLEEDA |
8. Troubleshooting
If you encounter issues with your KVM switch, please refer to the following common solutions:
- No Display on Monitor:
- Ensure all HDMI cables are securely connected to both the KVM switch and your computers/monitor.
- Verify that the correct input source is selected on your monitor.
- Try restarting the KVM switch and both computers.
- Test with different HDMI cables if possible, as faulty cables can cause display issues.
- Keyboard/Mouse Not Responding:
- Ensure the USB-A to USB-B cables are securely connected from the KVM switch to both computers.
- Confirm that your keyboard and mouse are plugged into the correct USB 2.0 ports on the KVM switch.
- Try connecting the keyboard and mouse directly to the computer to rule out device issues.
- Some specialized gaming keyboards/mice with high power requirements or complex drivers may not function optimally through a KVM.
- Intermittent Signal/Flickering:
- Check all cable connections for looseness.
- Ensure you are using high-quality HDMI cables, especially for 4K resolutions.
- Reduce the display resolution or refresh rate temporarily to see if the issue persists.
- Ensure the KVM switch is receiving adequate power (if an external power source is required for your specific setup, though this model typically draws power from USB).
- USB Devices Not Detected:
- Verify the USB device is properly connected to one of the KVM's USB 2.0 ports.
- Ensure the active computer's USB connection to the KVM is stable.
- Some high-power USB devices may require direct connection to the computer or a powered USB hub.
9. Warranty and Support
MLEEDA provides a 1-year warranty for this KVM switch. Additionally, lifetime technical support is available for any questions or assistance you may need. For support, please contact MLEEDA customer service. Professional after-sales service will reply within 12 hours.