1. Product Overview
The TOOLTOP 8620DX PRO is a high-performance 1300W hot air rework station designed for precision electronic repair, BGA rework, and welding applications. It features microcomputer temperature control, a large LED display, and a pluggable heating core for enhanced convenience and efficiency. This station provides precise temperature and airflow control, making it suitable for various soldering and desoldering tasks.
2. Safety Instructions
- Always operate the rework station in a well-ventilated area to avoid inhaling fumes.
- The hot air gun produces high temperatures. Avoid direct contact with the nozzle or heated components to prevent burns.
- Ensure the power supply matches the unit's voltage requirements (220V/110V).
- Do not use the station near flammable materials or gases.
- Always place the hot air gun in its stand when not in use. The automatic sleep function will activate to cool down the element.
- Unplug the unit from the power outlet before cleaning or performing any maintenance.
- Keep the equipment out of reach of children.
3. Setup
- Unpacking: Carefully remove all components from the packaging. Verify that all items listed in the packing list are present.
- Placement: Place the main unit on a stable, heat-resistant, and level surface. Ensure adequate space around the unit for ventilation.
- Connect Hot Air Gun: Connect the hot air gun cable to the designated port on the main unit. Ensure a secure connection.
- Attach Nozzle: Select the appropriate nozzle for your application and securely attach it to the hot air gun.
- Connect Power: Plug the power cord into the main unit and then into a grounded electrical outlet.
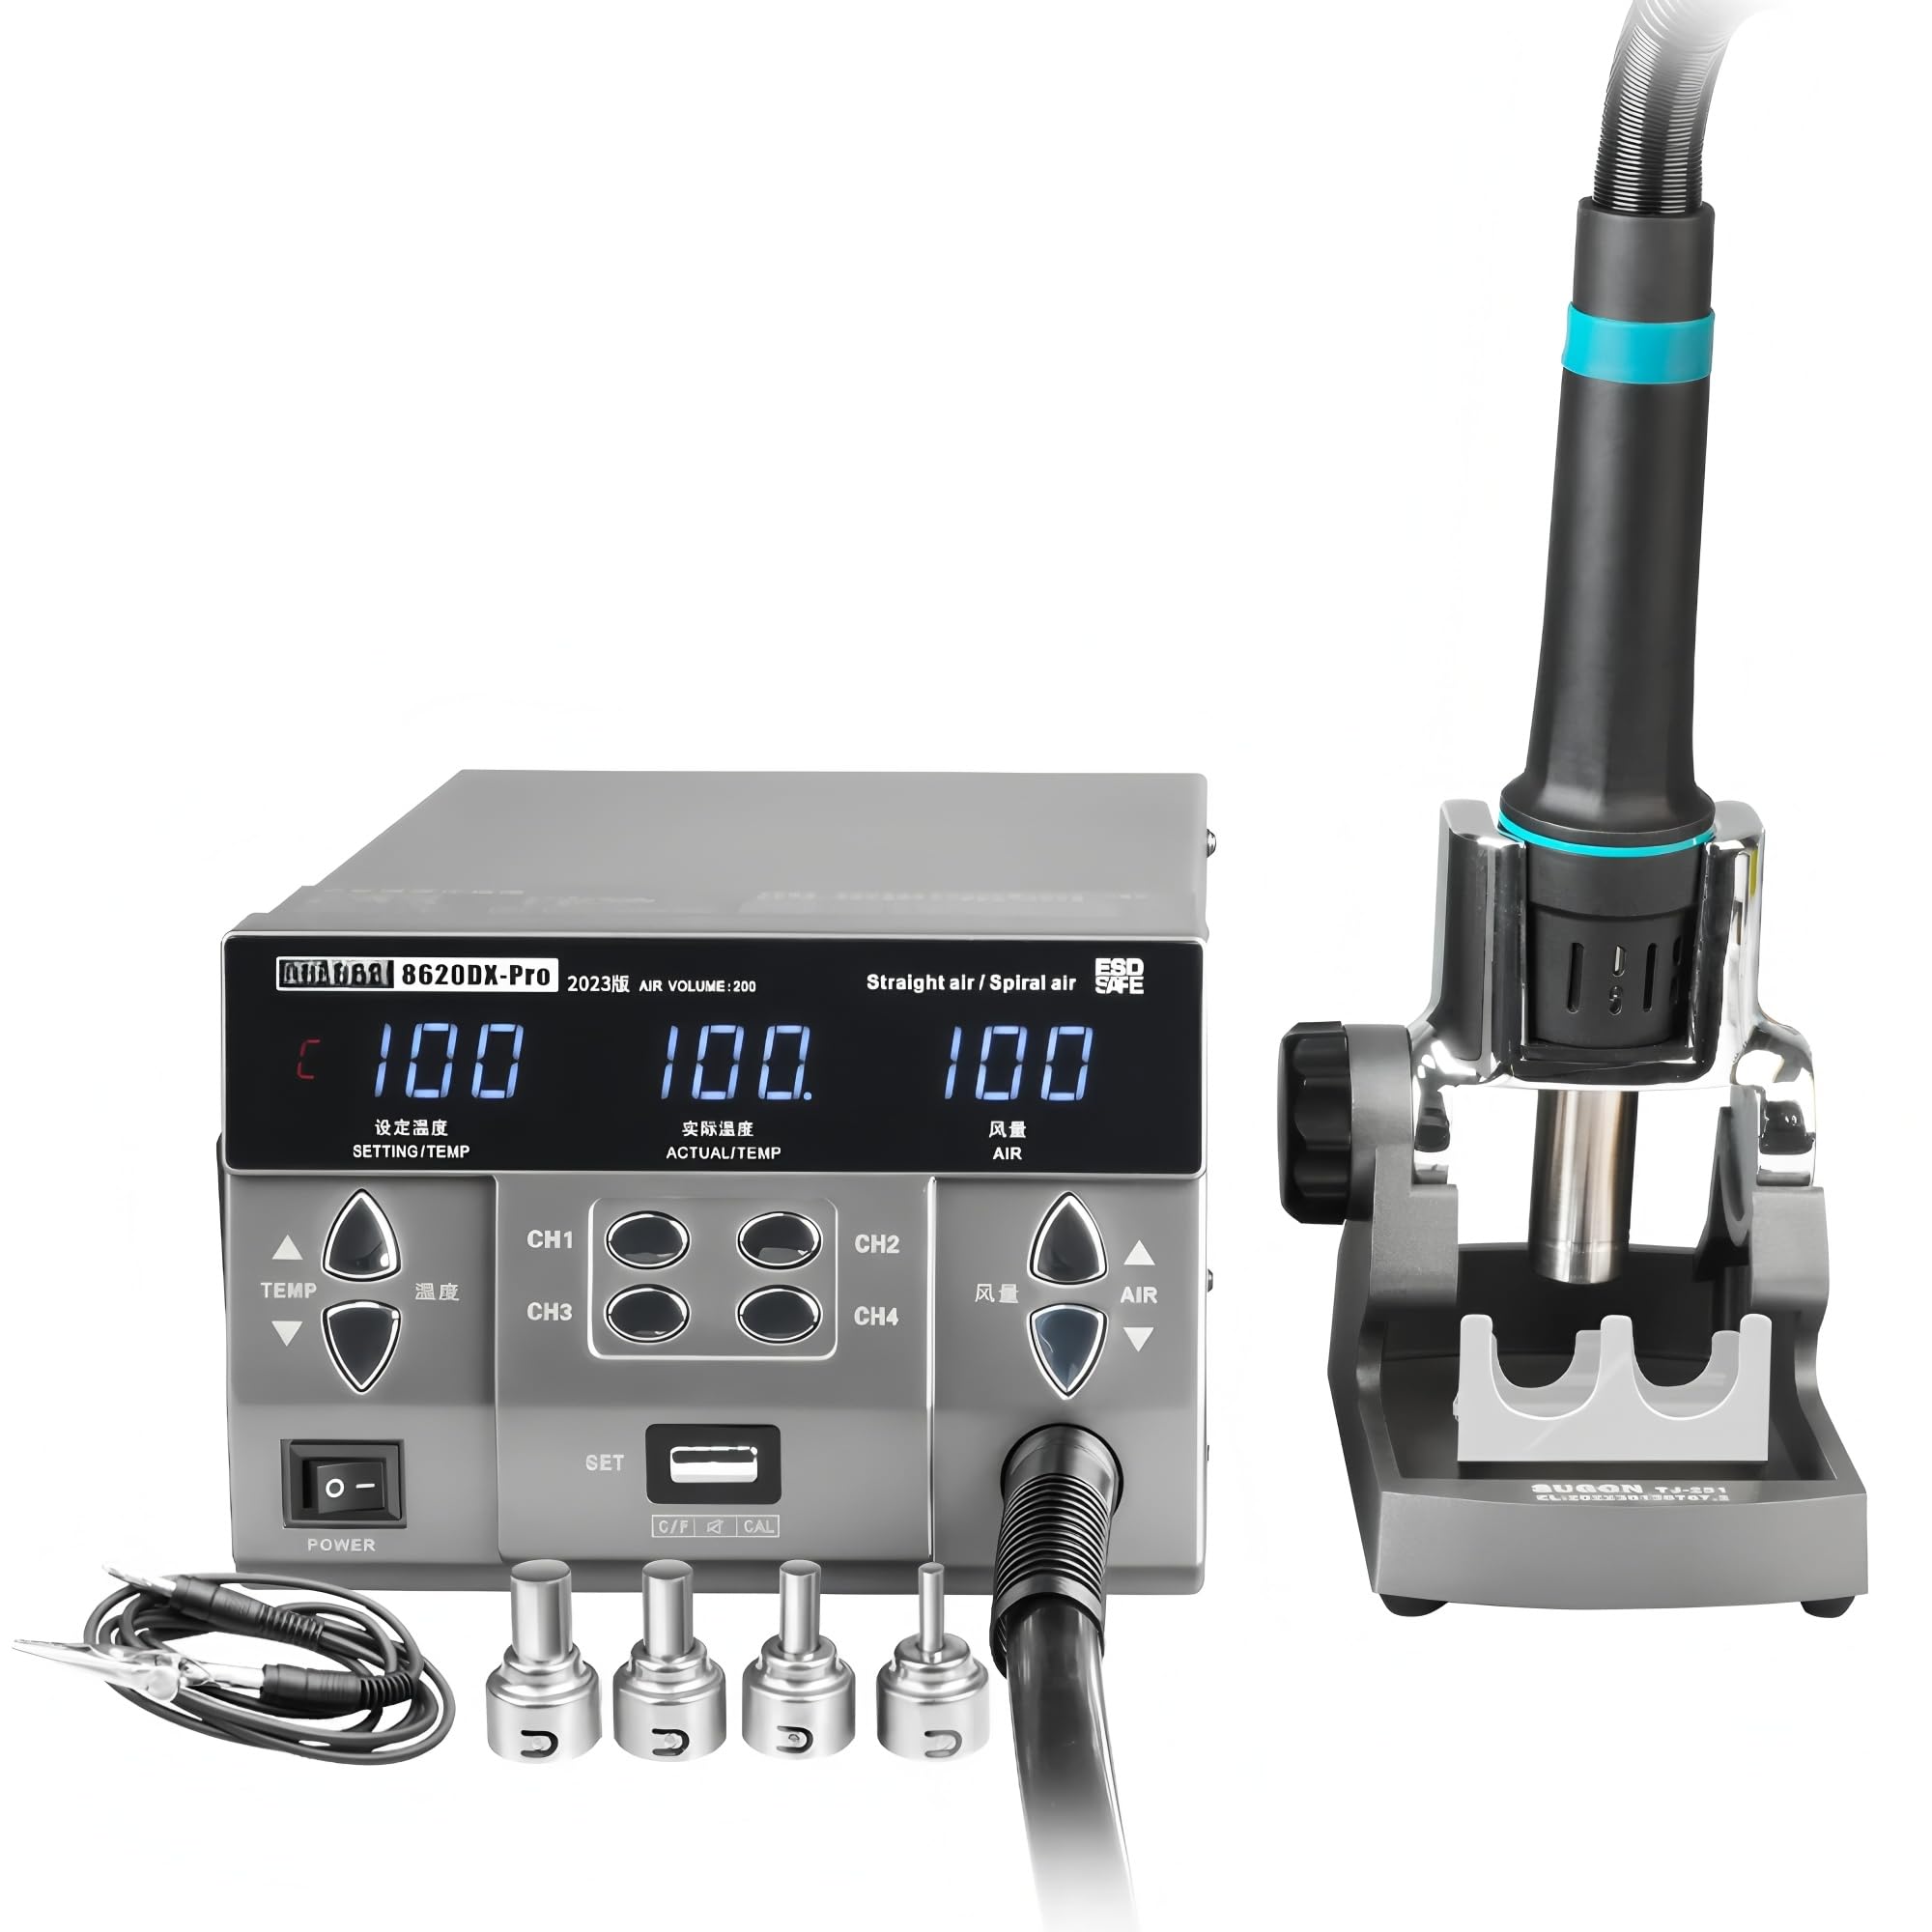
Figure 3.1: The TOOLTOP 8620DX PRO Hot Air Rework Station, showing the main unit, hot air gun, and stand.

Figure 3.2: Detailed view of the control panel and the hot air gun, highlighting the convenient pluggable heating core design.
4. Operating Instructions
4.1 Power On/Off
Press the power switch located on the front panel to turn the unit ON or OFF. The LED display will illuminate upon power-on.
4.2 Temperature Adjustment
- Use the TEMP up/down buttons to adjust the desired temperature.
- The temperature range is 100°C to 500°C.
- The large LED display shows both the set temperature and the actual temperature.
4.3 Air Volume Adjustment
- Use the AIR up/down buttons to adjust the airflow level.
- The air volume range is from Grade 1 to 200.
- The current air volume setting is displayed on the LED screen.
4.4 Memory Channels (CH1-CH4)
- The unit features four memory channels (CH1, CH2, CH3, CH4) to store frequently used temperature and air volume settings.
- To Save: Adjust the temperature and air volume to the desired settings. Press and hold the desired channel button (e.g., CH1) until a beep sounds, indicating the settings are saved.
- To Recall: Briefly press the desired channel button (e.g., CH1) to instantly recall the saved settings.
4.5 Automatic Sleep Function
When the hot air gun is placed in its stand, the unit will automatically enter sleep mode. The heating element will cool down to a safe temperature, extending the lifespan of the heating core and ensuring safety. Lifting the hot air gun from the stand will automatically resume operation with the last used settings.
4.6 Temperature Calibration/Conversion
The unit supports temperature calibration for precise adjustments and temperature unit conversion (e.g., Celsius to Fahrenheit). Refer to the detailed settings menu for these advanced functions.

Figure 4.1: The hot air gun in operation, demonstrating its rapid heating capability for rework tasks on a circuit board.

Figure 4.2: Illustration of the hot air gun's adjustable airflow and temperature range, crucial for precise control during rework.

Figure 4.3: The multi-angle adjustable stand for the hot air gun, designed to facilitate the automatic sleep function when the gun is docked.
5. Maintenance
5.1 Cleaning
- Ensure the unit is powered off and unplugged before cleaning.
- Wipe the main unit and hot air gun handle with a soft, damp cloth. Do not use abrasive cleaners or solvents.
- Periodically clean the hot air gun nozzle to prevent blockages.
5.2 Heating Core Replacement
The TOOLTOP 8620DX PRO features a pluggable heating core for easy replacement. If the heating performance degrades, or the heating element fails, replace the core by following these steps:
- Ensure the unit is powered off and completely cooled down.
- Carefully detach the hot air gun from its cable.
- Unscrew or unclip the housing of the hot air gun to access the heating core.
- Gently remove the old heating core and insert the new one, ensuring proper alignment.
- Reassemble the hot air gun and test its functionality.
6. Troubleshooting
- Unit does not power on: Check the power cord connection and ensure the power switch is in the ON position. Verify the power outlet is functional.
- No heat from hot air gun: Ensure the hot air gun is properly connected to the main unit. Check if the heating core needs replacement (refer to Section 5.2).
- Temperature not stable or inaccurate: Allow the unit to stabilize. If issues persist, consider performing a temperature calibration (refer to Section 4.6). Ensure the nozzle is clean and unobstructed.
- Low or no airflow: Check for any obstructions in the hot air gun nozzle or air intake vents on the main unit. Ensure the air volume setting is not at its minimum.
- Error message on display: Note the error code and consult the manufacturer's support for specific guidance.
7. Specifications
| Feature | Specification |
|---|---|
| Model | TT-Sugon 8620DX Pro 220V |
| Power | 1300W |
| Voltage | 220V/110V (as per feature bullets) |
| Temperature Range | 100°C - 500°C |
| Air Volume Range | Grade 1 - 200 |
| Gas Flow | 91 L/min |
| Display | Large LED Digital Display |
| Certifications | CE, RoHS |
8. Warranty and Support
The TOOLTOP 8620DX PRO comes with an EU Spare Part Availability Duration of 1 Year, ensuring access to necessary components for repairs within this period.
For technical support, warranty claims, or inquiries regarding spare parts, please contact your retailer or the manufacturer directly. Keep your purchase receipt as proof of purchase for warranty services.