1. Introduction
This manual provides essential information for the installation, operation, and maintenance of your TASTONTUP Heavy-Duty Boxed Rear Radius Arms. These arms are engineered to enhance the durability and performance of your Can-Am Maverick X3 72-inch model's rear suspension, offering superior strength and stability for demanding off-road conditions. Please read these instructions thoroughly before proceeding with installation or use.
2. Compatibility
The TASTONTUP Heavy-Duty Boxed Rear Radius Arms are designed for specific Can-Am Maverick X3 72-inch models. Ensure your vehicle matches the compatibility list below before installation.
- Can-Am Maverick X3 X RC Turbo / X RC Turbo R / X RC Turbo RR (2018–2021)
- Can-Am Maverick X3 X RS Turbo R / RS Turbo R / X RS Turbo RR (2017–2021)
- Can-Am Maverick X3 X MR Turbo R / X MR Turbo RR (2018–2021)
- Can-Am Maverick X3 MAX X RS / MAX RS / MAX X MR / MAX X DS Turbo RR 72 (2017–2023)

Image 2.1: Detailed compatibility chart for Can-Am Maverick X3 72-inch models.
3. Product Features
These radius arms are engineered for superior performance and longevity:
- Heavy-Duty Boxed Construction: Built from robust I-beam steel with 1/8″ thick plating and reinforced with internal gussets for maximum strength, rigidity, and stability.
- Pre-Assembled Heim Joints: Arrives fully assembled with Heim joints installed, ready for direct attachment. No complicated adjustments are required, maintaining alignment flexibility for lifted or modified vehicles.
- Durable Finish & Low Maintenance: Features a durable red powder coat for corrosion resistance and lasting appearance. Integrated greasable fittings allow for easy lubrication of Heim joints, ensuring smooth operation with minimal effort.
- Complete Rear Arm Set: Includes one pair of Rear Upper, one pair of Middle, and one pair of Lower Radius Arms, along with all required hardware for installation.

Image 3.1: Overview of the complete radius arm kit and included hardware.

Image 3.2: Close-up details of the radius arm construction and components.
4. Setup (Installation Instructions)
Installation of these radius arms is a direct bolt-on process, requiring no drilling. However, professional installation is recommended for optimal safety and performance.
4.1 Safety Precautions
- Always wear appropriate personal protective equipment (PPE), including safety glasses and gloves.
- Ensure the vehicle is securely supported on a level surface using jack stands before beginning any work. Do not rely solely on a jack.
- Disconnect the vehicle's battery to prevent accidental electrical activation.
4.2 Required Tools
- Socket wrench set
- Torque wrench
- Grease gun (for lubrication)
- Pry bar (optional, for leverage)
4.3 Installation Steps
- Prepare Vehicle: Park the Can-Am Maverick X3 on a flat, stable surface. Engage the parking brake. Lift the rear of the vehicle and support it securely with jack stands, ensuring the rear wheels are off the ground.
- Remove Wheels: Remove the rear wheels to gain access to the radius arms.
- Remove Old Radius Arms: Carefully unbolt and remove the existing upper, middle, and lower radius arms. Note the orientation of each arm for reference.
- Install New Radius Arms: Install the new TASTONTUP radius arms in the corresponding positions (upper, middle, lower). The arms are pre-assembled with Heim joints for direct fitment. Ensure all mounting points align correctly.
- Secure Hardware: Hand-tighten all bolts and nuts initially. Once all arms are in place, torque all fasteners to the vehicle manufacturer's specifications. Refer to your Can-Am Maverick X3 service manual for exact torque values.
- Lubricate Joints: Use a grease gun to lubricate the greasable fittings on the Heim joints until grease begins to seep out.
- Reinstall Wheels: Reattach the rear wheels and torque the lug nuts to specification.
- Lower Vehicle: Carefully lower the vehicle to the ground.
- Final Check: Perform a final visual inspection to ensure all components are securely fastened and there is no interference with other vehicle parts.
After installation, it is recommended to have a professional alignment performed, especially if your vehicle has been lifted or modified, to ensure proper handling and tire wear.
5. Operating Guidelines
Your TASTONTUP Heavy-Duty Boxed Rear Radius Arms are designed to withstand extreme off-road conditions. They provide enhanced stability and improved handling, allowing you to tackle challenging terrains with confidence. While these arms significantly increase durability, always operate your vehicle within its intended design limits and adhere to all safety guidelines.
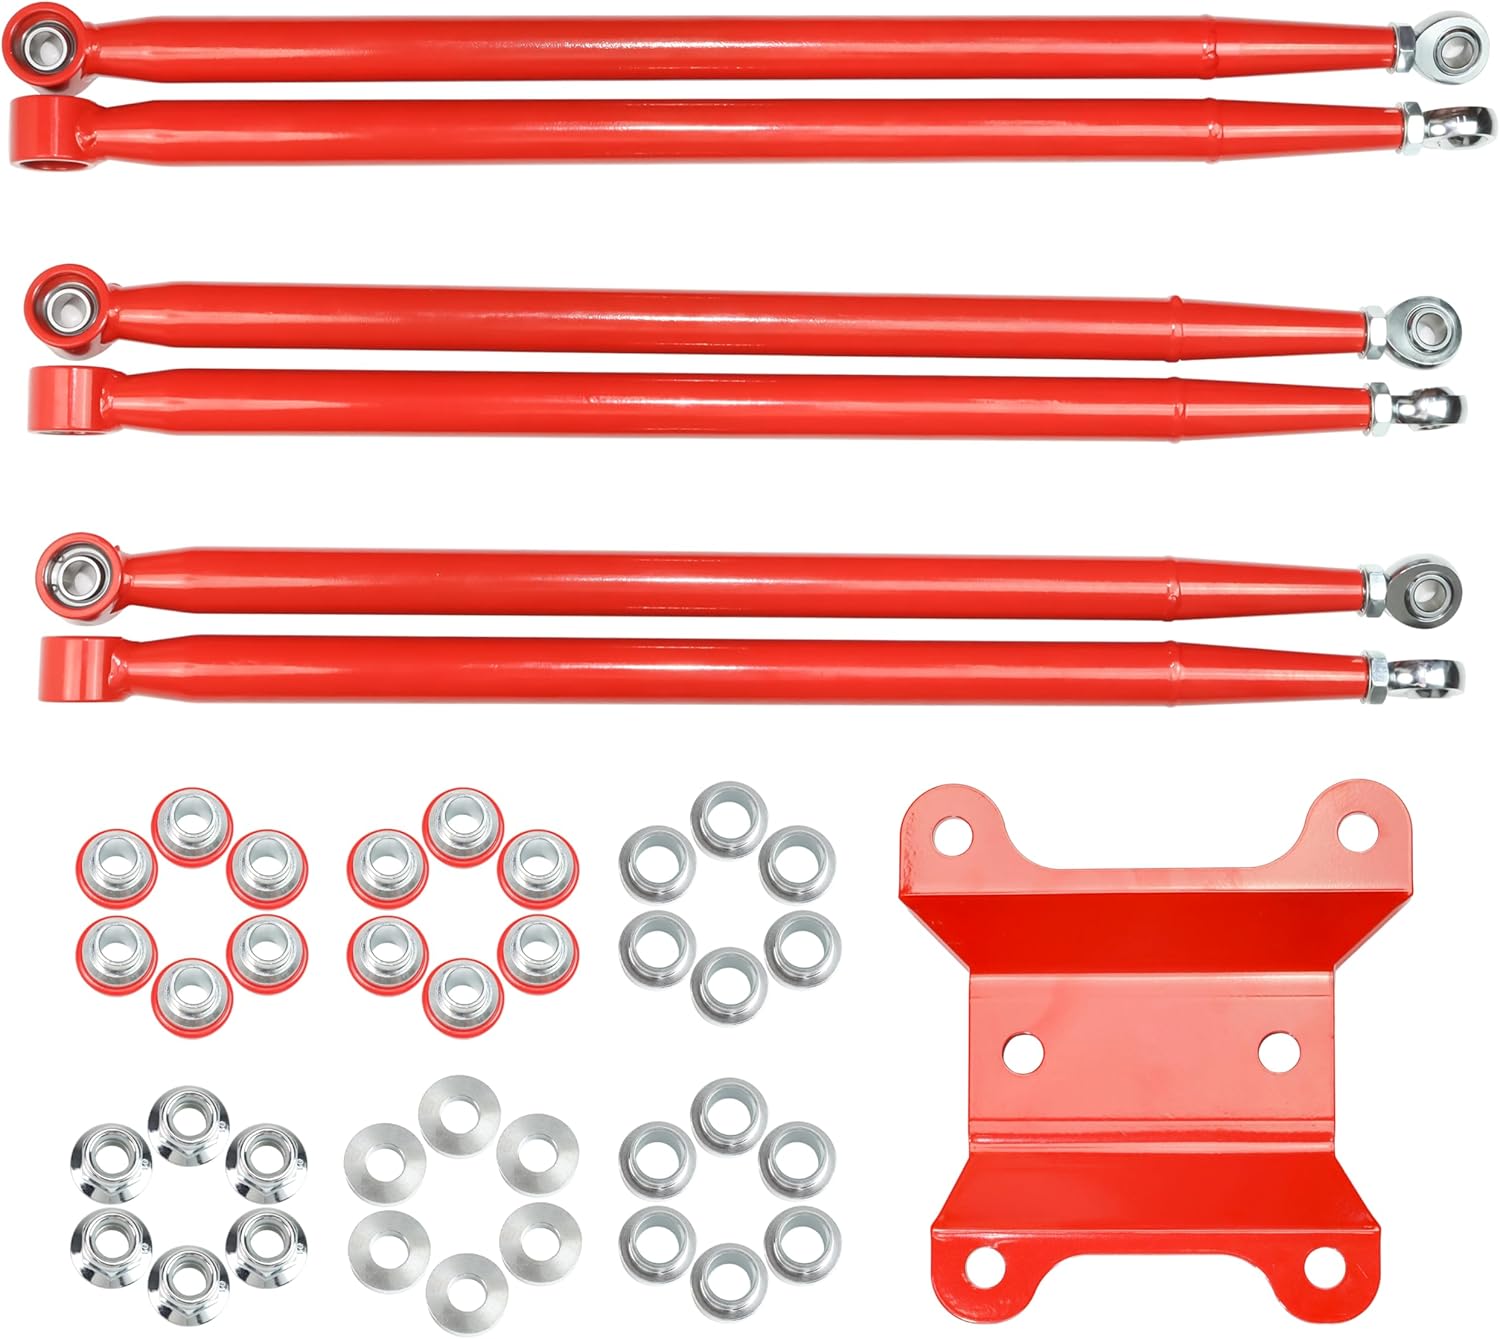
Image 5.1: TASTONTUP radius arms installed on a Can-Am Maverick X3.
6. Maintenance
Regular maintenance ensures the longevity and optimal performance of your radius arms:
- Periodic Inspection: Regularly inspect all radius arms, Heim joints, and mounting hardware for any signs of wear, damage, or looseness. Check for cracks in the powder coat or steel.
- Lubrication: Lubricate the greasable Heim joints every 500 miles or after every intense off-road excursion, or as needed, to prevent premature wear and maintain smooth articulation.
- Cleaning: Clean the radius arms with mild soap and water after off-road use to remove dirt, mud, and debris that could accelerate wear or corrosion. Avoid harsh chemicals that may damage the powder coat.
- Torque Check: Periodically re-check the torque on all mounting bolts, especially after the first few rides, to ensure they remain securely fastened.
7. Troubleshooting
If you encounter any issues, consider the following troubleshooting steps:
| Symptom | Possible Cause | Solution |
|---|---|---|
| Unusual noises (clunking, squeaking) from rear suspension | Loose hardware, dry Heim joints, damaged components | Check and re-torque all mounting bolts. Lubricate Heim joints. Inspect arms for damage and replace if necessary. |
| Excessive play or looseness in rear suspension | Loose mounting bolts, worn Heim joints | Re-torque all bolts to specification. Inspect Heim joints for excessive wear; replace if necessary. |
| Vehicle pulling to one side or unstable handling | Incorrect alignment, damaged arm | Have a professional alignment performed. Inspect arms for bending or damage. |
8. Specifications
- Brand: TASTONTUP
- Model Number: Can-Am Maverick X3 -72" Body
- Material: Alloy Steel
- Color: Red
- Auto Part Position: Rear
- Fit Type: Vehicle Specific Fit
- Included Components: 1 pair Rear Upper Radius Arms, 1 pair Middle Radius Arms, 1 pair Lower Radius Arms, all required mounting hardware.
9. Warranty Information
This TASTONTUP product comes with a 5-year manufacturer's warranty. This warranty covers defects in materials and workmanship under normal use. For specific terms, conditions, and to initiate a warranty claim, please refer to the official TASTONTUP warranty policy or contact customer support.
10. Support Contact
For any questions, technical assistance, or support regarding your TASTONTUP Heavy-Duty Boxed Rear Radius Arms, please contact our customer service team. Have your product model number and purchase details ready for faster service.
You can typically find contact information on the TASTONTUP official website or through your original point of purchase.

Image 10.1: TASTONTUP Customer Support.