AYMDKI FM152
AYMDKI Digital Meat Thermometer User Manual
Model: FM152
Introduction
Thank you for choosing the AYMDKI Digital Meat Thermometer. This manual provides essential information for the safe and efficient operation of your device. Please read it thoroughly before use and retain it for future reference.

Image: The AYMDKI Digital Meat Thermometer, black in color, with its probe extended, next to its brown retail packaging with a red ribbon. The thermometer displays "158.3°F".
Product Features
- Instant Read: Provides temperature readings within 2-3 seconds.
- High Accuracy: Measures with an accuracy of ±1°F/°C.
- Wide Temperature Range: Operates from -58°F to 572°F (-50°C to 300°C).
- Waterproof Design: IP67 rated for easy cleaning under running water.
- Backlit LCD Display: Clear readings in various lighting conditions.
- Foldable Probe: 180° rotation for safety and compact storage.
- Energy Efficient: Features auto-sleep and motion-activated wake, with over 4000 hours of battery life.
- Convenient Storage: Integrated magnet for attachment to metal surfaces and a hanging hook.
Package Contents
- AYMDKI Digital Meat Thermometer (Model: FM152)
- Instruction Manual (this document)
- 1 Lithium Ion Battery (pre-installed)
Setup
Battery Installation
The thermometer comes with a pre-installed Lithium Ion battery. If replacement is needed:
- Locate the battery compartment on the back of the device.
- Open the compartment cover.
- Insert one new Lithium Ion battery, ensuring correct polarity (+/-).
- Close the battery compartment cover securely.
Initial Use
Before first use, ensure any protective film on the display is removed. The thermometer will automatically power on when the probe is unfolded.
Operating Instructions
Power On/Off
- Power On: Unfold the probe to automatically turn on the thermometer.
- Power Off: Fold the probe back into the housing to automatically turn off the thermometer. The device also features an auto-sleep function after a period of inactivity to conserve battery.
Temperature Measurement
- Unfold the probe. The display will activate.
- Insert the stainless steel probe into the thickest part of the food, avoiding bone or gristle.
- Wait approximately 2-3 seconds for the temperature reading to stabilize on the LCD display.
- Remove the probe from the food.

Image: A hand holding the AYMDKI Digital Meat Thermometer, with its probe inserted into a cooking steak in a cast iron pan. The thermometer displays "158.3°F".
Switching Temperature Units (°C/°F)
Press the °C/°F button located on the thermometer body to toggle between Celsius and Fahrenheit units.
Hold Function
Press the HOLD button to lock the current temperature reading on the display. Press it again to release and resume live temperature measurement.
Backlight
The display features a backlight for improved visibility in low-light conditions. It activates automatically when the probe is unfolded or a button is pressed.

Image: A split image showing the AYMDKI Digital Meat Thermometer in two scenarios. On the left, it's used in daylight with a standard display. On the right, it's used in a darker setting with its bright blue backlight illuminated, showing "178.3°F".
Calibration Function
For maximum accuracy, the thermometer includes a calibration function. Refer to the detailed calibration instructions in the Troubleshooting section if you suspect inaccurate readings.
Recommended Internal Temperatures
Always cook food to safe internal temperatures. Consult reliable food safety guidelines for specific recommendations. A general guide is provided below:
| Food Type | Minimum Internal Temperature |
|---|---|
| Poultry (whole, ground, parts) | 165°F (74°C) |
| Ground Meats (beef, pork, veal, lamb) | 160°F (71°C) |
| Beef, Pork, Veal, Lamb (steaks, roasts, chops) | 145°F (63°C) with 3-minute rest |
| Fish & Shellfish | 145°F (63°C) |
| Egg Dishes | 160°F (71°C) |
| Leftovers & Casseroles | 165°F (74°C) |
Note: These are general guidelines. Always refer to official food safety resources for the most current and specific recommendations.
Maintenance
Cleaning
The AYMDKI Digital Meat Thermometer is IP67 waterproof. After each use:
- Fold the probe to turn off the device.
- Rinse the stainless steel probe and the body under running water.
- Use a mild soap if necessary.
- Wipe dry with a clean cloth. Do not immerse the entire unit in water for extended periods.
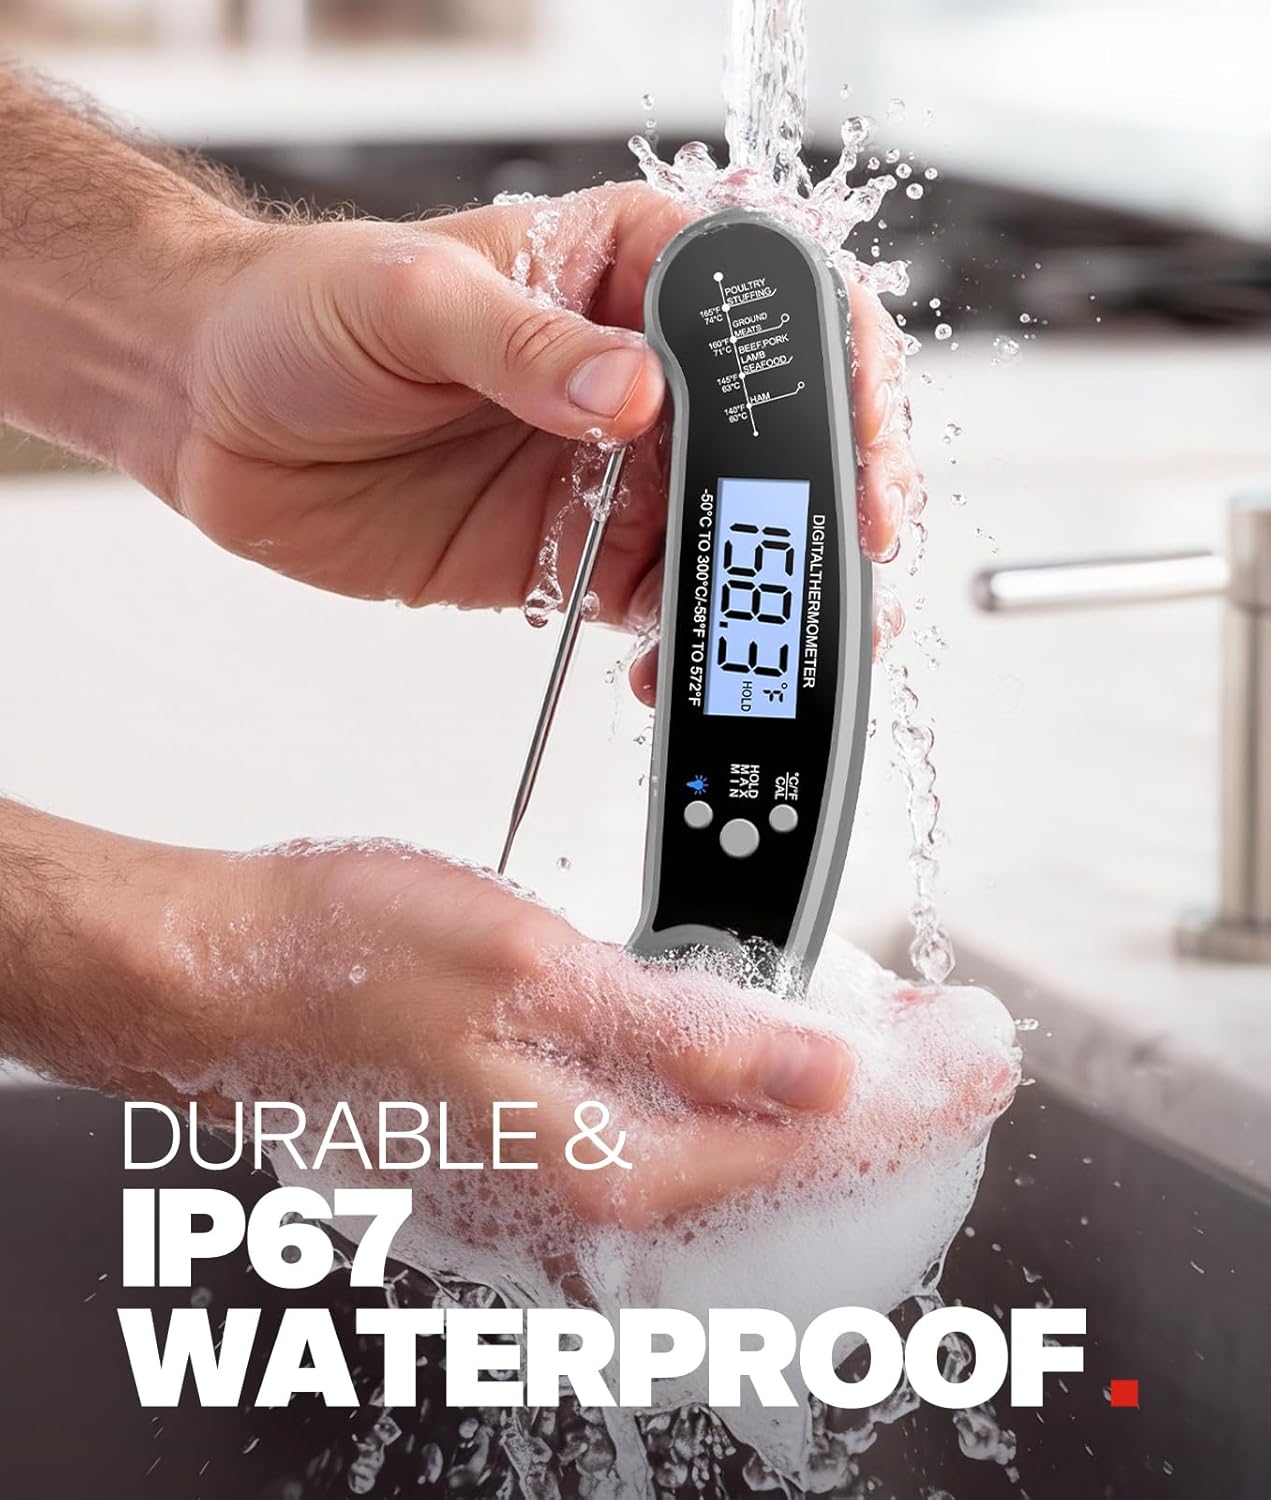
Image: A person's hands holding the AYMDKI Digital Meat Thermometer under running water in a sink, demonstrating its waterproof feature. Water splashes around the device.
Storage
When not in use, fold the probe for safe and compact storage. The thermometer features a magnetic back for attachment to metal surfaces (e.g., refrigerator) and a hanging hook for convenient storage.

Image: A kitchen scene showing two storage methods for the AYMDKI Digital Meat Thermometer. One thermometer is magnetically attached to a refrigerator door, and another is hanging from a hook on a utensil rack.
Troubleshooting
| Problem | Possible Cause | Solution |
|---|---|---|
| Thermometer does not turn on. | Probe not fully unfolded, or battery is low/dead. | Ensure the probe is fully extended. Replace the battery if necessary. |
| Inaccurate temperature readings. | Probe not inserted correctly, or calibration is needed. | Ensure the probe is inserted into the thickest part of the food, avoiding bone. Perform a calibration (see below). |
| Display is dim or flickering. | Low battery. | Replace the battery. |
Calibration Procedure
To ensure the highest accuracy, you can calibrate your thermometer using an ice-water bath:
- Fill a glass with crushed ice and add cold water until the glass is full. Stir well.
- Insert the thermometer probe into the center of the ice-water mixture, ensuring the probe tip does not touch the bottom or sides of the glass.
- Wait for the reading to stabilize (approximately 30 seconds). The temperature should read 32°F (0°C).
- If the reading is not 32°F (0°C), press and hold the CAL button (if available, or refer to specific model instructions for calibration mode) until the display shows "CAL" or starts flashing.
- Adjust the reading to 32°F (0°C) using the appropriate buttons (often the °C/°F button or dedicated up/down buttons).
- Confirm the calibration (usually by pressing CAL again or waiting for it to auto-save).
Note: The exact calibration process may vary slightly. If your model does not have a dedicated CAL button, consult the manufacturer's website or contact support for detailed instructions.
Specifications
| Model: | FM152 |
| Temperature Range: | -58°F to 572°F (-50°C to 300°C) |
| Accuracy: | ±1°F/°C |
| Response Time: | 2-3 seconds |
| Waterproof Rating: | IP67 |
| Display Type: | Digital LCD with Backlight |
| Power Source: | 1 x Lithium Ion Battery (included) |
| Battery Life: | 4000+ hours |
| Outer Material: | Acrylonitrile Butadiene Styrene (ABS) |
| Dimensions (folded): | Approx. 6.45 inches (length) |
| Weight: | Approx. 2.4 ounces |
| Certifications: | FDA compliant |
Warranty and Support
For warranty information or technical support, please contact AYMDKI customer service through the retailer where the product was purchased or visit the official AYMDKI website. Please have your model number (FM152) and purchase date available.
Related Documents - FM152
 |
Mighty Mule E-Z Gate Opener Planning Guide: Choose the Right Opener Comprehensive planning guide from Mighty Mule for selecting the right E-Z Gate opener. Details models, accessories, power options (solar/transformer), and installation considerations for residential, farm, and ranch gates. |
 |
Mighty Mule E-Z Gate Opener Planning Guide and Accessories Comprehensive planning guide for Mighty Mule E-Z Gate openers, detailing models, features, accessories, power options (solar and transformer), and installation considerations for residential, farm, and ranch gates. Includes a selection guide and FAQ. |
 |
uniview IPC Accessories Installation Guide Comprehensive installation guide for uniview IPC camera accessories, detailing mounting solutions for box, dome, fisheye, bullet, PTZ, and positioning system cameras. Includes model compatibility and installation diagrams. |
 |
Uniview IPC Accessories Installation Guide Comprehensive installation guide for Uniview IPC camera mounting accessories, detailing options for box, dome, fisheye, bullet, PTZ, and positioning system cameras. Includes model numbers and installation types. |
 |
Mighty Mule Gate Opener Accessories - Product Overview Explore the comprehensive range of Mighty Mule gate opener accessories from GTO, including entry transmitters, keypads, sensors, locks, power solutions, and hardware. Enhance your gate automation system with reliable products. |
 |
Uniview IP Camera Bracket Selection Guide: Mounts for Box, Dome, Fisheye, PTZ Cameras Comprehensive guide to Uniview IP camera brackets and mounting solutions. Find the right bracket for your Uniview box, dome, fisheye, mini bullet, and PTZ cameras, including model numbers and installation types. |
Ask a question about this manual
Ask about setup, troubleshooting, compatibility, parts, safety, or missing instructions. Manuals+ will review the question and use this page’s manual context to help answer it.