JR-JH2
JR-JH2 Wireless Bluetooth 5.4 Over-Ear Headphones User Manual
Model: JR-JH2
Introduction
Thank you for choosing the JR-JH2 Wireless Bluetooth 5.4 Over-Ear Headphones. This manual provides detailed instructions for setting up, operating, and maintaining your headphones to ensure optimal performance and longevity. Please read this manual thoroughly before using the product.
Safety Information
- Do not expose the headphones to extreme temperatures, humidity, or corrosive environments.
- Avoid dropping or subjecting the headphones to strong impacts.
- Do not disassemble or modify the headphones. This may void the warranty and cause damage.
- Clean the headphones with a soft, dry cloth. Do not use harsh chemicals or abrasive materials.
- Listen at moderate volume levels to prevent hearing damage.
Package Contents
Verify that all items are present in the package:
- JR-JH2 Over-Ear Headphones
- USB Type-C Charging Cable
- 3.5mm Audio Cable
- User Manual (this document)
Product Overview
Familiarize yourself with the components and controls of your JR-JH2 headphones.
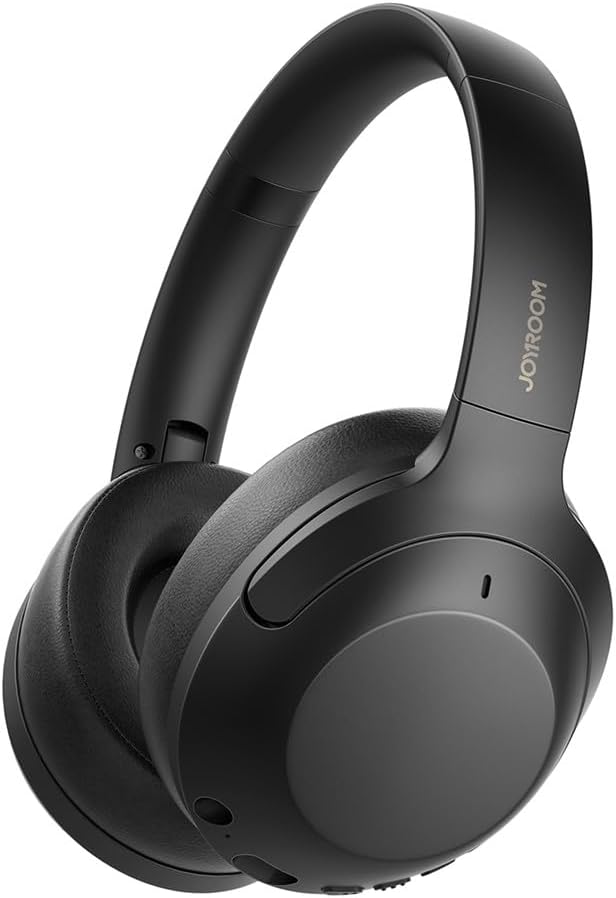
Image: Front view of the JR-JH2 Over-Ear Headphones, showcasing the sleek black design and earcups.
The headphones feature soft ear cushions and an adjustable headband for comfort. Controls are located on the earcups for easy access.
Setup
1. Charging the Headphones
Before first use, fully charge the headphones. A full charge takes approximately 1.5 hours.
- Connect the USB Type-C charging cable to the charging port on the headphones.
- Connect the other end of the cable to a USB power adapter (not included) or a computer's USB port.
- The indicator light will show charging status (e.g., red for charging, blue for fully charged).

Image: Close-up view of the headphone earcup showing the Type-C charging port and the 3.5mm AUX audio port.
Battery Life: Enjoy up to 100 hours of playback without Active Noise Cancellation (ANC) and up to 70 hours with ANC enabled, at 60-70% volume.

Image: Graphic illustrating the battery life: 100 hours without ANC, 70 hours with ANC, and 1.5 hours charging time.
2. Adjusting the Fit
For optimal sound and comfort, adjust the headband to fit your head snugly. The earcups should fully cover your ears.

Image: Demonstrates the foldable design for portability and the adjustable headband with numbered markings for length adjustment.
Operating Instructions
1. Power On/Off
- Power On: Press and hold the Power button for approximately 3 seconds until the indicator light flashes.
- Power Off: Press and hold the Power button for approximately 3 seconds until the indicator light turns off.
2. Bluetooth Pairing
To connect your headphones to a Bluetooth-enabled device:
- Ensure the headphones are powered off.
- Press and hold the Power button for 5-7 seconds until the indicator light flashes red and blue alternately, indicating pairing mode.
- On your device (smartphone, tablet, computer), enable Bluetooth and search for available devices.
- Select "JR-JH2" from the list of devices.
- Once connected, the indicator light will flash blue slowly.
3. Dual Device Connectivity
The JR-JH2 headphones support simultaneous connection to two Bluetooth devices.
- Connect the headphones to the first device as described in the "Bluetooth Pairing" section.
- Disable Bluetooth on the first device. The headphones will re-enter pairing mode.
- Connect the headphones to the second device.
- Re-enable Bluetooth on the first device. The headphones should automatically connect to both devices.
- Audio will play from the device that is actively playing content.
4. Wired Connection (AUX)
Use the included 3.5mm audio cable for a wired connection, even if the headphones' battery is depleted.
- Connect one end of the 3.5mm audio cable to the AUX port on the headphones.
- Connect the other end to the 3.5mm audio jack of your device.
- The headphones will automatically switch to wired mode.
5. Active Noise Cancellation (ANC)
The ANC feature reduces ambient noise by up to -38dB, providing a more immersive listening experience.
- Activate ANC: Press the ANC button once. The ANC indicator light will illuminate.
- Deactivate ANC: Press the ANC button again. The ANC indicator light will turn off.

Image: Illustrates the effect of Active Noise Cancellation, showing a "Before" and "After" comparison of ambient noise reduction.
6. EQ Modes
Switch between different sound profiles to suit your audio preference.
- Normal Vocal Mode: Optimized for clear vocals and balanced sound.
- Dynamic Bass Mode: Enhances bass frequencies for a more powerful sound.
- Switching Modes: Press the EQ button (or designated button) to cycle between available modes.

Image: Explains the "Dual EQ Modes Available," highlighting Hi-res audio with large composite titanium diaphragm speakers and balanced frequencies with digital enhancement technology.

Image: Shows icons for "Healing mode" (likely Normal Vocal Mode) and "Bass mode," indicating the two available sound effects.
7. Button Controls
The headphones feature intuitive button controls for various functions:
- Power Button: Press and hold to power on/off. Short press for play/pause (music) or answer/end call.
- Volume Up (+): Short press to increase volume. Long press for next track.
- Volume Down (-): Short press to decrease volume. Long press for previous track.
- ANC Button: Short press to toggle Active Noise Cancellation on/off.
Maintenance
- Cleaning: Wipe the headphones with a soft, dry, lint-free cloth. Do not use liquid cleaners or sprays.
- Storage: When not in use, store the headphones in a cool, dry place, away from direct sunlight and extreme temperatures. The foldable design allows for compact storage.
- Battery Care: To preserve battery life, charge the headphones regularly, even if not used frequently. Avoid fully discharging the battery for extended periods.
Troubleshooting
| Problem | Possible Cause | Solution |
|---|---|---|
| Headphones do not power on. | Low battery. | Charge the headphones fully. |
| Cannot pair via Bluetooth. | Headphones not in pairing mode; Bluetooth disabled on device; device too far. | Ensure headphones are in pairing mode (flashing red/blue). Enable Bluetooth on your device. Move device closer to headphones. |
| No sound. | Volume too low; incorrect audio source; headphones not connected. | Increase volume on headphones and device. Check Bluetooth connection or 3.5mm cable. Ensure correct audio output is selected on your device. |
| ANC not working effectively. | ANC not activated; improper fit. | Press the ANC button to activate. Adjust headphones for a snug fit over your ears. |
Specifications
| Feature | Detail |
|---|---|
| Model | JR-JH2 |
| Connectivity | Bluetooth 5.4, 3.5mm AUX |
| Driver Size | 40mm Dynamic Drivers |
| Noise Control | Active Noise Cancellation (up to -38dB) |
| Frequency Response | 20Hz - 20kHz |
| Sensitivity | 119dB |
| Impedance | 32 Ohms |
| Battery Life (ANC Off) | Up to 100 hours |
| Battery Life (ANC On) | Up to 70 hours |
| Charging Time | Approx. 1.5 hours (via USB Type-C) |
| Weight | 236 Grams |
| Special Features | Dual Device Connectivity, Dual EQ Modes, Foldable Design |
Warranty and Support
For warranty information or technical support, please refer to the retailer where you purchased the product or visit the manufacturer's official website. Keep your proof of purchase for warranty claims.
If you encounter any issues not covered in this manual, please contact customer support for assistance.
Related Documents - JR-JH2
 |
VEVOR Pipe Stands Technical Specifications Comprehensive technical specifications for VEVOR pipe stand models, including load capacities, weights, and dimensions for various SKU configurations. |
 |
JOYROOM Open-Ear True Wireless Earbuds JR-OE3 User Manual This user manual provides instructions for the JOYROOM Open-Ear True Wireless Earbuds JR-OE3, covering operation, charging, tap controls, dual connection, safety precautions, and troubleshooting. |
 |
VEVOR Pipe Stand Label and Address Label Specifications Technical specifications, material requirements, and placement instructions for VEVOR pipe stand product labels and general address labels. |
 |
Hangar 9 1/4 Scale Piper J-3 Cub Instruction Manual Detailed instruction manual for assembling the Hangar 9 1/4 Scale Piper J-3 Cub, a 90% pre-built radio control model aircraft. Includes specifications, parts list, step-by-step assembly guides, and flying recommendations. |
 |
JR Voyager E Electric Helicopter Assembly Instructions & Guide Comprehensive assembly instructions and specifications for the JR Voyager E electric-powered radio control helicopter, featuring advanced CCPM technology for enhanced performance. |
 |
VEVOR Pipe Stands: User Manual, Safety Instructions, and Specifications Comprehensive user manual and safety guide for VEVOR Pipe Stands, detailing models JR-1107A through JR-1107AS-4BALL. Includes operating instructions, safety precautions, and technical specifications for reliable pipe support. |
Ask a question about this manual
Ask about setup, troubleshooting, compatibility, parts, safety, or missing instructions. Manuals+ will review the question and use this page’s manual context to help answer it.