Introduction
This manual provides essential instructions for the installation, operation, and maintenance of the Generic RZ-MCI-1C (V3.0) Treadmill Motor Controller. Please read this manual thoroughly before use to ensure proper function and safety. This controller is designed for 220V non-incline treadmill systems, specifically compatible with IUBU models.
Safety Instructions
- Always disconnect power: Ensure the treadmill is unplugged from the main power source before attempting any installation, maintenance, or inspection.
- Qualified personnel: Installation and complex troubleshooting should be performed by qualified technicians to prevent electrical hazards or damage to the unit.
- Proper grounding: Verify that the treadmill system is properly grounded to prevent electrical shock.
- Avoid moisture: Keep the motor controller away from water, liquids, and excessive humidity to prevent short circuits and damage.
- Ventilation: Ensure adequate ventilation around the controller to prevent overheating during operation.
- Handle with care: Electronic components are sensitive. Avoid dropping or subjecting the controller to strong impacts.
Product Overview
The RZ-MCI-1C (V3.0) is a high-performance treadmill motor controller, also referred to as a circuit board, driver board, or motherboard. It is engineered for optimal performance, ensuring smooth and efficient operation of your treadmill. Built with high-quality materials, this controller offers longevity and reliable performance, reducing the need for frequent replacements.
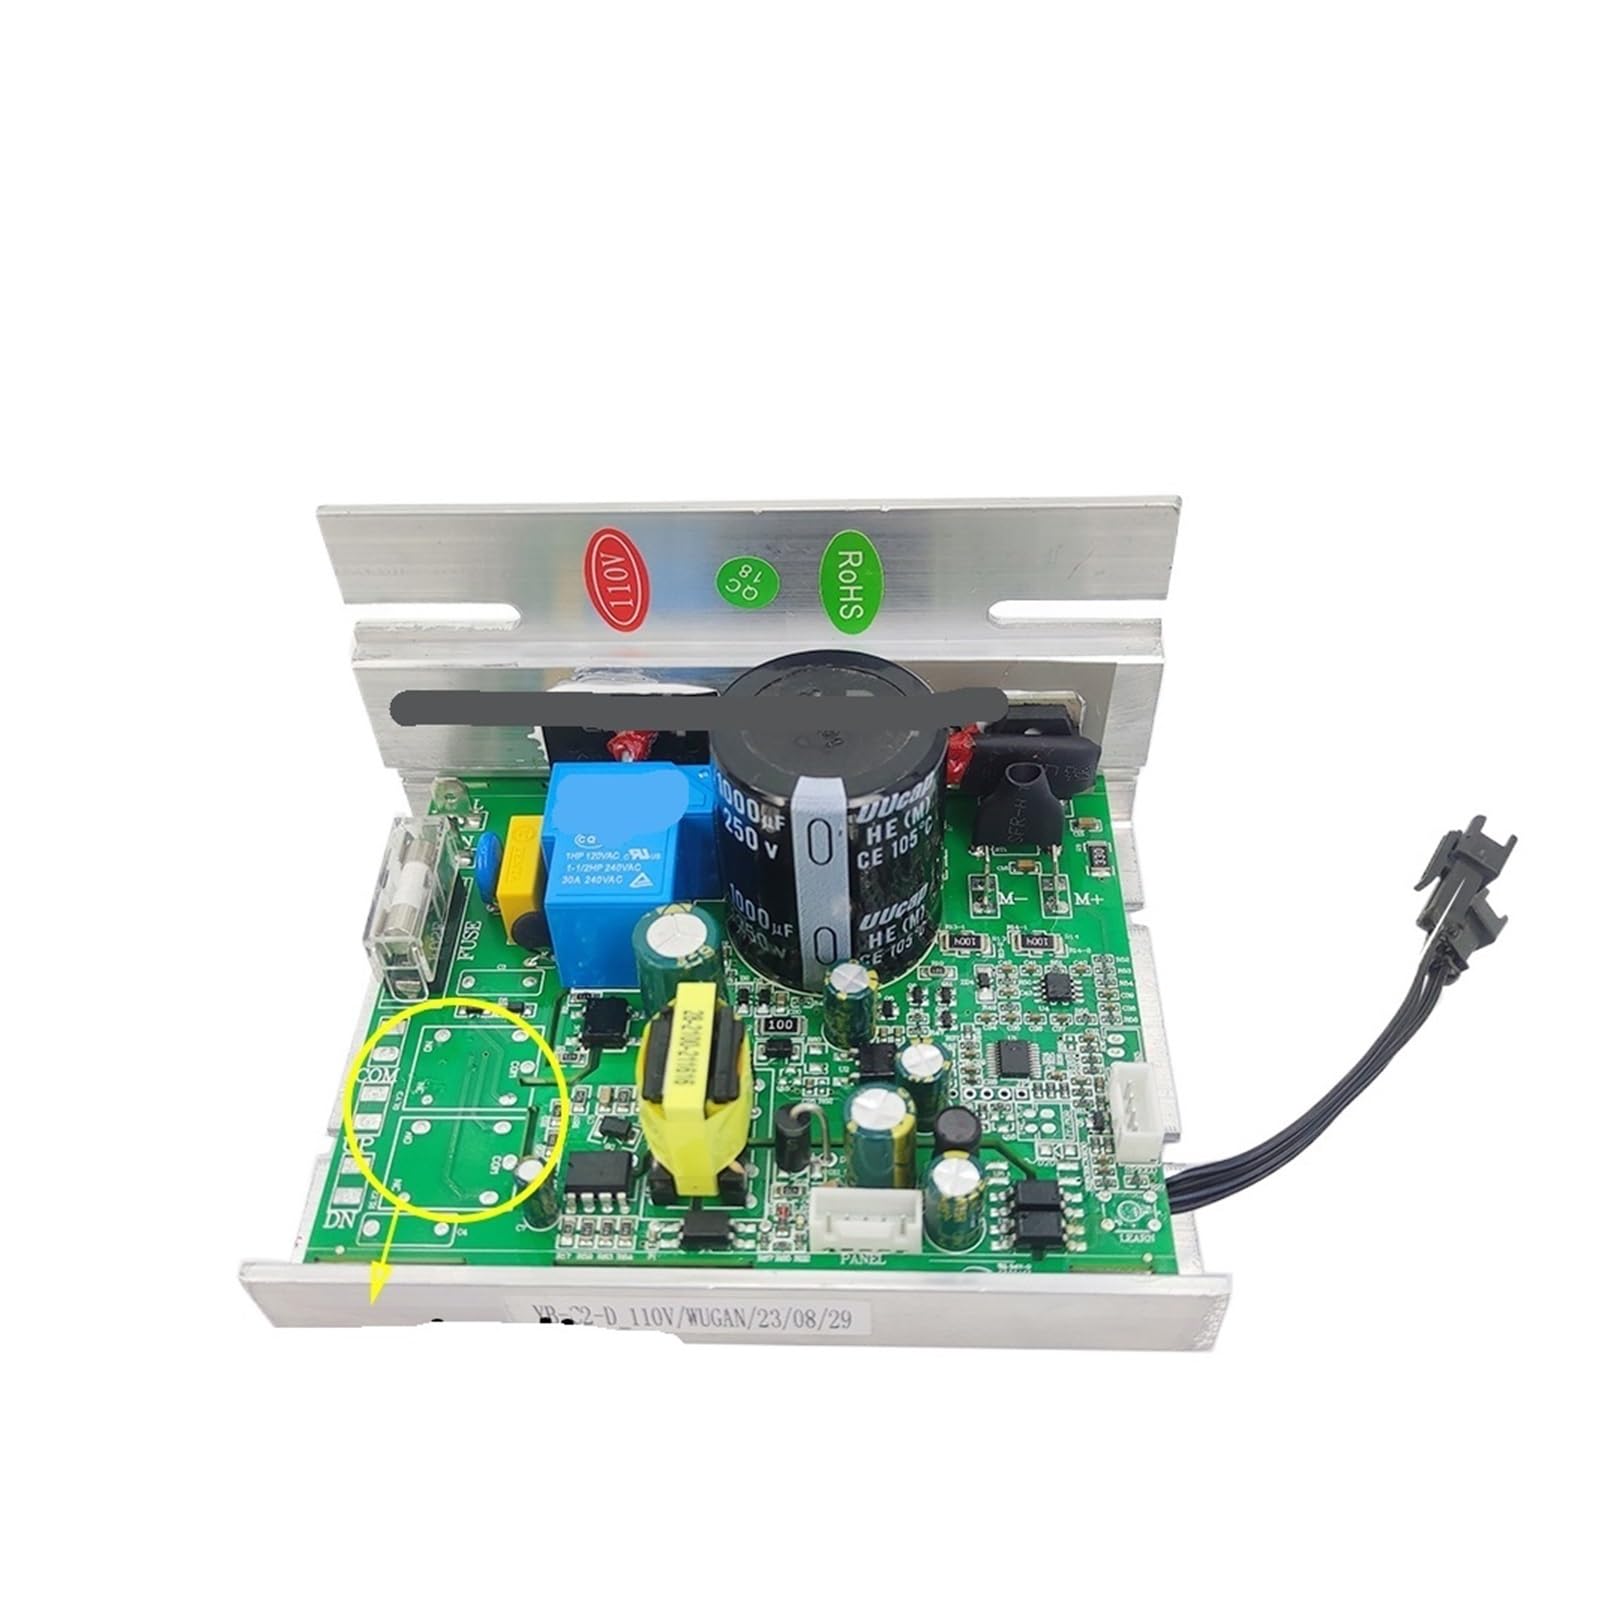
Image showing the RZ-MCI-1C (V3.0) Treadmill Motor Controller, highlighting its compact design and various connection points.
Key features include easy installation and compatibility with a wide range of treadmill components, making it suitable for DIY enthusiasts and professional repairs.
Setup (Installation)
This section outlines the general steps for installing the RZ-MCI-1C (V3.0) Treadmill Motor Controller. Specific wiring may vary based on your treadmill model. Always refer to your treadmill's original wiring diagram if available.
Tools Required:
- Screwdriver set (Phillips and Flathead)
- Multimeter (optional, for verifying connections)
- Camera (for documenting existing wiring)
Installation Steps:
- Power Disconnection: Ensure the treadmill is completely unplugged from the wall outlet.
- Access Controller: Open the motor cover or access panel of your treadmill to expose the existing motor controller.
- Document Wiring: Before disconnecting any wires, take clear photographs of all existing connections to the old controller. Note the color and position of each wire.
- Disconnect Old Controller: Carefully disconnect all wires from the old controller. Pay attention to the main power input, motor output, console communication, and sensor wires. Unscrew and remove the old controller from its mounting.
- Install New Controller: Position the RZ-MCI-1C (V3.0) controller in the designated area. Secure it using the appropriate screws.
- Connect Wires: Refer to your documented photographs and connect all wires to their corresponding terminals on the new RZ-MCI-1C (V3.0) controller. Ensure all connections are firm and secure. Common connections include:
- AC Power Input (L, N, Ground)
- DC Motor Output (+, -)
- Speed Sensor Input
- Console Communication (if applicable)
- Verify Connections: Double-check all wiring against your documentation to ensure accuracy. Ensure no loose wires are present that could cause a short circuit.
- Preliminary Test: Before closing the motor cover, plug in the treadmill and perform a brief power-on test as described in the Operating Instructions section. If everything appears normal, unplug the treadmill again.
- Secure Cover: Once satisfied with the installation and preliminary test, replace and secure the treadmill's motor cover or access panel.
Operating Instructions
After successful installation, the RZ-MCI-1C (V3.0) Treadmill Motor Controller will function in conjunction with your treadmill's console to manage motor speed and operation.
- Power On: Plug the treadmill's power cord into a suitable 220V electrical outlet. The treadmill console should illuminate.
- Start Treadmill: Use the treadmill's console to start a workout program or manually adjust the speed to a low setting.
- Observe Motor Response: The motor should begin to operate smoothly, and the belt should move at the selected speed.
- Speed Adjustment: Gradually increase and decrease the speed using the console controls to ensure the controller responds accurately and the motor maintains consistent performance across the speed range.
- Emergency Stop: Test the treadmill's emergency stop feature to ensure it functions correctly, immediately cutting power to the motor.
If any unusual noises, erratic speed changes, or error messages appear on the console, refer to the Troubleshooting section.
Maintenance
Proper maintenance ensures the longevity and reliable operation of your RZ-MCI-1C (V3.0) Treadmill Motor Controller.
- Regular Inspection: Periodically (e.g., every 3-6 months), unplug the treadmill and open the motor cover to inspect the controller. Check for dust accumulation, loose wire connections, or any visible signs of damage or wear on the components.
- Cleaning: Use a soft, dry brush or compressed air to gently remove any dust or debris from the circuit board. Do not use liquid cleaners or solvents, as these can damage electronic components.
- Ventilation: Ensure that the treadmill's motor compartment remains clear of obstructions to allow for proper airflow and prevent the controller from overheating.
- Environmental Conditions: Operate and store the treadmill in a dry, temperature-controlled environment. Avoid extreme temperatures, high humidity, and direct sunlight, which can degrade electronic components over time.
- Connection Check: Ensure all electrical connections remain tight and secure. Loose connections can lead to intermittent operation or damage.
Troubleshooting
This section provides solutions to common issues you might encounter. For problems not listed here or if issues persist, consult a qualified technician.
| Problem | Possible Cause | Solution |
|---|---|---|
| Treadmill has no power | No power from outlet; tripped circuit breaker; loose power connection. | Check wall outlet with another device. Reset circuit breaker. Ensure treadmill power cord is securely plugged in. Verify internal power connections to the controller. |
| Motor not responding / Belt not moving | Loose motor connections; faulty motor; console communication issue; controller fault. | Unplug treadmill. Check all motor wiring connections to the controller. Consult your treadmill's console manual for error codes. If motor is confirmed functional, controller may need replacement. |
| Erratic speed / Inconsistent belt movement | Loose speed sensor connection; faulty speed sensor; motor issue; controller issue. | Check speed sensor wiring to the controller. Ensure the sensor is clean and properly aligned. Lubricate the treadmill belt if friction is high. If problem persists, professional diagnosis is recommended. |
| Controller overheating | Poor ventilation; excessive load on motor; internal component failure. | Ensure motor compartment is clear for airflow. Reduce treadmill usage time or intensity. If overheating continues, discontinue use and seek professional service. |
Specifications
- Part Number: RZ-MCI-1C (V3.0)
- Application: For IUBU Treadmills
- Voltage: 220V
- Incline Support: Non-incline
- Product Dimensions: 0.39 x 0.39 x 0.39 inches
- Item Weight: 1.76 ounces
- Manufacturer: Generic
- Item Model Number: PALUPFPFU-220VNON-INCLINE
Warranty and Support
This product is manufactured by Generic. For specific warranty terms, conditions, and technical support, please refer to the seller's policies at the time of purchase or contact the manufacturer directly. It is recommended to retain your purchase receipt as proof of purchase for any warranty claims.


