1. Introduction
This manual provides instructions for the setup, operation, and maintenance of your SPC Frodi View Digital Alarm Clock Radio. Please read this manual thoroughly before using the device to ensure proper function and safety.

Figure 1: SPC Frodi View Digital Alarm Clock Radio with 1.8" LED display.
2. Package Contents
- SPC Frodi View Digital Alarm Clock Radio
- Power Adapter
- Instruction Manual

Figure 2: Product packaging showing the alarm clock, manual, and cable.
3. Product Overview
3.1 Front Display & Indicators
- 1.8" LED Display: Shows time, alarm status, and radio frequency.
- PM Indicator: Lights up when time is in PM (12-hour format).
- FM Indicator: Lights up when FM radio is active.
- SLP Indicator: Lights up when Sleep Timer is active.
- ALM1/ALM2 Indicators: Light up when Alarm 1 or Alarm 2 is set.
- ZZ Indicator: Lights up when Snooze function is active.
3.2 Top Panel Controls
- SNOOZE/LIGHT Button: Activates snooze, adjusts display brightness.
- M (Mode) Button: Enters setting modes (time, alarm, radio scan).
- + Button: Increases value, changes radio station, adjusts volume.
- - Button: Decreases value, changes radio station, adjusts volume, turns alarm on/off.
- RADIO Button: Turns FM radio on/off, sets sleep timer.
- VOL+ / VOL- Buttons: Adjusts volume.
- ON/OFF Button: Powers the device on/off.
3.3 Rear Panel Connections
- DC 5V Input: For connecting the power adapter.
- USB Output: For charging external devices (e.g., smartphones).
- Battery Compartment: For AAA backup batteries.
4. Setup
4.1 Power Connection
- Connect the power adapter to the DC 5V input port on the rear of the alarm clock.
- Plug the power adapter into a standard wall outlet. The display will light up.
4.2 Battery Backup
The device uses 2 AAA batteries (not included) for backup power. These batteries maintain time and alarm settings during a power outage but do not power the display or alarm sound.
- Open the battery compartment cover on the rear of the unit.
- Insert two AAA batteries, ensuring correct polarity (+ and -).
- Close the battery compartment cover.
5. Operating Instructions
5.1 Setting the Time
- Press and hold the M (Mode) button for 3 seconds to enter time setting mode. The hour digits will flash.
- Use the + or - buttons to adjust the hour.
- Press the M (Mode) button again to switch to minute setting. The minute digits will flash.
- Use the + or - buttons to adjust the minutes.
- Press the M (Mode) button again to confirm and exit time setting mode.
5.2 Adjusting Display Brightness
The display has multiple brightness levels, including a total blackout option.
- In normal time display mode, press the SNOOZE/LIGHT button repeatedly to cycle through brightness levels (e.g., High, Medium, Low, Off).
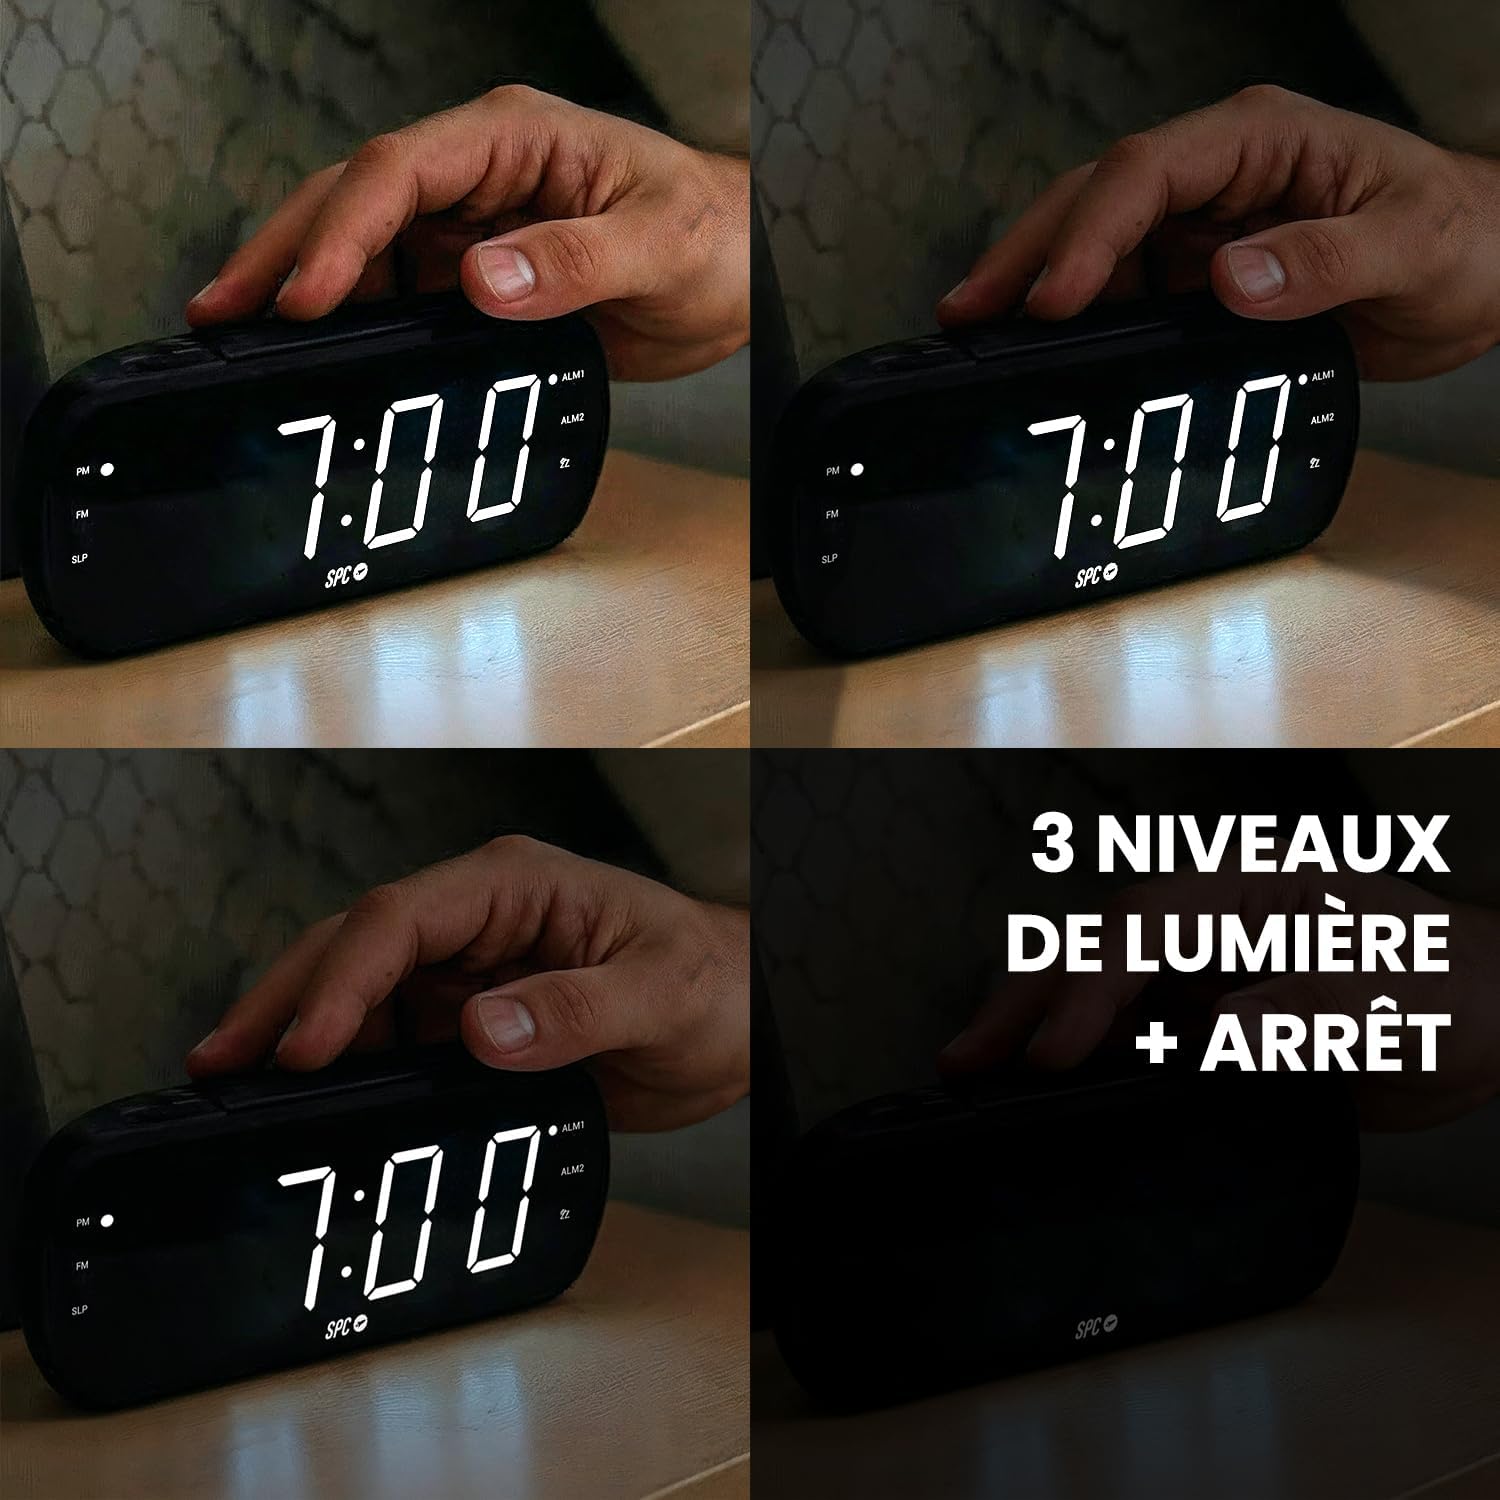
Figure 3: Adjustable brightness levels of the LED display.
5.3 Night Mode Setting
The night mode allows you to set a period during which the display brightness is automatically reduced.
- Press the M (Mode) button twice to enter night mode setting. The display will show 'ON' or 'OFF'.
- Use the + or - buttons to toggle night mode ON or OFF.
- If ON, press and hold M (Mode) for 2 seconds to enter the interval time setting mode.
- Set the start hour, start minute, end hour, and end minute using the + or - buttons and confirming each step with the M (Mode) button.
6. Alarm Functions
The SPC Frodi View features a dual alarm system, allowing you to set two independent alarms.

Figure 4: Dual alarm settings for different routines.
6.1 Setting Alarm Time (Alarm 1 & 2)
- In normal time display mode, press the M (Mode) button once to enter Alarm 1 setting mode. The Alarm 1 hour digits will flash.
- Use the + or - buttons to adjust the Alarm 1 hour.
- Press the M (Mode) button again to switch to Alarm 1 minute setting. The minute digits will flash.
- Use the + or - buttons to adjust the Alarm 1 minutes.
- Press the M (Mode) button again to select the alarm sound source (Buzzer or FM Radio). Use + or - to choose.
- Press the M (Mode) button again to confirm and exit Alarm 1 setting.
- Repeat steps 1-6 for Alarm 2 by pressing the M (Mode) button twice to enter Alarm 2 setting mode.
6.2 Activating/Deactivating Alarm
In normal time display mode, press the - button once to toggle Alarm 1 on/off. Press it again to toggle Alarm 2 on/off. The corresponding ALM1 or ALM2 indicator will light up when active.
6.3 Snooze Function
When the alarm sounds, press the SNOOZE/LIGHT button to activate the snooze function. The alarm will pause for 9 minutes and then sound again. This can be repeated up to five times. The ZZ indicator will light up when snooze is active.

Figure 5: Delaying the alarm with the snooze function.
7. Radio Functions
7.1 FM Radio Tuning
- Press the RADIO button once to turn on the FM radio. The FM indicator will light up.
- Auto Scan: Press and hold the M (Mode) button for 3 seconds. The radio will automatically scan and save available FM stations (up to 20 presets).
- Manual Tune: Use the + or - buttons to manually tune to a specific frequency.

Figure 6: FM Radio with 20 presets.
7.2 Adjusting Radio Volume
While the FM radio is on, use the VOL+ or VOL- buttons to adjust the volume (15 levels).
7.3 Sleep Timer for Radio
The sleep timer allows the radio to play for a set duration before automatically turning off.
- While the FM radio is on, press the RADIO button twice to enter sleep timer mode. The display will show the current sleep timer setting (e.g., 15, 30, 45, 60, 90, 120 minutes, or OFF).
- Use the + or - buttons to select the desired sleep timer duration.
- The radio will play for the selected time and then automatically shut off. The SLP indicator will light up.
8. Additional Features
8.1 USB Charging Port
The alarm clock includes a USB port on the rear panel for charging external devices like smartphones. Simply connect your device's USB charging cable to the USB output port.

Figure 7: USB charging port in use.
9. Maintenance
- Clean the device with a soft, dry cloth. Do not use abrasive cleaners or solvents.
- Keep the device away from water, moisture, and direct sunlight.
- Ensure proper ventilation and do not block any ventilation openings.
- If not using the device for an extended period, remove the backup batteries.
10. Troubleshooting
| Problem | Possible Cause | Solution |
|---|---|---|
| Display is blank. | No power, power adapter disconnected, or brightness set to OFF. | Check power connection. Press SNOOZE/LIGHT to adjust brightness. |
| Alarm does not sound. | Alarm not activated, incorrect time set, or volume too low. | Ensure ALM1/ALM2 indicator is lit. Verify alarm time. Adjust volume. |
| Poor FM radio reception. | Antenna not extended or positioned correctly. | Extend and reposition the FM antenna for better signal. |
| USB charging not working. | Device not properly connected, or device requires more power than available. | Ensure the USB cable is securely connected. Check device compatibility. |
11. Specifications
- Brand: SPC
- Model Number: 4592N
- Color: Black
- Display Type: Digital LED, 1.8 inches
- Power Source: Mains powered (Electric Cable)
- Backup Batteries: 2 x AAA (not included)
- Special Features: Dual Alarm, 9-minute Snooze, Adjustable Brightness, FM Radio, USB Charging Port
- Product Dimensions: 20.2 cm (Length) x 8.3 cm (Height)
- Item Weight: 265 Grams
- Material: Plastic
12. Warranty and Support
This product is covered by the manufacturer's warranty in accordance with current laws. For technical support, warranty claims, or further assistance, please refer to the contact information provided with your purchase or visit the official SPC website.
Please retain your proof of purchase for warranty purposes.