Introduction
The OBDEMOTO 101 is a versatile automotive diagnostic tool designed to quickly detect issues in various vehicle components. This pen-style tester utilizes electromagnetic principles to identify problems in ignition coils, spark plugs, fuel injectors, generators, fans, electric relays, emission gas control valves, and hall sensors without requiring component removal. It provides clear visual and audible feedback, making it suitable for both DIY enthusiasts and professional technicians.

Figure 1: OBDEMOTO 101 Ignition Coil Tester Tool.
Product Overview
Key Features
- Quick Detection: Instantly identifies ignition and spark plug problems, along with issues in generators, fans, electric relays, emission gas control valves, fuel injectors, and hall sensors.
- Wide Compatibility: Suitable for most 12V gasoline vehicles, including cars, SUVs, RVs, trucks, motorcycles, and ATVs.
- LED Display & Audible Cueing: Features clear LED indicators and a buzzer for visual and audible feedback on device status and electromagnetic field strength.
- Portable & Illuminated Design: Compact, lightweight, pen-style design with a bright LED light for use in dark or confined engine compartments.
- Replaceable Battery: Easy snap-on design for quick replacement of 2 AAA batteries.
- Durable Construction: Made with industrial-grade materials for extended lifespan.
What's in the Box
- 1 x OBDEMOTO 101 Ignition Coil Tester

Figure 2: Dimensions and functional overview of the OBDEMOTO 101.
Setup
Battery Installation
The OBDEMOTO 101 requires 2 AAA batteries for operation. Follow these steps to install or replace the batteries:
- Press the snap on the clip-on battery compartment and remove the cover.
- Insert 2 AAA batteries, ensuring correct polarity.
- Reattach the cover by aligning and snapping it into place.
- The device is now ready for use.
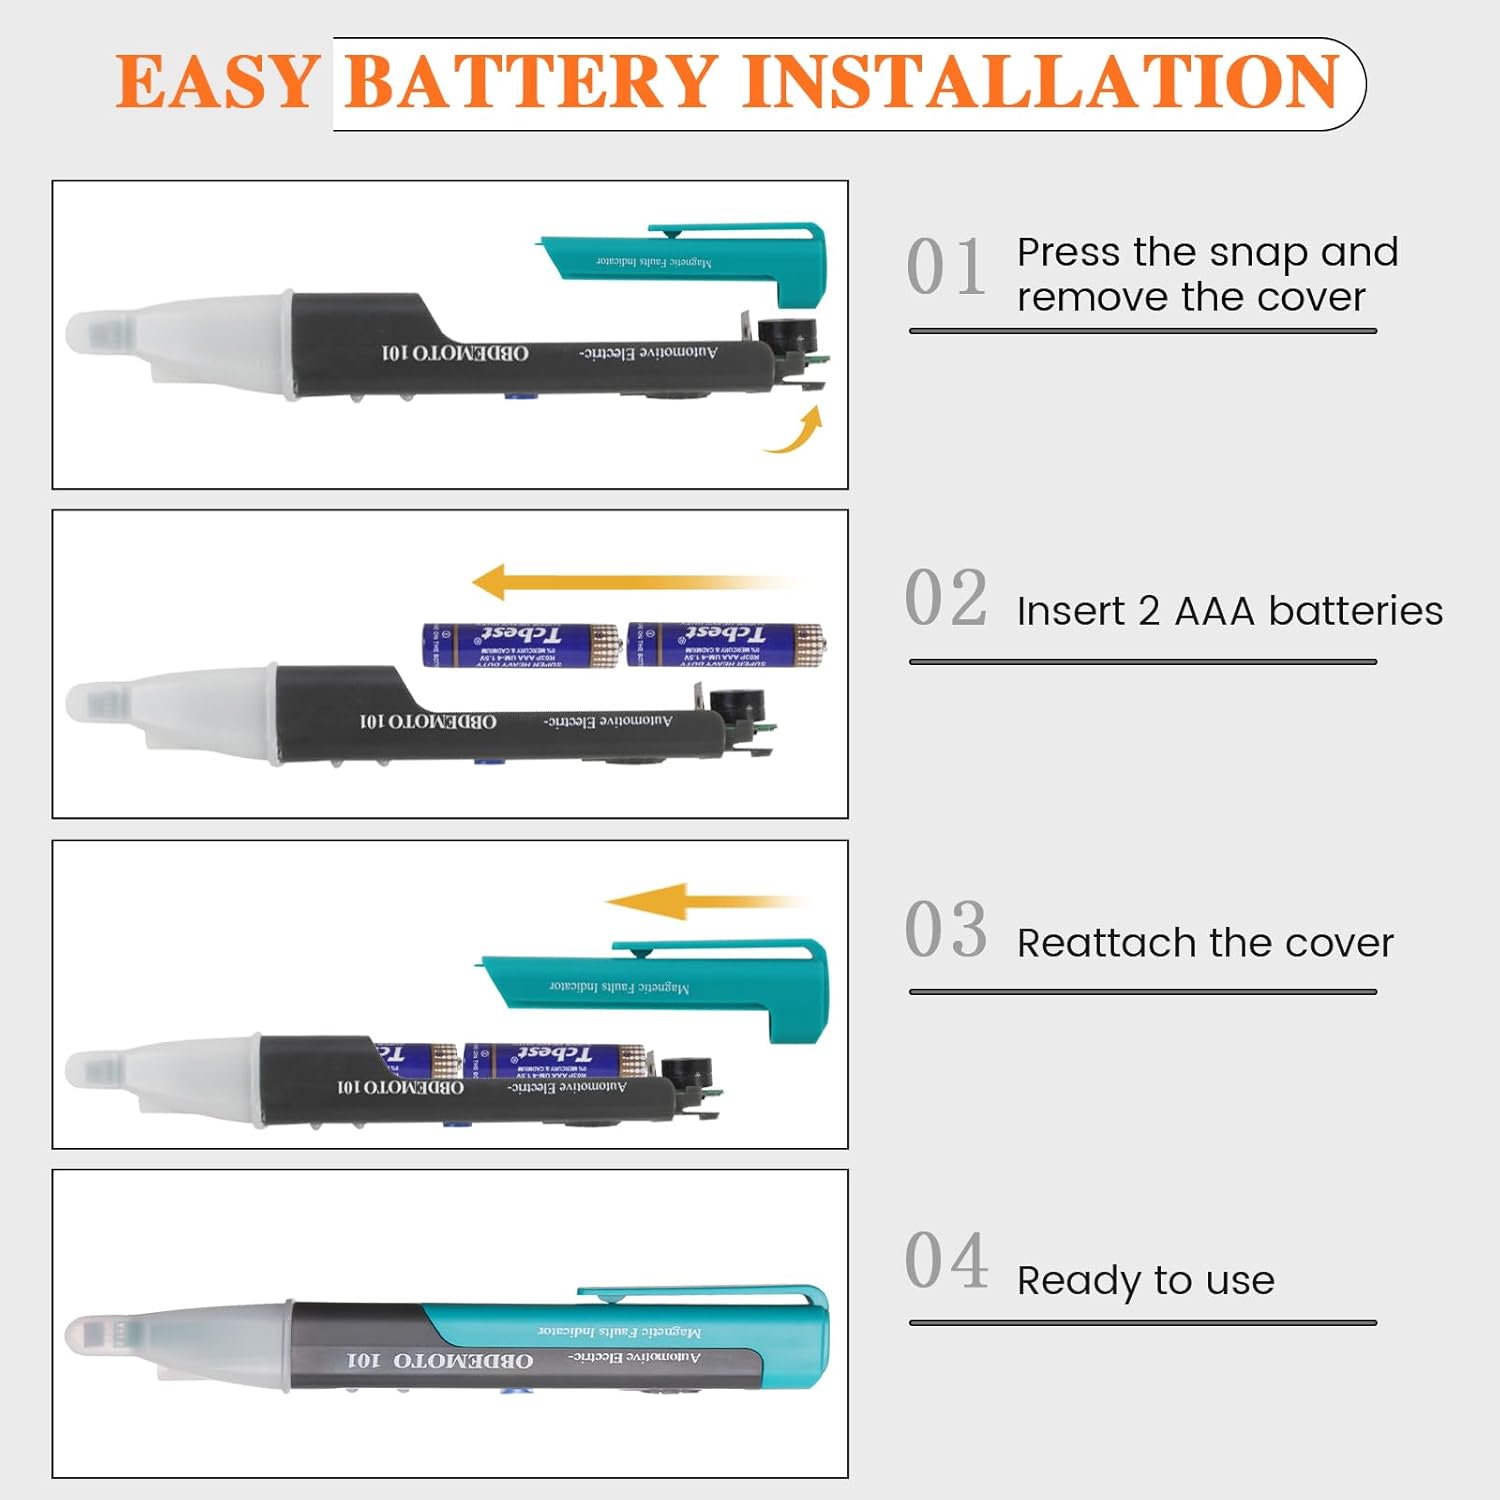
Figure 3: Step-by-step guide for battery installation.
Operating Instructions
The OBDEMOTO 101 features a simple interface with a power switch, sensitivity settings, and an LED lighting switch. The device uses LED indicators and an audible buzzer to communicate detection status.
General Operation
- Power On/Off: Use the main switch (O: Turn off, I: Low Sensitivity Test, II: High Sensitivity Test) to power on the device and select the desired sensitivity.
- LED Light: Press the LED lighting switch to activate the built-in flashlight for improved visibility in dark areas.
- Testing: Position the testing sensor near the component to be diagnosed. The device will provide visual (flashing LEDs) and audible (beeping) feedback if a magnetic field is detected.
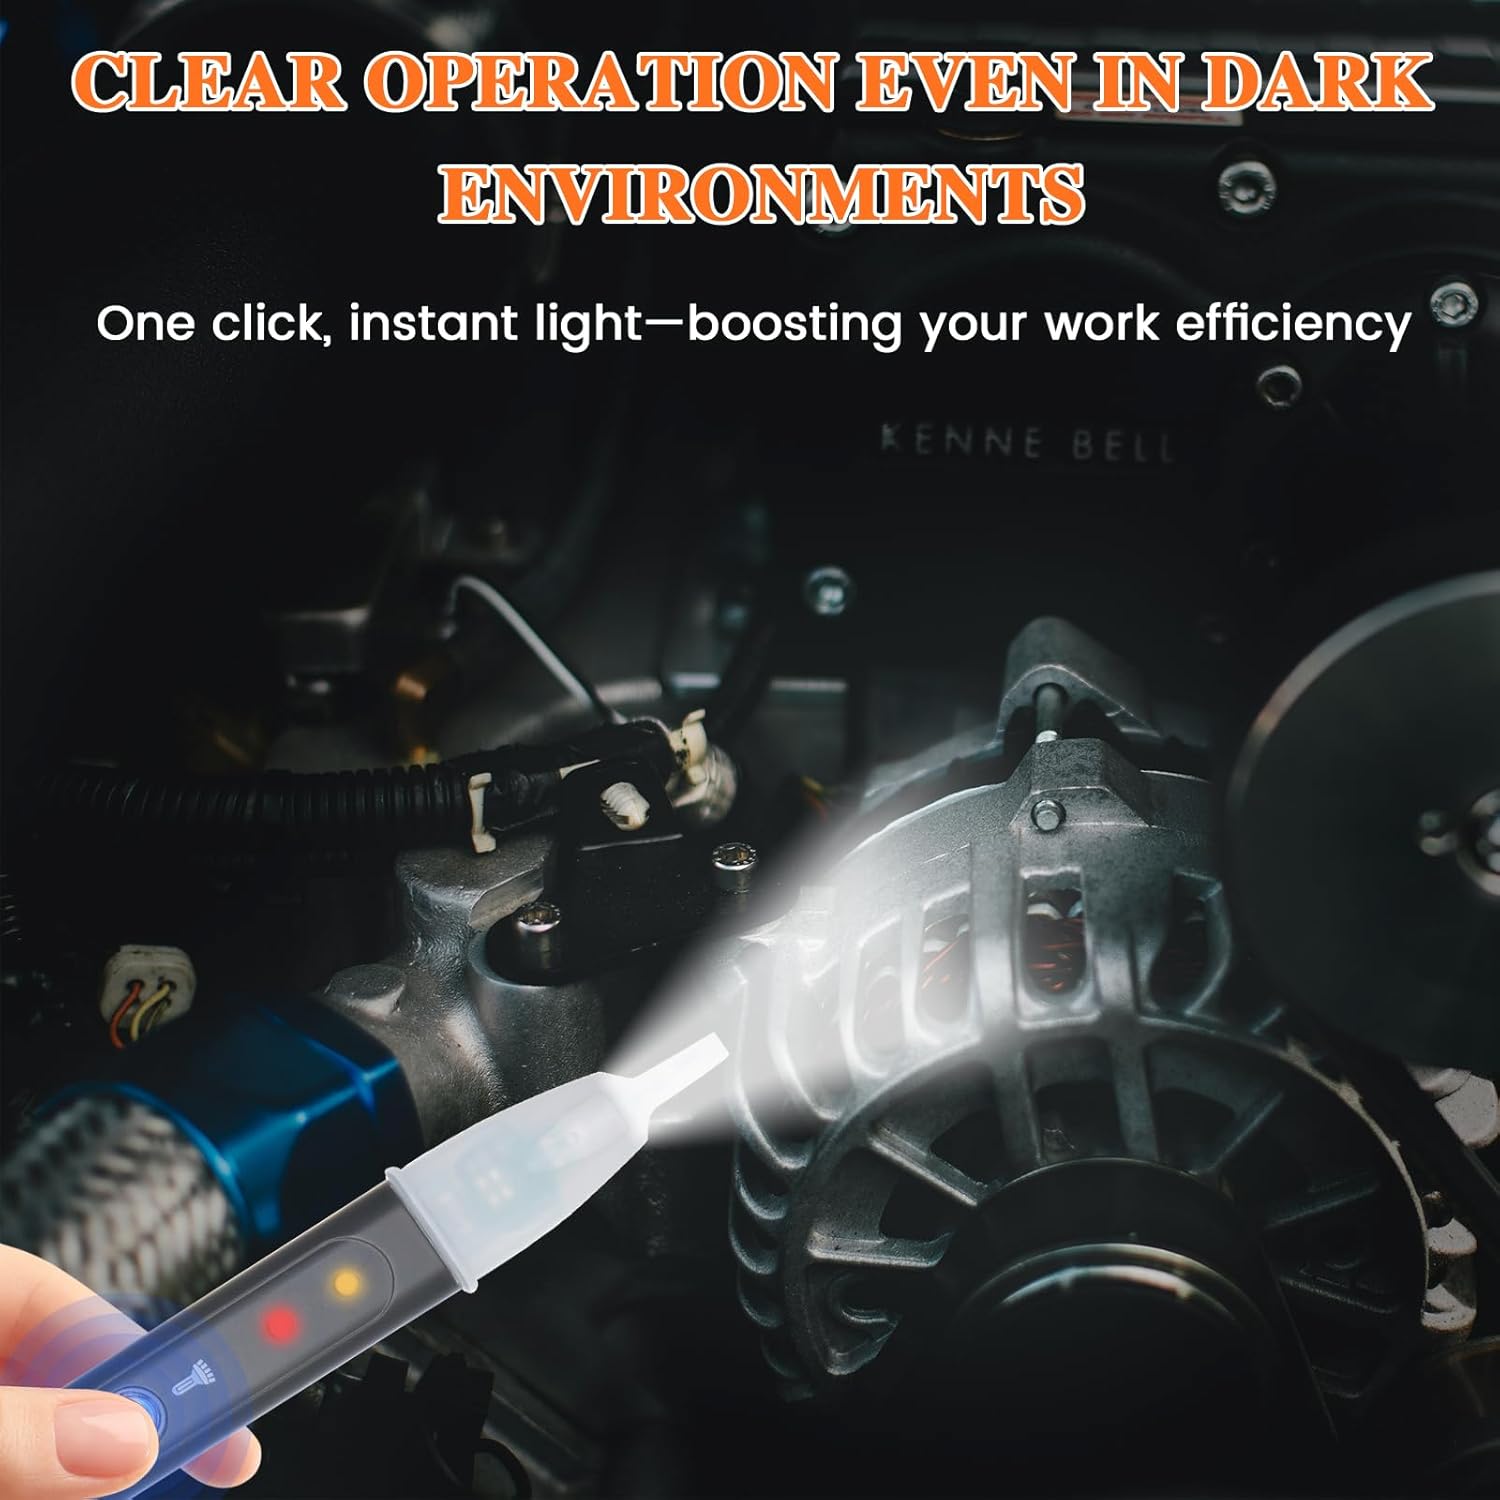
Figure 4: The integrated LED light assists in dark environments.
Specific Component Testing
The OBDEMOTO 101 can test a variety of components by detecting their electromagnetic fields. The presence of a flashing indicator and continuous beeping signifies normal operation.
- Ignition Coil Test: Place the sensor near the ignition coil. If the coil is working, the indicator lights will flash, and the buzzer will sound continuously. If no activity, the coil may be damaged or not working.
- Fuel Injector Test: Position the sensor near the fuel injector. Adjust the angle until a reaction (flashing lights, beeping) is observed, indicating proper function.
- Generator Test: Move the sensor near the alternator (generator). In a strong magnetic zone, both LED lights will flash, indicating the generator is working.
- Other Components: The tool can also be used to test fans, electric relays, emission gas control valves, and hall sensors by detecting their magnetic activity.

Figure 5: Visual examples of ignition coil and generator testing.
Demonstration Video
Video 1: Official demonstration of the OBDEMOTO 101 testing ignition coils, fuel injectors, and generators on a motorcycle and car.
Maintenance
Battery Replacement
When the device's performance degrades or the indicators become dim, it may be time to replace the batteries. Refer to the 'Battery Installation' steps in the Setup section for detailed instructions. Ensure to use 2 fresh AAA batteries.

Figure 6: The clip-on design allows for quick battery replacement.
General Care
- Keep the device clean and free from dirt, oil, and moisture.
- Store the tester in a dry, cool place when not in use.
- Avoid dropping the device or subjecting it to strong impacts.
Troubleshooting
The OBDEMOTO 101 provides clear indications for diagnosing component status. Refer to the following for common scenarios:
| Symptom | Indication | Possible Cause / Action |
|---|---|---|
| Component working | LEDs flash, buzzer sounds continuously | Normal operation. |
| Component not working / damaged | LEDs do not light up, buzzer is silent | Component may be faulty or not receiving power. Check connections and component integrity. |
| No power to tester | No lights, no sound when powered on | Check and replace AAA batteries. Ensure batteries are inserted with correct polarity. |

Figure 7: Visual representation of working vs. faulty indications.
Specifications
| Feature | Specification |
|---|---|
| Brand | OBDEMOTO |
| Model Number | OBDEMOTO 101 |
| Power Source | Battery Powered (2 AAA batteries required) |
| Style | Industry Design |
| Color | Green |
| Item Dimensions (L x W x H) | 6 x 0.97 x 0.7 inches |
| Item Weight | 1.44 ounces |
| Min. Operating Voltage | 2.9 Volts |
| Maximum Operating Voltage | 3.3 Volts |
| Certifications | CE, RoHS |
Warranty & Support
OBDEMOTO stands behind the quality of its products. For any questions, concerns, or technical assistance regarding your OBDEMOTO 101 Ignition Coil Tester Tool, please do not hesitate to contact our customer support team. Refer to your purchase documentation or the OBDEMOTO official website for specific warranty details and contact information.