1. Introduction
This manual provides detailed instructions for the safe and effective operation, setup, and maintenance of your TAGVIT Digital Torque Wrench, model TA-DN2. This precision tool is designed for accurate torque measurement in various applications, including automotive repair, bicycle maintenance, and industrial assembly. Please read this manual thoroughly before using the device.
2. Safety Information
Always observe the following safety precautions to prevent injury or damage to the tool and workpiece:
- Wear appropriate personal protective equipment, such as safety glasses, when operating the torque wrench.
- Ensure the workpiece is securely fastened before applying torque.
- Do not exceed the maximum torque capacity of the wrench.
- Avoid dropping the wrench or subjecting it to severe impacts.
- Keep the wrench clean and dry. Do not expose it to excessive moisture or corrosive substances.
- Do not attempt to disassemble or modify the wrench. Refer all servicing to qualified personnel.
3. Product Overview
The TAGVIT Digital Torque Wrench TA-DN2 features a robust design and advanced functionalities for precise torque applications.
3.1 Key Components
- Quick-change Socket Head: Allows for easy attachment and removal of sockets.
- Direction Switch: For clockwise (CW) and counter-clockwise (CCW) operation.
- Large Color Screen: Displays real-time torque values, modes, and battery status.
- Control Buttons: For power, mode selection, unit selection, and value adjustment.
- LED Indicator & Buzzer: Provides visual and audible alerts during operation.
- USB-C Charging Port: For recharging the internal battery.
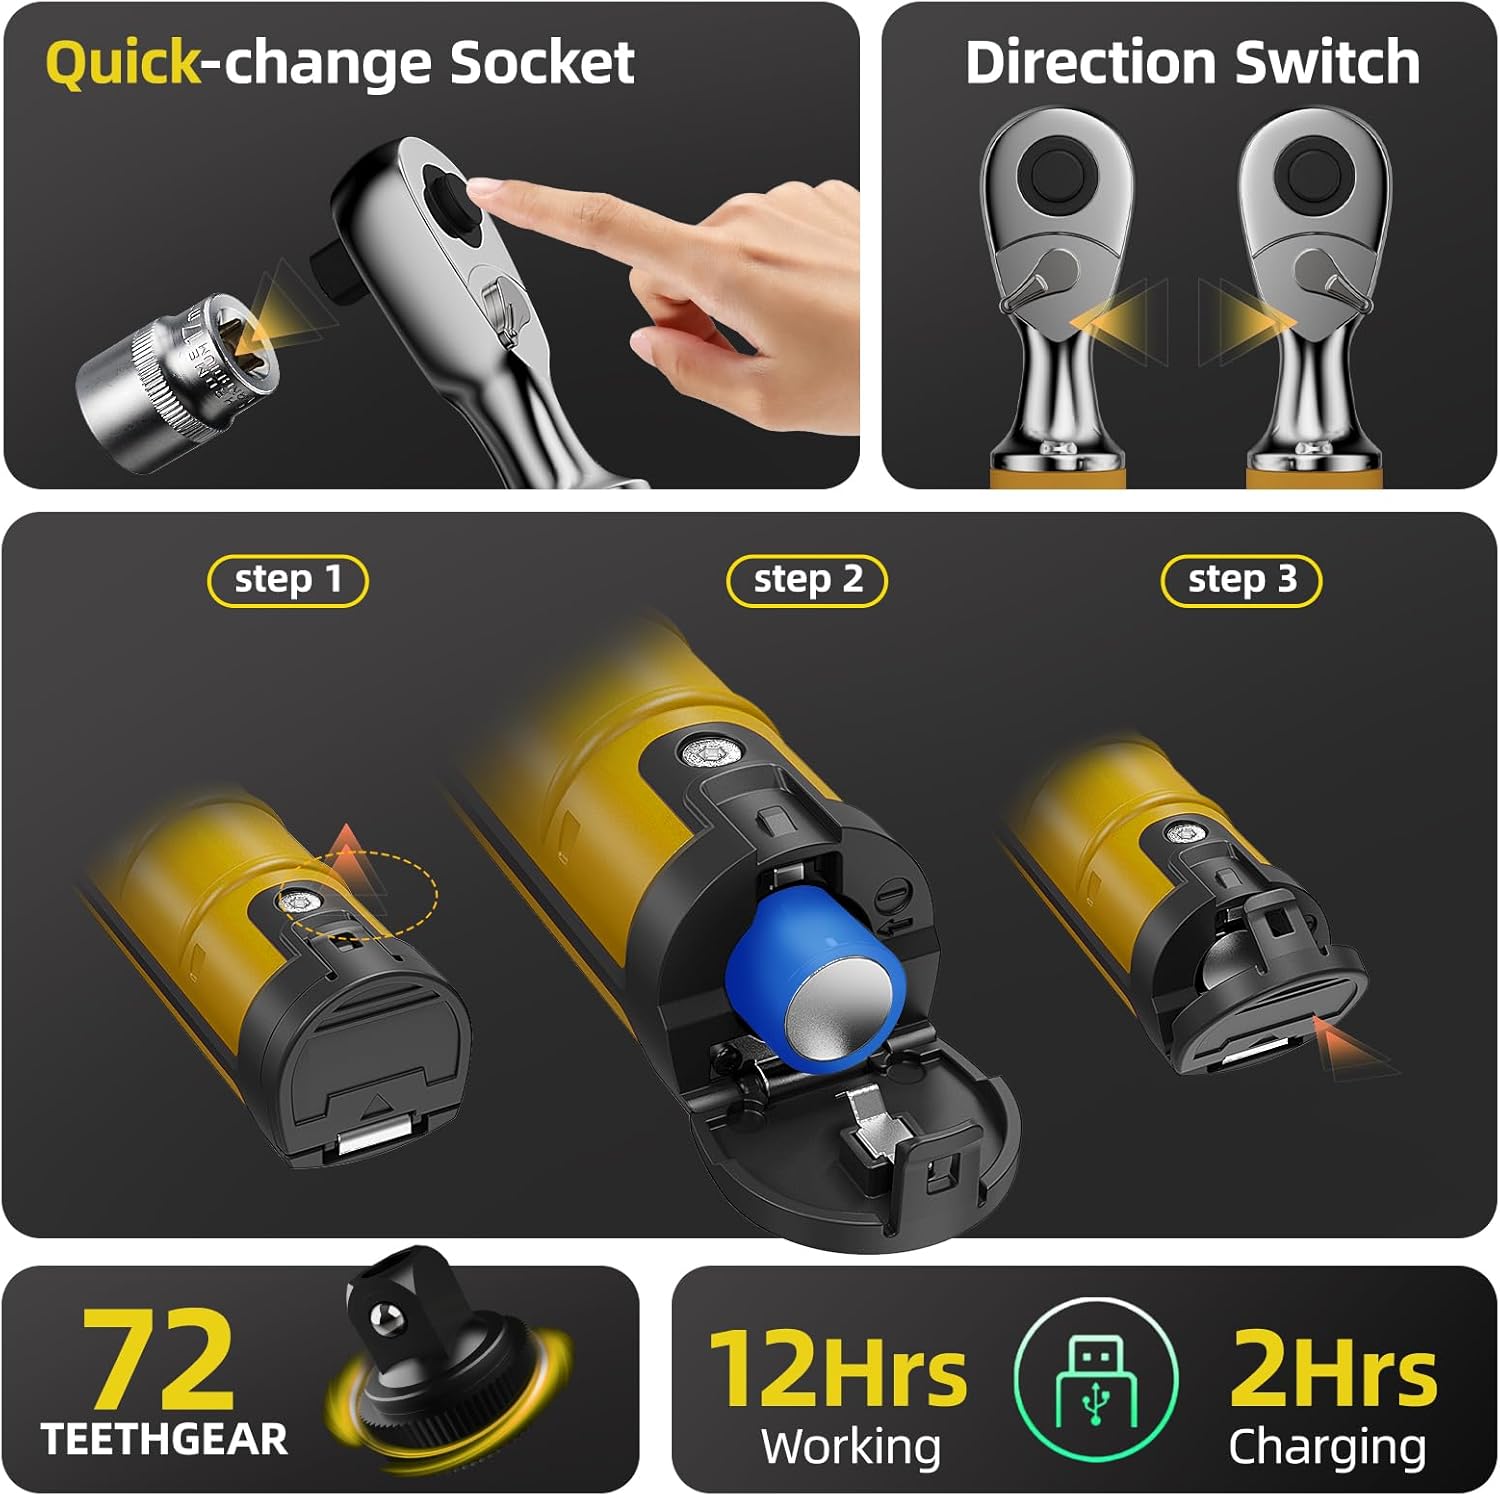
Figure 3.1: Overview of the wrench head, direction switch, and battery compartment.
3.2 Features
- High Precision: Advanced strain gauge sensor ensures ±2% accuracy.
- Large Color Screen: Vibrant LCD for clear display of information.
- Rechargeable Battery: 1500mAh lithium battery provides 12+ hours of continuous use.
- Smart Memory Function: Stores over 500 torque profiles for repeat jobs.
- Rugged Design: Aircraft-grade aluminum body for durability.
- 72-Tooth Gear: Provides fine ratcheting for precise adjustments.

Figure 3.2: The 72-tooth gear mechanism and durability features.
4. Setup
4.1 Battery Installation and Charging
The wrench comes with a pre-installed 1500mAh lithium-ion battery. Before first use, ensure the battery is fully charged.
- Locate the battery compartment cover, typically at the base of the handle.
- Open the cover and ensure the battery is correctly seated.
- Connect the included USB-C charging cable to the wrench's charging port and to a suitable USB power source.
- The screen will indicate charging status. A full charge typically takes approximately 2 hours and provides over 12 hours of continuous use.
4.2 Initial Power On and Calibration
The wrench features auto-calibration for ease of use.
- Press and hold the Power button (often labeled with a circle or 'OK') to turn on the wrench.
- The wrench will perform a self-check and auto-calibrate. Ensure the wrench is not under any load during this process.
- The display will show the default working mode and torque unit.
5. Operating Instructions
This section details how to use your digital torque wrench for various tasks.
5.1 Control Panel and Buttons

Figure 5.1: Control panel layout and button functions.
- Power Button (Short press: Reset/Back, OK/Power on; Long press: Power off): Controls power and navigation.
- Up/Down Buttons (Short press: Select/Adjust): Used to navigate menus and adjust values.
- M Button (Short press: Switch work group; Long press: Lock button): Changes working modes or locks settings.
- U Button (Long press: Main menu): Accesses the main menu for advanced settings.
5.2 Working Modes: Peak Mode and Track Mode
The wrench offers two primary operating modes:
- Peak Mode (P): Captures and displays the maximum torque value applied during an operation. Useful for verifying the peak torque achieved.
- Track Mode (T): Monitors and displays real-time torque values as they are applied. Ideal for observing torque changes during tightening.
To switch between modes, use the appropriate button as indicated on the control panel diagram (Figure 5.1).
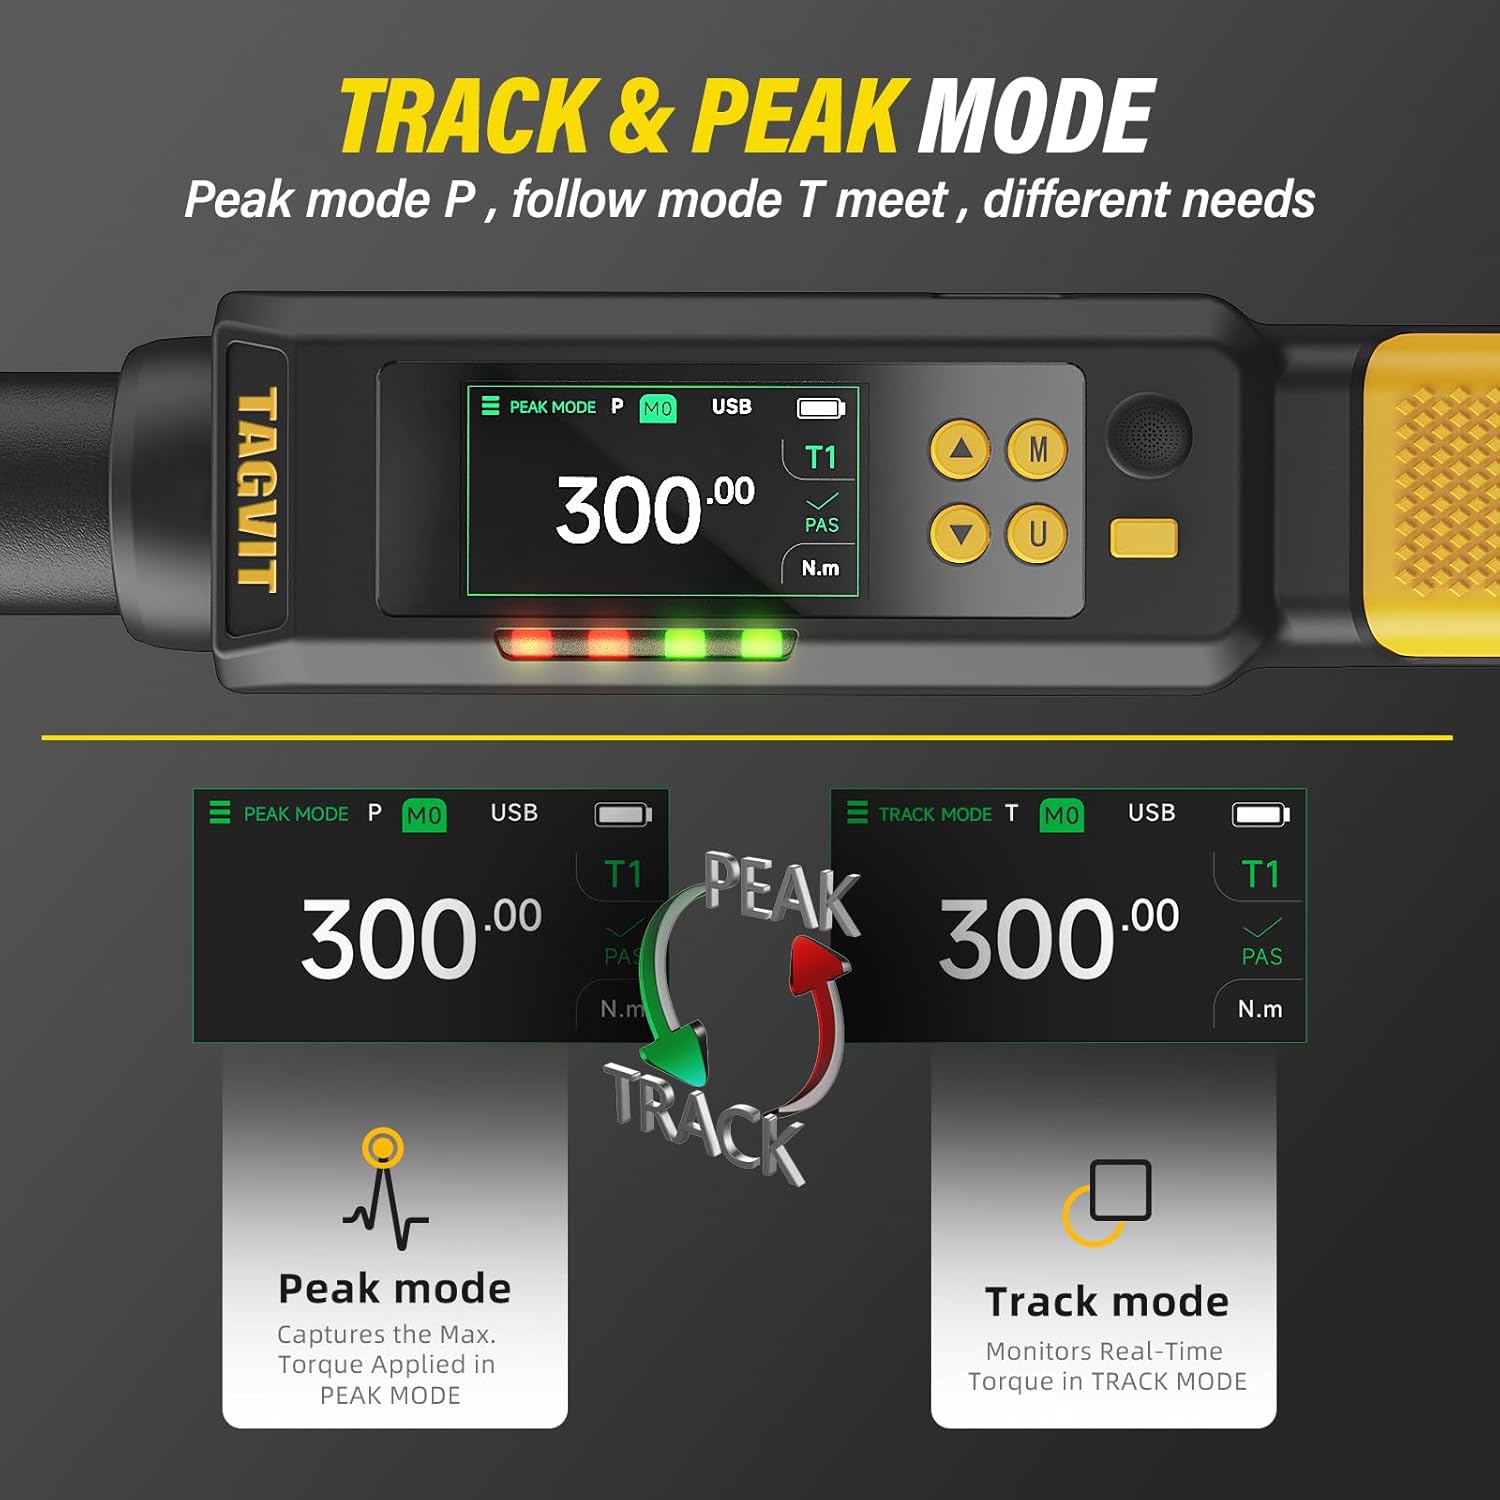
Figure 5.2: Display in Peak Mode (P) and Track Mode (T).

Figure 5.3: Practical application of Track and Peak modes.
5.3 Setting Torque Values and Units
- Long press the 'U' button to enter the Main Menu.
- Use the Up/Down buttons to navigate to "Set Unit" and press the Power/OK button to select. Choose your desired unit (N.m, ft-lb, in-lb, kg.cm).
- Navigate to "Set Alarm Value" to set your target torque. Use the Up/Down buttons to adjust the value.
- The wrench supports two alarm modes (T1/T2): T1 for a single target value, T2 for interval values. Select the appropriate alarm mode from the menu.

Figure 5.4: Main Menu options for settings.
5.4 Using the LED Indicator and Buzzer Alarm
The wrench provides visual and audible feedback as you approach and reach your target torque:
- Green Light (85% - 90% of target torque): Indicates you are approaching the set torque. Accompanied by intermittent beeping.
- Red Light (100% of target torque): Indicates the target torque has been reached. Accompanied by persistent beeping.

Figure 5.5: LED indicator and buzzer alarm in action.
5.5 Data Storage and Recall
The wrench can store over 500 torque profiles, allowing for detailed record-keeping and review.
- After each torque application, the result is automatically saved.
- To view stored data, long press the 'U' button to enter the Main Menu.
- Navigate to "Stored Data Menu" and press the Power/OK button to view the records.
- Records include torque values, peak/track mode, and pass/fail status.

Figure 5.6: Stored data display.
5.6 General Usage
Attach the appropriate socket to the quick-change head. Set the direction switch to either clockwise or counter-clockwise as required. Apply steady, even force to the wrench handle until the desired torque is reached, indicated by the LED lights and buzzer.
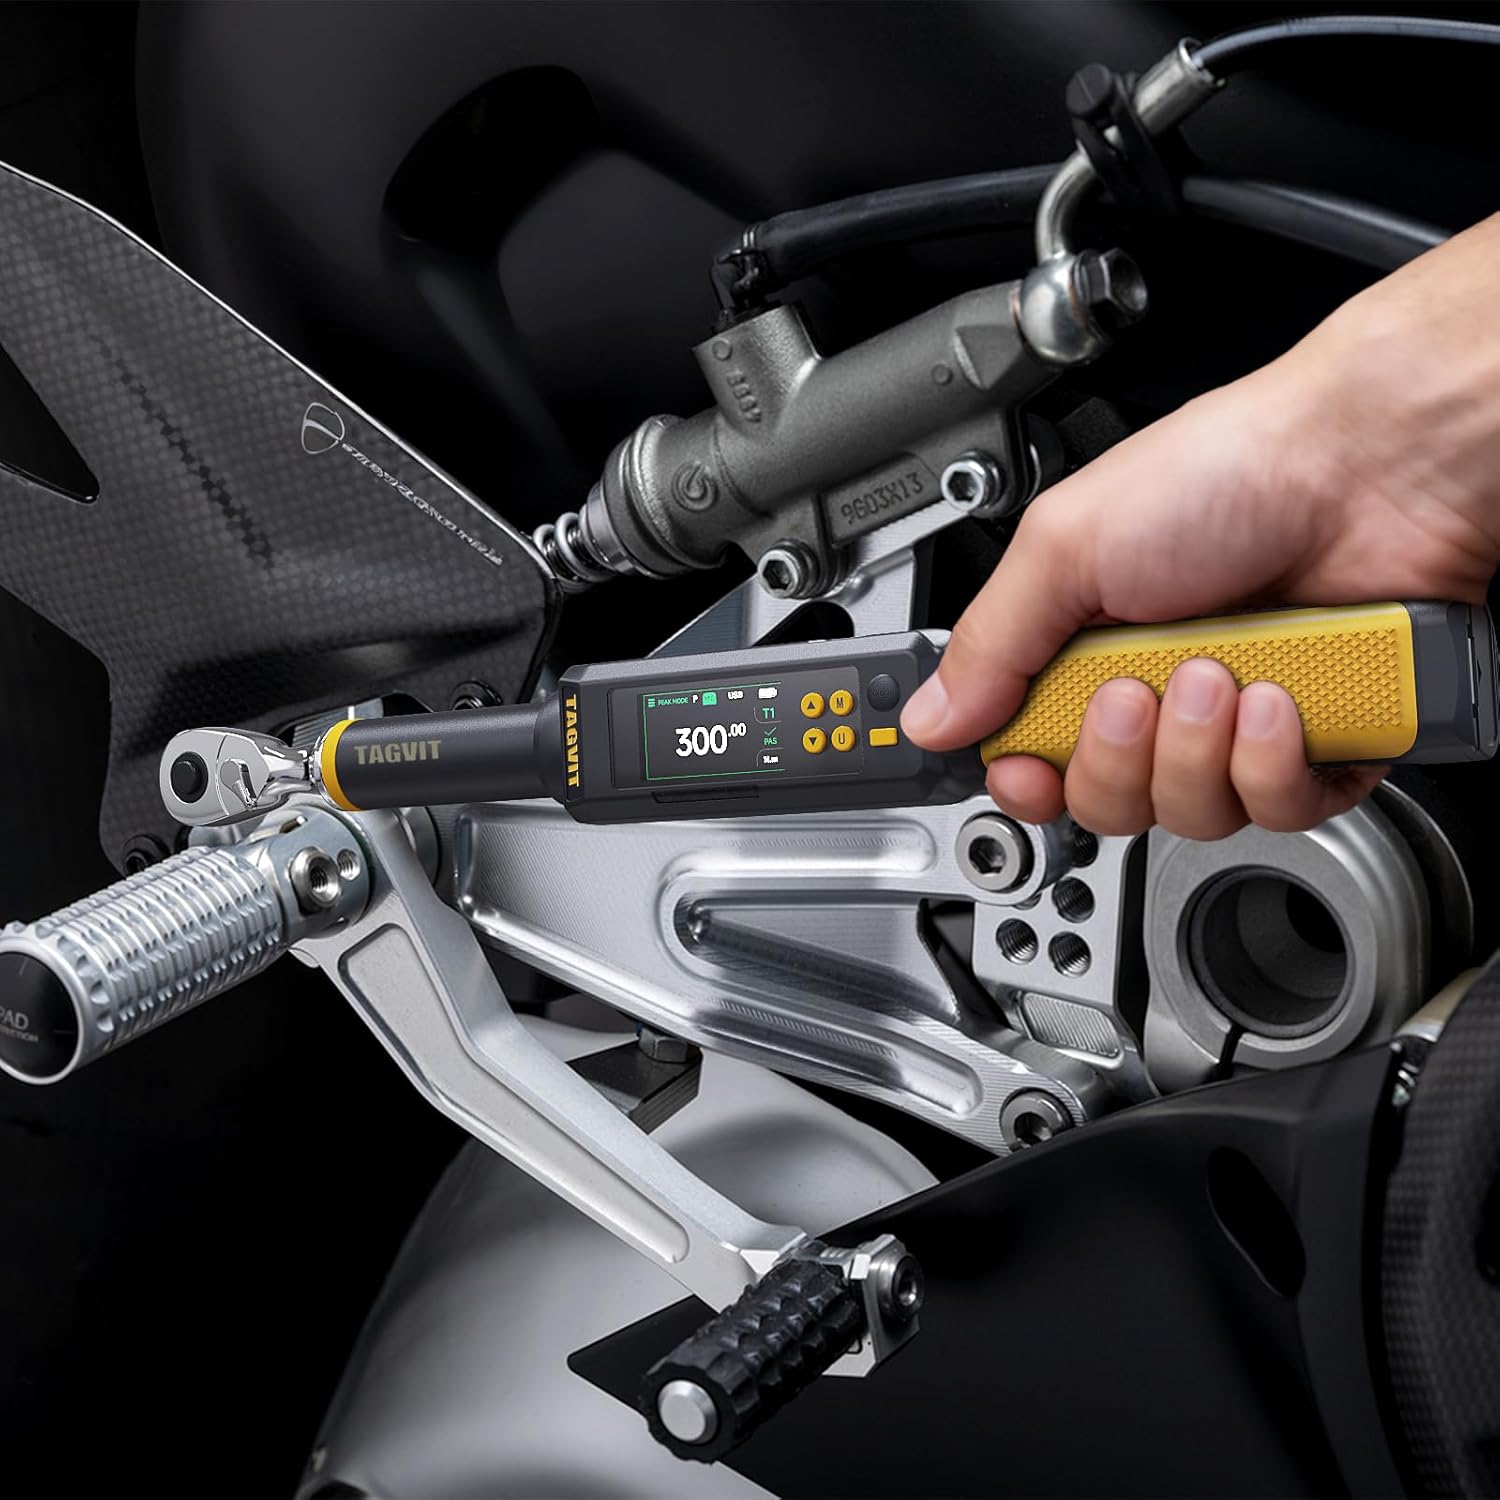
Figure 5.7: Example of torque wrench in use.
6. Maintenance
6.1 Cleaning and Storage
- Wipe the wrench clean with a soft, dry cloth after each use. Do not use abrasive cleaners or solvents.
- Store the wrench in its protective case in a dry, cool place, away from direct sunlight and extreme temperatures.
- Ensure the wrench is turned off before storage to conserve battery life.
6.2 Battery Care
- Recharge the battery regularly, even if the wrench is not in frequent use, to maintain battery health.
- Avoid fully discharging the battery for extended periods.
6.3 Recalibration
The TAGVIT Digital Torque Wrench is designed for long-term accuracy, with a claim of 15,000+ uses without requiring recalibration. However, for critical applications or if you suspect a loss of accuracy, professional recalibration services should be sought. Refer to the specifications for calibration standards.
7. Troubleshooting
If you encounter issues with your TAGVIT Digital Torque Wrench, refer to the following common problems and solutions:
| Problem | Possible Cause | Solution |
|---|---|---|
| Wrench does not power on | Low or discharged battery | Charge the battery using the provided USB-C cable. |
| Inaccurate torque readings | Wrench not properly calibrated or damaged | Ensure the wrench is not under load during power-on auto-calibration. If issues persist, contact support for recalibration. |
| Display is blank or frozen | Software glitch or low battery | Perform a soft reset by holding the power button for 10 seconds. If unsuccessful, fully charge the battery. |
| Buzzer not sounding | Buzzer disabled in settings or malfunction | Check alarm settings in the Main Menu. If enabled and still not working, contact support. |
8. Specifications
Detailed technical specifications for the TAGVIT Digital Torque Wrench TA-DN2.

Figure 8.1: Dimensions and key specifications.
| Feature | Specification |
|---|---|
| Model Number | TA-DN2 |
| Torque Range | 14.75-295 ft-lbs (20-400 N.m) |
| Accuracy | ±2% CW, ±2.5% CCW |
| Drive Size | 1/2-Inch |
| Units | N.m, ft-lb, in-lb, kg.cm |
| Working Modes | Peak Mode (P), Track Mode (T) |
| Memory Capacity | 512 data values |
| Battery Type | 1500mAh Lithium-Ion (rechargeable) |
| Battery Life | 12+ hours continuous use |
| Charging Time | Approx. 2 hours (USB-C) |
| Material | Chrome Vanadium Steel, Aircraft-grade Aluminum |
| Item Length | 24.2 inches (61.5 cm) |
| Item Weight | Approx. 0.035 ounces (1 gram - note: this weight seems incorrect from source data, likely a typo for the actual product weight) |
| Calibration Standard | ISO 6789-1:2017, ASME B107.14M |

Figure 8.2: Calibration and fatigue test standards.
9. Warranty and Support
TAGVIT provides a lifetime warranty against defects for this product. This includes free replacements and 24/7 support to ensure lifelong reliability.
For warranty claims, technical assistance, or any questions regarding your TAGVIT Digital Torque Wrench, please contact TAGVIT customer support through the retailer where the product was purchased or refer to the contact information provided with your product packaging.


