
1. Introduction
Thank you for purchasing the T-FAMY Digital Alarm Clock T518. This manual provides detailed instructions for setting up, operating, and maintaining your new alarm clock. Please read this manual thoroughly before use to ensure proper function and to maximize your user experience.
2. Package Contents
- T-FAMY Digital Alarm Clock (Model T518)
- USB Power Cable
- USB Power Adapter
- User Manual
3. Product Overview
Familiarize yourself with the clock's components and controls.
Front Display
The front features a 2.2-inch LED pixel display showing time, PM indicator, alarm status (bell icon), and snooze status (Zz icon).
Top Buttons
- SNOOZE / AL STOP: Tap to snooze the alarm or press to stop the alarm.
Back Buttons and Ports
The back of the clock houses all control buttons and the power input.

Image: Back view of the T-FAMY Digital Alarm Clock. From left to right, buttons are labeled DOWN AL ON/OFF, UP 12/24, DIMMER, DST, Weekend, ALARM SET, TIME SET. A DC5V IN port is visible on the right side.
- DOWN / AL ON/OFF: Decreases values during setting; Toggles alarm on/off.
- UP / 12/24: Increases values during setting; Switches between 12-hour and 24-hour time format.
- DIMMER: Adjusts display brightness.
- DST: Activates/deactivates Daylight Saving Time.
- Weekend: Toggles Weekend Alarm Mode.
- ALARM SET: Enters alarm setting mode.
- TIME SET: Enters time setting mode.
- DC5V IN: Power input port.
- Battery Compartment: For 2 AAA backup batteries (not included).
4. Setup
4.1 Power Connection
The T-FAMY Digital Alarm Clock operates primarily on AC power. Use the provided USB cable and adapter to connect the clock to a standard wall outlet.

Image: The T-FAMY Digital Alarm Clock is shown plugged into a wall outlet using its adapter. The display shows '10:45 PM'. Text indicates 'Outlet Powered Only and Battery (not supplied) for backup' and 'Adapter Included'.
4.2 Battery Installation (Backup)
For uninterrupted timekeeping during power outages, install two AAA batteries (not included) into the battery compartment on the back of the clock. The batteries serve as a backup for time and alarm settings; the display will turn off during a power outage to conserve battery life.

Image: A T-FAMY Digital Alarm Clock with a red display showing '10:45'. Icons for 'Outlet Powered' and 'Battery Backup (2*AAA battery not included)' are displayed next to it.
5. Operating Instructions
5.1 Setting the Time
- Press and hold the TIME SET button on the back of the clock. The hour digits will begin to flash.
- Use the UP / 12/24 or DOWN / AL ON/OFF buttons to adjust the hour.
- Press the TIME SET button again to confirm the hour and move to minute setting. The minute digits will flash.
- Use the UP / 12/24 or DOWN / AL ON/OFF buttons to adjust the minutes.
- Press the TIME SET button once more to save the time and exit time setting mode.
5.2 12/24 Hour Format
To switch between 12-hour and 24-hour display formats, press the UP / 12/24 button when the clock is not in setting mode.
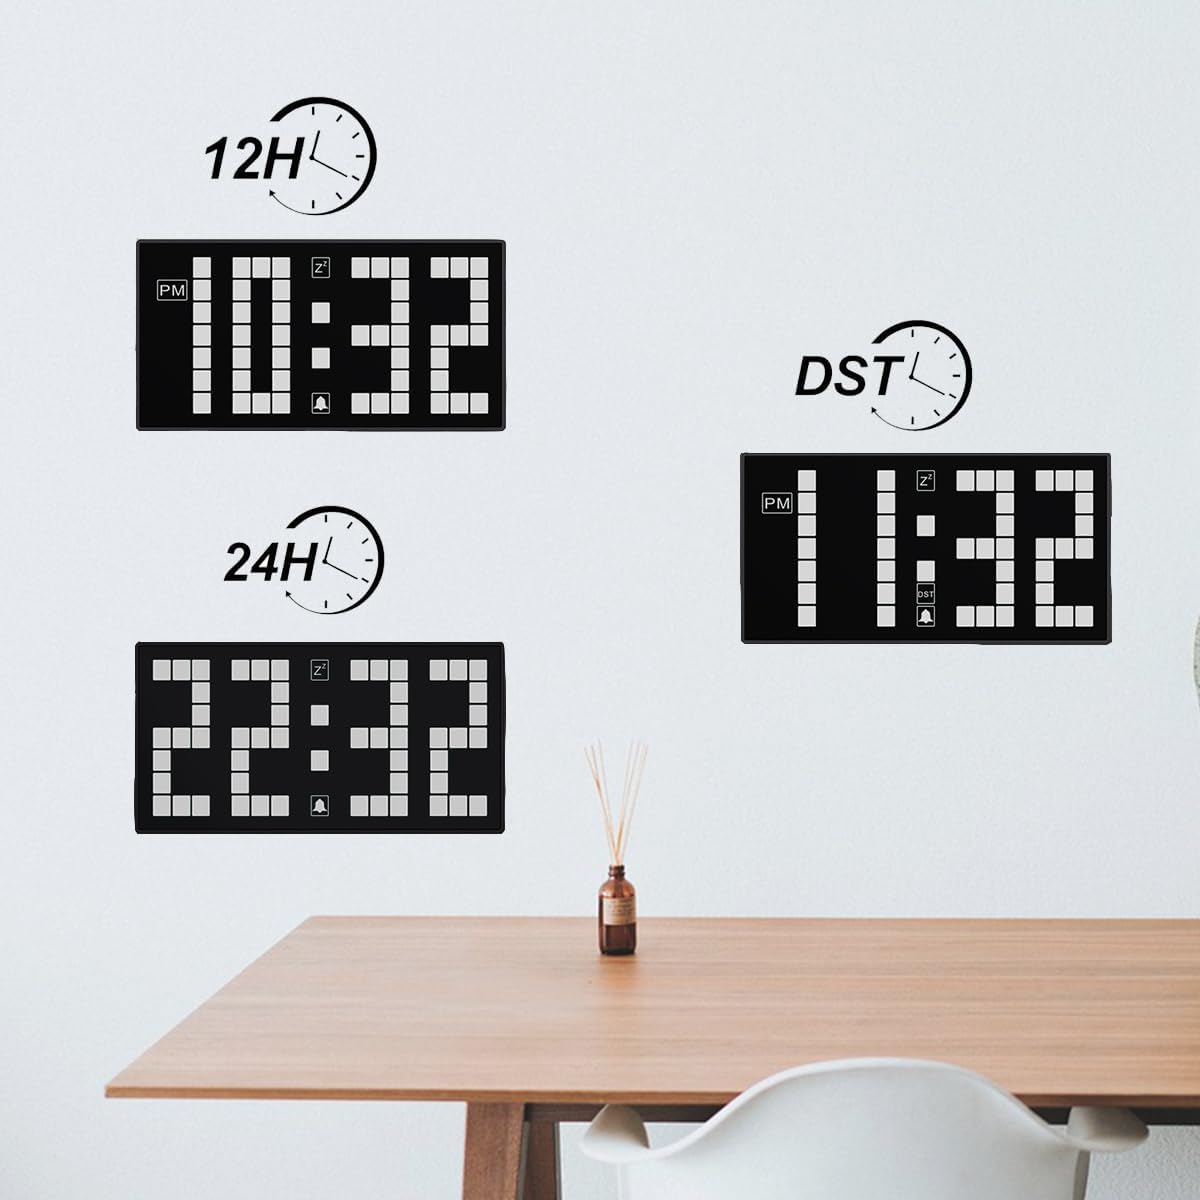
Image: Three clock displays showing '10:32 PM' (12H format), '22:32' (24H format), and '11:32 PM' (DST adjusted time).
5.3 Setting the Alarm
- Press and hold the ALARM SET button. The alarm hour digits will flash.
- Use the UP / 12/24 or DOWN / AL ON/OFF buttons to adjust the alarm hour.
- Press the ALARM SET button again to confirm the alarm hour and move to minute setting. The alarm minute digits will flash.
- Use the UP / 12/24 or DOWN / AL ON/OFF buttons to adjust the alarm minutes.
- Press the ALARM SET button once more to save the alarm time and exit alarm setting mode.
5.4 Activating/Deactivating Alarm
To turn the alarm on or off, press the DOWN / AL ON/OFF button when the clock is not in setting mode. A bell icon will appear on the display when the alarm is active and disappear when it is off.
5.5 Weekend Alarm Mode
Activate Weekend Alarm Mode to prevent the alarm from sounding on Saturdays and Sundays. The alarm will only ring from Monday to Friday.
- Press the Weekend button on the back of the clock to toggle Weekend Alarm Mode on or off.
- When active, the word "Weekend" will appear on the display.

Image: A T-FAMY Digital Alarm Clock on a bedside table, displaying 'Weekend' and '11:59'. A child is sleeping peacefully in the background, illustrating the benefit of the weekend alarm mode.

Image: A T-FAMY Digital Alarm Clock with a blue display showing '10:32' and the 'Weekend' indicator, positioned on a bedside table next to a sleeping child.
5.6 Snooze Function
When the alarm sounds, tap the SNOOZE / AL STOP button on the top of the clock to activate the snooze function. The alarm will pause for 7 minutes and then sound again. This can be repeated up to 3 times.
5.7 Stopping the Alarm
To stop the alarm completely after it sounds, press any button on the back of the clock, or press and hold the SNOOZE / AL STOP button on top.
5.8 Display Brightness
The clock features an auto-dimmable display and manual brightness settings.

Image: A collage demonstrating the brightness settings of the T-FAMY Digital Alarm Clock. It shows the clock in a bright room (day, high brightness), in a dark room (night, low brightness), and examples of 'Auto', 'L3' (High), 'L2' (Medium), and 'L1' (Low) brightness levels.
- Auto-Dim Mode: By default, the clock automatically adjusts its brightness based on ambient light conditions.
- Manual Brightness: Press the DIMMER button on the back of the clock to cycle through 4 brightness levels: High (L3), Medium (L2), Low (L1), and Auto-Dim (AU). Select the desired brightness level.
5.9 Daylight Saving Time (DST) Adjustment
To adjust for Daylight Saving Time, press the DST button on the back of the clock. The time will advance or recede by one hour as appropriate. Press it again to revert to standard time.
6. Maintenance
6.1 Cleaning
To clean the clock, gently wipe the surface with a soft, dry cloth. Do not use abrasive cleaners, solvents, or chemical sprays, as these may damage the display or casing.
6.2 Battery Replacement
If the backup batteries are depleted, replace them with two new AAA batteries. Ensure correct polarity (+/-) when inserting the batteries.
7. Troubleshooting
- Clock display is off: Ensure the clock is properly connected to a working power outlet using the provided adapter. If using battery backup during a power outage, the display is designed to turn off to conserve power, but timekeeping continues.
- Alarm does not sound: Verify that the alarm is activated (bell icon visible on display). Check that the alarm time is set correctly. If Weekend Alarm Mode is active, ensure it's not a weekend.
- Time is incorrect: Re-set the time following the instructions in Section 5.1. Check if DST is accidentally activated or deactivated.
- Display is too dim/bright: Adjust the brightness using the DIMMER button (Section 5.8) or ensure it's in Auto-Dim mode if preferred.
8. Specifications
| Brand | T-FAMY |
| Model Number | T518 |
| Display Type | Digital LED Pixel Display |
| Screen Size | 2.2 inches |
| Power Source | Corded Electric (DC 5V) |
| Battery Backup | 2 x AAA batteries (not included) |
| Product Dimensions | 5.1" W x 2.6" H x 1.1" D |
| Item Weight | 5.6 ounces |
| Material | Plastic |
| Timekeeping Accuracy | ±30 seconds per month |

Image: A diagram showing the dimensions of the T-FAMY Digital Alarm Clock: 5.1 inches wide, 2.6 inches high, and 1.1 inches deep.
9. Warranty and Support
T-FAMY products are designed for reliability and performance. For any questions, technical support, or warranty inquiries, please refer to the contact information provided with your purchase or visit the official T-FAMY website. Please retain your proof of purchase for warranty claims.