
1. Introduction and Overview
Thank you for choosing the ONBRILL BVS-129 Bathroom Vanity with Sink Combo. This manual provides detailed instructions for the assembly, operation, maintenance, and troubleshooting of your new vanity. This 36-inch freestanding vanity features a modern design with delicate stripe carving lines, a ceramic integrated sink, two soft-closing drawers, two soft-closing doors, an adjustable interior shelf, and four solid legs.
Please read this manual thoroughly before beginning assembly or use to ensure proper installation and safe operation. Keep this manual for future reference.
2. Safety Information
- Always use appropriate tools for assembly.
- Ensure all parts are present and undamaged before beginning assembly.
- Do not overtighten screws, as this may damage the material.
- Assembly requires two adults for safety and ease of installation.
- The maximum load capacity for this vanity is 220 pounds (100 kg). Do not exceed this weight limit.
- Keep small parts away from children during assembly.
- Ensure the vanity is placed on a level surface to prevent tipping.
3. Package Contents
Verify that all components listed below are included in your package:
- Vanity Cabinet (MDF wood frame)
- Ceramic Integrated Sink
- Hardware Kit (including handles, hinges, drawer rails, legs, screws, and other fasteners)
- Assembly Instructions Manual
4. Specifications
| Feature | Detail |
|---|---|
| Brand | ONBRILL |
| Model | BVS-129 |
| Dimensions (D x W x H) | 18.8" x 36" x 33.7" |
| Material | Ceramic (sink), Engineered Wood (cabinet) |
| Color | Green |
| Weight | 110 Pounds |
| Mounting Type | Floor Mount |
| Installation Type | Freestanding |
| Number of Drawers | 2 |
| Number of Doors | 2 |
| Number of Shelves | 1 (adjustable) |
| Maximum Load Capacity | 220 lbs |

Figure 4.1: Product Dimensions and Load Capacity
5. Setup and Assembly Instructions
Assembly of the ONBRILL BVS-129 vanity typically takes about one hour with two adults. Follow these steps carefully:
5.1 Preparation
- Clear a spacious, clean, and level area for assembly.
- Unpack all components and verify against the package contents list.
- Gather necessary tools (e.g., screwdriver, wrench).
5.2 Step-by-Step Assembly
- Attach Legs: Securely attach the four solid legs to the base of the vanity cabinet using the provided hardware. Ensure they are tightened firmly but do not overtighten.
- Install Drawer Rails: Mount the soft-closing drawer rails inside the cabinet according to the pre-drilled holes. Ensure they are level and aligned for smooth drawer operation.
- Assemble Cabinet Structure: Follow the detailed diagrams in the included assembly manual to connect the cabinet panels.
- Install Hinges: Attach the soft-closing hinges to the cabinet doors and then to the cabinet frame. Adjustments can be made later for proper door alignment.
- Place Ceramic Sink: Carefully place the ceramic integrated sink onto the top of the vanity cabinet. Ensure it is properly seated and aligned with the cabinet.
- Install Handles: Attach the metal handles to the drawers and doors.
- Adjust Doors and Drawers: After full assembly, adjust the door hinges to ensure proper alignment and smooth closing. Adjustments can be made for door height, side gaps, and door gaps.

Figure 5.1: Soft-Close Door Hinge Adjustment Points

Figure 5.2: Vanity Interior Storage and Drawer Access
6. Operating Instructions
6.1 Drawers and Doors
- The vanity is equipped with soft-closing hinges and drawer rails. This feature allows for quiet and smooth opening and closing, preventing slamming.
- To open, gently pull the handles. To close, push gently until the soft-closing mechanism engages.
- The cabinet features an adjustable shelf, allowing you to customize storage space for taller items.
6.2 Ceramic Sink
- The integrated ceramic sink includes a standard pre-drilled faucet hole (1.38 inches), an overflow hole, and a drain hole (1.77 inches).
- Ensure your faucet and drain assembly are compatible with these dimensions.
- The overflow feature helps prevent water from spilling over the sink rim if the drain is blocked.
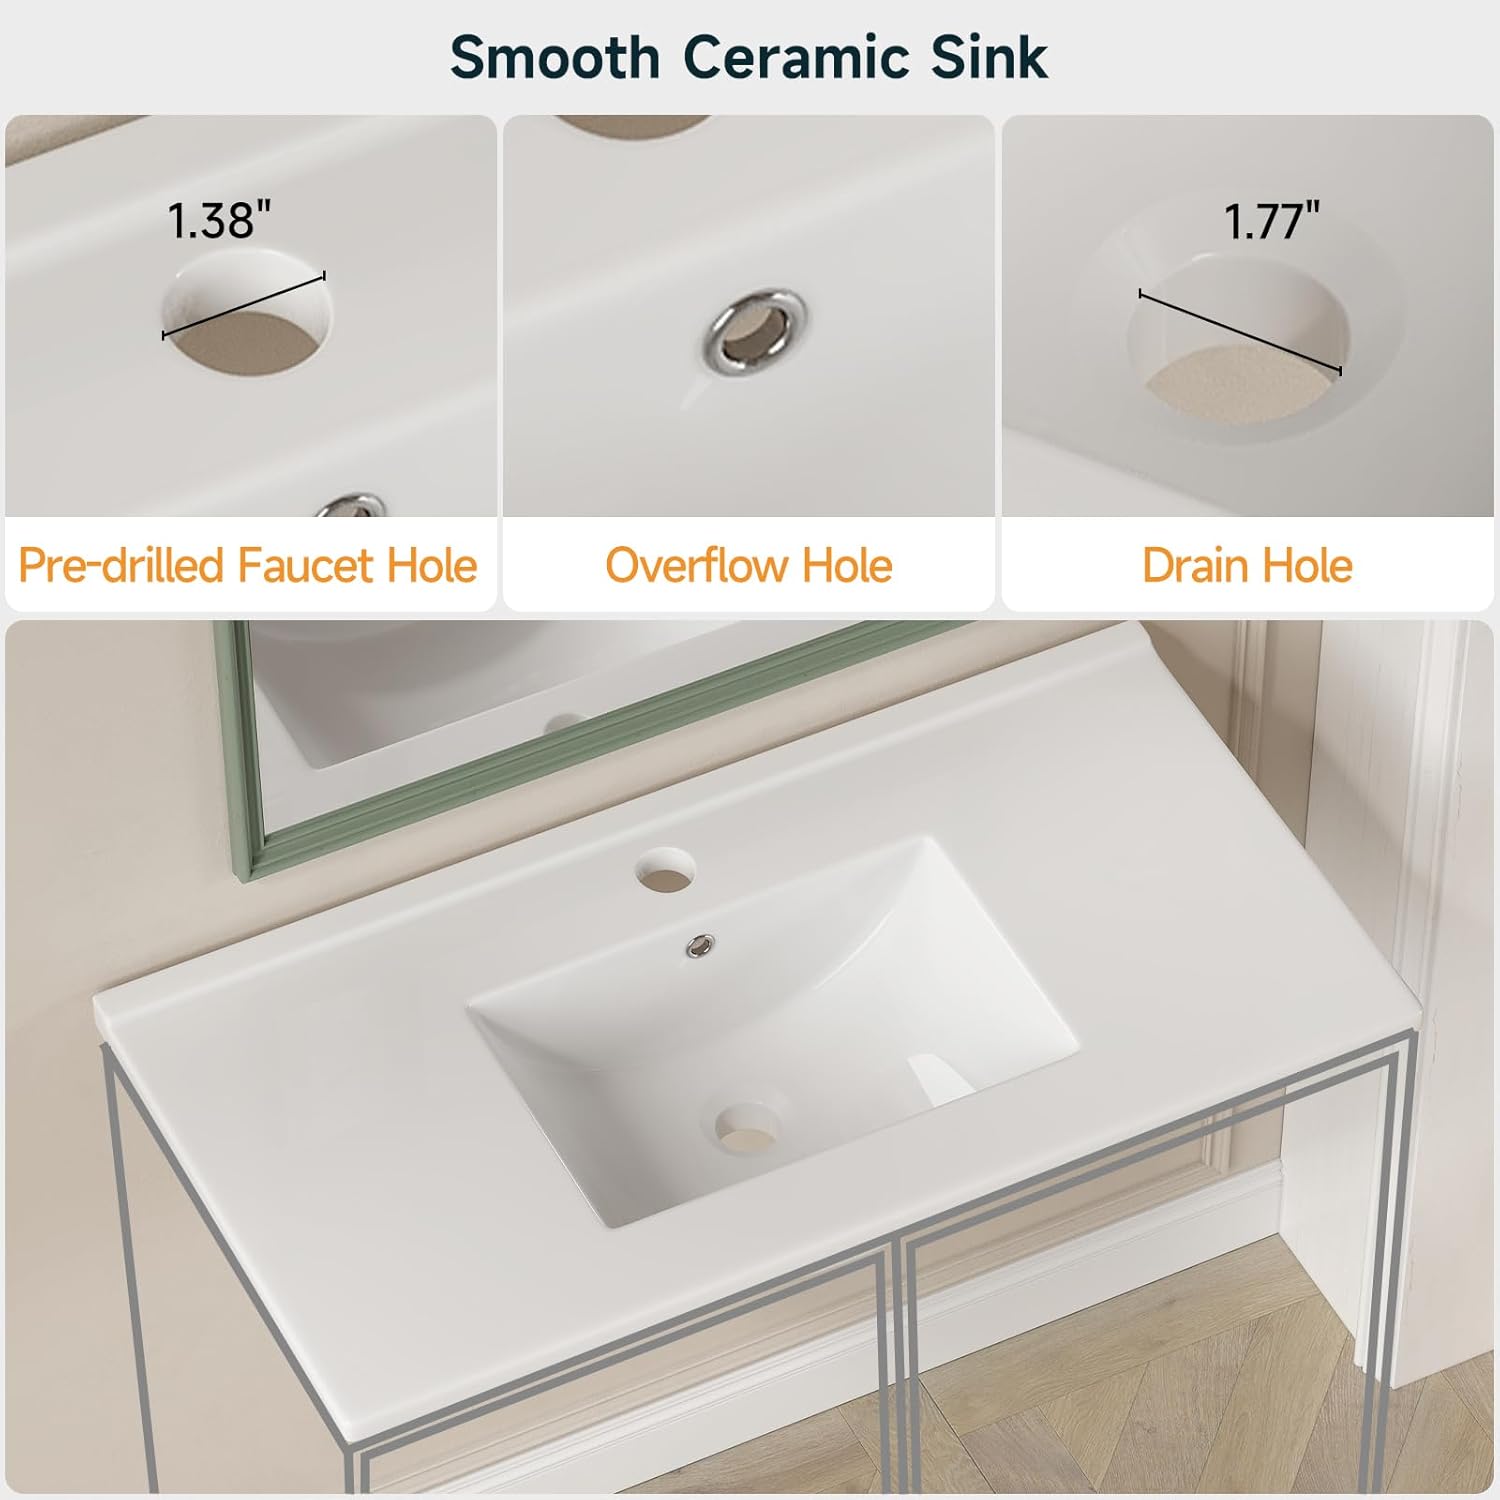
Figure 6.1: Ceramic Sink Features
7. Maintenance
Proper care and maintenance will extend the life and appearance of your vanity.
7.1 Cleaning
- Ceramic Sink: Clean with a soft cloth and mild, non-abrasive soap and water. Rinse thoroughly and dry immediately to prevent water spots. Avoid harsh chemicals or abrasive cleaners that can damage the glossy surface.
- Cabinet Surface: Wipe the painted MDF wood surface with a soft, damp cloth. Avoid using harsh chemicals, ammonia-based cleaners, or abrasive materials, as these can damage the finish. Dry immediately after cleaning.
- Handles: Clean metal handles with a soft, dry cloth.
7.2 General Care
- Wipe up any spills on the vanity surface or inside the cabinet immediately to prevent water damage.
- Periodically check all screws and fasteners to ensure they remain tight. Retighten if necessary.
- Ensure the soft-closing hinges and drawer rails operate smoothly. If they become stiff, a small amount of silicone lubricant can be applied.
8. Troubleshooting
If you encounter any issues with your ONBRILL BVS-129 vanity, refer to the following common problems and solutions:
| Problem | Possible Cause | Solution |
|---|---|---|
| Doors are misaligned or do not close properly. | Hinges are not adjusted correctly or are loose. | Adjust the soft-closing hinges using the adjustment screws (refer to Figure 5.1). Ensure all hinge screws are tight. |
| Drawers are sticking or do not slide smoothly. | Drawer rails are misaligned, obstructed, or loose. | Check for any obstructions in the drawer rails. Ensure the rails are securely fastened and properly aligned. Apply a small amount of silicone lubricant if needed. |
| Water leaks from the sink or drain area. | Improperly sealed plumbing connections (faucet or drain). | This vanity does not include plumbing fixtures. Ensure that the faucet and drain assembly (installed by user) are properly sealed and tightened according to their respective instruction manuals. Consult a plumber if necessary. |
| Vanity feels unstable or wobbly. | Legs are not tightened or the floor is uneven. | Ensure all four legs are securely tightened. If the floor is uneven, use shims under the legs to stabilize the vanity. |
9. Warranty and Support
For specific warranty details regarding your ONBRILL BVS-129 Bathroom Vanity, please contact ONBRILL customer support directly. The product is typically covered by a 30-day easy returns policy.
If you require further assistance, have questions about assembly, or need to report a missing or damaged part, please contact ONBRILL WORLD customer support. Contact information can usually be found on the product packaging or the seller's website.