1. Introduction
This manual provides comprehensive instructions for the safe and effective use of your SUN C4 Plus 256W High-Power UV LED Nail Lamp. Please read this manual thoroughly before operating the device and retain it for future reference.
2. Product Overview
The SUN C4 Plus UV LED Nail Lamp is designed for efficient curing of various gel polishes, suitable for both professional salon and home use. It features advanced technology for fast and even curing.
Key Features:
- 256W High Power: Ensures rapid and thorough curing of gel polishes.
- Dual UV/LED Light Beads: Equipped with 57 strategically placed LED beads for 180-degree uniform curing.
- Smart Automatic Sensor: Automatically activates the lamp when hands or feet are inserted and deactivates when removed.
- 4 Timer Settings: Includes 10s, 30s, 60s, and a 99s low-heat mode for different curing needs.
- Smart LCD Display: Shows the remaining curing time.
- Detachable Base: Facilitates easy cleaning and accommodates both manicures and pedicures.
- Ergonomic Handle: For convenient portability.
- Wide Compatibility: Suitable for curing all types of gel polishes, including base coat, color gel, builder gel, and top coat.
Package Contents:
- SUN C4 Plus UV LED Nail Lamp
- Power Adapter

Figure 2.1: The SUN C4 Plus UV LED Nail Lamp in operation, curing red gel polish.
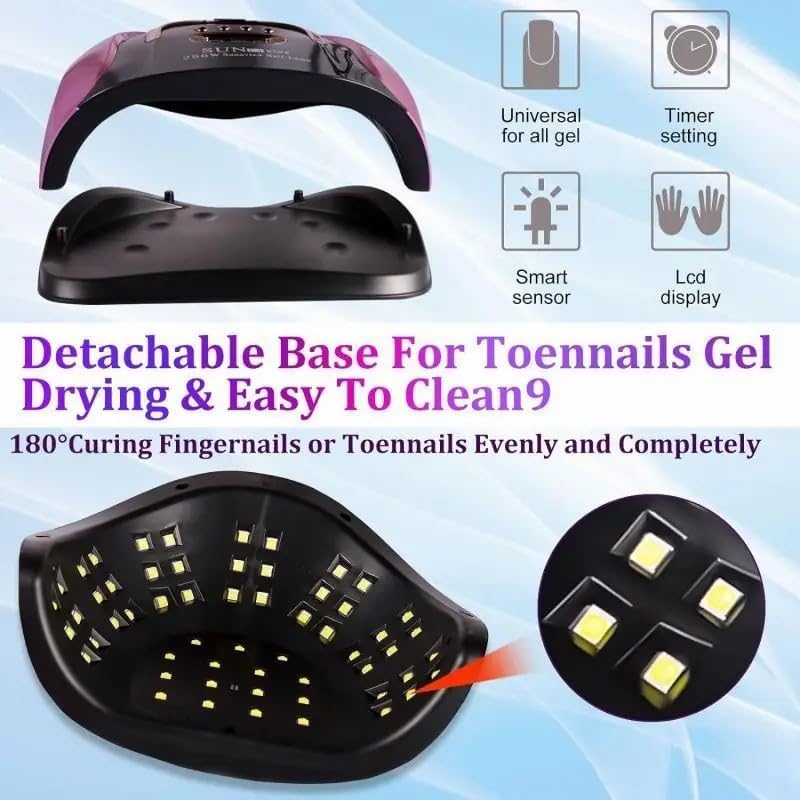
Figure 2.2: Illustration of the 57 LED beads providing 180-degree uniform curing.
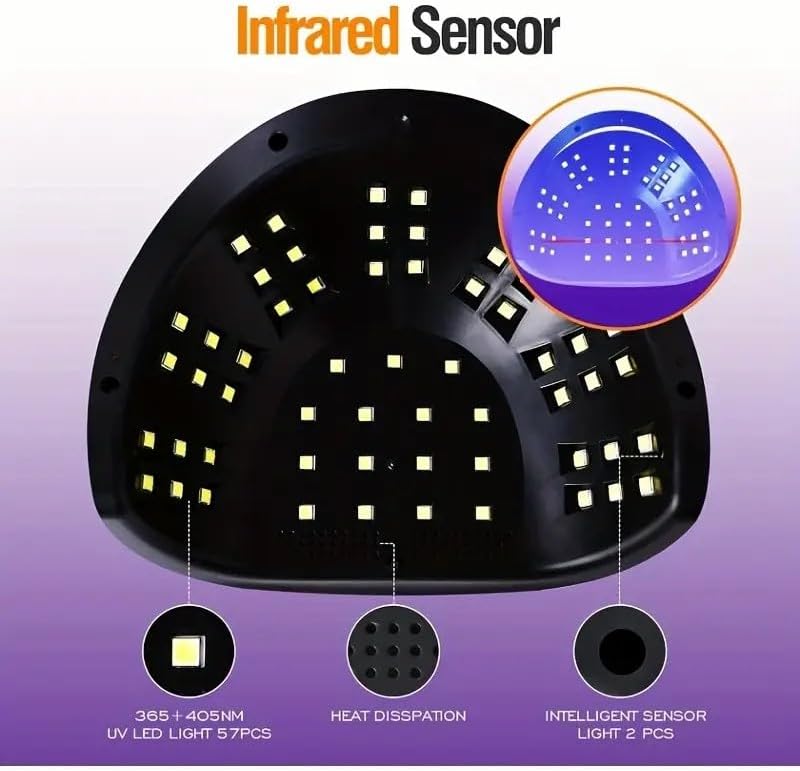
Figure 2.3: The nail lamp is compatible with various gel types including hard gel, sculpture gel, gem glue, base coat, top coat, color gel, builder gel, and UV gel.
3. Setup
- Unpack the SUN C4 Plus nail lamp and its power adapter from the packaging.
- Connect the power adapter to the DC input port located at the back of the lamp.
- Plug the power adapter into a suitable electrical outlet. The LCD display will illuminate, indicating the lamp is ready for use.
- Ensure the lamp is placed on a stable, flat surface.
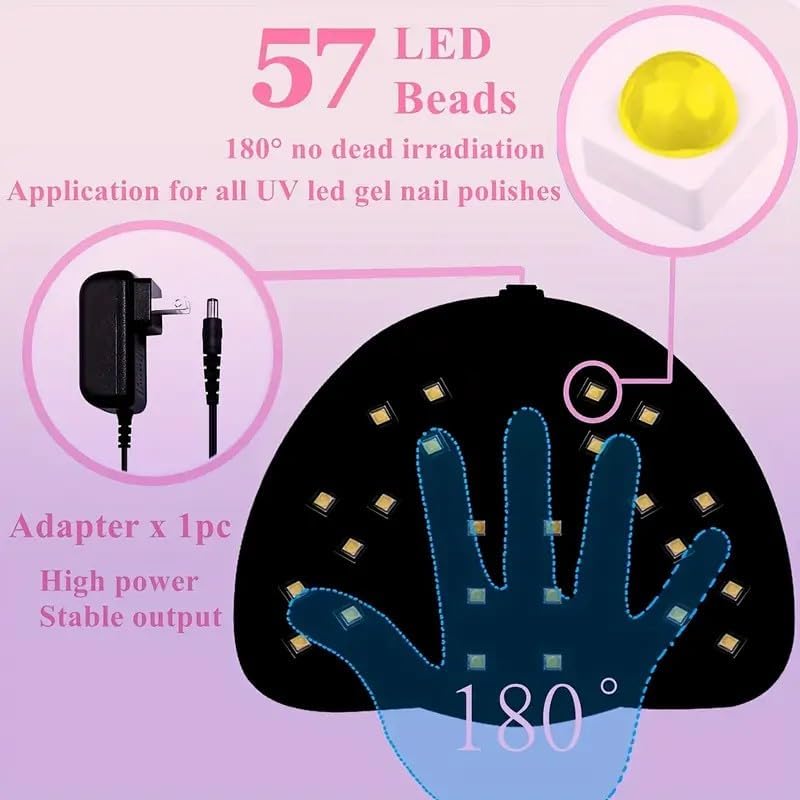
Figure 3.1: Rear view of the nail lamp, showing the power adapter connection point.
4. Operating Instructions
Using the Automatic Sensor:
- Once powered on, the lamp is in standby mode.
- Place your hand or foot into the lamp. The built-in infrared sensor will detect the presence and automatically start the curing process.
- The default curing time will be displayed on the LCD screen.
- Remove your hand or foot when curing is complete, and the lamp will automatically turn off.
Selecting Timer Settings:
For specific curing times, use the timer buttons located on the top of the lamp:
- 10s Button: For quick curing of thin gel polishes.
- 30s Button: Standard curing time for regular gel polishes.
- 60s Button: Recommended for darker colors or thicker gel polishes.
- 99s Low-Heat Mode Button: Provides a gradual increase in power to minimize heat sensation, ideal for sensitive nails or builder gels.
Press the desired timer button before inserting your hand or foot. The lamp will start and count down the selected time. If you insert your hand/foot without pressing a button, the automatic sensor will activate with a default timer (usually 99s low-heat or a pre-set time).

Figure 4.1: Front view of the nail lamp showing the timer buttons and LCD display.

Figure 4.2: Side view of the nail lamp, illustrating the ergonomic handle for portability.
Video 4.1: Demonstration of the SUN C4 Plus UV LED Nail Lamp's features, including the automatic sensor and timer settings.
5. Maintenance
Cleaning:
- Always unplug the lamp from the power outlet before cleaning.
- The base of the lamp is detachable for easy cleaning. Gently pull the base downwards to separate it from the main unit.
- Wipe the exterior and interior surfaces of the lamp with a soft, dry cloth. For stubborn stains, a slightly damp cloth with mild soap can be used, ensuring no liquid enters the electrical components.
- Do not use abrasive cleaners, solvents, or harsh chemicals, as these can damage the lamp's finish or internal components.
- Ensure the lamp is completely dry before reattaching the base and plugging it back in.

Figure 5.1: The detachable base of the nail lamp, allowing for easy cleaning and use for pedicures.
Storage:
When not in use, store the lamp in a cool, dry place, away from direct sunlight and moisture. Keep it out of reach of children.
6. Troubleshooting
| Problem | Possible Cause | Solution |
|---|---|---|
| Lamp does not turn on. | Not plugged in correctly; Power outlet issue; Adapter fault. | Ensure the adapter is securely connected to both the lamp and the power outlet. Test the outlet with another device. If the issue persists, contact customer support. |
| Automatic sensor not working. | Obstruction of sensor; Hand/foot not fully inserted. | Ensure nothing is blocking the sensor area. Fully insert your hand or foot into the lamp. |
| Gel polish not curing properly. | Incorrect curing time; Too thick application; Expired gel polish; Incompatible gel polish. | Increase curing time or use a higher power setting (e.g., 60s). Apply thinner coats of gel polish. Ensure gel polish is not expired and is compatible with UV/LED lamps. |
| Lamp feels hot during use. | Normal operation; Prolonged use. | A slight warmth is normal. If the lamp becomes excessively hot, discontinue use and allow it to cool down. Use the 99s low-heat mode for reduced heat sensation. |
7. Specifications
| Feature | Detail |
|---|---|
| Model Name | UV Nail Lamp (C4) |
| Power | 256W |
| Lamp Type | UV/LED Dual Light Source |
| Number of LED Beads | 57 |
| Timer Settings | 10s, 30s, 60s, 99s (Low-Heat Mode) |
| Special Features | Automatic Sensor, LCD Display, Detachable Base, Ergonomic Handle |
| Material | Plastic |
| Color | Purple and Black |
| Product Dimensions | 7"D x 9"W x 3.5"H (approx. 17.8cm D x 22.8cm W x 8.9cm H) |
| Manufacturer | Dongguan GaoFanDe Technology Co., Ltd |
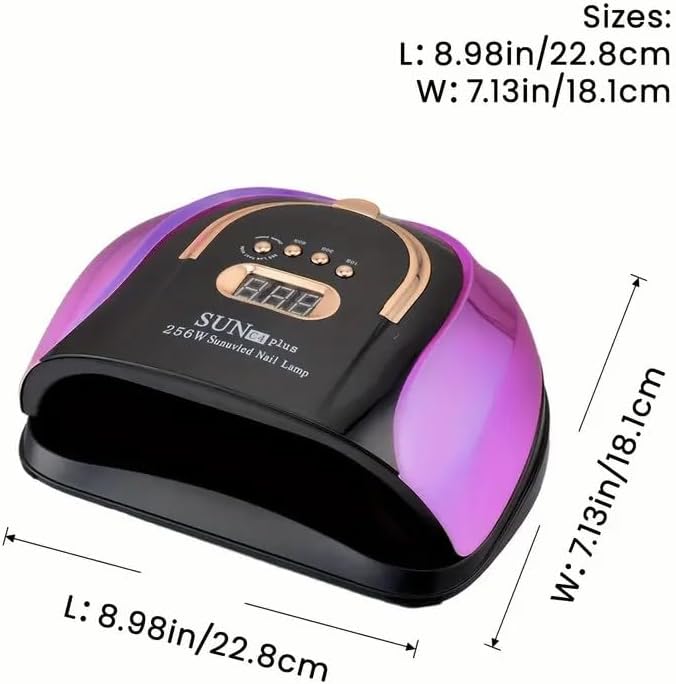
Figure 7.1: Dimensions of the SUN C4 Plus nail lamp: Length 8.98in (22.8cm), Width 7.13in (18.1cm).
8. Warranty and Support
For warranty information or technical support, please refer to the contact details provided with your purchase or visit the official SUN C4 Plus website. Keep your purchase receipt as proof of purchase for any warranty claims.